


强迫症,整理了一下 Tensorflow2 与 Pytorch 在 张量Tensor 基础操作方面的不同。
Tensorflow版本:2.0
Pytorch版本:1.2
本文涉及代码:我的GitHub
import tensorflow as tf
import torch
torch.set_printoptions(precision=16)
import numpy as np
Tensor基本操作1
创建标量
# 创建数值标量 tf.constant、torch.tensor
b = tf.constant(1.2)
a = torch.tensor(1.3)
display(b)
display(a)

创建tensor(从列表创建)
可以看到tensorflow中的tensor的打印信息非常丰富,包括了shape、dtype、numpy的data
b2 = tf.constant([1,2,3,4,5.5])
a2 = torch.tensor([1,2,3,4,5.5])
b2, a2

生成随机tensor(按指定形状、按标准正态分布)
tf.random.normal
torch.randn
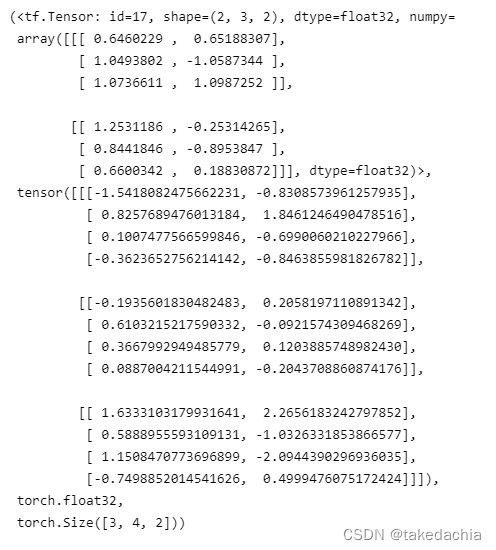
b3 = tf.random.normal([2,3,2])
a3 = torch.normal(mean=0, std=1, size=(3,4,2))
# a3 = torch.randn(3,4,2)   同上
b3, a3, a3.dtype, a3.shape
建立字符串型tensor
字符串类型为tensorflow独有。
# 字符串
b4 = tf.constant('hello world')
# 在pytorch中没有自己的字符串类型
b4
# 有了string类型,就可以使用字符串的各种方法,详见:https://www.tensorflow.org/versions/r2.0/api_docs/python/tf/strings

建立布尔型tensor
p5 = True

b5 = tf.constant(True)
a5 = torch.tensor(True)
# 可直接与python的布尔型做逻辑运算
b5, b5==p5, a5, a5.type(), p5==a5

dtype类型与数值精度
# 数值类型,数值精度
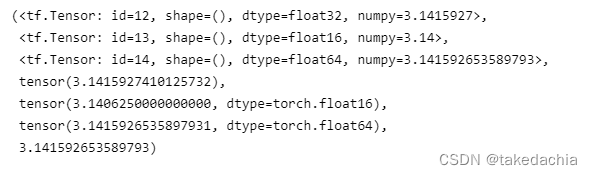
b6 = tf.constant(np.pi, dtype=tf.float32)
b7 = tf.constant(np.pi, dtype=tf.half) # tf.half 等于 tf.float16
b8 = tf.constant(np.pi, dtype=tf.double) # tf.double 等于 tf.float32
a6 = torch.tensor(np.pi, dtype=torch.float32)
a7 = torch.tensor(np.pi, dtype=torch.half) # torch.half 等于 torch.float16
a8 = torch.tensor(np.pi, dtype=torch.double) # torch.double 等于 torch.float32
b6, b7, b8, a6, a7, a8, np.pi
dtype类型转换
tensorflow:cast
pytorch:to
# 数据类型转换  tf.cast、 to
b = tf.constant(np.pi, dtype=tf.double)
a = torch.tensor(np.pi, dtype=torch.double)

b9 = tf.cast(b, dtype=tf.float32)
a9 = a.to(dtype=torch.float32)
b9, a9

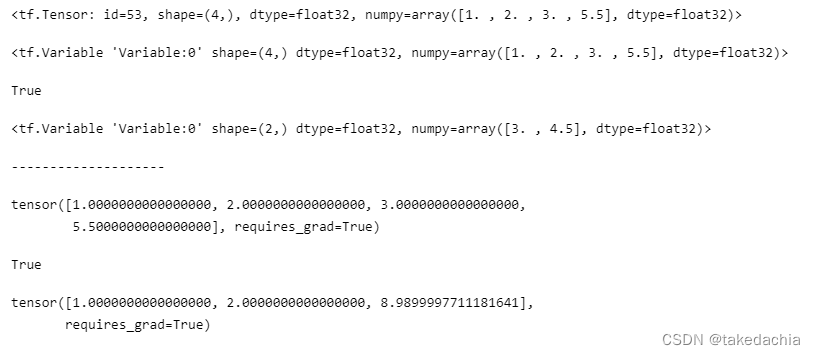
设置成 可优化变量(设置梯度)
tensorflow通过建立变量Variable,将其变为可优化变量。
转换成Variable后,可通过trainable判断该变量是否可训练。
pytorch通过将tensor设上梯度,将其变为可优化变量。
requires_grad属性可判断是否可反向传播。
# 转换为可优化变量(tensorflow)
b10 = tf.constant([1,2,3,5.5])
b10_grad = tf.Variable(b10)
b11 = tf.Variable([3,4.5])

# 转换成Variable后,可通过trainable判断该变量是否可训练
display(b10, b10_grad, b10_grad.trainable, b11)
print('-'*20)

# 设上梯度(pytorch)
a10 = torch.tensor([1,2,3,5.5])
a10.requires_grad_(True)
a11 = torch.tensor([1,2,8.99], requires_grad=True)
display(a10, a10.requires_grad, a11)
Tensor基本操作2
Tensor的创建方式
可传入List、np.array
tensorflow:convert_to_tensor()、tensor()、Variable()
pytorch:tensor()
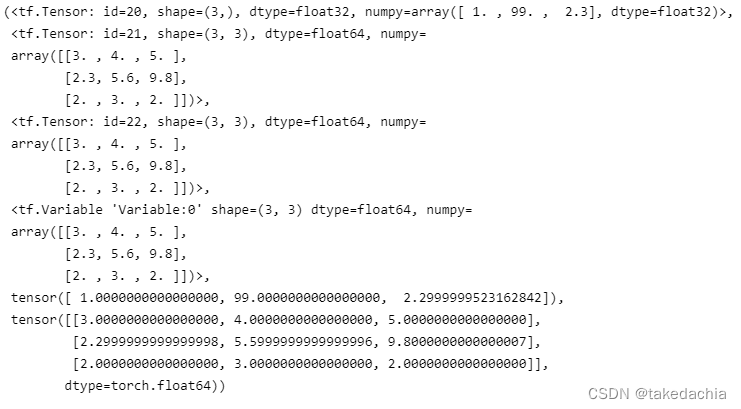
特别注意:从np.array创建的tensor,默认dtype是 float64(对于tensorflow和pytorch都是如此)。
# 从list、np.array创建
c1 = [1, 99, 2.3]
c2 = np.array([[3,4,5],[2.3,5.6,9.8],[2,3,2]])

# 注意:从np.array创建的tensor,默认dtype是 float64
b1 = tf.convert_to_tensor(c1)
b2 = tf.convert_to_tensor(c2)
b3 = tf.constant(c2)
b4 = tf.Variable(c2)

a1 = torch.tensor(c1)
a2 = torch.tensor(c2)

b1, b2, b3, b4, a1, a2
生成各类特殊tensor(tensorflow)
全0型、全1型、指定数值填充(fill)、随机正态分布、随机均匀分布、生成序列
b3 = tf.zeros((3,4))
b4 = tf.ones((4,4), dtype=tf.float64)
b5 = tf.zeros_like(b2)
b6 = tf.fill((2,2), 8)
b7 = tf.random.normal((3,3), mean=0, stddev=1)  # 生成指定形状的取值呈正态分布的tensor,默认mean=0,stddev=1
b7_uni = tf.random.uniform((3,3))  # 生成默认[0, 1)区间的均匀分布数值
# 生成序列
b8 = tf.range(10)
b9 = tf.range(3,12, delta=2)

b3, b4, b5, b6, b7, b7_uni, b8, b9

生成各类特殊tensor(pytorch)
全0型、全1型、指定数值填充(fill_)、随机正态分布、随机均匀分布、生成序列
a3 = torch.zeros((3,4))
a4 = torch.ones((4,4), dtype=torch.double)
a5 = torch.zeros_like(a2)
a6 = torch.zeros((2,2))
a6.fill_(8)
a7 = torch.normal(mean=0, std=1, size=(3,3)) # 生成指定形状的取值呈正态分布的tensor,默认mean=0,std=1
a7_2 = torch.randn(3,3)    # 效果同上,直接生成指定形状的取值呈标准正态分布的tensor(mean=0,std=1)
a7_uni = torch.rand(3,3)   # 生成默认[0, 1)区间的均匀分布数值
# 生成序列
a8 = torch.range(0, 9)  # pytorch必须指定起止位置,且是闭区间
a9 = torch.range(3, 12, step=2)

a3, a4, a5, a6, a7, a7_2, a7_uni, a8, a9

下标访问(pytorch与tensorflow相同)
imgs_tf = tf.random.normal((2, 2, 4, 3))
print(imgs_tf)
print('-'*20)
print(imgs_tf[0][1][3][1])
print('-'*20)
print(imgs_tf[0,1,3,1])  # 等同于上
print('-'*10, '取第一张图像', '-'*10)
print(imgs_tf[0])
# print(imgs_tf[0, ::])  # 等同于上
print('-'*10, '取一张图像,隔行隔列采样', '-'*10)
print(imgs_tf[0, ::2, ::2, ::])

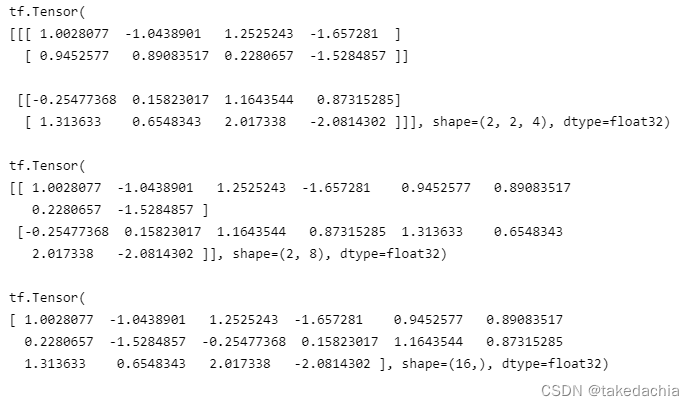
tensor的维度变换 / 改变视图(tensorflow)
常用reshape
imgs_tf2 = tf.random.normal((2, 2, 2, 2))
img1 = tf.reshape(imgs_tf2, (2,2,4))
print(img1)
print()
img1 = tf.reshape(imgs_tf2, (2,-1))  # 传入-1,让计算机自己算长度
print(img1)
print()
img1 = tf.reshape(imgs_tf2, (16,))
print(img1)
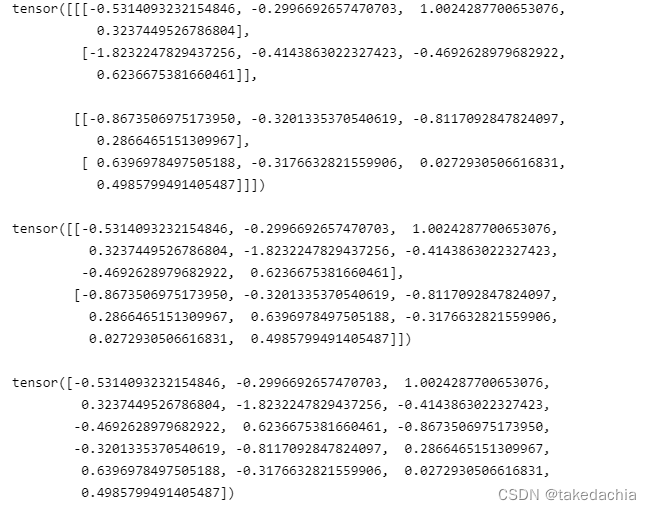
tensor的维度变换 / 改变视图(pytorch)
常用view
imgs_tf3 = torch.randn(2, 2, 2, 2)
img1 = imgs_tf3.view(2,2,4)
print(img1)
print()
img1 = imgs_tf3.view(2,-1)  # 传入-1,让计算机自己算长度
print(img1)
print()
img1 = imgs_tf3.view(16,)
print(img1)
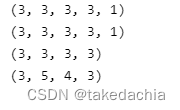
增加、删除、交换维度(tensorflow)
tf.expand_dims、tf.squeeze、tf.transpose
# 增加维度  tf.expand_dims
imgs_tf2 = tf.random.normal((3, 3, 3, 3))
img2 = tf.expand_dims(imgs_tf2, -1) # 往最后一维扩展
print(img2.shape)
img2 = tf.expand_dims(imgs_tf2, 4) # 往第4维后扩展,等同于上面
print(img2.shape)

# 删除维度  tf.squeeze
# 只能删除维度上长度为1的维度
img2 = tf.squeeze(img2, -1)
print(img2.shape)

# 维度交换  tf.transpose
imgs_tf2 = tf.random.normal((3, 4, 5, 3))
img2 = tf.transpose(imgs_tf2, perm=[0, 2, 1, 3])  # 把第3维和第2维交换,在perm中传入改变后的index列表
print(img2.shape)
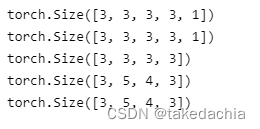
增加、删除、交换维度(pytorch)
torch.unsqueeze、torch.squeeze、torch.transpose、permute
# 增加维度  torch.unsqueeze
imgs_tf3 = torch.randn(3, 3, 3, 3)
img3 = torch.unsqueeze(imgs_tf3, -1) # 往最后一维扩展
print(img3.shape)
img3 = torch.unsqueeze(imgs_tf3, 4) # 往第4维后扩展,等同于上面
print(img3.shape)

# 删除维度  torch.squeeze
# 只能删除维度上长度为1的维度
img3 = torch.squeeze(img3, -1)
print(img3.shape)

# 维度交换  torch.transpose、permute
imgs_tf3 = torch.randn(3, 4, 5, 3)
img3 = torch.transpose(imgs_tf3, 1, 2)  # 把第3维和第2维交换,在perm中传入改变后的index列表
print(img3.shape)
# 方法2
img3 = imgs_tf3.permute([0, 2, 1, 3])  # 把第3维和第2维交换,直接在permute中传入改变后的index列表
print(img3.shape)
Tensor高级操作
张量的合并 —— 拼接、堆叠(tensorflow)
tf.concat、tf.stack
# 张量的合并 —— 拼接 tf.concat
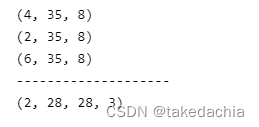
a = tf.random.normal([4, 35, 8]) # 比如该数据为:4个班级,35个学生,8门课的成绩
print(a.shape)
b = tf.random.normal([2, 35, 8]) # 比如该数据为另一个年级的数据
print(b.shape)
# 在第一维拼接:把所有班级拼起来
c = tf.concat([a, b], axis=0)
print(c.shape)
print('-'*20)
# 张量的合并 —— 堆叠 tf.stack
# 堆叠即创建一个新的维度,在新的维度上合并数据。待堆叠数据的shape必须相同。
a = tf.random.normal([28,28,3])
b = tf.random.normal([28,28,3])
c = tf.stack([a, b], axis=0) # 把两张图片堆叠起来,形成图像集
print(c.shape)
张量的合并 —— 拼接、堆叠(pytorch)
torch.cat、torch.stack
# 张量的合并 —— 拼接    torch.cat
a2 = torch.randn(4, 35, 8)  # 比如该数据为:4个班级,35个学生,8门课的成绩
print(a2.shape)

b2 = torch.randn(2, 35, 8)  # 比如该数据为另一个年级的数据
print(b2.shape)

# 在第一维拼接:把所有班级拼起来
c2 = torch.cat([a2, b2], dim=0)
print(c2.shape)
print('-'*20)

# 张量的合并 —— 堆叠    torch.stack
# 堆叠即创建一个新的维度,在新的维度上合并数据。待堆叠数据的shape必须相同。
a2 = torch.randn(28,28,3)
b2 = torch.randn(28,28,3)
c2 = torch.stack([a2, b2], dim=0)   # 把两张图片堆叠起来,形成图像集
print(c2.shape)

张量的分割(tensorflow)
tf.split、tf.unstack
# 张量的分割 tf.split、tf.unstack
# 张量的分割即将张量拆分为多个张量,需要指定分割方案(num_or_size_splits,传入num即指定分割为多少份,传入一个List即指定按列表制定的方案分割)
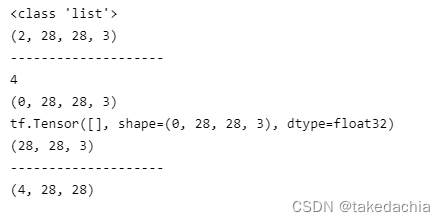
a = tf.random.normal([4, 28, 28, 3]) # a是一个图像集,有4张图
result = tf.split(a, 2, axis=0) # 指定分割为两份
print(type(result)) # 返回一个列表,列表元素为两个tensor
print(result[0].shape) # 第一份是一个2张图片的图像集
print('-'*20)
a = tf.random.normal([4, 28, 28, 3]) # a是一个图像集,有4张图
result = tf.split(a, [1,2,1,0], axis=0) # 指定分割方式,传入一个List
print(len(result)) # 被分割成了4份
print(result[-1].shape) # 最后一份没有图片
print(result[-1]) # 是一个空tensor,只有形状
print(result[0][0].shape) # 可访问第一份的那张图片
print('-'*20)
# 如果想等份分割,每份都只有1个元素,可用 unstack 方法。分完后,分割的那个维度消失
a = tf.random.normal([4, 28, 28, 3])
result = tf.unstack(a, axis=3) # 把最后一个维度,即通道进行分割
print(result[0].shape) # 分完后,被分割的那个维度消失
张量的分割(pytorch)
torch.chunk、torch.split、torch.unbind
# 张量的分割 torch.chunk、torch.split、torch.unbind
# 张量的分割即将张量拆分为多个张量,需要指定分割方案(传入数字或传入列表)
# 传入一个List即指定按列表制定的方案分割
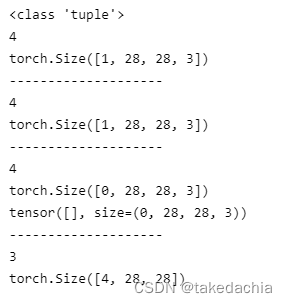
a2 = torch.randn(4, 28, 28, 3) # a是一个图像集,有4张图
result = torch.chunk(a2, 4, dim=0) # 指定分割为4份
print(type(result)) # 返回一个元组
print(len(result))
print(result[0].shape) # 第一份是一个1张图片的图像集
print('-'*20)
result = torch.split(a2, 1, dim=0) # 注意!!这里第二个参数是指定每个部分有多少个元素!而不是指定分割成多少份!
print(len(result))
print(result[0].shape) # 第一份是一个1张图片的图像集
print('-'*20)
a2 = torch.randn(4, 28, 28, 3) # a是一个图像集,有4张图
result = torch.split(a2, [1,2,1,0], dim=0) # 指定分割方式,传入一个List
print(len(result)) # 被分割成了4份
print(result[-1].shape) # 最后一份没有图片
print(result[-1]) # 是一个空tensor,只有形状
print('-'*20)
# 如果想等份分割,每份都只有1个元素,可用 unbind 方法。
# 注意:分完后,分割的那个维度消失。
a2 = torch.randn(4, 28, 28, 3)
result = torch.unbind(a2, dim=3) # 把最后一个维度,即通道进行分割
print(len(result))
print(result[0].shape) # 分完后,被分割的那个维度消失
张量的数据统计(tensorflow)
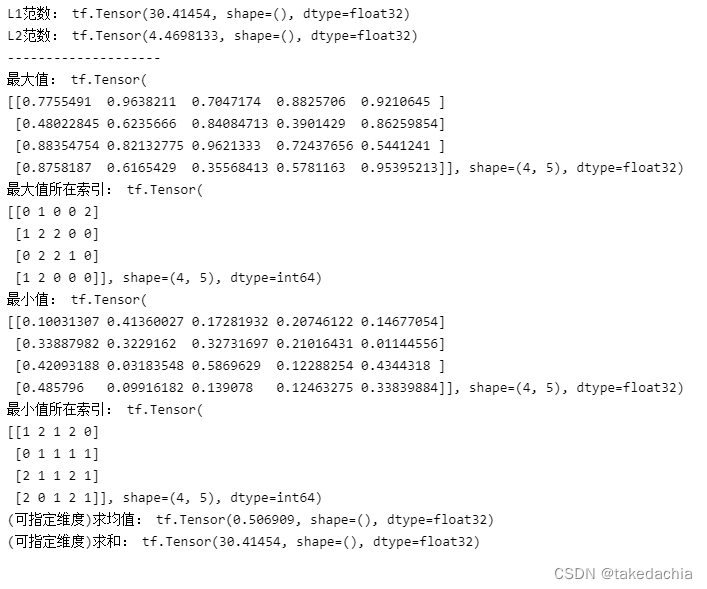
data = np.random.random((3,4,5))

# 1、范数
b = tf.constant(data, dtype=tf.float32)

l1_b = tf.norm(b, 1)
print('L1范数:', l1_b)
l2_b = tf.norm(b, 2)
print('L2范数:', l2_b)
print('-'*20)

# 2、维度最大值、最小值、均值、和
print('最大值:', tf.reduce_max(b, axis=0))  # 不指定axis,返回张量中最大的那一个数值
print('最大值所在索引:', tf.argmax(b))  # 默认axis=0,返回该维度上最大值所在位置(索引)
print('最小值:', tf.reduce_min(b, axis=0))
print('最小值所在索引:', tf.argmin(b))
print('(可指定维度)求均值:', tf.reduce_mean(b))  # 不指定axis则求所有数的均值
print('(可指定维度)求和:', tf.reduce_sum(b))    # 不指定axis则求所有数的和
张量的数据统计(pytorch)
data = np.random.random((3,4,5))

# 1、范数
a = torch.tensor(data, dtype=torch.float32)

l1_a = torch.norm(a, 1)
print('L1范数:', l1_a)
l2_a = torch.norm(a, 2)
print('L2范数:', l2_a)
print('-'*20)

# 2、维度最大值、最小值、均值、和
print('最大值和索引:', torch.max(a, dim=0))  # 不指定dim,会返回张量中最大的那一个数值
# 指定好维度dim后,可以看到max方法返回两个元素,一个是最大值矩阵,一个是最大值所在索引
print('最小值和索引:', torch.min(a, dim=0))  # 不指定dim,会返回张量中最小的那一个数值
# 指定好维度dim后,可以看到max方法返回两个元素,一个是最小值矩阵,一个是最小值所在索引
print('可以单独求最大值所在索引(最小值所在索引同理):', torch.argmax(a, dim=0))
print('(可指定维度)求均值:', torch.mean(a))  # 不指定dim则求所有数的均值
print('(可指定维度)求和:', torch.sum(a))    # 不指定dim则求所有数的和

Tensor的填充(扩展)、复制与限幅
填充(扩展)一般指往外填0。填充操作是为了卷积核能有效卷到靠近图像边缘的位置。
复制指在指定维度层面复制数据,也可以理解为堆叠(tile)。
填充 / 扩展(tensorflow)
tf.pad
b = tf.random.normal((2,28,28,3))
# 扩展为[2,32,32,3]
b_pad = tf.pad(b, [[0,0], [2,2], [2,2], [0,0]])
# pad方法的第二个参数:传入一个嵌套List,指定每个维度的扩展方案,比如第二个维度为[2,2],意为向左边扩展2个,向右边扩展2个。
print(b_pad.shape)
print(b_pad)  # 可以看到默认扩展的是0值

填充 / 扩展(pytorch)
torch.nn.functional.pad
a = torch.randn(2,28,28,3)
# 扩展为[2,32,32,3]

# 在pytorch中,使用:torch.nn.functional.pad(input, pad, mode='constant', value=0)
# 文档地址:https://pytorch.org/docs/1.2.0/nn.functional.html?highlight=pad#torch.nn.functional.pad
# pad方法的第二个参数:传入一个Tuple,指定每个维度的扩展方案。

import torch.nn.functional as F
a_pad = F.pad(a, (0,0, 2,2, 2,2))
# 可以看到第二个参数,传入的各个维度的扩展个数,两个值为一对;从左到右依次对应为倒数第1个维度,倒数第2个维度...往后类推。
# 比如我传入的(0,0, 2,2, 2,2),意为倒数第1个维度左边扩0,右边括0;倒数第2个维度左边扩2,右边扩2;倒数第3个维度左边扩2,右边扩2

print(a_pad.shape)
# 默认扩展0值

复制(tensorflow)
tf.tile
# 填充即在指定维度层面复制数据,注意复制数据是实际意义上的扩充数据
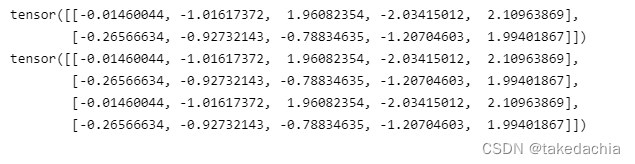
b = tf.random.normal([2,5])
print(b)
b = tf.tile(b, multiples=[2, 1]) # 第二个参数multiple,指定各个维度的复制倍数。比如这里指第1个维度复制为2倍,第二个维度为1倍(即不变)
print(b)

复制(pytorch)
tensor.repeat
# 填充即在维度层面复制数据,注意复制维度数据是实际意义上的扩充数据
a = torch.randn(2,5)
print(a)

# 在pytorch 1.2中没有tile方法,可用repeat方法
a = a.repeat(2,1)    # 直接对tensor使用repeat方法,传入的参数即指定各个维度的复制倍数。比如这里指第1个维度复制为2倍,第二个维度为1倍(即不变)
print(a)
限幅(tensorflow)
限幅指对数值大小进行约束。
下限幅:maximum, 上限幅:minimum,这里有点反直觉。
# 下限幅:maximum, 上限幅:minimum(这里有点反直觉)
b = tf.range(10)
print(b)
print('设定下限幅效果:', tf.maximum(b, 2))   # 下限幅为maximum,可以理解为最大的最小值
print('设定上限幅效果:', tf.minimum(b, 7))   # 上限幅为minimum,可以理解为最小的最大值
print('设定上下限幅效果:', tf.clip_by_value(b, 3, 7))

限幅(pytorch)
torch.clamp
# 限幅:torch.clamp
a = torch.range(0, 10)
print(a)
print('设定下限幅效果:', torch.clamp(a, min=2))   # 只设定min的话,即设下限幅
print('设定上限幅效果:', torch.clamp(a, max=7))   # 只设定max的话,即设上限幅
print('设定上下限幅效果:', torch.clamp(a, min=2, max=7))

数据索引、数据收集
# 建立一些人工随机数据
data = np.random.uniform(size=[2,10,4])
data_2 = np.random.uniform(size=[3,3,4])
data_3 = np.random.uniform(size=[2,3,4])
根据索引号收集数据(tensorflow)
我们指导切片只能提取规则数据,gather方法则能用于提取不规则非连续数据。
tf.gather(x, 索引方案, axis)
# 设有2个班级,每班10名学生,每名学生4门成绩:
b = tf.constant(data)
print(b)
print('*'*40)

print('取第一个班的成绩册:', tf.gather(b, [0], axis=0))  # 传入List
print('抽取学号为1、3、5、7、9号同学的成绩:', tf.gather(b, [0,2,4,6,8], axis=1))  # 传入List
print('*'*40)

b2 = tf.gather(b, [1], axis=0)
b3 = tf.gather(b2, [0,2,7], axis=1)
b4 = tf.gather(b3, [0,3], axis=2)
print('抽取第2个班级,第1、3、8名同学,第1、4门成绩:', b4)
print('抽取第2个班级,第1名同学,第1门成绩 和 第1个班级,第2名同学,第4门成绩:', tf.gather_nd(b, [[1,0,0],[0,1,3]]))  # gather_nd中,第二个参数传入维度索引方案,可为嵌套列表。


根据索引号收集数据(pytorch)
关于pytorch的gather函数的用法,可以见我的这篇文章。
但是,gather函数理解起来十分反人类,我们可以用别的方法通过索引收集数据:
torch.index_select()
# 设有2个班级,每班10名学生,每名学生4门成绩:
a = torch.tensor(data)
print(a)
print('*'*40)

# 我们使用: torch.index_select(input, dim, index, out=None) → Tensor
# 注意,传入的index必须为tensor
index1 = torch.tensor([0])
print('取第一个班的成绩册:', torch.index_select(a, dim=0, index=index1))
index2 = torch.tensor([0,2,4,6,8])
print('抽取学号为1、3、5、7、9号同学的成绩:', torch.index_select(a, dim=1, index=index2))
print('*'*40)

a2 = torch.index_select(a, dim=0, index=torch.tensor([1]))
a3 = torch.index_select(a2, dim=1, index=torch.tensor([0,2,7]))
a4 = torch.index_select(a3, dim=2, index=torch.tensor([0,3]))
print('抽取第2个班级,第1、3、8名同学,第1、4门成绩:', a4)
# 关于 抽取第2个班级,第1名同学,第1门成绩 和 第1个班级,第2名同学,第4门成绩。这个不如直接用切片索引来的方便。

根据掩码(布尔索引)收集数据(tensorflow)
tf.boolean_mask(x, mask, axis)
# tf.boolean_mask(x, mask, axis)
# mask可为简单列表形式,也可以是嵌套列表的矩阵
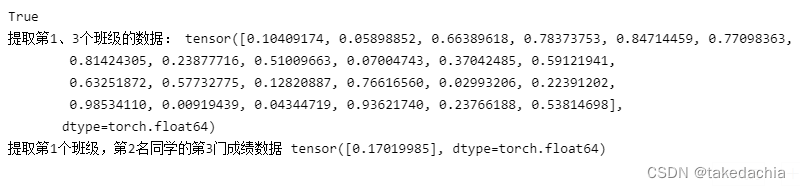
b = tf.constant(data_2) # 设有3个班级,每班3名学生,每名学生4门成绩
print('提取第1、3个班级的数据:', tf.boolean_mask(b, [True, False, True], axis=0))
print()
b = tf.constant(data_3)
print('提取第1个班级,第1,2名同学的成绩数据;提取第2个班级,第2,3名同学的成绩数据:',
tf.boolean_mask(b, [[True, True, False], [False, True, True]]))
print('提取第1个班级,第2名同学的第3门成绩数据',
tf.boolean_mask(b, [[[False, False, False, False],
[False, False, True, False],
[False, False, False, False]],
[[False, False, False, False],
[False, False, False, False],
[False, False, False, False]]]))

根据掩码(布尔索引)收集数据(pytorch)
我们可以使用pytorch的masked_select()函数。
但是它只能传入全体索引,不能指定维度,所以索引张量要自己扩个容。
同时,返回的tensor是一个拉伸成一维的tensor,所以这个方法并不好用。
# torch.masked_select(input, mask, out=None) → Tensor
# mask是一个与原tensor同形状的tensor

a = torch.tensor(data_2)  # 设有3个班级,每班3名学生,每名学生4门成绩
# 由于pytorch的masked_select函数只能传入全体索引,不能指定维度,所以索引张量要自己扩个容。
# 同时,返回的tensor是一个拉伸成一维的tensor。
index1 = torch.tensor([True, False, True])
index1 = torch.stack([index1 for _ in range(3)], dim=-1)
index1 = torch.stack([index1 for _ in range(4)], dim=-1)
print(index1.shape == a.shape)
print('提取第1、3个班级的数据:', torch.masked_select(a, index1))
# 所以,pytorch的masked_select方法并不好用。

a = torch.tensor(data_3)
print('提取第1个班级,第2名同学的第3门成绩数据',
    torch.masked_select(a, torch.tensor([[[False, False, False, False],
                                        [False, False, True, False],
                                        [False, False, False, False]],
                                        [[False, False, False, False],
                                        [False, False, False, False],
                                        [False, False, False, False]]])))
根据条件收集数据(tensorflow)
tf.where
# 根据条件收集数据    tensorflow
# tf.where(cond, a, b)
# cond是布尔索引
# 如果 cond[i]=True, x[i]=a[i]
# 如果 cond[i]=False, x[i]=b[i]
# 当a, b无确定值时,返回cond中所有True元素的索引坐标。

b1 = tf.ones([3,3])
b2 = tf.zeros([3,3])
cond = [[True,False,False], [False,True,False], [False,False,True]]
print(tf.where(cond, b1, b2))
根据条件收集数据(pytorch)
torch.where
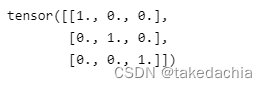
# 这里基本同tensorflow
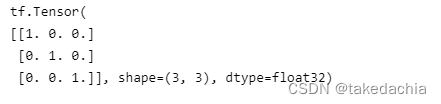
a1 = torch.ones([3,3])
a2 = torch.zeros([3,3])
cond = torch.tensor([[True,False,False], [False,True,False], [False,False,True]])
print(torch.where(cond, a1, a2))


 404
404


 被折叠的 条评论
为什么被折叠?
被折叠的 条评论
为什么被折叠?
 到【灌水乐园】发言


