


第一部分 直接使用BSP镜像
一、下载Ultra96的BSP
可以通过此链接下载| Zedboard http://zedboard.org/support/design/24166/156 Ultra96_BSP,其他开发板的BSP可以在官网下载。
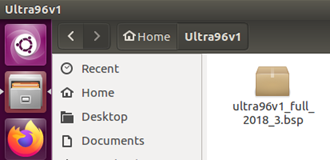
打开虚拟机Ubutun 16.04, 创建文件夹,拷入BSP文件,如下图所示:
二、建立环境变量
source ~/petalinux2018.3/settings.sh
长久建立环境变量:
echo 'source /petalinux2018.3/settings.sh’>>/.bashrc
或者编辑写入下面文件之一:
sudo vim ~/.bashrc
sudo vim /etc/profile
三、创建工程
基于BSP,根据ug1144步骤操作即可, 创建一个基于官方硬件开发板的一个工程:
petalinux-create -t project -s ultra96v1_full_2018_3.bsp
john@john-virtual-machine:~$ cd ultra96v1
john@john-virtual-machine:~/ultra96v1$ petalinux-create -t project -s /mnt/hgfs/xilinx/ultra96v1/ultra96v1_full_2018_3.bsp

四、虚拟机挂载TF卡
将TF卡连接虚拟机,在下图的可移动设备中选取TF卡,断开与主机连接,连接虚拟机

查看硬盘:
john@john-virtual-machine:~/ultra96v1$ sudo fdisk -l

创建挂载文件夹:
john@john-virtual-machine:~/ultra96v1$ sudo mkdir /media/boot
john@john-virtual-machine:~/ultra96v1$ sudo mkdir /media/rootfs
五、TF分区和拷贝
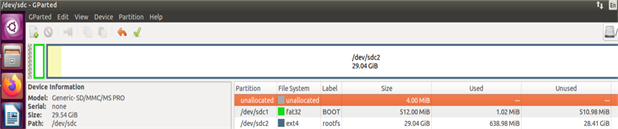
安装gparted软件,并进行分区,第一分区格式为FAT32,第二分区格式为ext4, 第一分区前预留4M。
挂载TF卡
john@john-virtual-machine:~/ultra96v1$ sudo mount /dev/sdc1 /media/boot
john@john-virtual-machine:~/ultra96v1$ sudo mount /dev/sdc2 /media/rootfs
然后拷贝文件:
john@john-virtual-machine:~/ultra96v1
s
u
d
o
c
p
/
h
o
m
e
/
j
o
h
n
/
u
l
t
r
a
96
v
1
/
u
l
t
r
a
96
v
1
f
u
l
l
2
01
8
3
/
p
r
e
−
b
u
i
l
t
/
l
i
n
u
x
/
i
m
a
g
e
s
/
B
O
O
T
.
B
I
N
/
m
e
d
i
a
/
b
o
o
t
j
o
h
n
@
j
o
h
n
−
v
i
r
t
u
a
l
−
m
a
c
h
i
n
e
:
/
u
l
t
r
a
96
v
1
sudo cp /home/john/ultra96v1/ultra96v1_full_2018_3/pre-built/linux/images/BOOT.BIN /media/boot john@john-virtual-machine:~/ultra96v1
sudocp/home/john/ultra96v1/ultra96v1full20183/pre−built/linux/images/BOOT.BIN/media/bootjohn@john−virtual−machine: /ultra96v1sudo cp /home/john/ultra96v1/ultra96v1_full_2018_3/pre-built/linux/images/image.ub /media/boot
sudo tar zxvf /home/john/ultra96v1/ultra96v1_full_2018_3/pre-built/linux/images/rootfs.ext4.gz -C /media/rootfs
解压后的TF目录根文件:

五、检查BOOT.BIN文件属性
BOOT.BIN是否为可执行文件,若不是,请下面属性处打勾:

六、卸载TF卡
john@john-virtual-machine:~/ultra96v1$ sudo umount /media/boot
第二部分 BSP生成镜像
一、输入命令进行配置
petalinux-config

图一
二、DTG Setting
图一第三项DTG Setting, 输入avnet_ultra96_rev1,如果你用的是BSP,不用更改。

三、Yocto Settings
打开图一最后一项Yocto Settings,

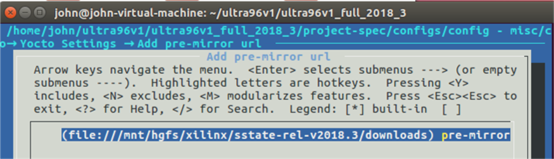
其中第三项Add pre-mirror url:
http://petalinux.xilinx.com/sswreleases/rel-v${PETALINUX_VER}/downloads
修改为file://
file:///mnt/hgfs/xilinx/sstate-rel-v2018.3/downloads
第四项Local sstate feeds settings:
修改为:
/mnt/hgfs/xilinx/sstate-rel-v2018.3/aarch64

四、检查根文件格式设置,进入Image Packaging Configuration

勾选SD card

五、执行petalinux-build编译及问题分析
执行petalinux-build编译命令,若需要重新编译,可考虑是否需要执行以下两个清除命令:
Clean all build collaterals. It removes build/, ${TMPDIR} and images. This will bring the project to its initial state
$ petalinux-build -x mrproper
Clear the build area of the PetaLinux project for archiving as a BSP or for revision
control. This example retains the images directory of the project
$ petalinux-build -x distclean
以下是编译过程中可能出现的问题:
5.1 编译时间过长,内存溢出
请参考我的博客
xilinx ultra96 2018.3以上版本BSP制作镜像时运行时间过长、内存耗尽的分析和解决_u010879745的博客-CSDN博客
https://blog.csdn.net/u010879745/article/details/104136726
5.2 找不到源文件
2018.3与2018.2版本在编译时在以下三个文件中均会出现缺少源文件cec-ctl.cpp, cec-compliance.cpp, cec-fellow.cpp, 解决方案见我在xilinx论坛上的post,

在/home/john/ultra96v2/v2/build/tmp/work/aarch64-xilinx-linux/v4l-utils/1.12.3-r0/文件夹下找到这些缺失的文件,
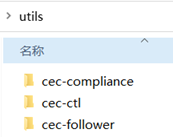
将其拷贝到文件缺失的以下三个目录中
/home/john/ultra96v2/v2/build/tmp/work/aarch64-xilinx-linux/v4l-utils/1.12.3-r0/build/utils/cec-ctl
/home/john/ultra96v2/v2/build/tmp/work/aarch64-xilinx-linux/v4l-utils/1.12.3-r0/build/utils/cec-compliance
/home/john/ultra96v2/v2/build/tmp/work/aarch64-xilinx-linux/v4l-utils/1.12.3-r0/build/utils/cec-follower
例如某个目录拷贝完的文件:

5.3 无线驱动无法下载
V2 版从网上下载无线配置遇到这个问题,V1没有无线配置没有这个问题


WARNING: wilc-15.2-r0 do_fetch: Failed to fetch URL git://github.com/avnet/u96v2-wilc-driver;protocol=http;branch=v15_2, attempting MIRRORS if available
ERROR: wilc-firmware-15.2-r0 do_fetch: Function failed: base_do_fetch
ERROR: Task (/home/john/ultra96v2/v2/project-spec/meta-user/recipes-bsp/wilc-firmware/wilc-firmware_15.2.bb:do_fetch) failed with exit code ‘1’
export HOME="/home/john"; git -c core.fsyncobjectfiles=0 ls-remote http://github.com/linux4wilc/firmware failed with exit code 128, output:
fatal: unable to access ‘http://github.com/linux4wilc/firmware/’: Recv failure: Connection reset by peer
找到下面的无线配置文件,
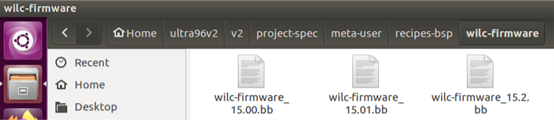
打开文件,找到下面的段落:
SUMMARY = “wilc-firmware: Firmware binaries for Microchip WILC1000/WILC3000”
SECTION = “PETALINUX/modules”
LICENSE = “GPLv3”
LIC_FILES_CHKSUM = “file://${COMMON_LICENSE_DIR}/GPL-3.0;md5=c79ff39f19dfec6d293b95dea7b07891”
SRC_URI = “git://github.com/linux4wilc/firmware;protocol=http;tag=wilc_linux_15_2”
将文件中的协议protocol=http;改为protocol=https;
六、打包 BOOT.BIN
通过以上修改,petalinux-build应能编译通过,之后打包BOOT.BIN
petalinux-package --boot --fsbl zynqmp_fsbl.elf --u-boot u-boot.elf --pmufw pmufw.elf --fpga system.bit –force
七、拷贝文件至TF卡
请参考第一部分的第四章和第五章。
以上是采用petalinux流程,以下是采用SDK流程
SDK流程

标题Xilinx SDK的软件设计全流程:
将Zynq硬件平台导入SDK
创建并了解BareMetal BSP
在SDK中开发一个Zynq软件应用
在硬件中下载和调试软件应用
第三部分 从TF卡拷贝镜像源
john@john-virtual-machine:~$ sudo fdisk -l

john@john-virtual-machine:~$ sudo dd if=/dev/sdb status=progress | gzip>/home/john/ultra96image.gz
第四部分 从镜像源压缩文件拷贝到TF卡
Linux下的dd命令,偶的最爱
- 制作软盘镜像文件diska.img
命令: dd if=/dev/zero of=diska.img bs=512 count=2880 - 复制boot.bin到boot.img中
命令: dd if=boot.bin of=boot.img bs=512 count=1 - 复制diska.img中从第512字节往后的内容添加到boot.img中(这是dd最出彩的部分)
命令: dd if=diska.img of=boot.img skip=1 seek=1 bs=512 count=2879
https://blog.csdn.net/sunjing_/article/details/78781411
在linux环境下,使用以下步骤将备份文件写入到SD卡。
1、删除SD卡分区。
使用 fdisk 命令对SD卡格式化
2、写入备份文件
$ sudo gzip -dc /home/lixinxing/raspberry.gz | sudo dd of=/dev/sdc
其中备份文件的位置、文件名和 SD卡的路径要根据实际选择。
https://blog.csdn.net/zhenguo26/article/details/79967247


2021。3。20再次记录
/project-spec/configs Configuration files of top level config and RootFS config
/project-spec/configs/config Configuration file used to store user settings
/project-spec/configs/rootfs_config Configuration file used for root file system.
/project-spec/meta-user/recipes-bsp/devicetree/files/system-user.dtsi is not modified by any PetaLinux tools.
/project-spec/meta-plnx-generated/recipesbsp/u-boot/configs U-Boot PetaLinux configuration files. The following files are auto generated by petalinux-config:
platform-auto.h config.cfg
platform-top.h will not be modified by any PetaLinux tools. When U-Boot builds, these files are copied into U-Boot build directory build/linux/u-boot/src/<U_BOOT_SRC>/ as follows:
config is the U-Boot kconfig file.
/components/ Directory for embedded software workspace and place to hold external sources while packing BSP. You can also
manually copy components into this directory. Here is the rule to place a external component: /components/ext_source//project-spec/meta-user/conf/petalinuxbsp.conf This configuration file contains all the local user configurations for your build environment. It is a substitute for “local.conf” in the Yocto meta layers.
kernel The following files are in /project-spec/meta-plnxgenerated/
recipes-kernel/linux/configs/
plnx_kernel.cfg
bsp.cfg
U-Boot The following files are in /project-spec/meta-plnxgenerated/
recipes-bsp/u-boot/configs/
config.cfg
platform-auto.h
/project-spec/meta-user/recipes-core/images/petalinux-user-image.bbappend
To remove any default feature, add the following code in the petalinuxbsp.conf:
IMAGE_FEATURES_remove = “ssh-server-dropbear”
To add any new feature, add the following command in the petalinuxbsp.conf:
IMAGE_FEATURES_append = " myfeature"
zynq plnx-zynq7
加bb
- The location of the recipe is /opt/pkg/petalinux/components/yocto/source/
aarch64/layers/meta-openembedded/meta-oe/recipes-benchmark/iperf3/
iperf3_3.2.bb.
加bb,不一定加image,所以加入petalinux-image-full.bbappend - Add the following line in /project-spec/meta-user/recipescore/
images/petalinux-image-full.bbappend.
IMAGE_INSTALL_append = " iperf3"
IMPORTANT! Whenever “_append” is used, there should be a space after = “.
加入petalinux-image-full.bbappend,不一定入根文件系统 - Run petalinux-config -c rootfs.
入了根文件系统 - Select user packages → iperf3. Enable it, save and exit.
编译文件 - Run petalinux-build.
创建模块
petalinux-create -t modules --name mymodule --enable
recipes-core/images/petalinux-image-full.bbappend
直接编译放到根文件里
petalinux-build -c rootfs
petalinux-build -x package
这显然把module归入root
Original: earlycon clk_ignore_unused root=/dev/mmcblk0p2 rw rootwait
Updated: earlycon earlyprintk clk_ignore_unused root=/dev/mmcblk1p2 rw rootwait console=ttyPS0,115200


 407
407


 被折叠的 条评论
为什么被折叠?
被折叠的 条评论
为什么被折叠?
 到【灌水乐园】发言


