


Navit is an open source navigation system with GPS tracking.
It works great with a Raspberry Pi, a GPS module and a small TFT with touch, jut like the official Raspberry Pi Displayor PiScreen.
In this guide, we will be using;
- A Raspberry PI 3
- The official Raspberry Pi Display
- BerryGPS-IMU
- SmartPi Touch
Setting up the GPS
Navit can be installed without a GPS connected to your Raspberry Pi, but you will not be able to use the real-time turn by turn navigation. You will however be able to browse maps. If you are not going to use a GPS, you can skip to the next step.
As we are using the BerryGPS-IMU, we will be following the guide in the link below. As most GPS modules use serial to communication, this guide can be followed for other GPS modules.
BerryGPS Setup Guide for the Raspberry Pi
The images below shows how we have connected the BerryGPS-IMU to the Raspberry Pi 3 whilst it is in the SmartPi Touch case.


If you plan on testing this out in your car, you need to be mindfully of where you place your BerryGPS. In my setup and I have placed it in the air vent as shown below, and BerryGPS gets a good strong signal.

If you are using an external antenna, then there is no need to worry about where your BerryGPS is placed.

Navit
Apply any updates;
pi@raspberrypi ~/ $ sudo apt-get upgrade
Install Navit;
We will copy the default Navit config folder under the home directory.
pi@raspberrypi ~/navit-build $ cp /etc/navit/navit.xml .navit/navit.xml
You can now run Navit;
If there is no GPS signal, Navit will default to Munich as shown below. If you have a GPS signal, you will most likely have a blank screen as Navit has moved to the coordinates from your GPS and there is no map install for that location (yet).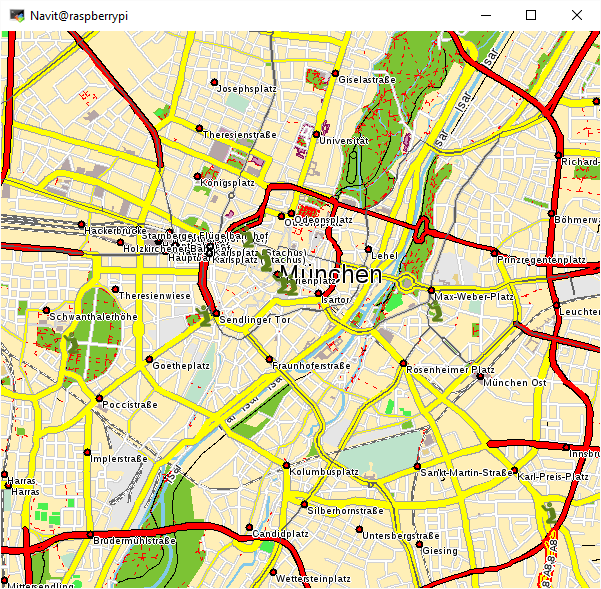
Download Maps
Navit can use Garmin or OpenStreetMaps(OSM). In this guide we are using OSM.
Go to http://maps9.navit-project.org/ and download your map.
The file will be named something silimiar to this; osm_bbox_151.1,-33.9,151.3,-33.7.bin
We will rename it so it is easier to read. And place it under /home/pi/maps
pi@raspberrypi ~/ $ mkdir ~/maps
pi@raspberrypi ~/ $ mv sydney.bin maps/
The Navit config file needs to be edited to include the new map. While we are there we will also disable the sample map that came with the source.
To disable the sample map, look for;
<!-- If you dont want to use the sample map, either set enabled="no" in the next line or remove the xml file from the maps directory -->
<mapset enabled="yes">
	<xi:include href="$NAVIT_SHAREDIR/maps/*.xml"/>
</mapset>
And changed enabled to “no”
<!-- If you dont want to use the sample map, either set enabled="no" in the next line or remove the xml file from the maps directory -->
<mapset enabled="no">
	<xi:include href="$NAVIT_SHAREDIR/maps/*.xml"/>
</mapset>
To enable the map which was just downloaded, look for;
<!-- Mapset template for openstreetmaps -->
<mapset enabled="no">


<map type="binfile" enabled="yes" data="/media/mmc2/MapsNavit/osm_europe.bin"/>
</mapset>
And set it to enabled and specify the location of the bin file which was just downloaded. And set enabled to yes.
<!-- Mapset template for openstreetmaps -->
<mapset enabled="yes">


<map type="binfile" enabled="yes" data="/home/pi/maps/sydney.bin"/>
</mapset>

Enable Speech
Navit can also read out the directions when navigating.
Look for;
<speech type="cmdline" data="echo 'Fix the speech tag in navit.xml to let navit say:' '%s'" cps="15"/>
and change it to;
<speech type="cmdline" data="espeak '%s'" cps="15"/>
Change Locale
The default locale is set to United Kingdom/English. Which means that the default country when searching for an address will be United Kingdom.
If you are not in the United Kingdom, then it is best to change this.
In navit.xml, look for
<config xmlns:xi="http://www.w3.org/2001/XInclude">
And change it to your specific locale;
<config xmlns:xi="http://www.w3.org/2001/XInclude" language="en_AU">
As I am in Australia, I have set it to en_AU. Now when I search for an address the default country is Australia.
Some other examples are;
language=”en_US”
language=”fr_FR”,
language=”de_FR”,
language=”pl_PL”
Open Full Screen
To force Navit to open in full screen, look for;
<gui type="internal" enabled="yes"><
The config for Navit is found in ~/.navit/navit.xml
We will edit this file so that the display looks as shown above. You will also need to download the customs icons.
Download the configs needed for navit.xml
If you are using the Raspberry Pi official display, download this config file or use wget;
If you are using a 3.5″ TFT, like PiScreen or PiTFT, download this config file or use wget;
Then download the icons;
Extract the icons from the zip file into the directory where Navit stores icon images;
No we will added the config from the downloaded text file to the Navit config file.
Open the config file;
Insert the new config in just before the lines below;
<!-- for a debug log -->
<log enabled="no" type="textfile_debug" data="debug_%Y%m%d-%i.txt" flush_size="1000" flush_time="30"/>
The next time you start Navit, it should look as shown in the above screenshot.
Other Useful Navit Modifications
Width & Height
To specify the width and height of the Navit window, look for this
<graphics type="gtk_drawing_area"/>
And change it to something like this;
<graphics type="gtk_drawing_area" w="600" h="400"/>
Disable Points of Interest
To permanently disable points of interest, look for;
<layer name="POI Symbols">
And disable it as shown;
<layer name="POI Symbols" enabled="no">


 242
242

 被折叠的 条评论
为什么被折叠?
被折叠的 条评论
为什么被折叠?
 到【灌水乐园】发言


