


JetpackCompose从入门到实战学习笔记4——Image的简单使用
文章目录
- JetpackCompose从入门到实战学习笔记4——Image的简单使用
- 自定义图片
- 内容缩放
- 1.ContentScale.Fit:
- 2.效果预览:
- 3.ContentScale.Crop:
- 4.居中裁剪效果预览:
- 5.ContentScale.FillHeight:
- 6.效果预览:
- 7.ContentScale.FillBounds:
- 8.效果预览:
- 9.ContentScale.Inside:
- 10.效果预览:
- 11.ContentScale.None:
- 12.效果预览:
- 13.将 Image 可组合项裁剪为某个形状
- 14.效果预览:
- 15.圆角形状 Modifier.clip
- 16.效果预览:
- 17.将 Image 可组合项裁剪为形状:
- 18.效果预览:
- 19.为 Image 可组合项添加边框
- 20.效果预览:
- 21.绘制彩虹渐变边框:
- 22.效果预览:
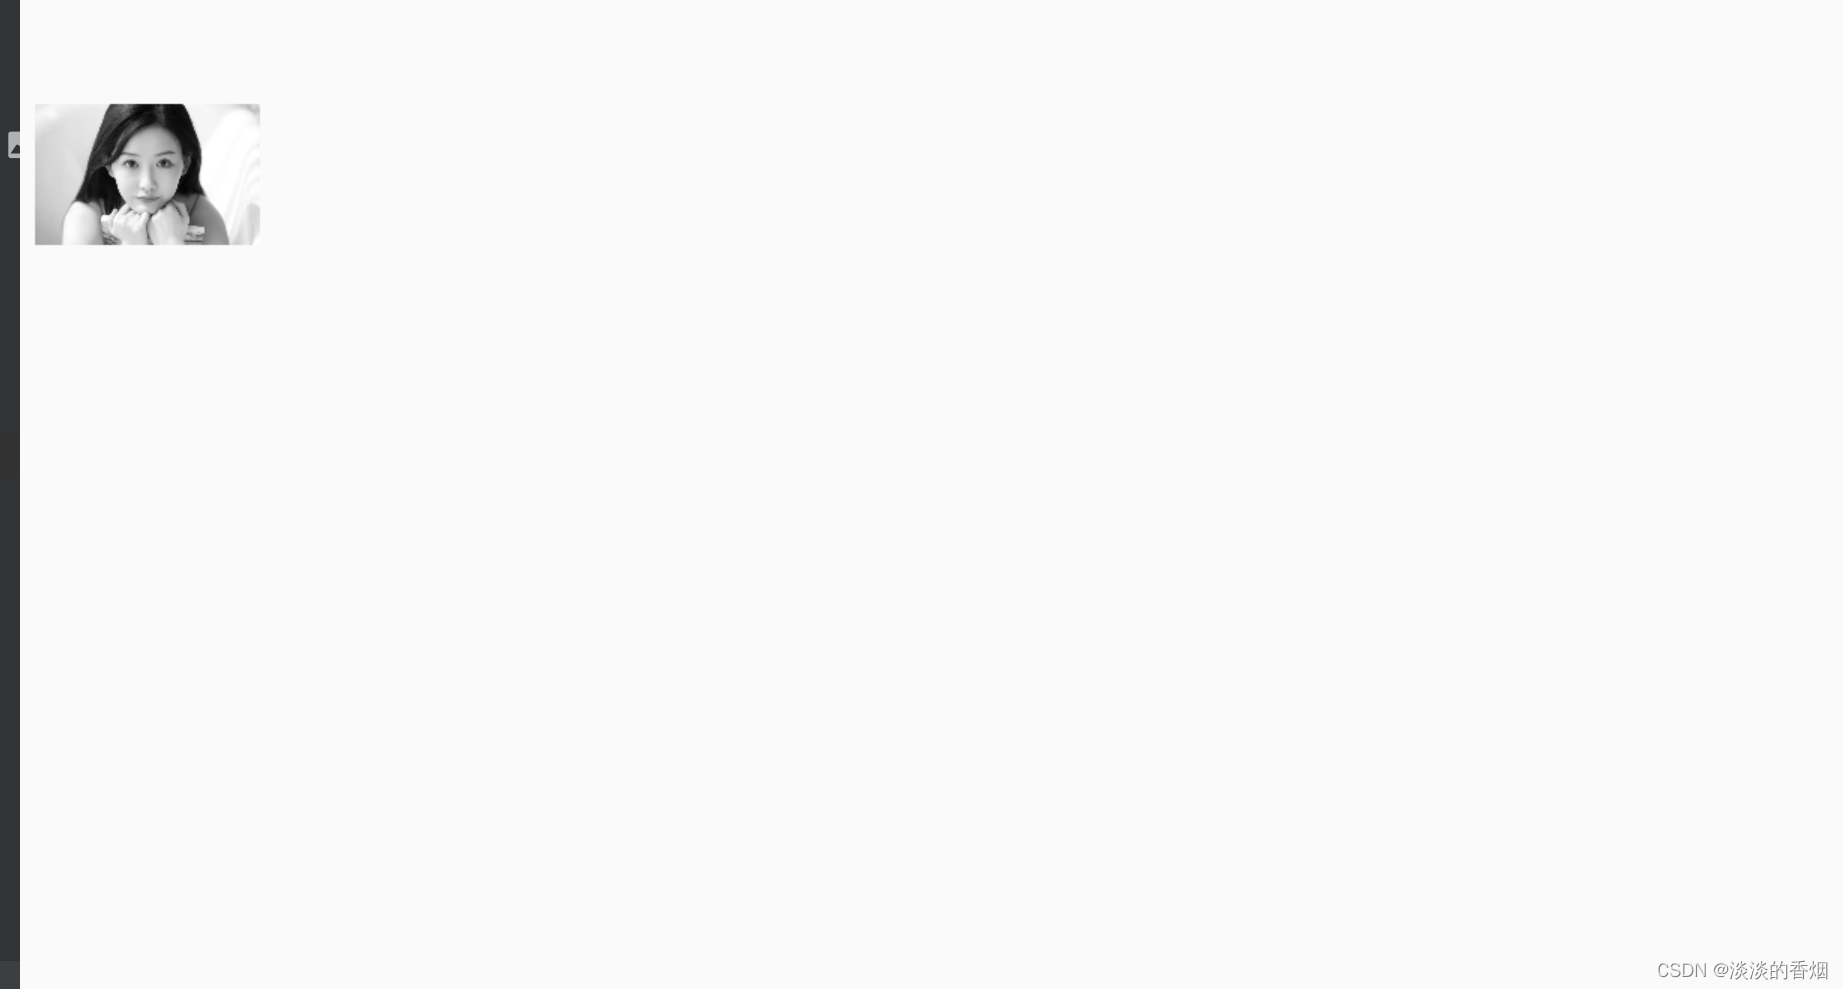
- 颜色滤镜 - 转换图片的像素颜色
- 23.ColorFilter.tint
- 24.效果预览:
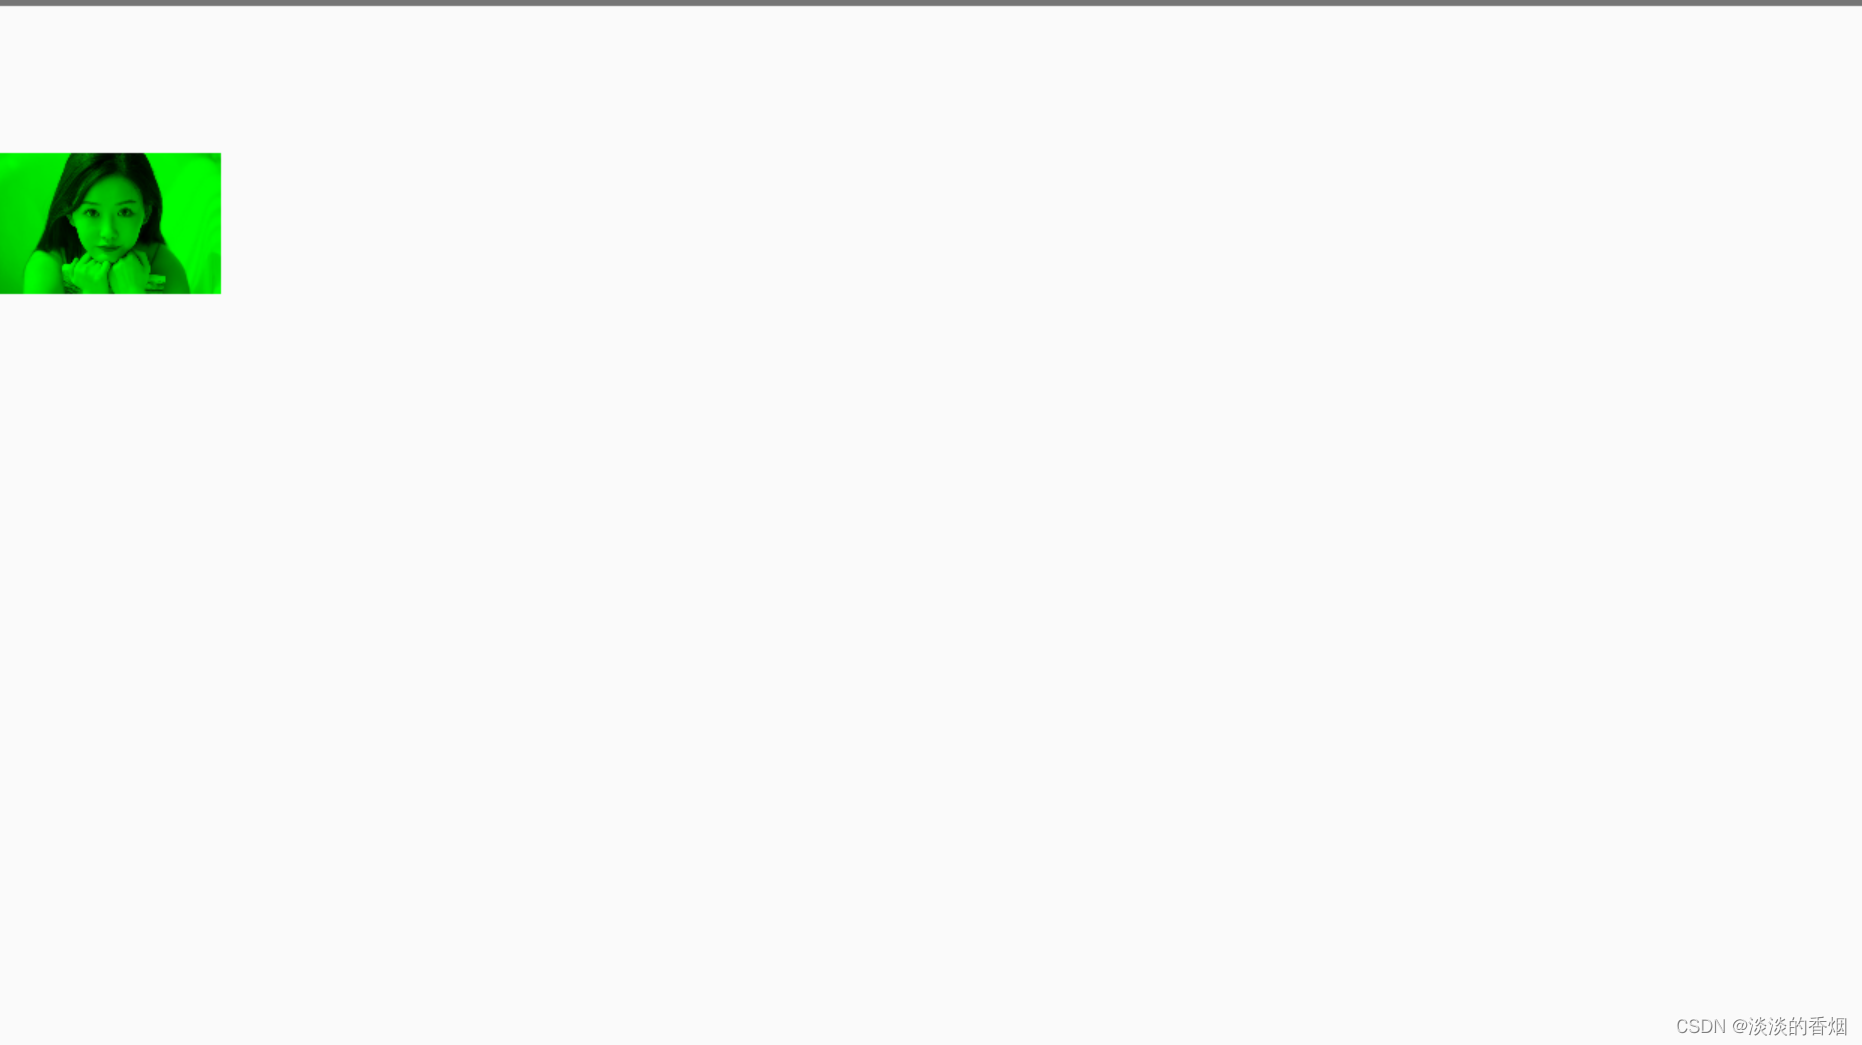
- 25.BlendMode.Darken和 Color.Green
- 26.效果预览:
- 27.通过颜色矩阵应用图片滤镜
- 28.效果预览:
- 29.调整 Image 可组合项的对比度或亮度
- 30.效果预览:
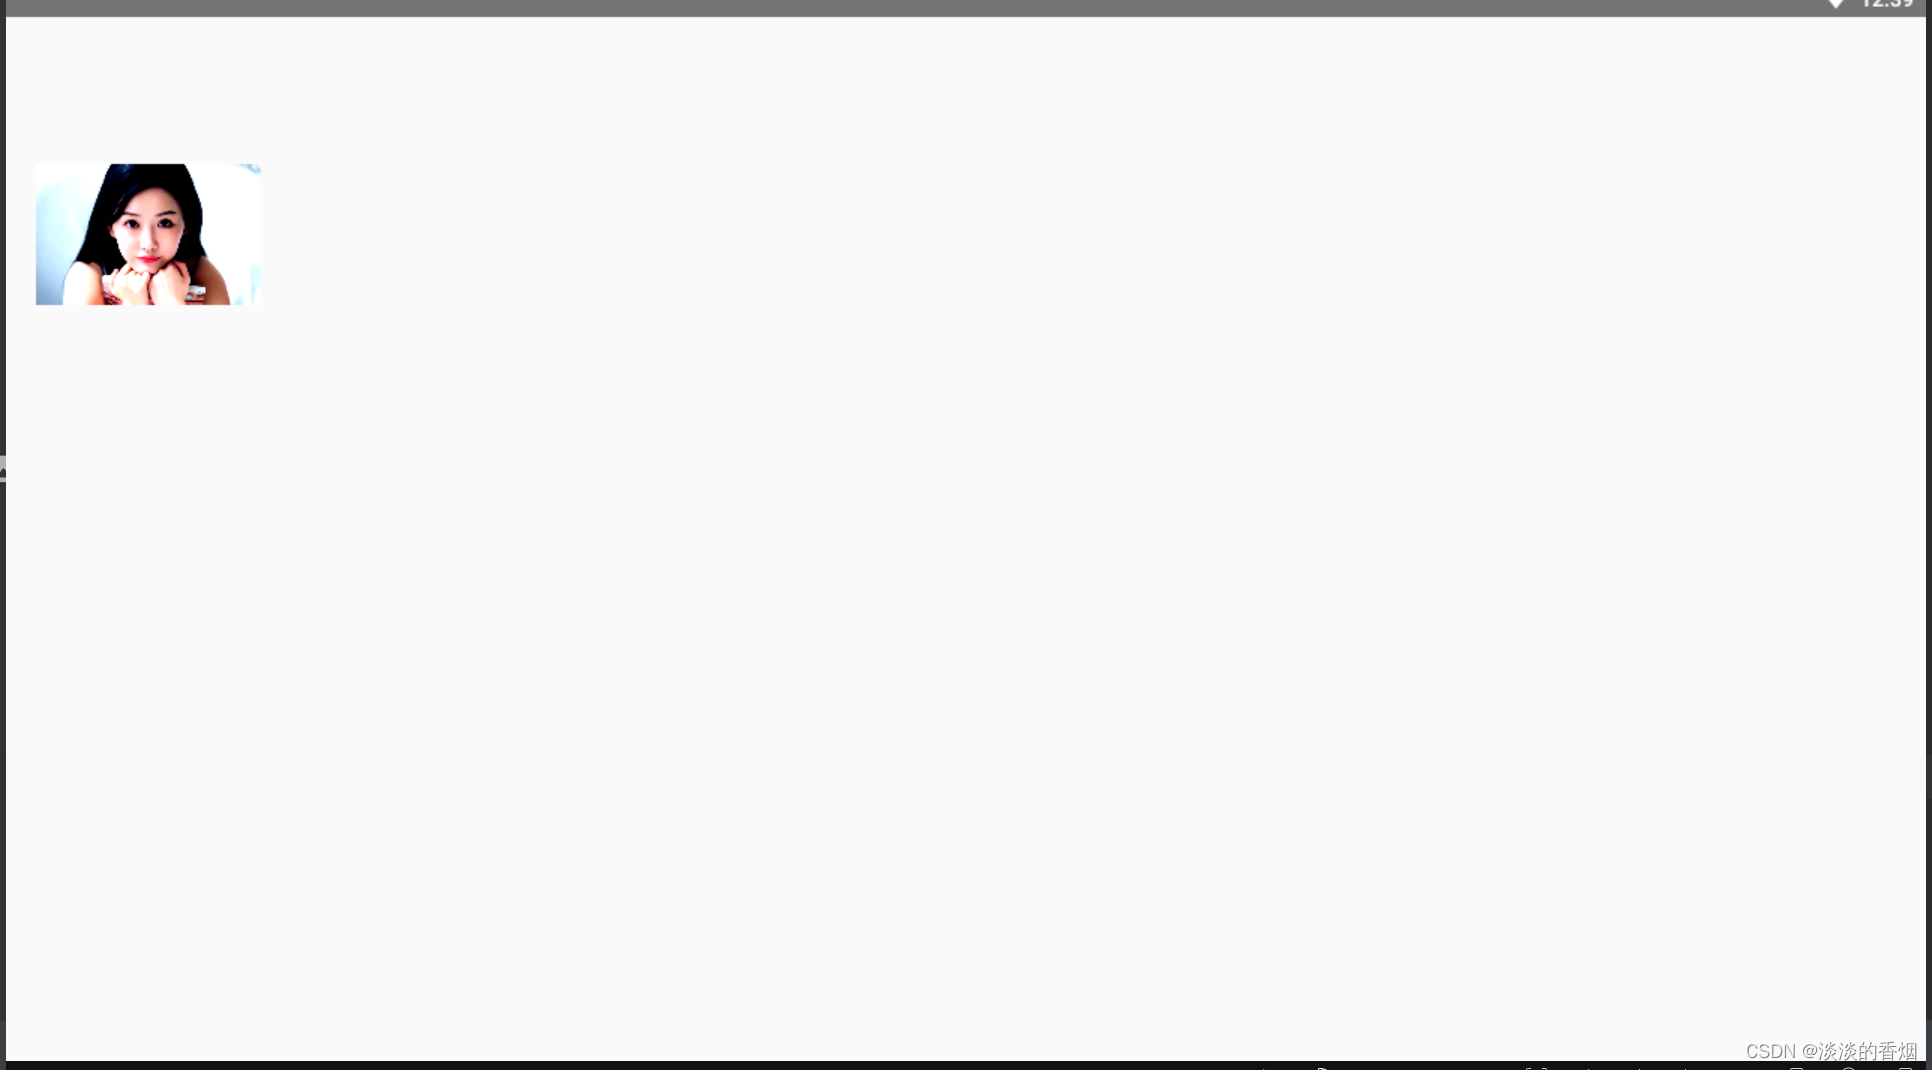
- 31.反转 Image 可组合项的颜色
- 32.效果预览:
- 33.对 Image 可组合项进行模糊处理
- 34.效果预览:
- 35.BlurredEdgeTreatment(Shape)
- 36.效果预览:
- 37.设置自定义宽高比:
- 38.效果预览:
- 39.完整代码:
- 40.完整效果预览如下:
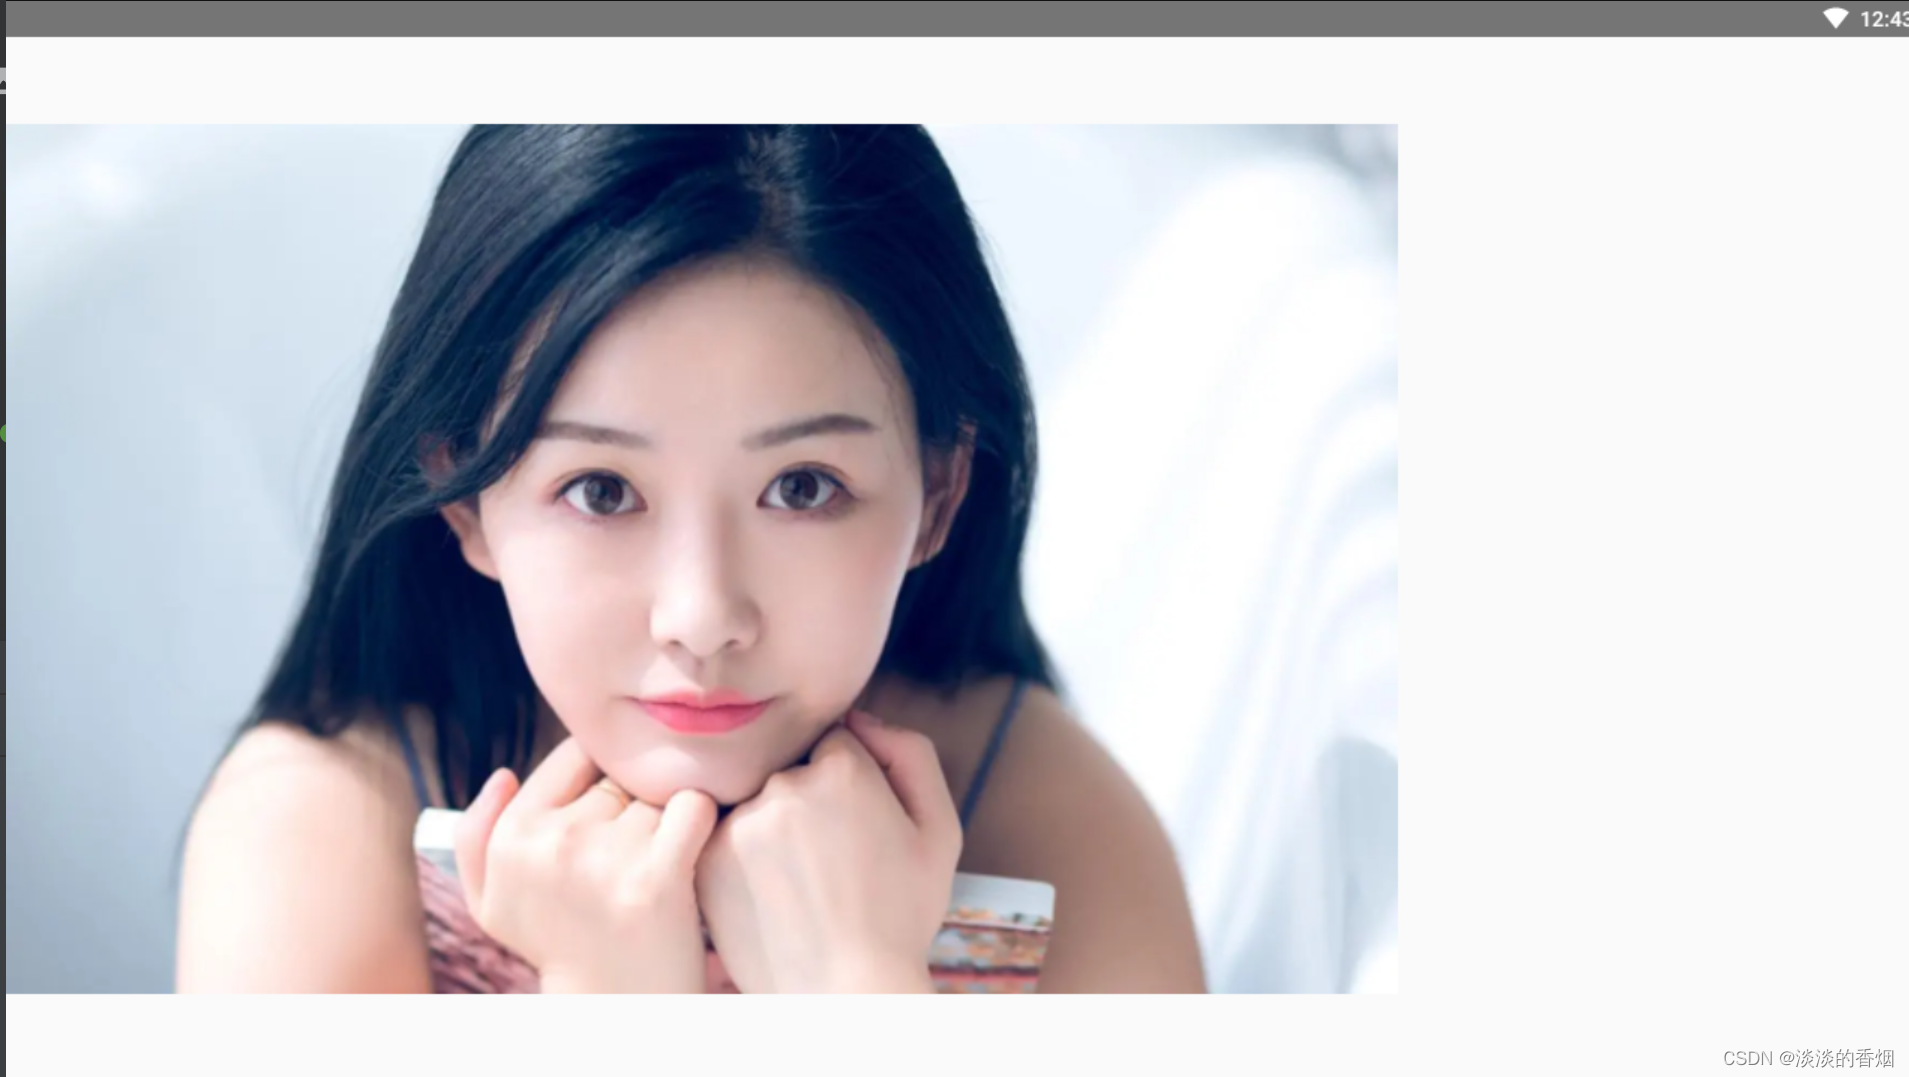
自定义图片
您可以使用 Image 可组合项(contentScale 和 colorFilter)中的属性来自定义图片。您还可以使用现有的 Modifiers 来将不同的效果应用到 Image。修饰符可用于任何可组合项,而不仅仅是 Image 可组合项,而 contentScale 和 colorFilter 是 Image 可组合项上的显式参数。
内容缩放
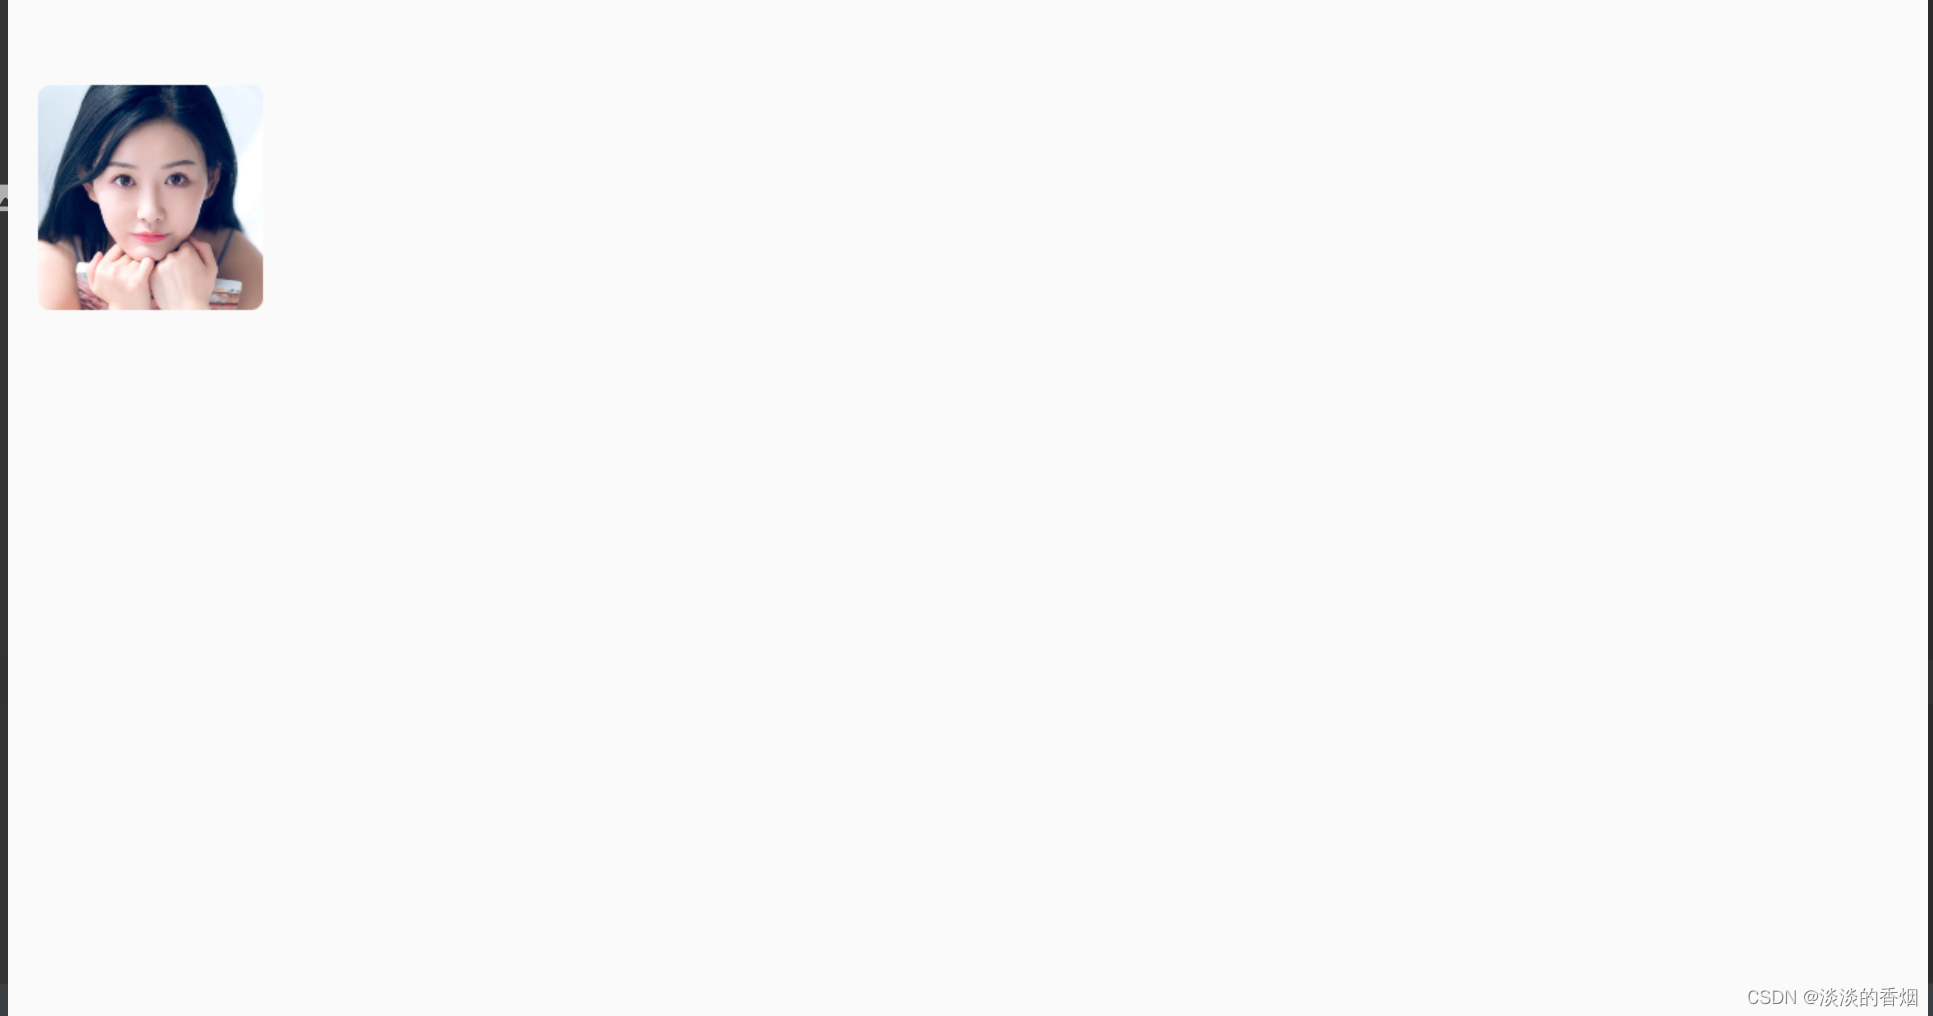
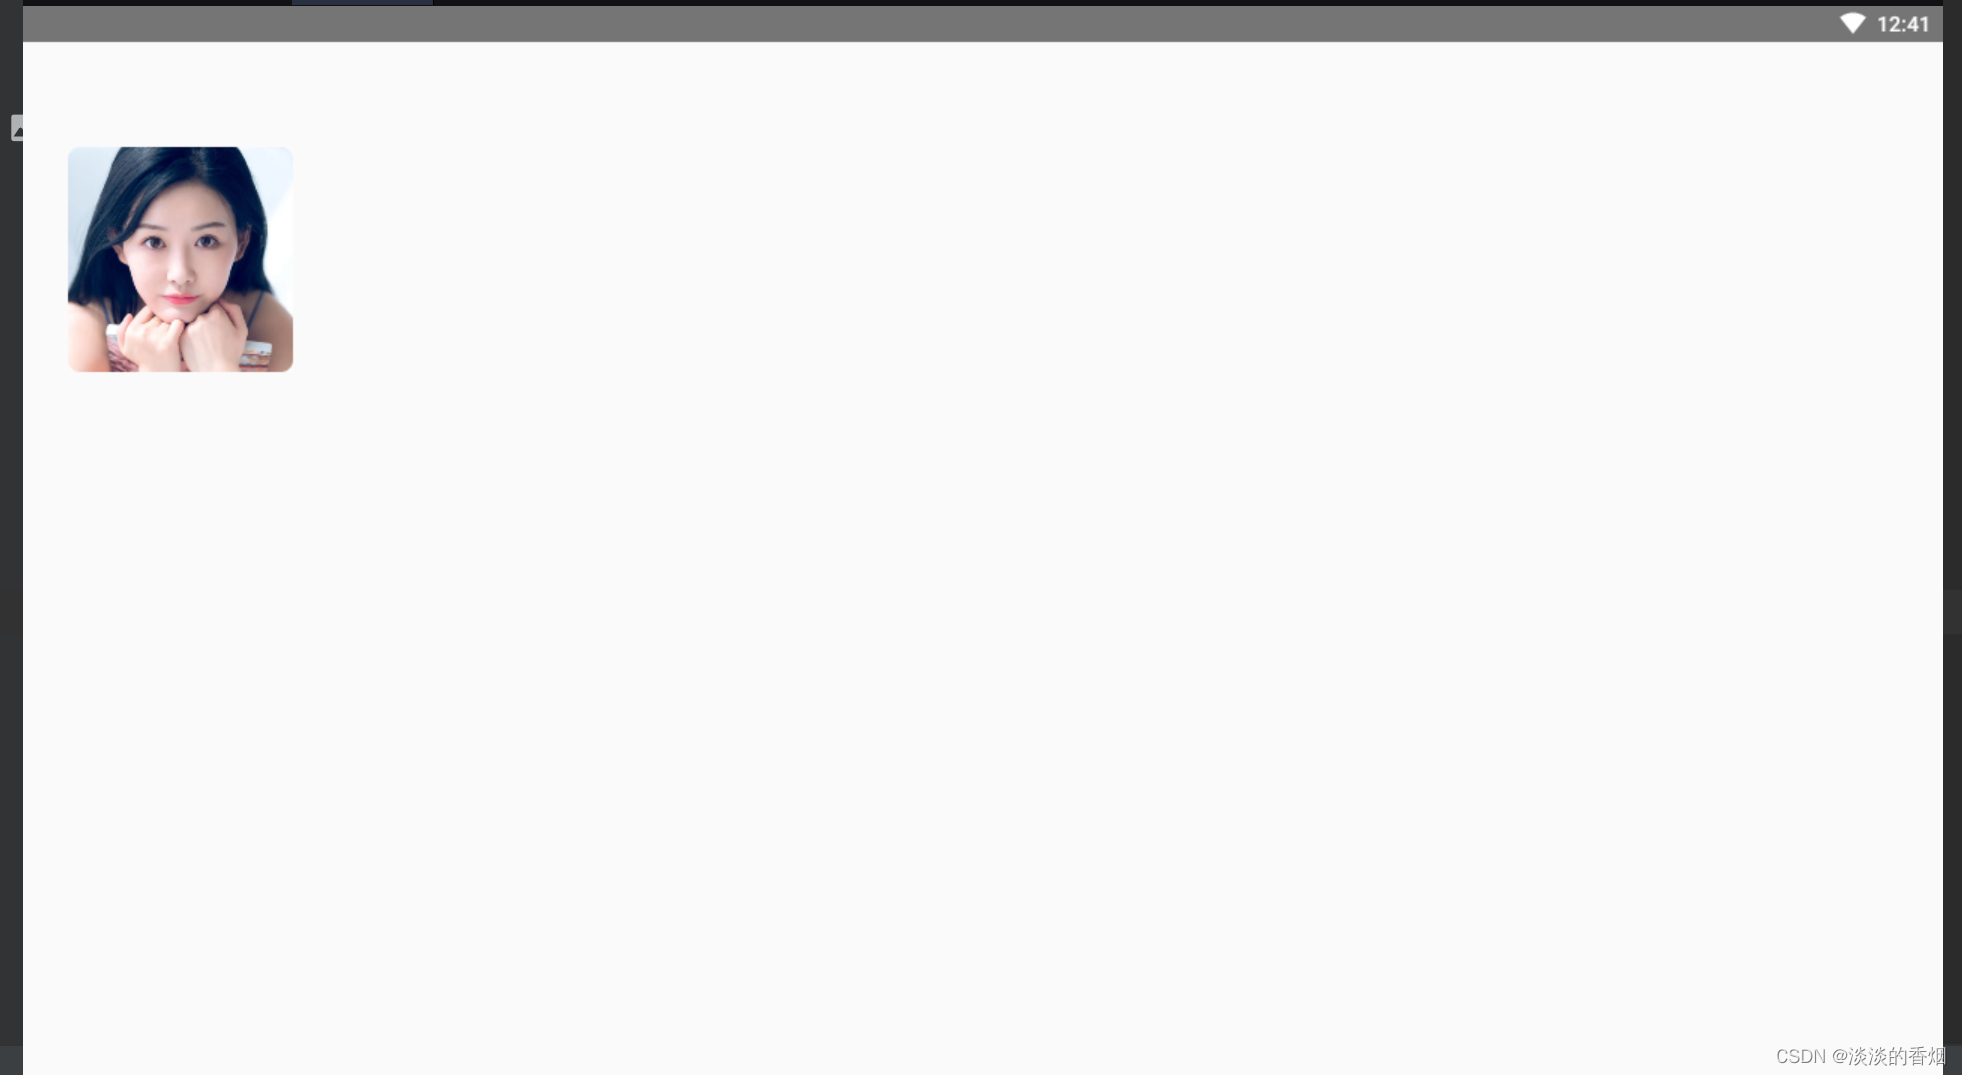
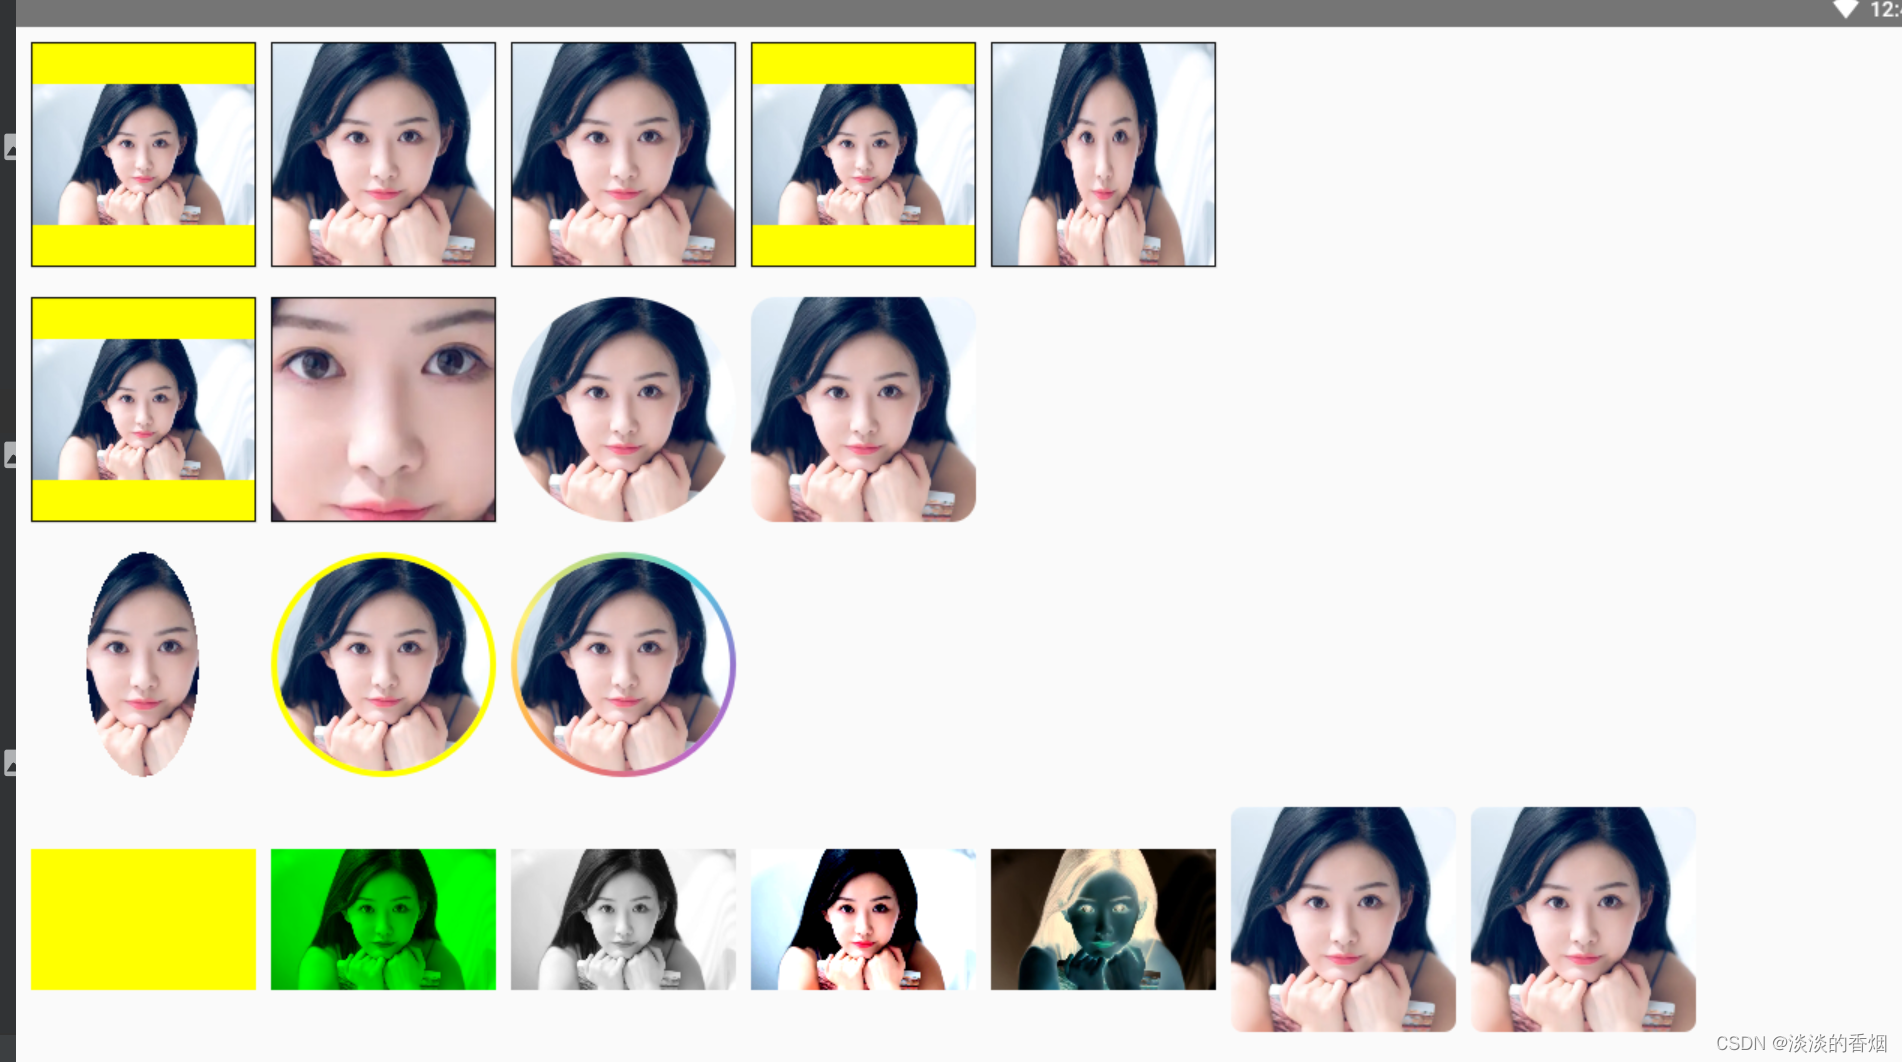
指定 contentScale 选项以剪裁图片或更改图片在其边界内的缩放方式。默认情况下,如果您未指定 contentScale 选项,系统将使用 ContentScale.Fit。
在以下示例中,Image 可组合项的尺寸限制为 150dp,并带有边框,且 Image 可组合项的背景设置为黄色,以展示下表中的不同 ContentScale 选项。
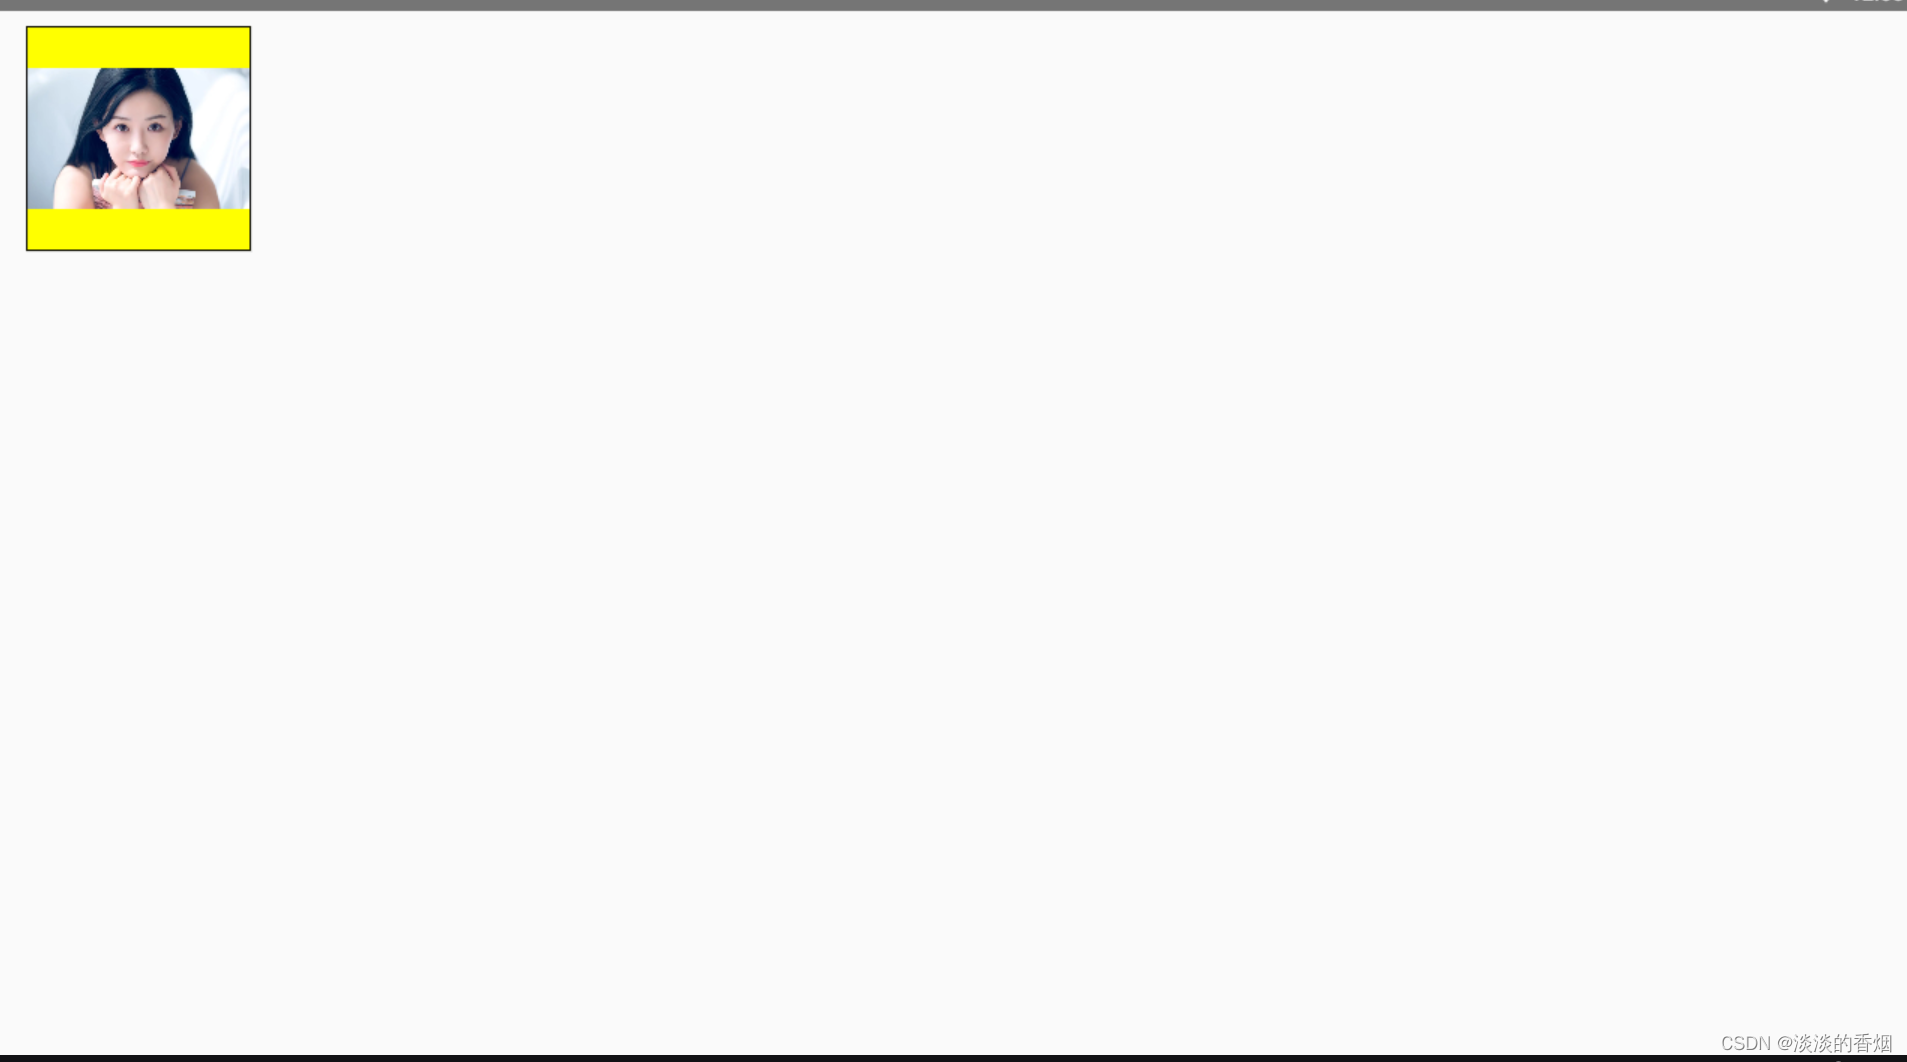
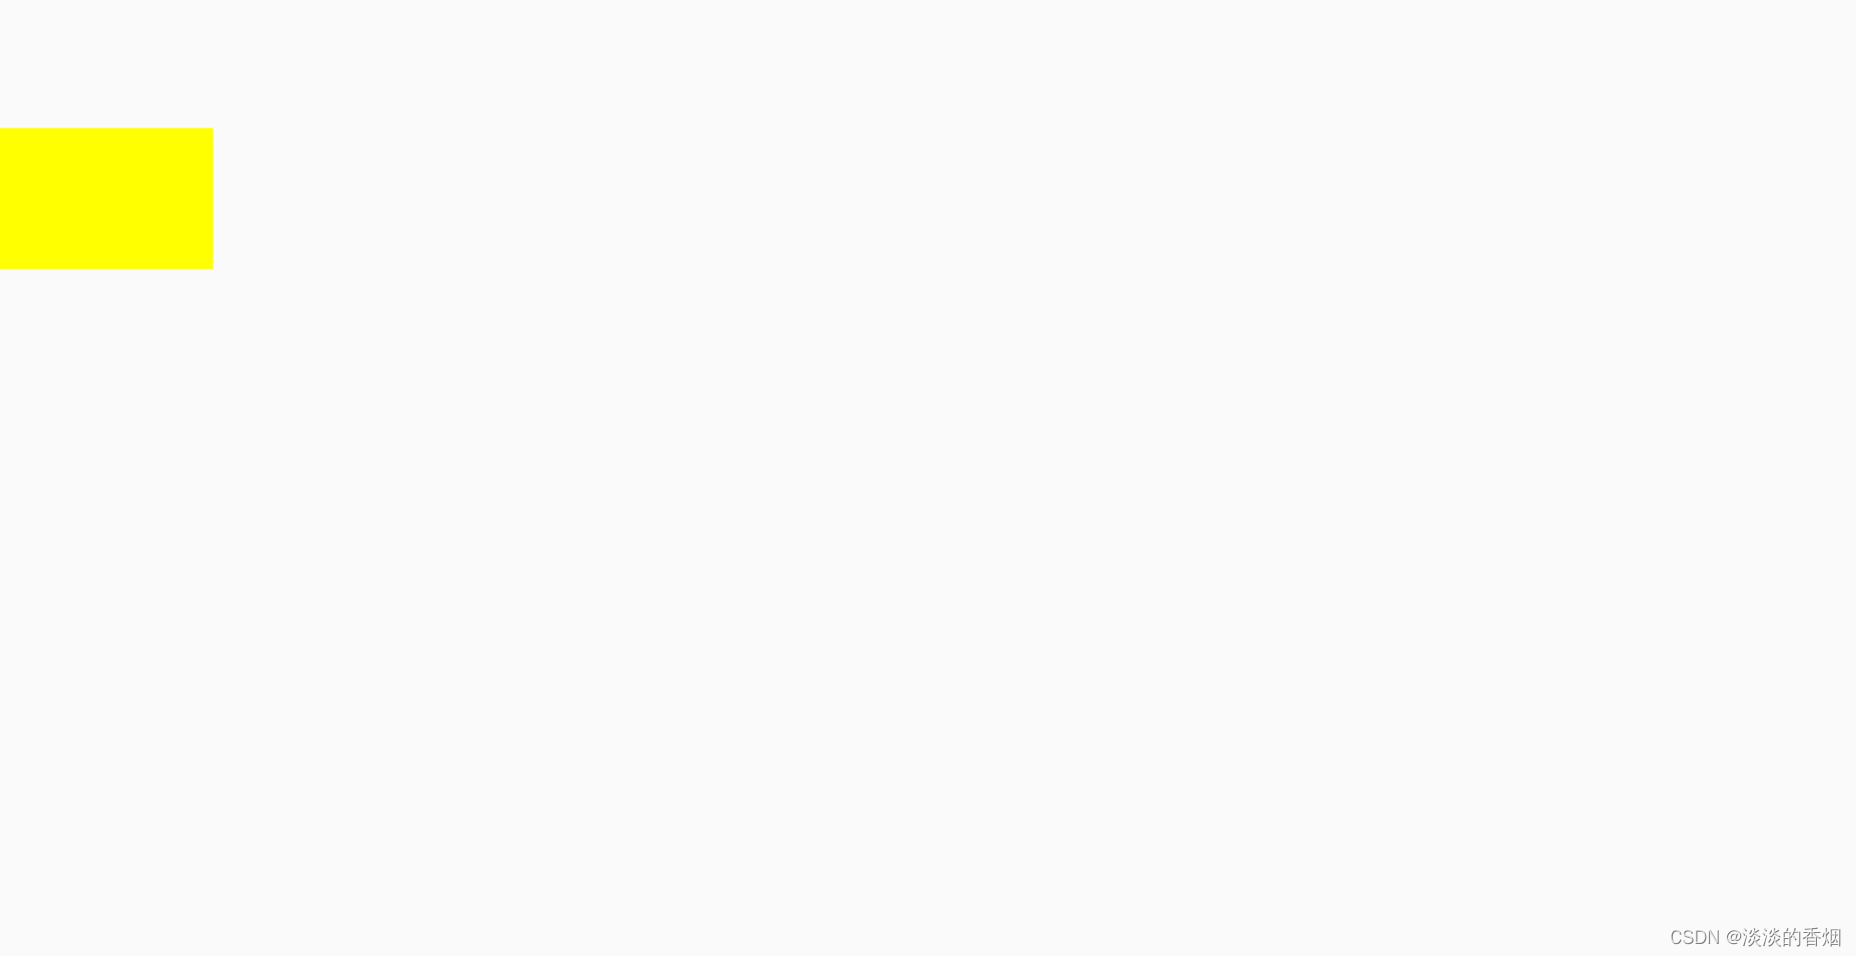
1.ContentScale.Fit:
均匀缩放图片,并保持宽高比(默认)。如果内容小于指定大小,系统会放大图片以适应边界。
val imageModifier = Modifier
    .size(150.dp)
    .border(BorderStroke(1.dp, Color.Black))
    .background(Color.Yellow)
Image(
    painter = painterResource(id = R.drawable.dog),
    contentDescription = stringResource(id = R.string.dog_content_description),
    contentScale = ContentScale.Fit,
    modifier = imageModifier
)
2.效果预览:

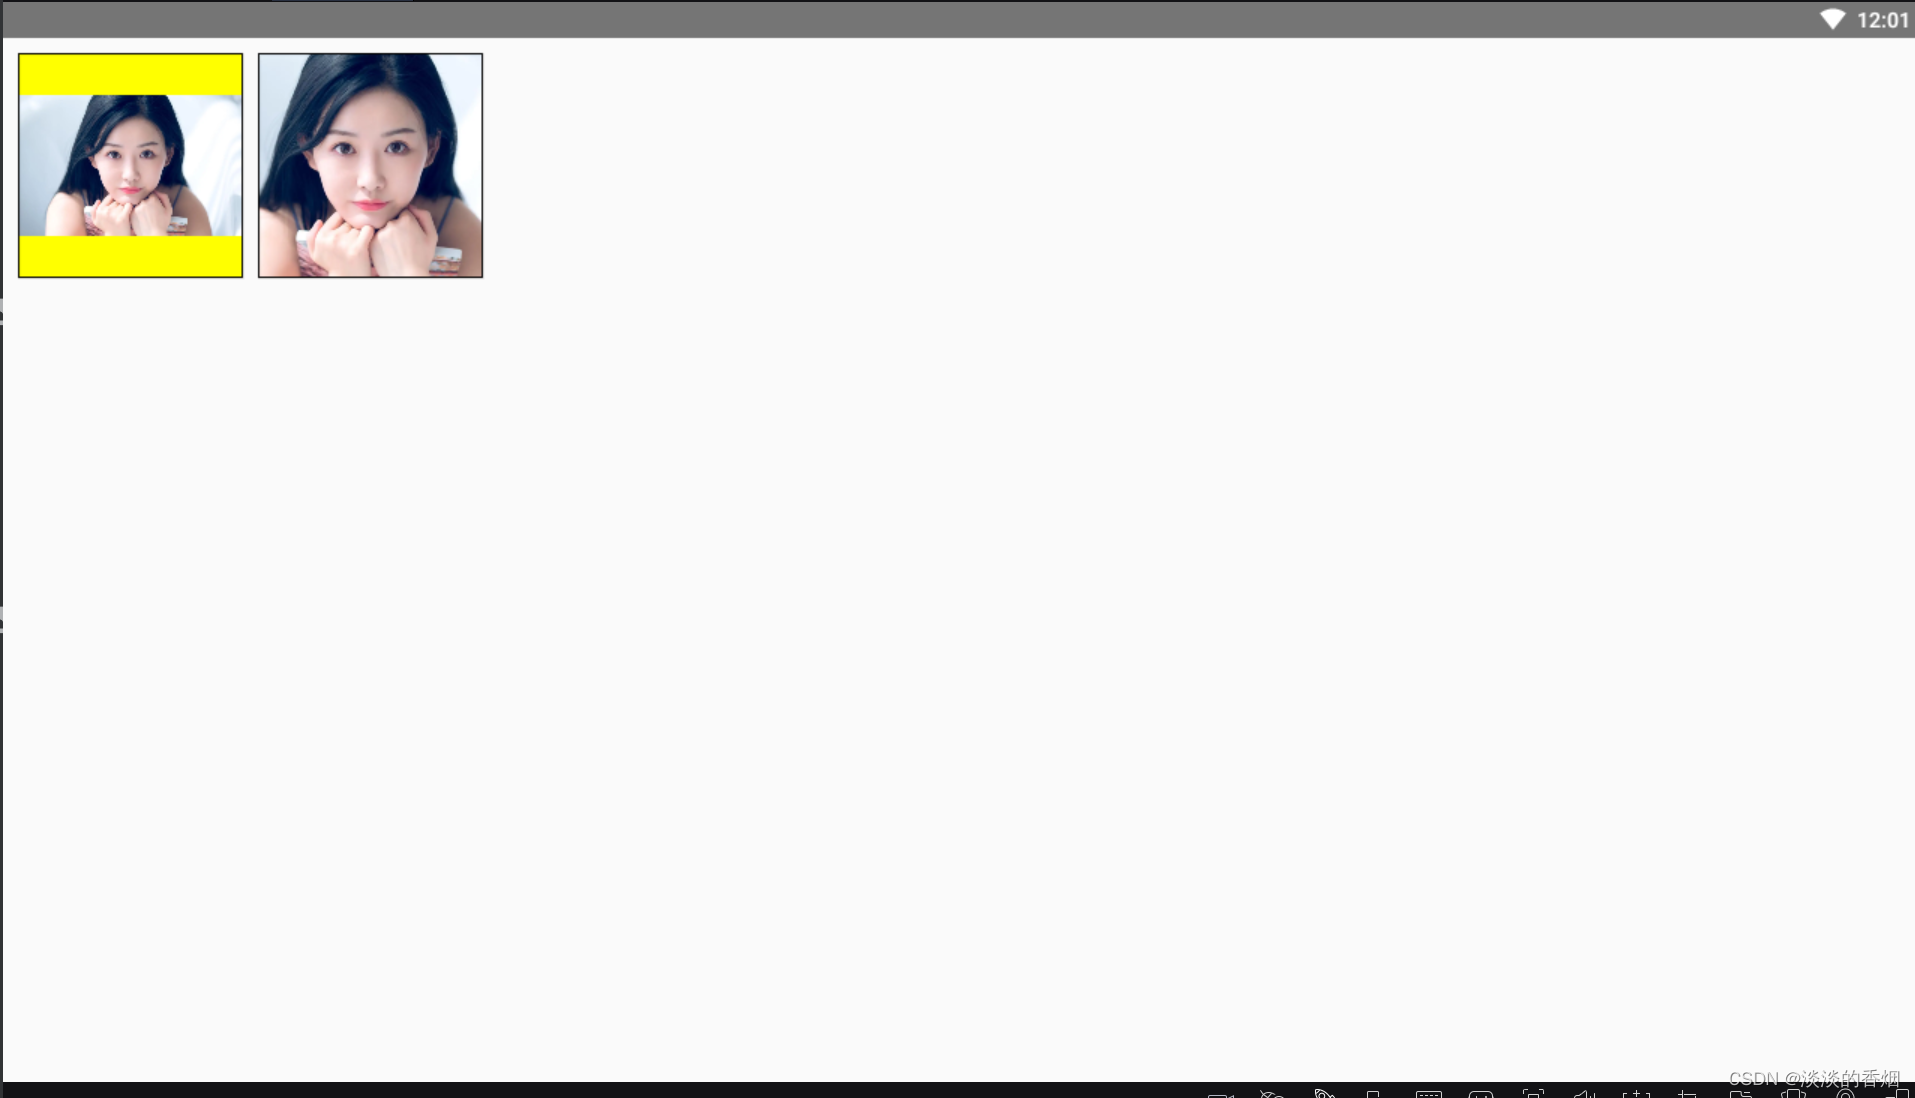
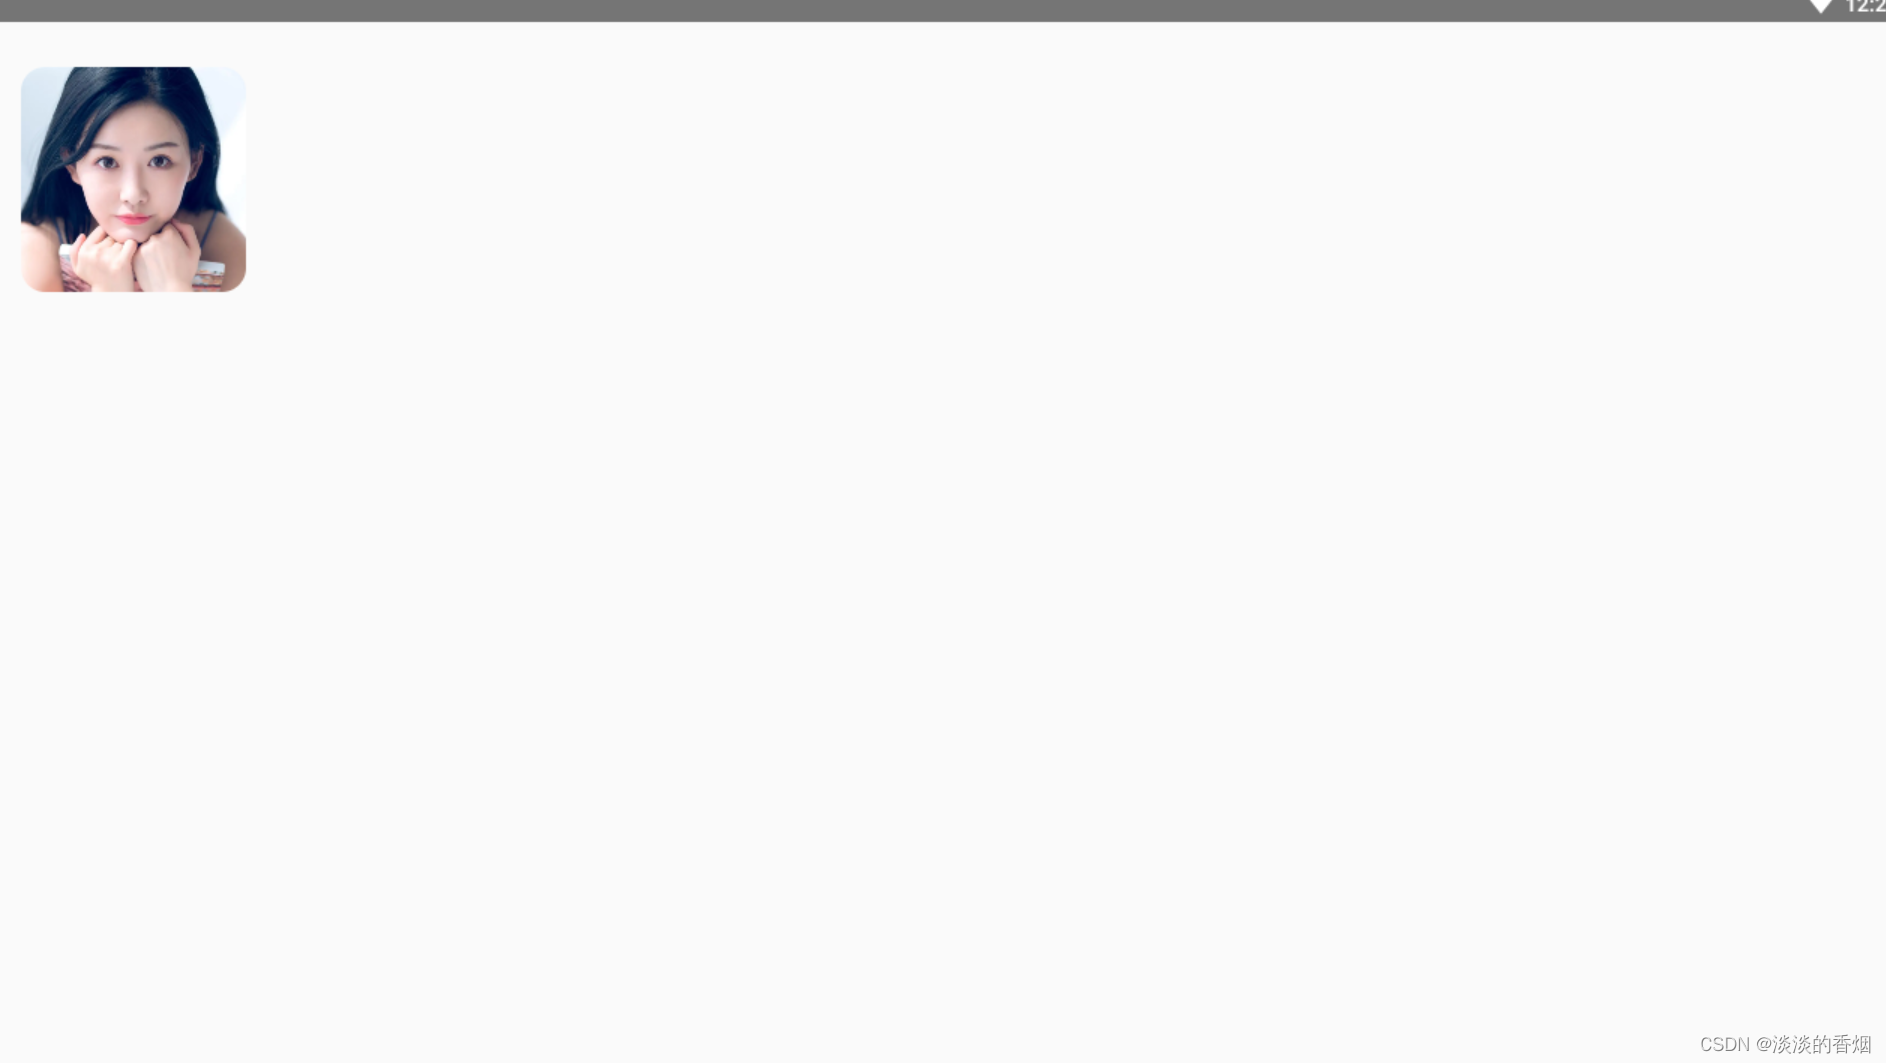
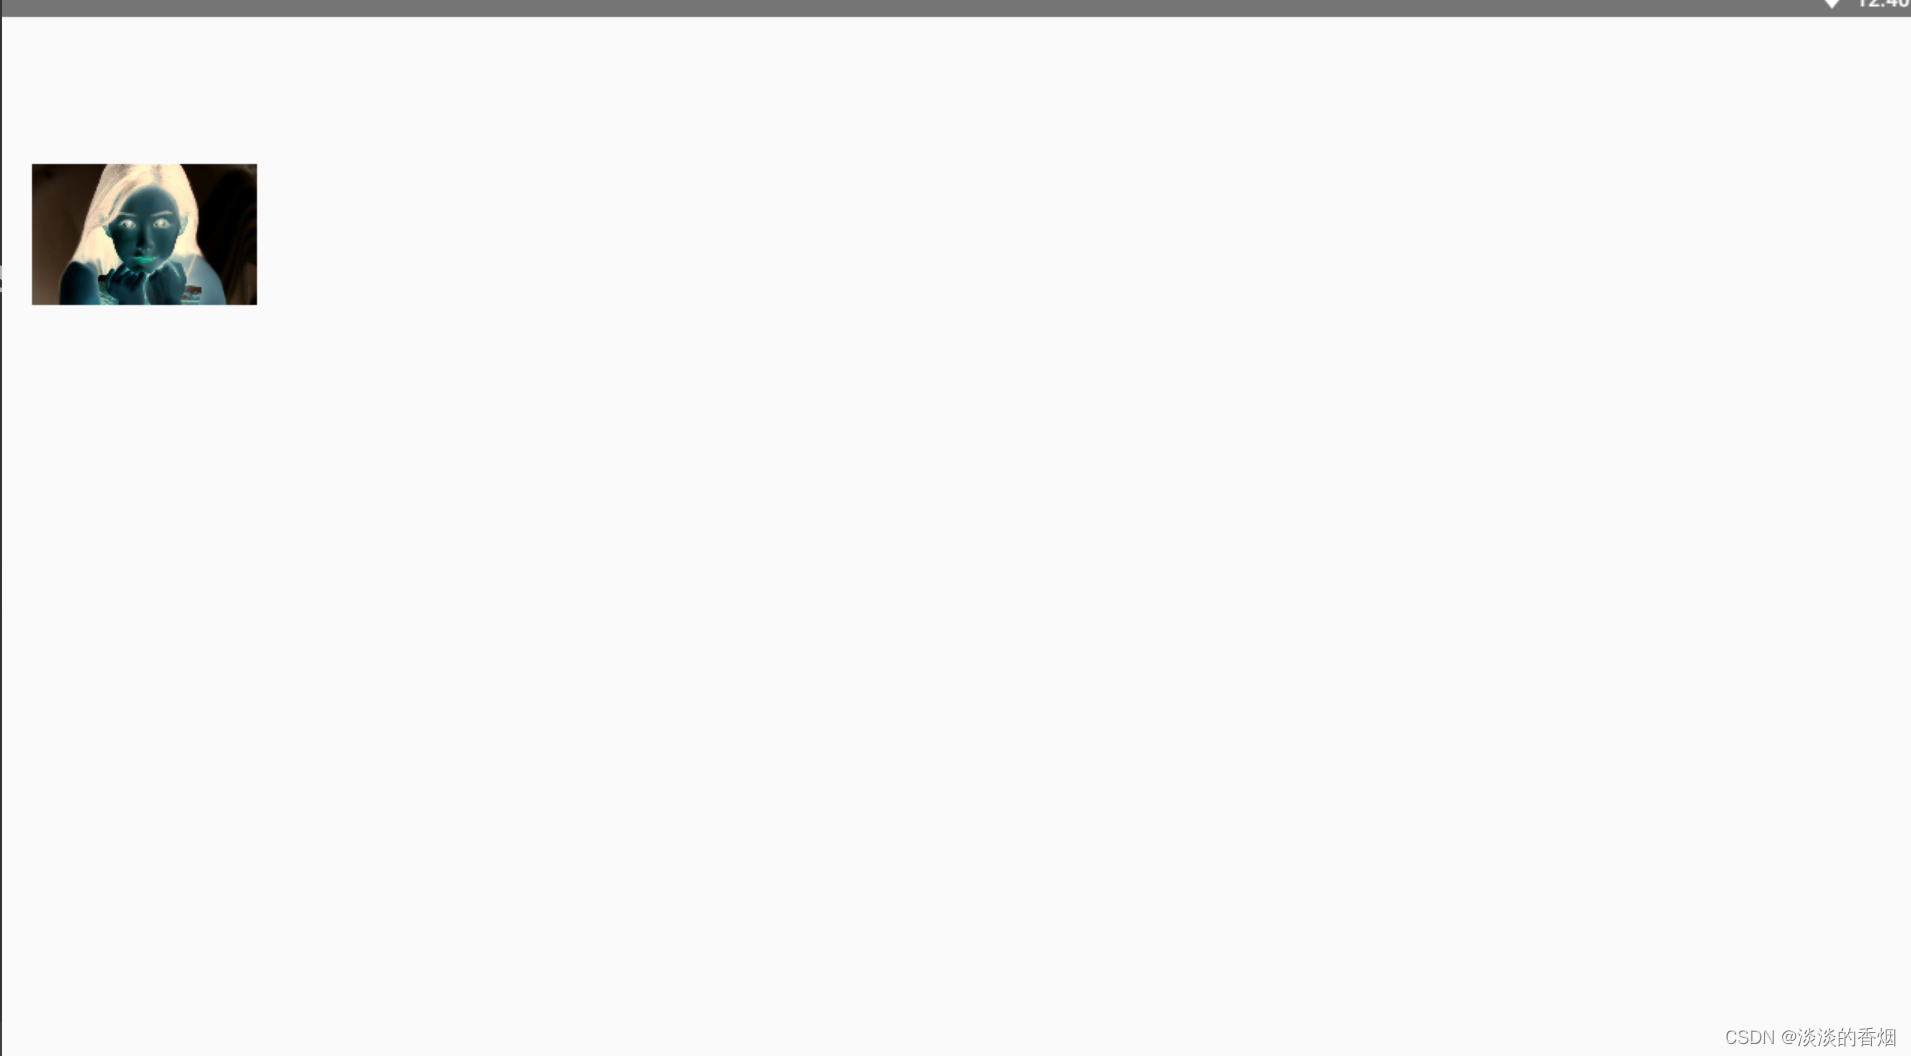
3.ContentScale.Crop:
将图片居中裁剪到可用空间。
val imageModifier = Modifier
    .size(150.dp)
    .border(BorderStroke(1.dp, Color.Black))
    .background(Color.Yellow)
Image(
    painter = painterResource(id = R.mipmap.avatar),
    contentDescription = stringResource(id = R.string.dog_content_description),
    contentScale = ContentScale.Crop,
    modifier = imageModifier
)
4.居中裁剪效果预览:
5.ContentScale.FillHeight:
缩放来源图片,保持宽高比不变,使边界与目标高度匹配。
val imageModifier = Modifier
    .size(150.dp)
    .border(BorderStroke(1.dp, Color.Black))
    .background(Color.Yellow)
Spacer(modifier = Modifier.width(10.dp))
Image(
    painter = painterResource(id = R.mipmap.avatar),
    contentDescription = stringResource(id = R.string.dog_content_description),
    contentScale = ContentScale.FillHeight,
    modifier = imageModifier
)

Spacer(modifier = Modifier.width(10.dp))
Image(
    painter = painterResource(id = R.mipmap.avatar),
    contentDescription = stringResource(id = R.string.dog_content_description),
    contentScale = ContentScale.FillWidth,
    modifier = imageModifier
)
6.效果预览:
7.ContentScale.FillBounds:
以非均匀方式垂直和水平缩放内容,以填充目标边界。(注意:如果将图片放入与其宽高比不完全相符的容器中,则图片会失真
Spacer(modifier = Modifier.width(10.dp))
Image(
    painter = painterResource(id = R.mipmap.avatar),
    contentDescription = stringResource(id = R.string.dog_content_description),
    contentScale = ContentScale.FillBounds,
    modifier = imageModifier
)
8.效果预览:

9.ContentScale.Inside:
缩放来源图片,使宽高保持在目标边界内。如果来源图片在两个维度上都小于或等于目标,则其行为类似于“None”。内容始终包含在边界内。如果内容小于边界,则不会应用缩放。
Image(
    painter = painterResource(id = R.mipmap.avatar),
    contentDescription = stringResource(id = R.string.dog_content_description),
    contentScale = ContentScale.Inside,
    modifier = imageModifier
)
10.效果预览:

11.ContentScale.None:
不对来源图片应用任何缩放。如果内容小于目标边界,则不会缩放以适应相应区域。
Image(
       painter = painterResource(id = R.mipmap.avatar),
       contentDescription = stringResource(id = R.string.dog_content_description),
       contentScale = ContentScale.None,
       modifier = imageModifier
   )
12.效果预览:
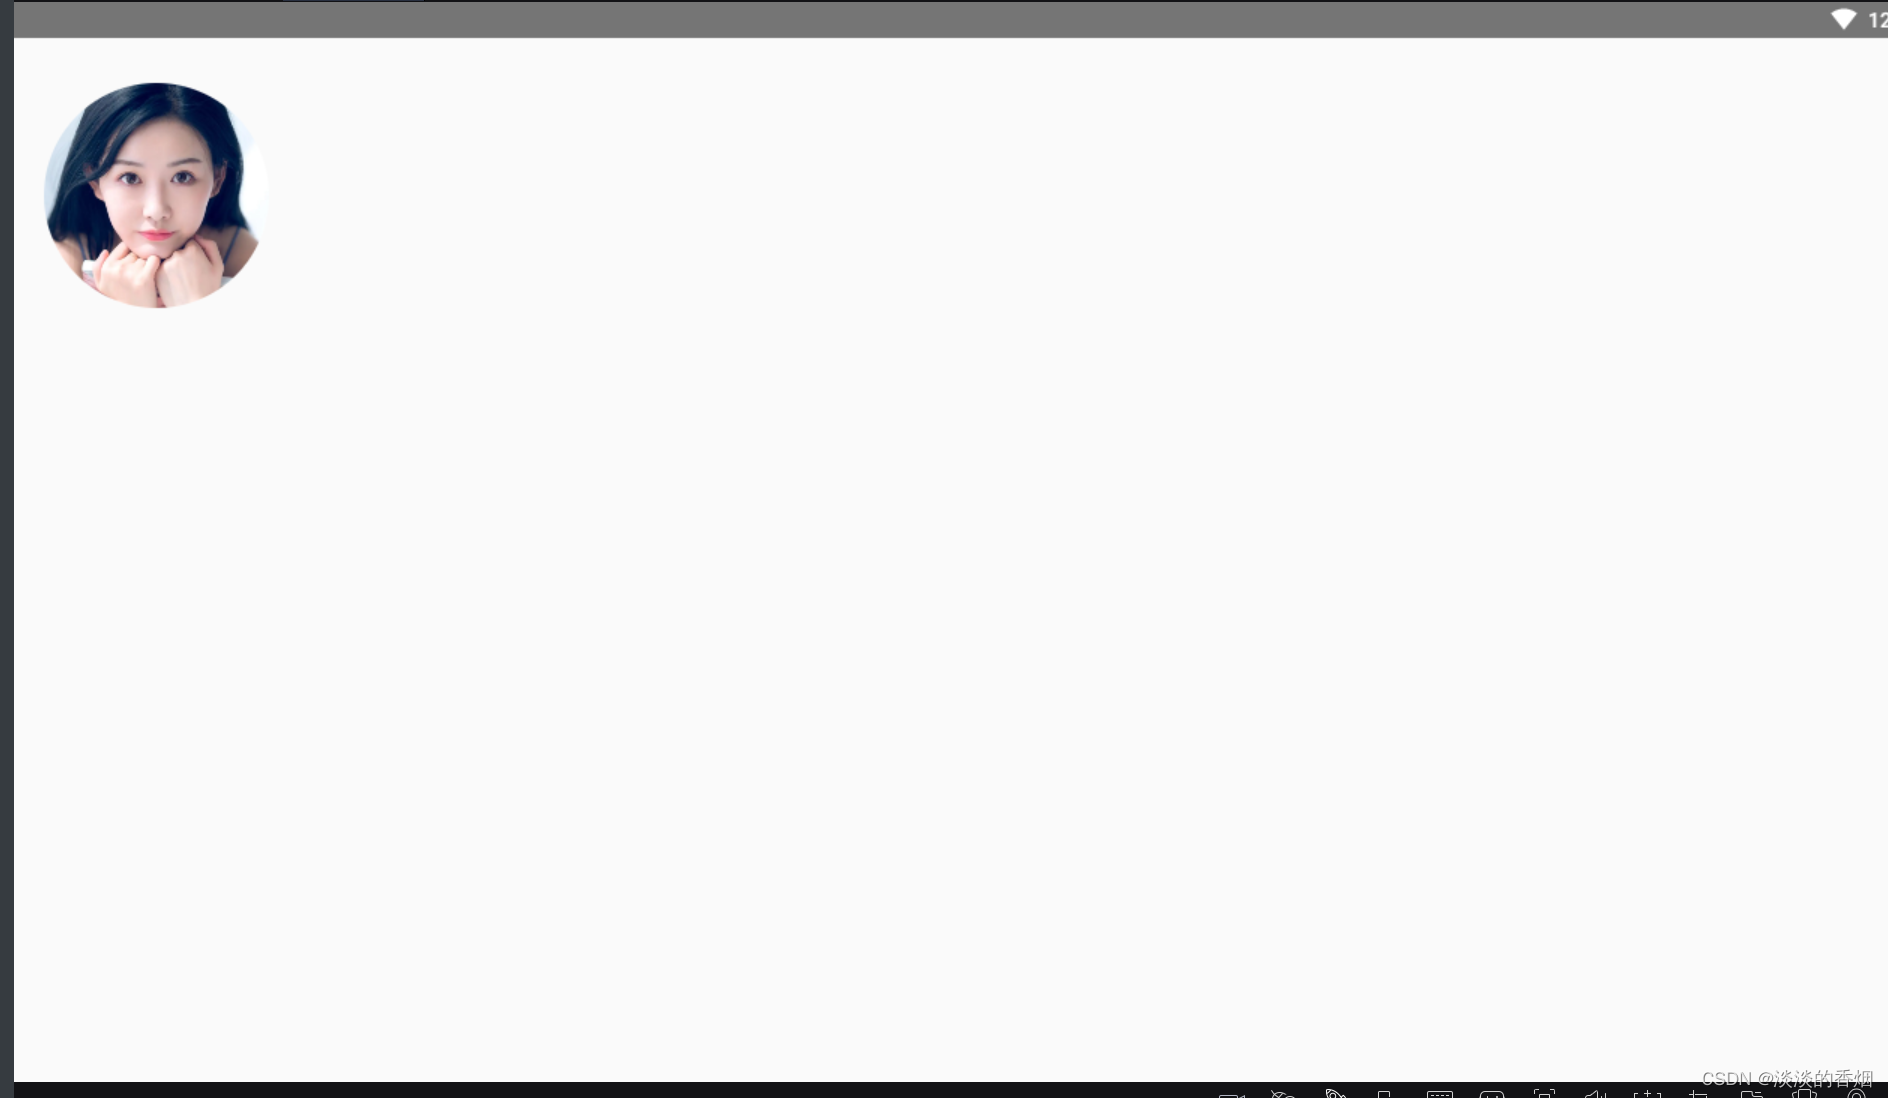
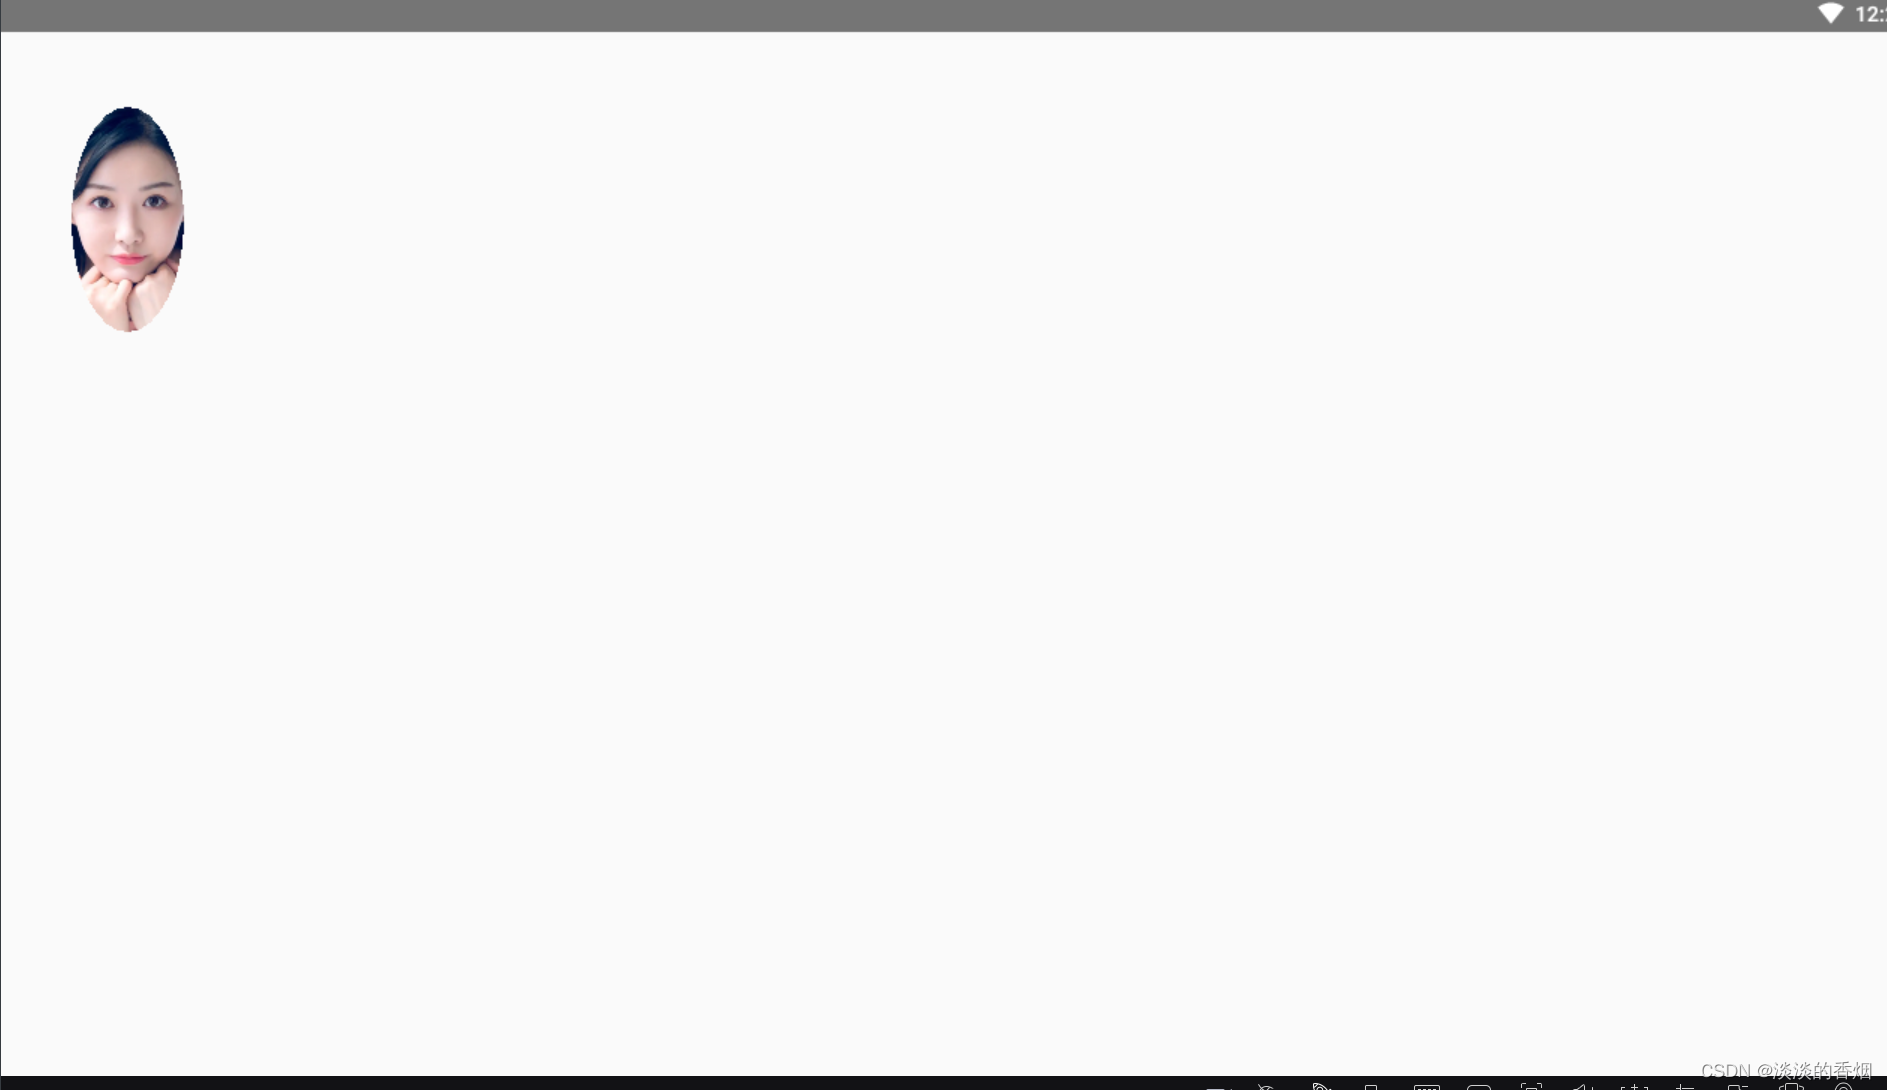
13.将 Image 可组合项裁剪为某个形状
  Image(
      painter = painterResource(id = R.mipmap.avatar),
      contentDescription = stringResource(id = R.string.dog_content_description),
      contentScale = ContentScale.Crop,
      modifier = Modifier
      .size(100.dp)
      .clip(CircleShape)
  )
14.效果预览:
15.圆角形状 Modifier.clip
使用 Modifier.clip(RoundedCornerShape(16.dp) 并指定圆角形状的边角大小:
Image(
    painter = painterResource(id = R.mipmap.avatar),
    contentDescription = stringResource(id = R.string.dog_content_description),
    contentScale = ContentScale.Crop,
    modifier = Modifier
        .size(100.dp)
        .clip(RoundedCornerShape(16.dp))
)
16.效果预览:
17.将 Image 可组合项裁剪为形状:
class SquashedOval : Shape {
    override fun createOutline(
        size: androidx.compose.ui.geometry.Size,
        layoutDirection: androidx.compose.ui.unit.LayoutDirection,
        density: Density
    ): Outline {
        val path = Path().apply {
            // We create an Oval that starts at ¼ of the width, and ends at ¾ of the width of the container.
            addOval(
                Rect(
                    left = size.width / 4f,
                    top = 0f,
                    right = size.width * 3 / 4f,
                    bottom = size.height
                )
            )
        }
        return Outline.Generic(path = path)
    }
}

     Image(
         painter = painterResource(id = R.mipmap.avatar),
         contentDescription = "Golden retriever in falling autumn leaves",
         contentScale = ContentScale.Crop,
         modifier = Modifier
         .size(100.dp)
         .clip(SquashedOval())
     )
18.效果预览:
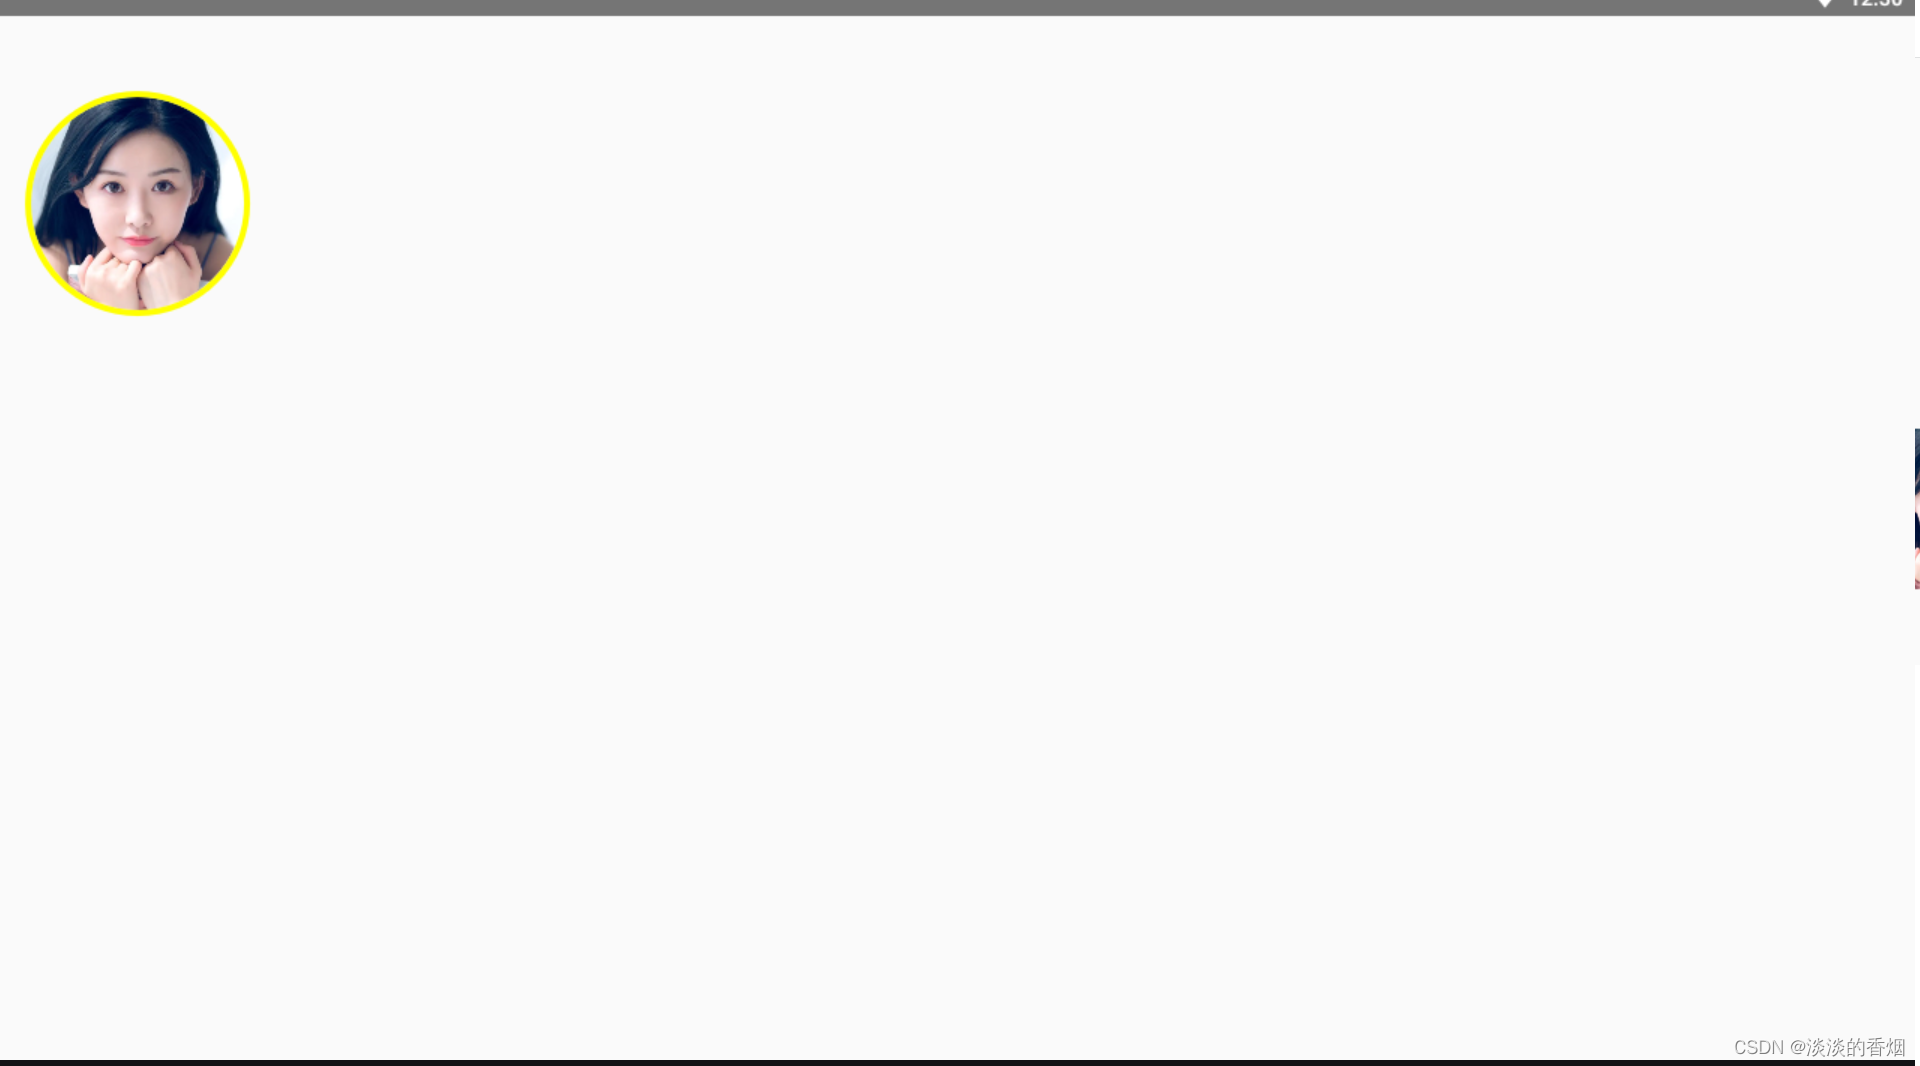
19.为 Image 可组合项添加边框
val borderWidth = 4.dp
Image(
    painter = painterResource(id = R.mipmap.avatar),
    contentDescription = stringResource(id = R.string.dog_content_description),
    contentScale = ContentScale.Crop,
    modifier = Modifier
        .size(100.dp)
        .border(
            BorderStroke(borderWidth, Color.Yellow),
            CircleShape
        )
        .padding(borderWidth)
        .clip(CircleShape)
)
20.效果预览:
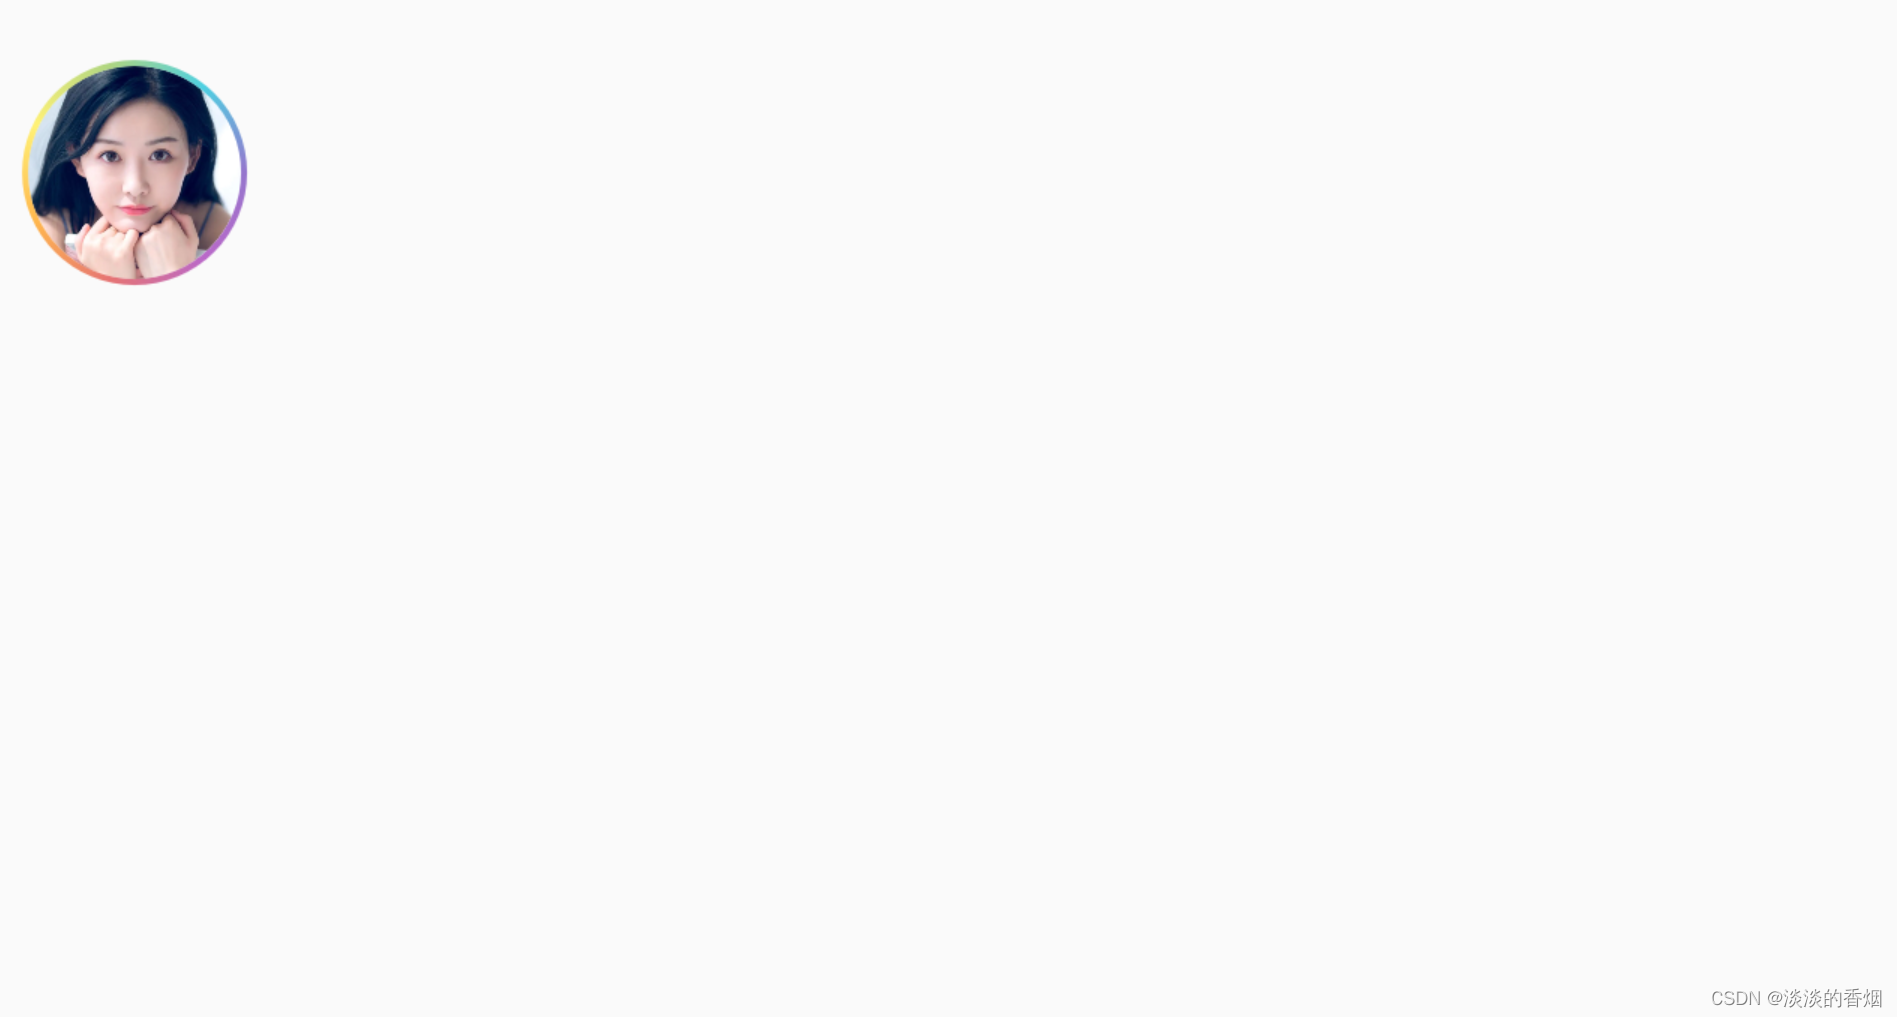
21.绘制彩虹渐变边框:
val rainbowColorsBrush = remember {
    Brush.sweepGradient(
        listOf(
            Color(0xFF9575CD),
            Color(0xFFBA68C8),
            Color(0xFFE57373),
            Color(0xFFFFB74D),
            Color(0xFFFFF176),
            Color(0xFFAED581),
            Color(0xFF4DD0E1),
            Color(0xFF9575CD)
        )
    )
}
Spacer(modifier = Modifier.width(10.dp))
val borderWidth1 = 4.dp
//为 Image 可组合项添加边框,一种常见的操作是结合使用 Modifier.border() 与 Modifier.clip() 在图片周围创建边框:
Image(
    painter = painterResource(id = R.mipmap.avatar),
    contentDescription = stringResource(id = R.string.dog_content_description),
    contentScale = ContentScale.Crop,
    modifier = Modifier
        .size(100.dp)
        .border(
            BorderStroke(borderWidth1, rainbowColorsBrush),
            CircleShape
        )
        .padding(borderWidth1)
        .clip(CircleShape)
)
22.效果预览:
颜色滤镜 - 转换图片的像素颜色
Image 可组合项包含一个 colorFilter 参数,可用于更改图片中各个像素的输出。
23.ColorFilter.tint
Image(
    painter = painterResource(id = R.mipmap.avatar),
    contentDescription = stringResource(id = R.string.dog_content_description),
    colorFilter = ColorFilter.tint(Color.Yellow),
    modifier = Modifier
        .size(150.dp)
)
24.效果预览:
25.BlendMode.Darken和 Color.Green
Image(
    painter = painterResource(id = R.mipmap.avatar),
    contentDescription = stringResource(id = R.string.dog_content_description),
    colorFilter = ColorFilter.tint(Color.Green, blendMode = BlendMode.Darken),
    modifier = Modifier
        .size(150.dp)
)
26.效果预览:
27.通过颜色矩阵应用图片滤镜
Image(
    painter = painterResource(id = R.mipmap.avatar),
    contentDescription = stringResource(id = R.string.dog_content_description),
    colorFilter = ColorFilter.colorMatrix(ColorMatrix().apply { setToSaturation(0f) }),
    modifier = Modifier
        .size(150.dp)
)
28.效果预览:
29.调整 Image 可组合项的对比度或亮度
val contrast = 2f // 0f..10f (1 should be default)
val brightness = -180f // -255f..255f (0 should be default)
val colorMatrix = floatArrayOf(
    contrast, 0f, 0f, 0f, brightness,
    0f, contrast, 0f, 0f, brightness,
    0f, 0f, contrast, 0f, brightness,
    0f, 0f, 0f, 1f, 0f
)
Spacer(modifier = Modifier.width(10.dp))
Image(
    painter = painterResource(id = R.mipmap.avatar),
    contentDescription = stringResource(id = R.string.dog_content_description),
    colorFilter = ColorFilter.colorMatrix(ColorMatrix(colorMatrix)),
    modifier = Modifier
        .size(150.dp)
)
30.效果预览:
31.反转 Image 可组合项的颜色
val colorMatrix1 = floatArrayOf(
    -1f, 0f, 0f, 0f, 255f,
    0f, -1f, 0f, 0f, 255f,
    0f, 0f, -1f, 0f, 255f,
    0f, 0f, 0f, 1f, 0f
)
Spacer(modifier = Modifier.width(10.dp))
Image(
    painter = painterResource(id = R.mipmap.avatar),
    contentDescription = stringResource(id = R.string.dog_content_description),
    colorFilter = ColorFilter.colorMatrix(ColorMatrix(colorMatrix1)),
    modifier = Modifier
        .size(150.dp)

)
32.效果预览:
33.对 Image 可组合项进行模糊处理
    painter = painterResource(id = R.mipmap.avatar),
    contentDescription = stringResource(id = R.string.dog_content_description),
    contentScale = ContentScale.Crop,
    modifier = Modifier
        .size(150.dp)
        .blur(
            radiusX = 10.dp,
            radiusY = 10.dp,
            edgeTreatment = BlurredEdgeTreatment(RoundedCornerShape(8.dp))
        )
)
34.效果预览:
35.BlurredEdgeTreatment(Shape)
Image(
    painter = painterResource(id = R.mipmap.avatar),
    contentDescription = stringResource(id = R.string.dog_content_description),
    contentScale = ContentScale.Crop,
    modifier = Modifier
        .size(150.dp)
        .blur(
            radiusX = 10.dp,
            radiusY = 10.dp,
            edgeTreatment = BlurredEdgeTreatment.Unbounded
        )
        .clip(RoundedCornerShape(8.dp))
)
36.效果预览:
37.设置自定义宽高比:
  Image(
         painter = painterResource(id = R.mipmap.avatar),
         contentDescription = stringResource(id = R.string.dog_content_description),
         modifier = Modifier
             .aspectRatio(16f / 9f)
     )
     Image(
         painter = painterResource(id = R.mipmap.avatar),
         contentDescription = stringResource(id = R.string.dog_content_description),
         modifier = Modifier
             .aspectRatio(4f / 3f)
     )
38.效果预览:
39.完整代码:
package com.example.composemodifiterdemo

import android.os.Bundle
import androidx.activity.ComponentActivity
import androidx.activity.compose.setContent
import androidx.compose.foundation.BorderStroke
import androidx.compose.foundation.Image
import androidx.compose.foundation.background
import androidx.compose.foundation.border
import androidx.compose.foundation.layout.*
import androidx.compose.foundation.shape.CircleShape
import androidx.compose.foundation.shape.RoundedCornerShape
import androidx.compose.runtime.Composable
import androidx.compose.runtime.remember
import androidx.compose.ui.Modifier
import androidx.compose.ui.draw.BlurredEdgeTreatment
import androidx.compose.ui.draw.blur
import androidx.compose.ui.draw.clip
import androidx.compose.ui.geometry.Rect
import androidx.compose.ui.graphics.*
import androidx.compose.ui.layout.ContentScale
import androidx.compose.ui.res.painterResource
import androidx.compose.ui.res.stringResource
import androidx.compose.ui.unit.Density
import androidx.compose.ui.unit.dp

/**
 * @auth: njb
 * @date: 2022/12/26 10:37
 * @desc:
 */
class ImageSampleActivity : ComponentActivity() {
    override fun onCreate(savedInstanceState: Bundle?) {
        super.onCreate(savedInstanceState)
        setContent {
            image()
        }
    }

    @Composable
    fun image() {
        //内容缩放,指定 contentScale 选项以剪裁或更改图片在其边界内的缩放方式。默认情况下,如果您未指定 contentScale 选项,系统将使用 ContentScale.Fit。
        //在以下示例中,Image 可组合项的尺寸限制为 150dp,并带有边框,且 Image 可组合项的背景设置为黄色,以展示下表中的不同 ContentScale 选项。
        Column {
            val imageModifier = Modifier
                .size(150.dp)
                .border(BorderStroke(1.dp, Color.Black))
                .background(Color.Yellow)
            Row(modifier = Modifier.padding(all = 10.dp)) {
                Image(
                    painter = painterResource(id = R.mipmap.avatar),
                    contentDescription = stringResource(id = R.string.dog_content_description),
                    contentScale = ContentScale.Fit,
                    modifier = imageModifier
                )
                Spacer(modifier = Modifier.width(10.dp))
                Image(
                    painter = painterResource(id = R.mipmap.avatar),
                    contentDescription = stringResource(id = R.string.dog_content_description),
                    contentScale = ContentScale.Crop,
                    modifier = imageModifier
                )
                Spacer(modifier = Modifier.width(10.dp))
                Image(
                    painter = painterResource(id = R.mipmap.avatar),
                    contentDescription = stringResource(id = R.string.dog_content_description),
                    contentScale = ContentScale.FillHeight,
                    modifier = imageModifier
                )
                Spacer(modifier = Modifier.width(10.dp))
                Image(
                    painter = painterResource(id = R.mipmap.avatar),
                    contentDescription = stringResource(id = R.string.dog_content_description),
                    contentScale = ContentScale.FillWidth,
                    modifier = imageModifier
                )
                Spacer(modifier = Modifier.width(10.dp))
                Image(
                    painter = painterResource(id = R.mipmap.avatar),
                    contentDescription = stringResource(id = R.string.dog_content_description),
                    contentScale = ContentScale.FillBounds,
                    modifier = imageModifier
                )
            }
            Row(modifier = Modifier.padding(all = 10.dp)) {
                //将 Image 可组合项裁剪为形状:如需使图片适应形状,请使用内置的 clip 修饰符。如需将图片剪裁成圆形,请使用 Modifier.clip(CircleShape):
                Image(
                    painter = painterResource(id = R.mipmap.avatar),
                    contentDescription = stringResource(id = R.string.dog_content_description),
                    contentScale = ContentScale.Inside,
                    modifier = imageModifier
                )
                Spacer(modifier = Modifier.width(10.dp))
                Image(
                    painter = painterResource(id = R.mipmap.avatar),
                    contentDescription = stringResource(id = R.string.dog_content_description),
                    contentScale = ContentScale.None,
                    modifier = imageModifier
                )
                Spacer(modifier = Modifier.width(10.dp))
                Image(
                    painter = painterResource(id = R.mipmap.avatar),
                    contentDescription = stringResource(id = R.string.dog_content_description),
                    contentScale = ContentScale.Crop,
                    modifier = Modifier
                        .size(100.dp)
                        .clip(CircleShape)
                )
                Spacer(modifier = Modifier.width(10.dp))
                Image(
                    painter = painterResource(id = R.mipmap.avatar),
                    contentDescription = stringResource(id = R.string.dog_content_description),
                    contentScale = ContentScale.Crop,
                    modifier = Modifier
                        .size(100.dp)
                        .clip(RoundedCornerShape(16.dp))
                )
            }
            Row(modifier = Modifier.padding(all = 10.dp)) {
                //将 Image 可组合项裁剪为形状:
                Image(
                    painter = painterResource(id = R.mipmap.avatar),
                    contentDescription = "Golden retriever in falling autumn leaves",
                    contentScale = ContentScale.Crop,
                    modifier = Modifier
                        .size(100.dp)
                        .clip(SquashedOval())
                )
                Spacer(modifier = Modifier.width(10.dp))
                val borderWidth = 4.dp
                Image(
                    painter = painterResource(id = R.mipmap.avatar),
                    contentDescription = stringResource(id = R.string.dog_content_description),
                    contentScale = ContentScale.Crop,
                    modifier = Modifier
                        .size(100.dp)
                        .border(
                            BorderStroke(borderWidth, Color.Yellow),
                            CircleShape
                        )
                        .padding(borderWidth)
                        .clip(CircleShape)
                )
                //如果您想要创建渐变边框,可以使用 Brush API 在图片周围绘制彩虹渐变边框:
                val rainbowColorsBrush = remember {
                    Brush.sweepGradient(
                        listOf(
                            Color(0xFF9575CD),
                            Color(0xFFBA68C8),
                            Color(0xFFE57373),
                            Color(0xFFFFB74D),
                            Color(0xFFFFF176),
                            Color(0xFFAED581),
                            Color(0xFF4DD0E1),
                            Color(0xFF9575CD)
                        )
                    )
                }
                Spacer(modifier = Modifier.width(10.dp))
                val borderWidth1 = 4.dp
                //为 Image 可组合项添加边框,一种常见的操作是结合使用 Modifier.border() 与 Modifier.clip() 在图片周围创建边框:
                Image(
                    painter = painterResource(id = R.mipmap.avatar),
                    contentDescription = stringResource(id = R.string.dog_content_description),
                    contentScale = ContentScale.Crop,
                    modifier = Modifier
                        .size(100.dp)
                        .border(
                            BorderStroke(borderWidth1, rainbowColorsBrush),
                            CircleShape
                        )
                        .padding(borderWidth1)
                        .clip(CircleShape)
                )

            }
            Row (modifier = Modifier.padding(all = 10.dp)){
                //对图片进行色调处理
                Image(
                    painter = painterResource(id = R.mipmap.avatar),
                    contentDescription = stringResource(id = R.string.dog_content_description),
                    colorFilter = ColorFilter.tint(Color.Yellow),
                    modifier = Modifier
                        .size(150.dp)
                )
                Spacer(modifier = Modifier.width(10.dp))
                Image(
                    painter = painterResource(id = R.mipmap.avatar),
                    contentDescription = stringResource(id = R.string.dog_content_description),
                    colorFilter = ColorFilter.tint(Color.Green, blendMode = BlendMode.Darken),
                    modifier = Modifier
                        .size(150.dp)
                )
                Spacer(modifier = Modifier.width(10.dp))
                //通过颜色矩阵应用图片滤镜
                Image(
                    painter = painterResource(id = R.mipmap.avatar),
                    contentDescription = stringResource(id = R.string.dog_content_description),
                    colorFilter = ColorFilter.colorMatrix(ColorMatrix().apply { setToSaturation(0f) }),
                    modifier = Modifier
                        .size(150.dp)
                )

                val contrast = 2f // 0f..10f (1 should be default)
                val brightness = -180f // -255f..255f (0 should be default)
                val colorMatrix = floatArrayOf(
                    contrast, 0f, 0f, 0f, brightness,
                    0f, contrast, 0f, 0f, brightness,
                    0f, 0f, contrast, 0f, brightness,
                    0f, 0f, 0f, 1f, 0f
                )
                Spacer(modifier = Modifier.width(10.dp))
                Image(
                    painter = painterResource(id = R.mipmap.avatar),
                    contentDescription = stringResource(id = R.string.dog_content_description),
                    colorFilter = ColorFilter.colorMatrix(ColorMatrix(colorMatrix)),
                    modifier = Modifier
                        .size(150.dp)
                )
                //反转 Image 可组合项的颜色
                val colorMatrix1 = floatArrayOf(
                    -1f, 0f, 0f, 0f, 255f,
                    0f, -1f, 0f, 0f, 255f,
                    0f, 0f, -1f, 0f, 255f,
                    0f, 0f, 0f, 1f, 0f
                )
                Spacer(modifier = Modifier.width(10.dp))
                Image(
                    painter = painterResource(id = R.mipmap.avatar),
                    contentDescription = stringResource(id = R.string.dog_content_description),
                    colorFilter = ColorFilter.colorMatrix(ColorMatrix(colorMatrix1)),
                    modifier = Modifier
                        .size(150.dp)

                )
                Spacer(modifier = Modifier.width(10.dp))
                //对 Image 可组合项进行模糊处理
                Image(
                    painter = painterResource(id = R.mipmap.avatar),
                    contentDescription = stringResource(id = R.string.dog_content_description),
                    contentScale = ContentScale.Crop,
                    modifier = Modifier
                        .size(150.dp)
                        .blur(
                            radiusX = 10.dp,
                            radiusY = 10.dp,
                            edgeTreatment = BlurredEdgeTreatment(RoundedCornerShape(8.dp))
                        )
                )
                Spacer(modifier = Modifier.width(10.dp))
                Image(
                    painter = painterResource(id = R.mipmap.avatar),
                    contentDescription = stringResource(id = R.string.dog_content_description),
                    contentScale = ContentScale.Crop,
                    modifier = Modifier
                        .size(150.dp)
                        .blur(
                            radiusX = 10.dp,
                            radiusY = 10.dp,
                            edgeTreatment = BlurredEdgeTreatment.Unbounded
                        )
                        .clip(RoundedCornerShape(8.dp))
                )
            }
            //设置自定义宽高比
            Image(
                painter = painterResource(id = R.mipmap.avatar),
                contentDescription = stringResource(id = R.string.dog_content_description),
                modifier = Modifier
                    .aspectRatio(16f / 9f)
            )
        }
    }

    class SquashedOval : Shape {
        override fun createOutline(
            size: androidx.compose.ui.geometry.Size,
            layoutDirection: androidx.compose.ui.unit.LayoutDirection,
            density: Density
        ): Outline {
            val path = Path().apply {
                // We create an Oval that starts at ¼ of the width, and ends at ¾ of the width of the container.
                addOval(
                    Rect(
                        left = size.width / 4f,
                        top = 0f,
                        right = size.width * 3 / 4f,
                        bottom = size.height
                    )
                )
            }
            return Outline.Generic(path = path)
        }
    }

}
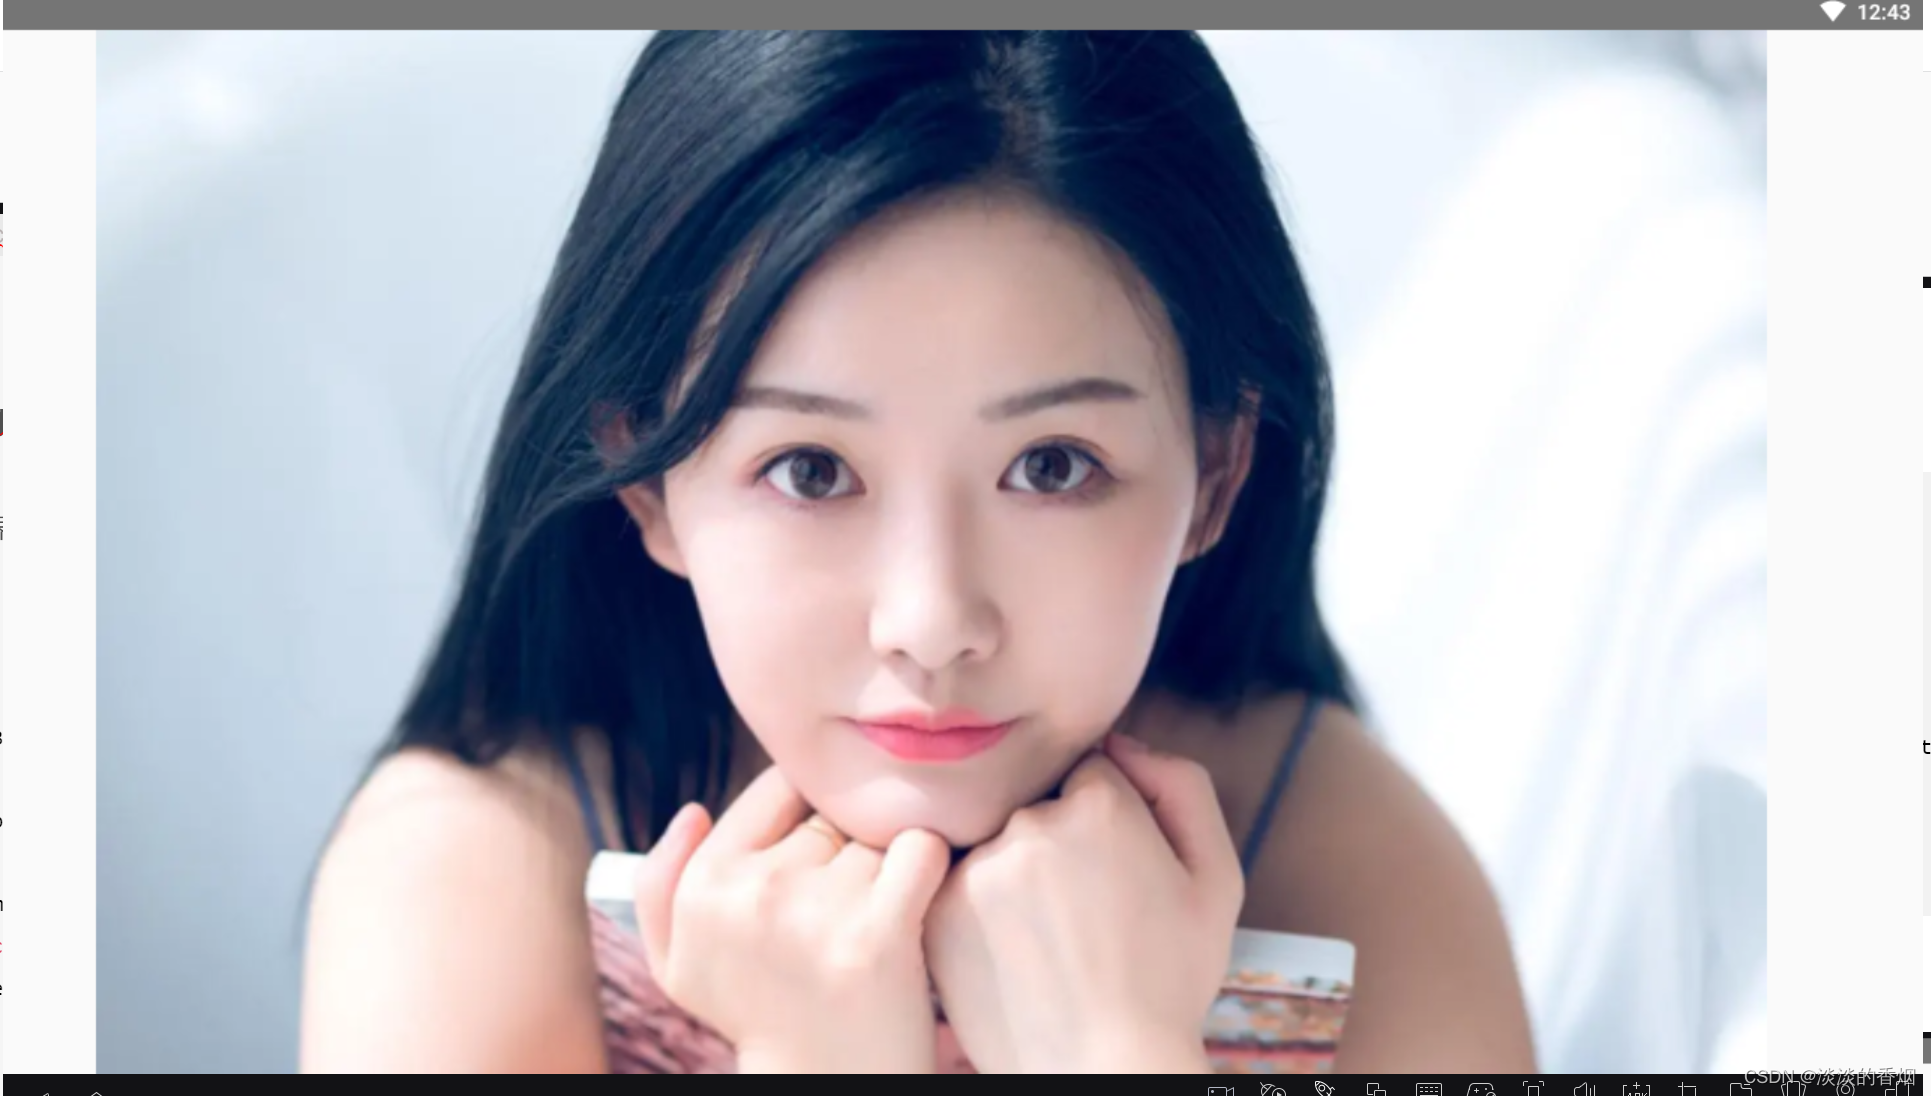
40.完整效果预览如下:


 4144
4144

 被折叠的 条评论
为什么被折叠?
被折叠的 条评论
为什么被折叠?
 到【灌水乐园】发言


