


小时转换为机器学习特征
This project was originally designed by Kaz Sato.
该项目最初由 Kaz Sato 设计 。
Walking — it’s one of covid-19’s greatest (and only) pleasures, isn’t it? These days, you can do anything on foot: listen to the news, take meetings, even write notes (with voice dictation). The only thing you can’t do while walking is read machine learning research papers.
散步-这是covid-19的最大(也是唯一)乐趣之一,不是吗? 如今,您可以步行进行任何操作:收听新闻,参加会议,甚至记笔记(带有语音命令)。 走路时唯一不能做的就是阅读机器学习研究论文。
Or can’t you?
可以吗
In this post, I’ll show you how to use machine learning to transform documents in PDF or image format into audiobooks, using computer vision and text-to-speech. That way, you can read research papers on the go.
在这篇文章中,我将向您展示如何使用机器学习,使用计算机视觉和文本转语音功能,将PDF或图像格式的文档转换为有声读物。 这样,您可以随时随地阅读研究论文。
But should you? That’s for you to decide.
但是你应该吗? 那是你决定的。
Want to jump straight to the code? Check it out on GitHub.
But first: Credit to Kaz Sato, a Google engineer based in Japan who originally created this project (he was creating Japanese audiobooks from Computer Science textbooks). I took borrowed architecture with a few little tweaks.
但首先:要感谢最初创建此项目的日本Google工程师Kaz Sato (他是根据《计算机科学》教科书创建日语有声读物的)。 我进行了一些小调整,以借用了建筑。
We’ll build our PDF-to-audiobook converter in three main steps:
我们将通过三个主要步骤来构建PDF到有声读物转换器:
- Extract text from PDFs (or images) 从PDF(或图像)中提取文本
- Decide which parts of the text to include in the audiobook 确定要在有声读物中包括文本的哪些部分
- Convert the text into spoken words 将文字转换为口语
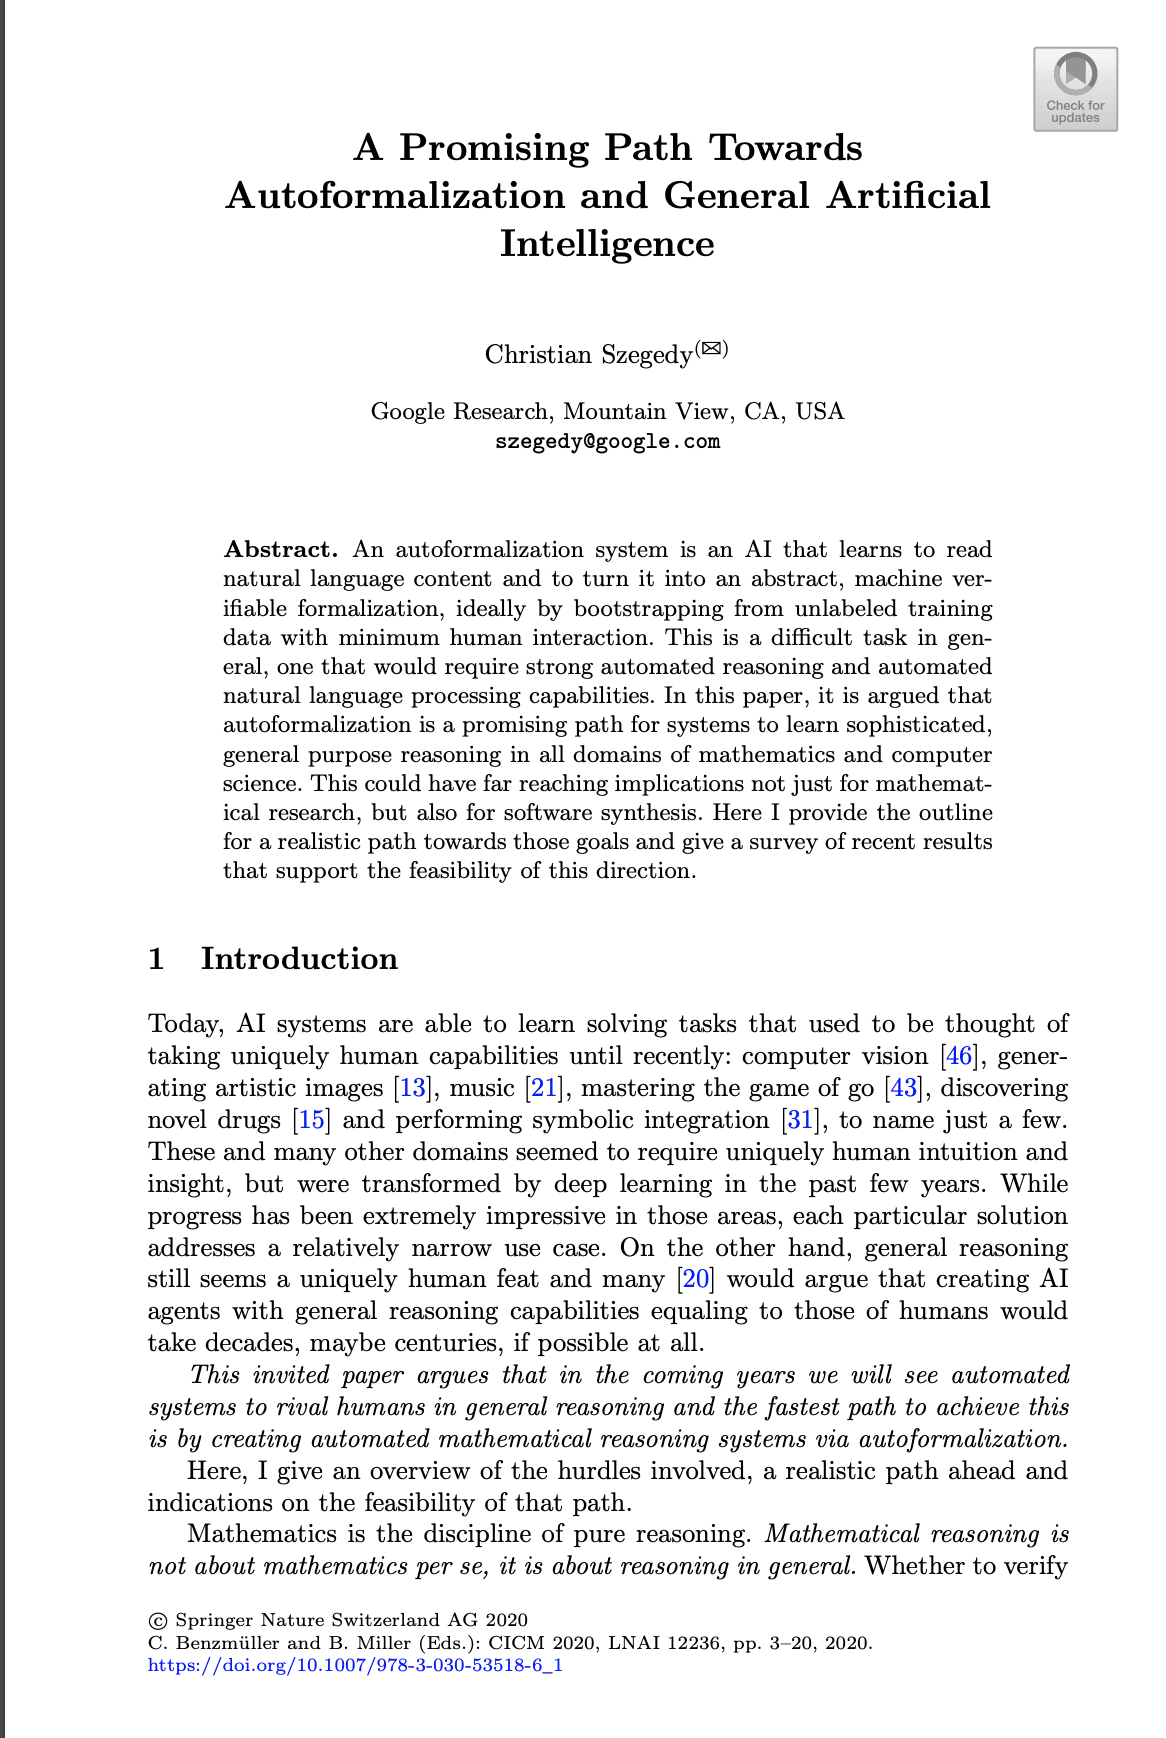
In this post, I’ll show you how to convert this dense research paper (“A Promising Path Towards Autoformalization and General Artificial Intelligence”) into an audiobook. Here’s what it looks like:
在本文中,我将向您展示如何将这份密集的研究论文 (“通往自动形式化和通用人工智能的有希望的道路”)转换为有声读物。 看起来是这样的:
从PDF到文本 (From PDFs to Text)
First, we’ll extract the text from the document using OCR. You could use lots of different types of tools to do this, like:
首先,我们将使用OCR从文档中提取文本。 您可以使用许多不同类型的工具来执行此操作,例如:
Calamari, on open-source Python library
Calamari ,在开源Python库上
The Google Cloud Vision AI API
Google Cloud Vision AI API
The (new!) Google Cloud Document AI API. This API extracts not only text but also intelligently parses tables and forms
(新!)Google Cloud Document AI API 。 该API不仅可以提取文本,还可以智能地分析表格和表格
For this project, I used the Vision API (which is cheaper than the new Document AI API), and found the quality to be quite good. Check out Kaz’s GitHub repo to see exactly how you call the API.
对于该项目,我使用了Vision API(比新的Document AI API便宜),并且发现质量相当不错。 查看Kaz的GitHub存储库,以确切了解如何调用API。
When you pass a document through the Vision API, you’re returned both raw text as well as layout information. Here’s what the response looks like:
通过Vision API传递文档时,将同时返回原始文本和布局信息。 响应如下所示:
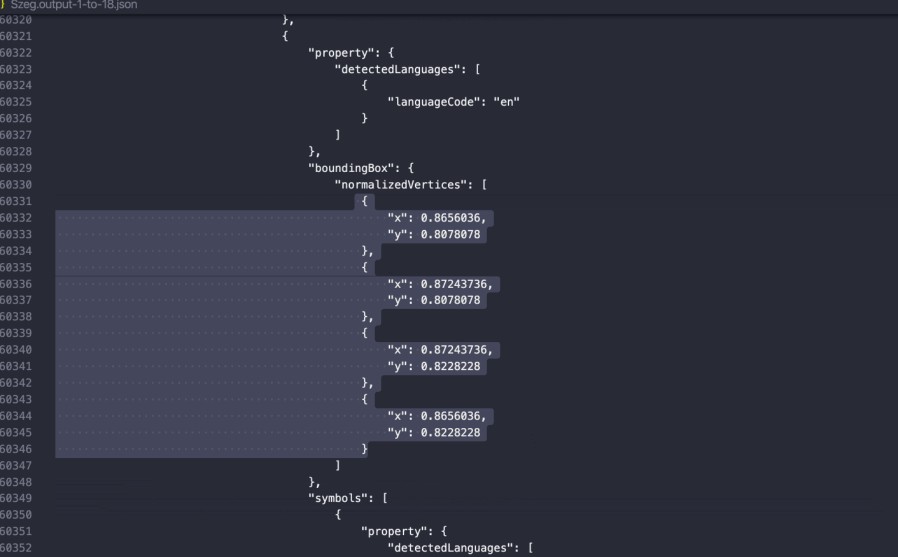
As you can see, the API returns not just the raw text on the page, but also each character’s (x, y) position.
如您所见,API不仅返回页面上的原始文本,还返回每个字符的(x,y)位置。
At this point, you could take all that raw text and dump it straight into an audiobook, if you’re a doofus. But you’re not a doofus, and you probably don’t want to do that, because then you’d be listening to all sorts of uninteresting artifacts like image captions, page numbers, document footers, and so on.
在这一点上,如果您是疯子,则可以将所有原始文本都直接转储到有声书中。 但是您不是痴迷者,您可能不想这样做,因为那样的话,您会听到各种无趣的工件,例如图像标题,页码,文档页脚等。
So in the next step, we’ll decide which bits of raw text should be included in the audiobook.
因此,在下一步中,我们将决定应在有声读物中包括哪些原始文本。
在PDF中查找相关文本 (Finding Relevant Text in PDFs)
What part of a research paper do we want to include in an audiobook? Probably the paper’s title, the author’s name, section headers, body text, but none of these bits highlighted in red:
我们想在有声读物中包括研究论文的哪一部分? 可能是论文的标题,作者的姓名,节标题,正文,但这些位都没有用红色突出显示:

It turns out identifying those relevant sections is a tricky problem with lots of possible solutions. In this post, I’ll show you two approaches, one that’s quick ‘n dirty and one that’s high-quality but a bit more work.
事实证明,识别这些相关部分是一个棘手的问题,有许多可能的解决方案。 在这篇文章中,我将向您展示两种方法,一种是快速的“肮脏”方法,另一种是高质量的,但需要更多工作。
通过机器学习查找相关文本 (Finding Relevant Text with Machine Learning)
When you look at a research paper, it’s probably easy for you to gloss over the irrelevant bits just by noting the layout: titles are large and bolded; captions are small; body text is medium-sized and centered on the page.
当您查看研究论文时,仅注意一下布局就可以很容易地掩盖无关的部分:标题大而加粗; 字幕很小; 主体文本为中等大小,位于页面中心。
Using spatial information about the layout of the text on the page, we can train a machine learning model to do that, too. We show the model a bunch of examples of body text, header text, and so on, and hopefully it learns to recognize them.
使用关于页面上文本布局的空间信息,我们也可以训练机器学习模型来做到这一点。 我们向该模型展示了一些正文文本,标头文本等示例,并希望它学会了识别它们。
This is the approach that Kaz, the original author of this project, took when trying to turn textbooks into audiobooks.
这是该项目的原始作者卡兹(Kaz)在尝试将教科书转变为有声书时所采用的方法。
Earlier in this post, I mentioned that the Google Cloud Vision API returns not just text on the page, but also its layout. It groups text into chunks (pages, blocks, paragraphs, words, and characters) and returns its location on the page. In particular, for each word, it returns a bounding box that looks like this:
在本文的前面,我提到Google Cloud Vision API不仅返回页面上的文本,还返回其布局。 它将文本分为块(页面,块,段落,单词和字符),并返回其在页面上的位置。 特别是,对于每个单词,它将返回如下所示的边界框:
"boundingBox": {
   "normalizedVertices": [
		{"x": 0.9248292,"y": 0.06006006},
 		{"x": 0.9384966,"y": 0.06006006},
        {"x": 0.9384966,"y": 0.067567565},
        {"x": 0.9248292,"y": 0.067567565}
    ]
}
The bounding box above describes where a word is located on the page, and how large it is.
上方的边界框描述了单词在页面上的位置及其大小 。
We can use this data to train a model. Let’s take a look at the data that Kaz collected below:
我们可以使用这些数据来训练模型。 让我们看一下Kaz收集的以下数据:

The book Kaz was converting was, obviously, in Japanese. For each chunk of text, he created a set of features to describe it: how many characters were in the chunk of text? How large was it, and where was it located on the page? What was the aspect ratio of the box enclosing the text (a narrow box, for example, might just be a side bar)?
Kaz正在转换的书显然是日语。 他为每个文本块创建了一组描述它的功能:文本块中有多少个字符? 它有多大?它在页面上的什么位置? 包含文本的框的长宽比是多少(例如,一个狭窄的框可能只是一个侧边栏)?
Notice there’s also a column named “label” in that spreadsheet above. That’s because, in order to train a machine learning model, we need a labeled training dataset from which the model can “learn.” For each block of text in the training data, Kaz had to manually label the chunk as “body,” “header,” “caption,” or “other.” Labeling training data is always one of the more time-consuming parts of ML projects, and this one was no exception!
注意上面的电子表格中还有一个名为“标签”的列。 这是因为,为了训练机器学习模型,我们需要一个标记的训练数据集,模型可以从中“学习”。 对于训练数据中的每个文本块,Kaz必须手动将块标记为“正文”,“标题”,“标题”或“其他”。 标注训练数据始终是ML项目中比较耗时的部分之一,这一点也不例外!
That’s why, when I recreated Kaz’s project, I used a hack to avoid it (more on that below).
这就是为什么当我重新创建Kaz的项目时,我使用了一个hack来避免它(请参见下文)。
After Kaz collected and labeled a bunch of documents, he trained a machine learning model using Google Cloud AutoML Tables. It’s a no-code tool for building models based on tabular data. Here’s a little gif showing what that tool looks like, and how Kaz used it to train a model:
在Kaz收集并标记了一堆文档后,他使用Google Cloud AutoML Tables训练了机器学习模型。 这是用于基于表格数据构建模型的无代码工具。 这是一张小gif文件,显示了该工具的外观以及Kaz如何使用它来训练模型:
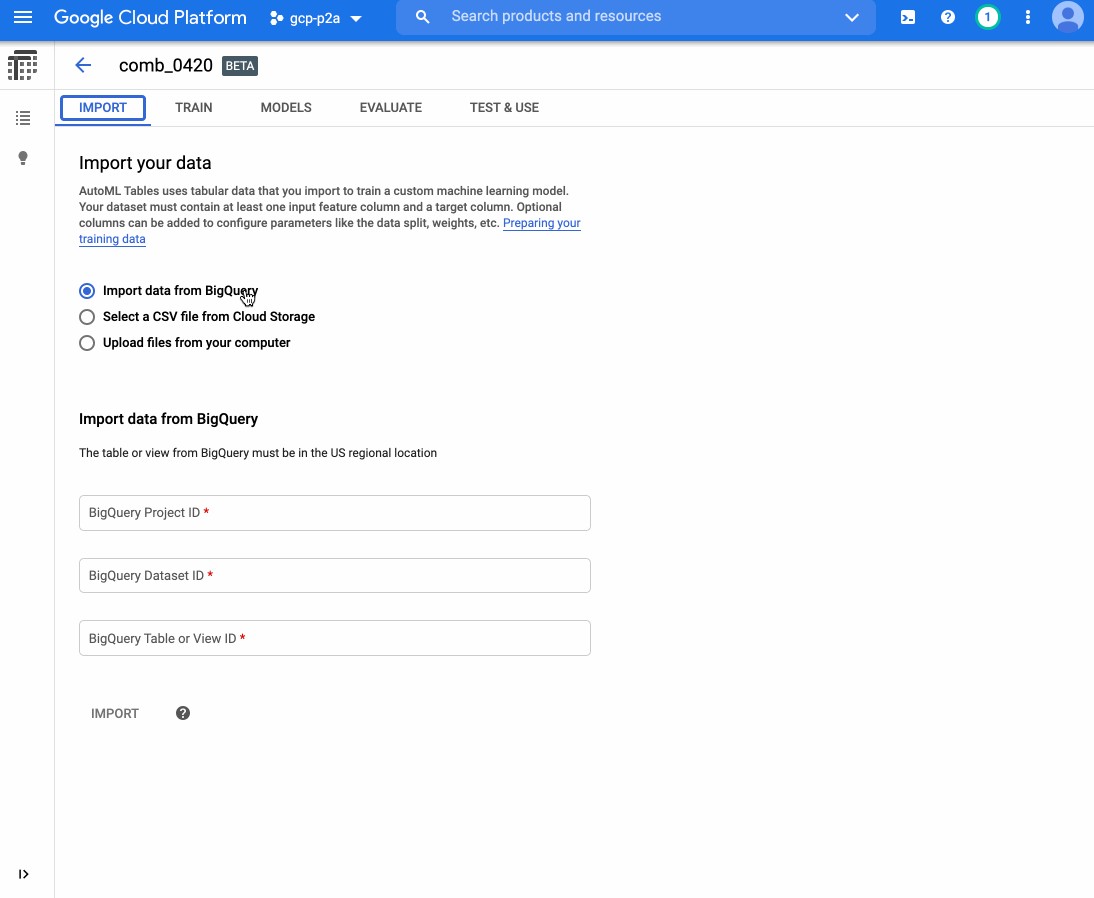
As you can see, the model was quite accurate (~95% precision and recall)! So Kaz used this model as an intermediary step to identify which text to put in the audiobook.
如您所见,该模型非常准确(准确率和召回率约为95%)! 因此,卡兹(Kaz)使用此模型作为中介步骤来确定要在有声读物中放入哪些文本。
查找带有唾液和胶水以及字体大小的相关文本 (Finding Relevant Text with Spit and Glue and Font Sizes)
Look, I’m no sissy — I’ve spent a lot of my life labeling training data (even though, these days, you really don’t have to). But for this project, I wondered if I could use a simple heuristic (one that would let me avoid labeling data) instead.
瞧,我不是很娘娘腔-我已经花了很多时间来标记培训数据(即使这些天,您确实不必这样做 )。 但是对于这个项目,我想知道是否可以使用一种简单的启发式方法(一种可以避免标注数据的方法)。
I figured you could learn a lot just by looking at font size. For example: the title of a paper is probably written in the largest text size. Meanwhile, body text is the most common text in a document. Using those observations, I used this heuristic:
我认为仅查看字体大小,您就能学到很多东西。 例如:一篇论文的标题可能是用最大的文字大小写的。 同时,正文是文档中最常见的文本。 根据这些观察,我使用了这种启发式方法:
- Calculate the font size for all words 计算所有单词的字体大小
- Compute the most common font size. Label ever bit of text in that font size “body” 计算最常见的字体大小。 以该字体大小“ body”标记所有文本
- Compute the largest font size. Label every bit of text in that font size as “title” 计算最大字体大小。 将该字体大小的每一段文本标记为“标题”
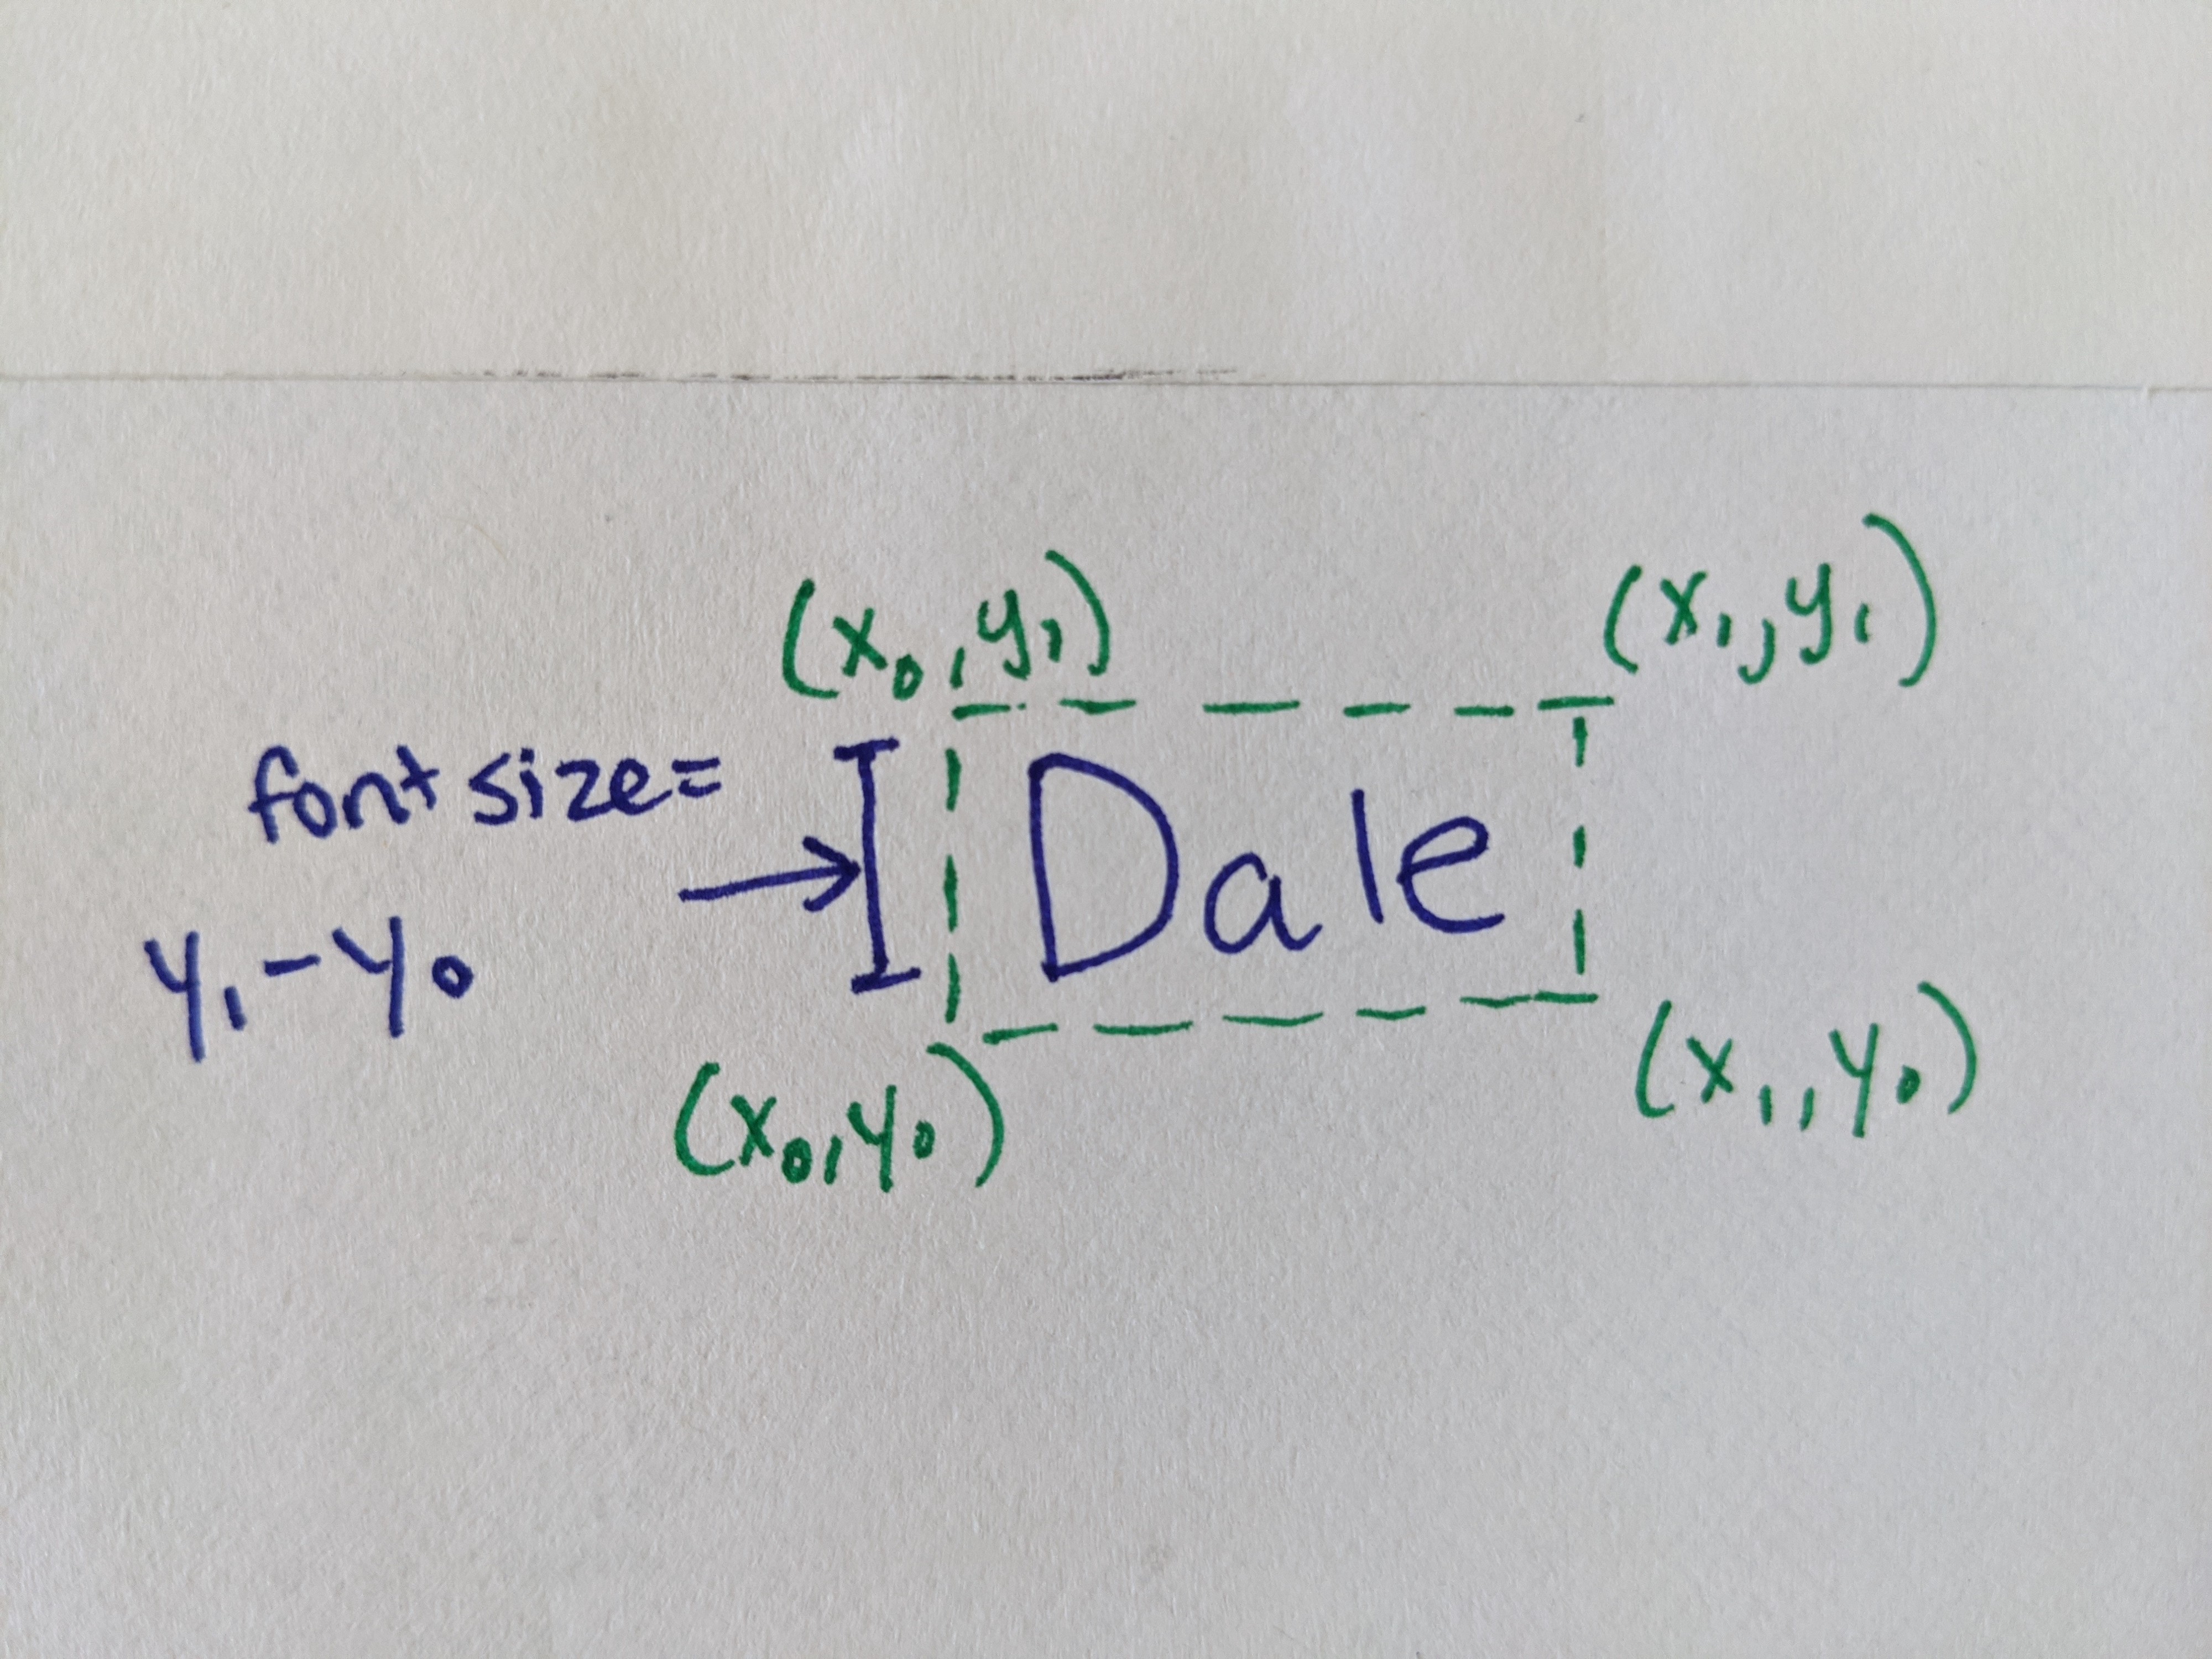
For the first step, computing font size, I subtracted the y coordinates around words:
第一步,计算字体大小,我减去了单词周围的y坐标:
Next, to see if my idea would work, I plotted the distribution of font sizes in the document:
接下来,要查看我的想法是否可行,我在文档中绘制了字体大小的分布图:
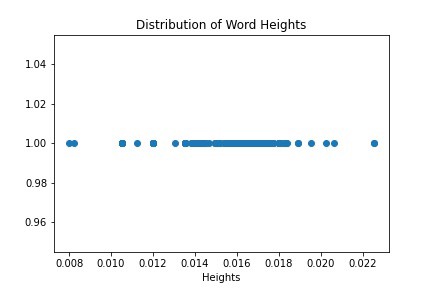
You can see that on the right hand side, there’s a single dot (the largest text) that represents the document title (woohoo!). Meanwhile, that long span of points in the middle, that’s the body text. The captions and other document metadata, which is in even smaller text, is all the way on the left side of the diagram.
您可以在右侧看到一个表示文档标题(woohoo!)的单个点(最大的文本)。 同时,中间的那段长跨度就是正文。 标题和其他文档元数据(甚至更小的文本)始终位于图的左侧。
This graph gave me confidence that my little hack would work, at least for this document (note that it didn’t work for all research papers, especially not papers with fancy side bars or vertical layouts!).
该图使我确信,至少对于本文档而言,我的小技巧会奏效(请注意,它不适用于所有研究论文,特别是不适用于带有侧边栏或垂直布局的论文!)。
One tricky bit here, though, is that the body text font size falls in a range (not one fixed value). That’s because I’m not computing font size like we usually think of it (i.e. 12 pt), but as subtracted pixel values, and there’s some noise. To figure out the cutoffs (i.e. what should be the bounds for what’s considered body text?), I used Jenks Natural Breaks Algorithm (if you haven’t heard of this one, no fear-neither had I before this project!).
不过,这里有些棘手的地方是,正文文本的字体大小在一定范围内 (不是一个固定值)。 那是因为我没有像我们通常认为的那样计算字体大小(即12磅),而是减去像素值,并且会有一些噪音。 为了弄清楚分界点(即,什么才是被认为是正文的界限?),我使用了Jenks Natural Breaks Algorithm (如果您还没有听说过这一点,那就不用担心-在这个项目之前我也没有!)。
I know I’m being a little quick here, so feel free to drop me comments below here or on Twitter and I’ll definitely answer questions!
我知道我在这里会有点快,所以请随时在这里或在Twitter上发表评论,我肯定会回答问题!
从文字到口语 (From Text to Spoken Word)
The most fun part of this project is definitely choosing a computer voice to be our narrator. For this, I used the Google Text-to-Speech API, which uses a technology called WaveNet to produce very lifelike voices. The API supports lots of voices and languages, and you can compare them for yourself on your own input text straight from the product page.
这个项目最有趣的部分肯定是选择计算机语音作为我们的叙述者。 为此,我使用了Google Text-to-Speech API,该API使用称为WaveNet的技术来产生逼真的声音。 该API支持多种语音和语言,您可以直接在产品页面上的自己的输入文本中对它们进行比较。
I choose a male voice to read the paper title and a female voice to read the paper body. Here’s what the resulting “audiobook” sounded like:
我选择一个男声来阅读论文标题,并选择一个女声来阅读论文正文。 产生的“有声读物”听起来像这样:
Not too bad, right?
还不错吧?
Anyway, that’s all for now.
无论如何,仅此而已。
If you build something neat like this, share it with me and I’ll feature it on social media!
如果您制作出这样的整洁的东西,请与我分享,我将在社交媒体上刊登!
Originally published at https://daleonai.com on September 1, 2020.
最初于 2020年9月1日 发布于 https://daleonai.com 。
翻译自: https://towardsdatascience.com/convert-pdfs-to-audiobooks-with-machine-learning-6f2f6461a29c
小时转换为机器学习特征


 291
291


 被折叠的 条评论
为什么被折叠?
被折叠的 条评论
为什么被折叠?
 到【灌水乐园】发言


