


From an iOS developer perspective, how screens are presented in an Android is quite strange. The first time I developed an Android app, I was taught to create an Activity per screenful of content. Then, they have introduced me to Fragments, at the same time warning me about their cumbersome behavior and the lack of a proper constructor.
从iOS开发人员的角度来看,如何在Android中显示屏幕是很奇怪的。 第一次开发Android应用程序时,我被教导要按每屏 内容创建一个Activity。 然后,他们向我介绍了Fragments,同时警告我它们笨拙的行为以及缺少适当的构造函数。
I was so confused and, searching the web for a simple alternative to navigate from a list to a detail screen, I encountered Conductor project. Basically, they embrace a single Activity structure of the project and they introduce Controller objects able to present Views. It sounds a lot like UIViewController, isn’t it?
我很困惑,在网上寻找一种从列表导航到详细屏幕的简单选择,我遇到了Conductor项目 。 基本上,它们包含项目的单个Activity结构,并且引入了能够呈现View的 Controller对象。 听起来很像UIViewController ,不是吗?
More recently, I googled again, and I discovered Android team has introduced (many months ago) a Jetpack component, called Navigation. At a first glance it’s very similar to Apple’s storyboards and I would like to try it from an iOS developer perspective.
最近,我再次谷歌搜索,我发现Android团队引入了一个名为Navigation的Jetpack组件(许多个月前)。 乍一看,它与Apple的故事板非常相似,我想从iOS开发人员的角度进行尝试。
安装 (Installation)
I create a new project with Android Studio (version higher that 3.3), selecting Empty Activity template, with Kotlin, AndroidX support, and API 19 as minimum deployment target.
我使用Android Studio(版本高于3.3)创建一个新项目,选择Empty Activity模板,并将Kotlin,AndroidX支持和API 19作为最低部署目标。
To include Navigation support in your project, add the following dependencies to your app’s build.gradle file (check latest available version on Jetpack page):
要将导航支持包含在项目中,请将以下依赖项添加到应用程序的build.gradle文件中(在Jetpack页面上检查最新的可用版本):
Add also this option to android group:
也将此选项添加到android组:
To enable SafeArgs, you need to add dependency to your project’s build.gradle file:
要启用SafeArgs ,您需要向项目的build.gradle文件添加依赖build.gradle :
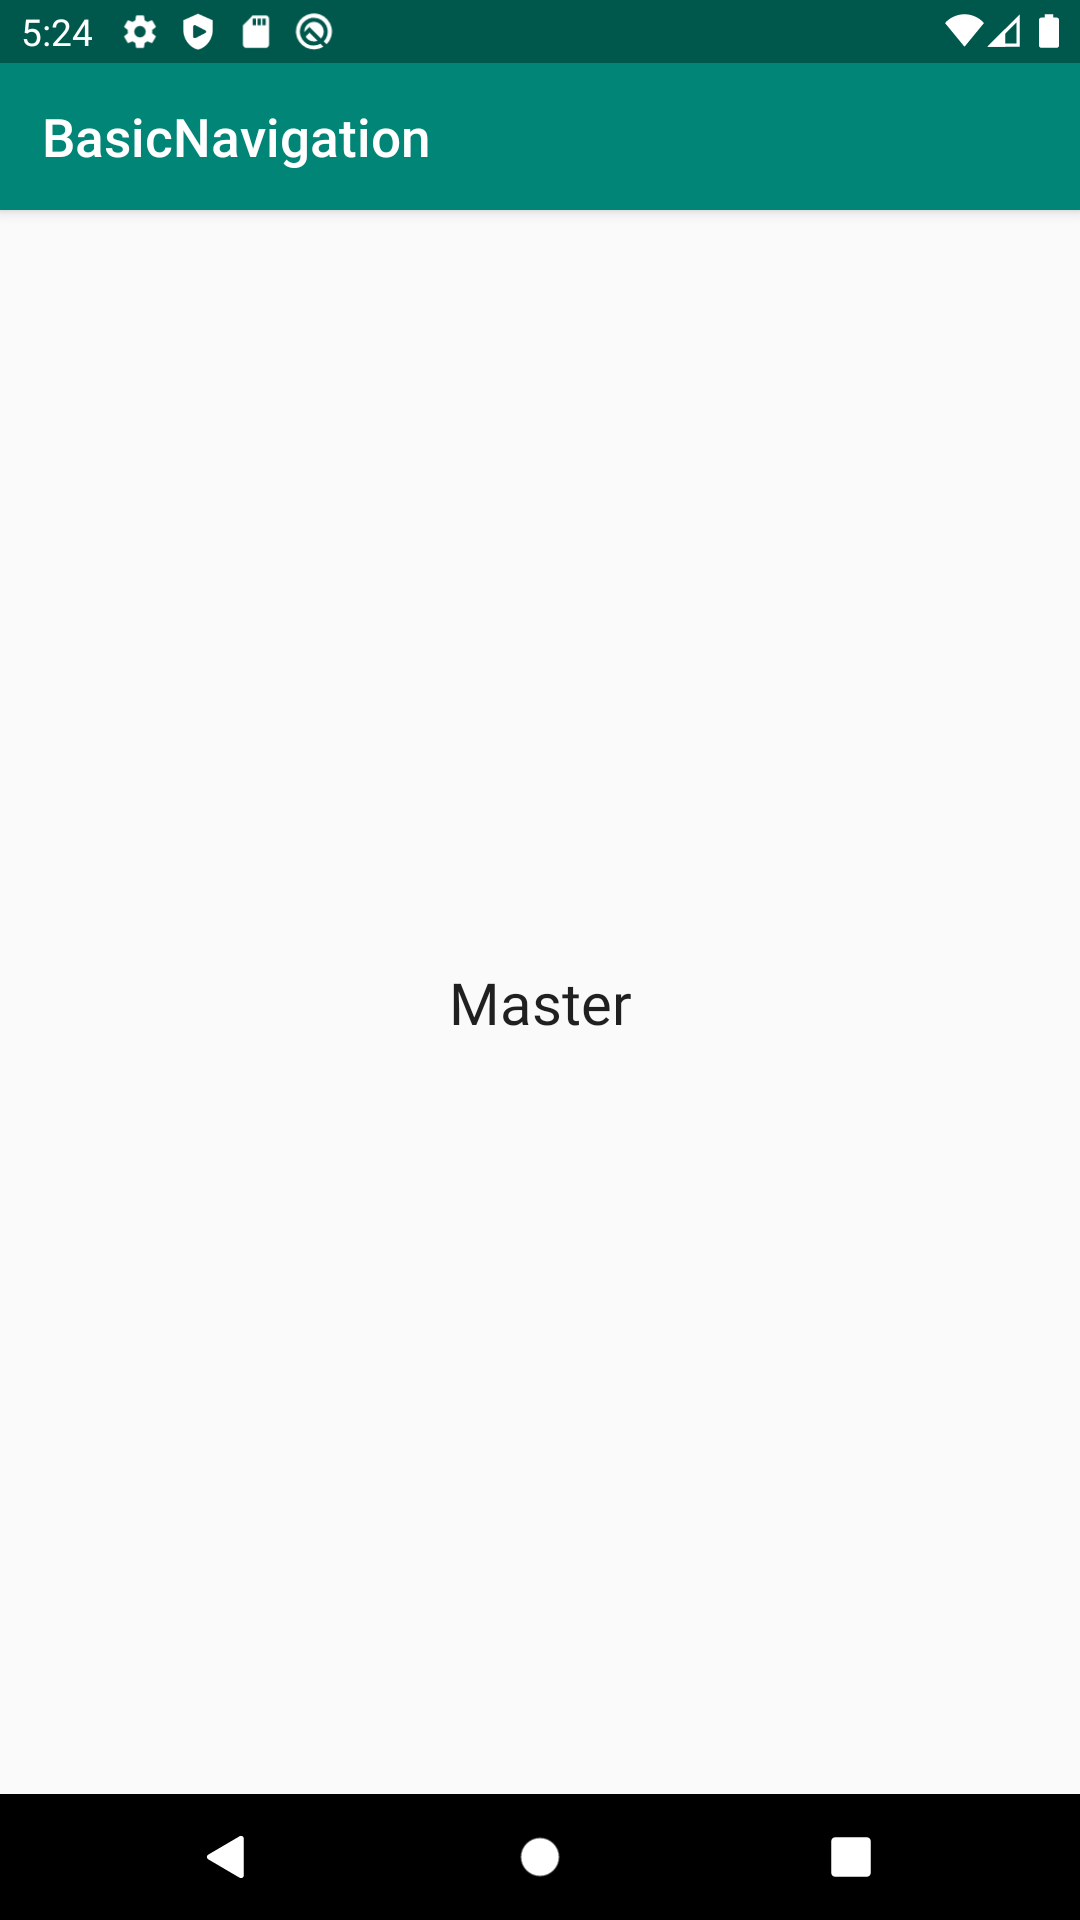
At this point your project should launch properly on emulator with a white Hello World screen.
此时,您的项目应在带有白色Hello World屏幕的模拟器上正常启动。
推和弹出 (Push and Pop)
Let’s push our first screen on navigation stack. I know, push is not the proper verb in Material Design world, but I am trying to translate from my iOS mindset.
让我们将第一个屏幕推送到导航堆栈上。 我知道, push在Material Design世界中不是正确的动词,但我正在尝试从我的iOS心态进行翻译。
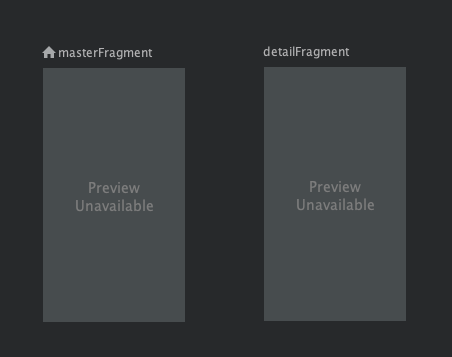
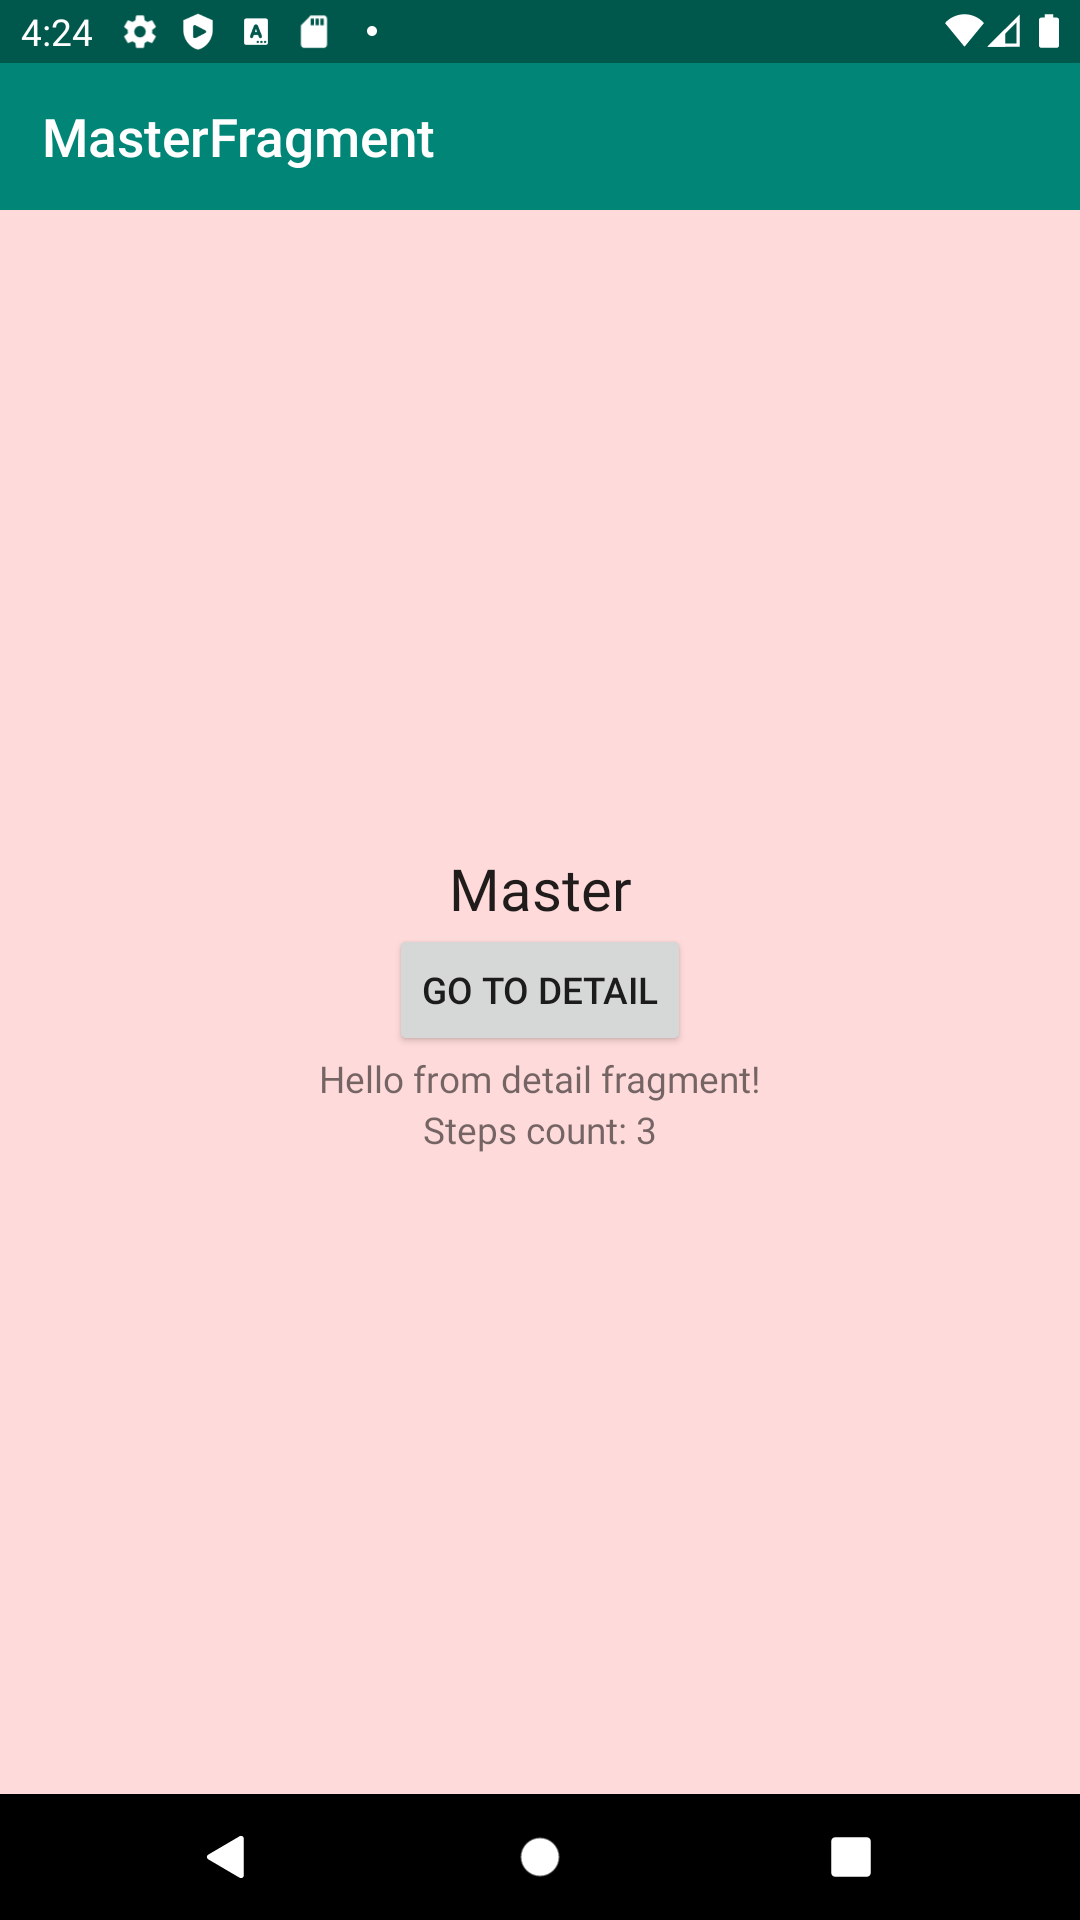
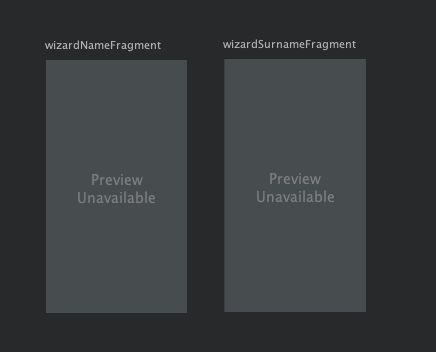
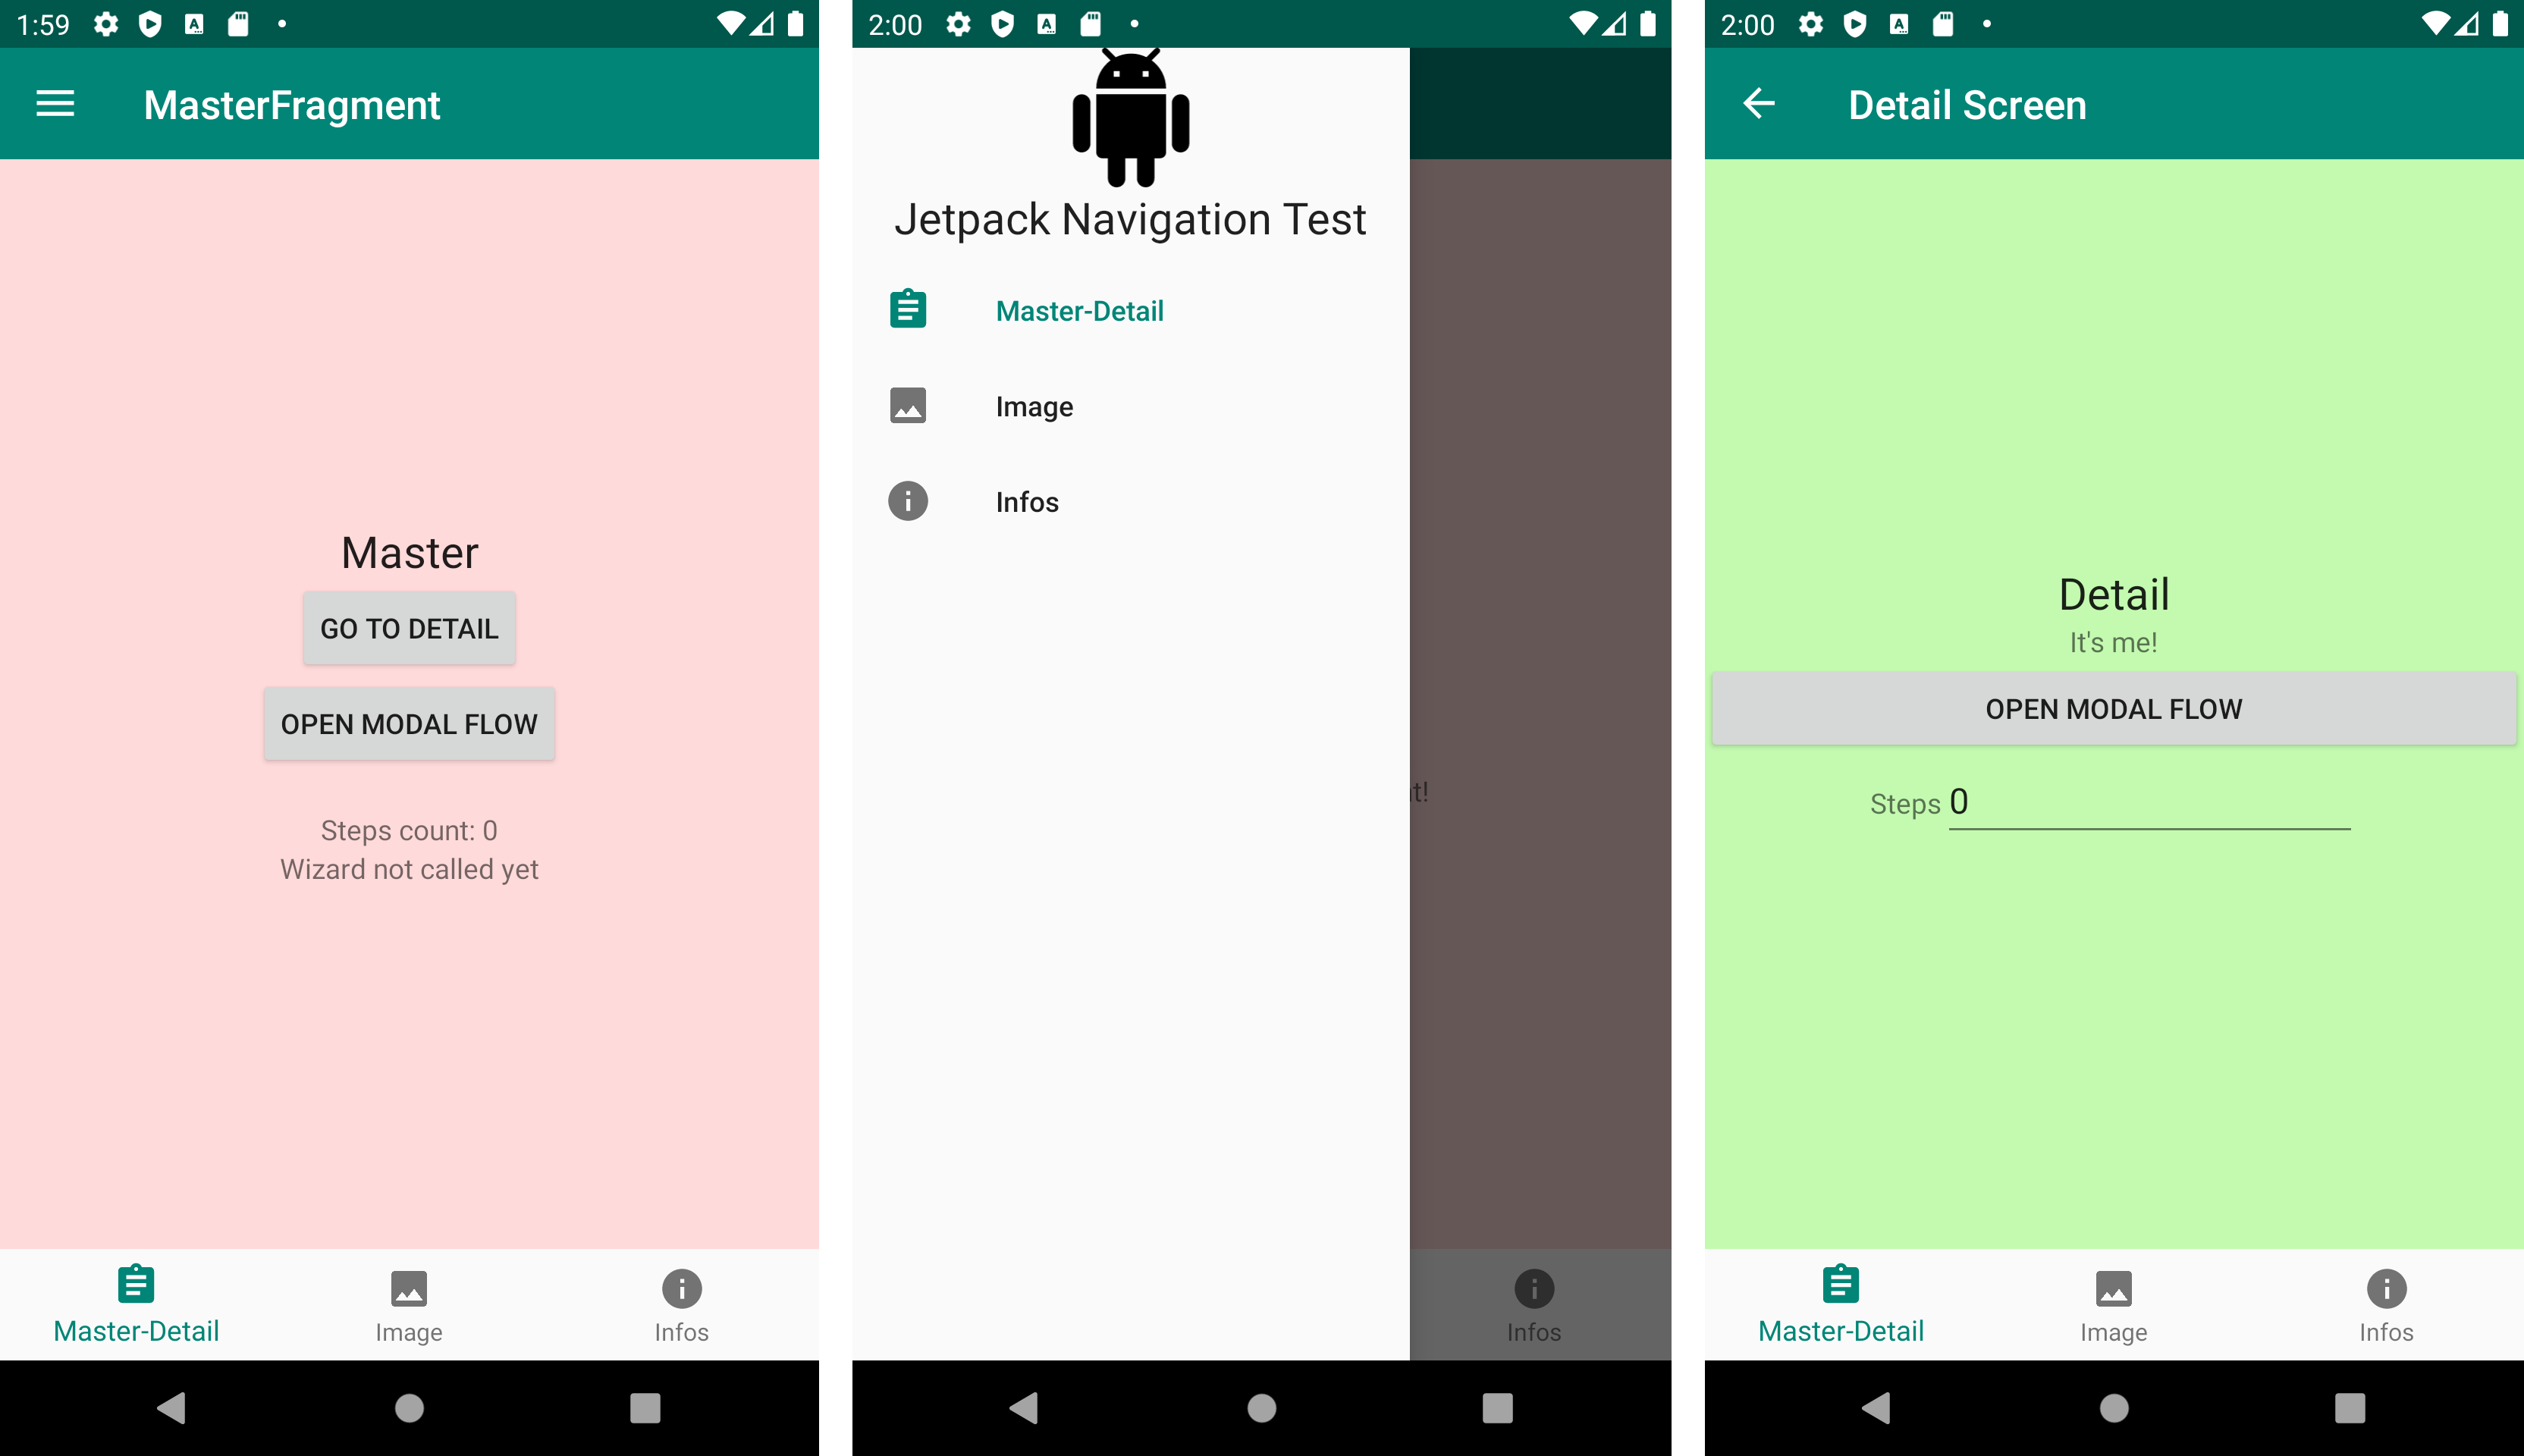
First of all, I’ll create a MasterFragment and a DetailFragment using Android Studio wizard. I choose a blank fragment, with XML layout, but without any method or interface.
首先,我将使用Android Studio向导创建MasterFragment和DetailFragment 。 我选择一个空白片段,具有XML布局,但没有任何方法或接口。
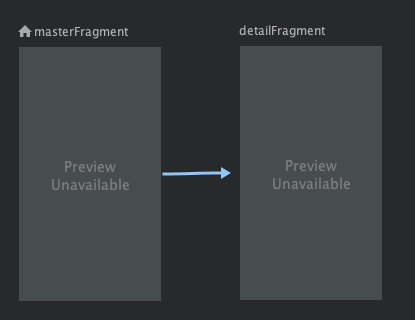
Then, I add a navigation graph to project: right-click on the res directory and select New > Android Resource File. Resource type must be Navigation. I have chosen to call it main, because it reminds me about Main.storyboard file.
然后,向项目添加一个导航图:右键单击res目录,然后选择New> Android Resource File 。 资源类型必须为Navigation 。 我选择将其命名为main ,因为它使我联想到Main.storyboard文件。

Click on Add Destination button and add our two destinations.
单击添加目的地按钮,然后添加我们的两个目的地。
Select masterFragment and drag from it, to detailFragment to create an action (a segue) from these two destinations.
选择masterFragment并将其拖到masterFragment ,以detailFragment两个目标创建一个动作( segue )。
Last step is to tell where this graph should be displayed. Open activity_main.xml layout file, and insert a NavHostFragment. Its XML will be like this:
最后一步是告诉该图应在何处显示。 打开activity_main.xml布局文件,然后插入NavHostFragment 。 其XML将如下所示:
Please note app:defaultNavHost="true" attribute ensures that NavHostFragment intercepts the system Back button. Only one NavHost can be the default.
请注意app:defaultNavHost="true"属性可确保NavHostFragment拦截系统的“后退”按钮。 默认只有一个NavHost 。
Navigating to a destination is done using a NavController, an object that manages app navigation within a NavHost. Each NavHost has its own corresponding NavController. You can retrieve a NavController by using one of the following methods:
使用NavController导航到目的地,该对象在NavHost中管理应用程序导航。 每个NavHost都有自己的对应NavController 。 您可以使用以下方法之一检索NavController :
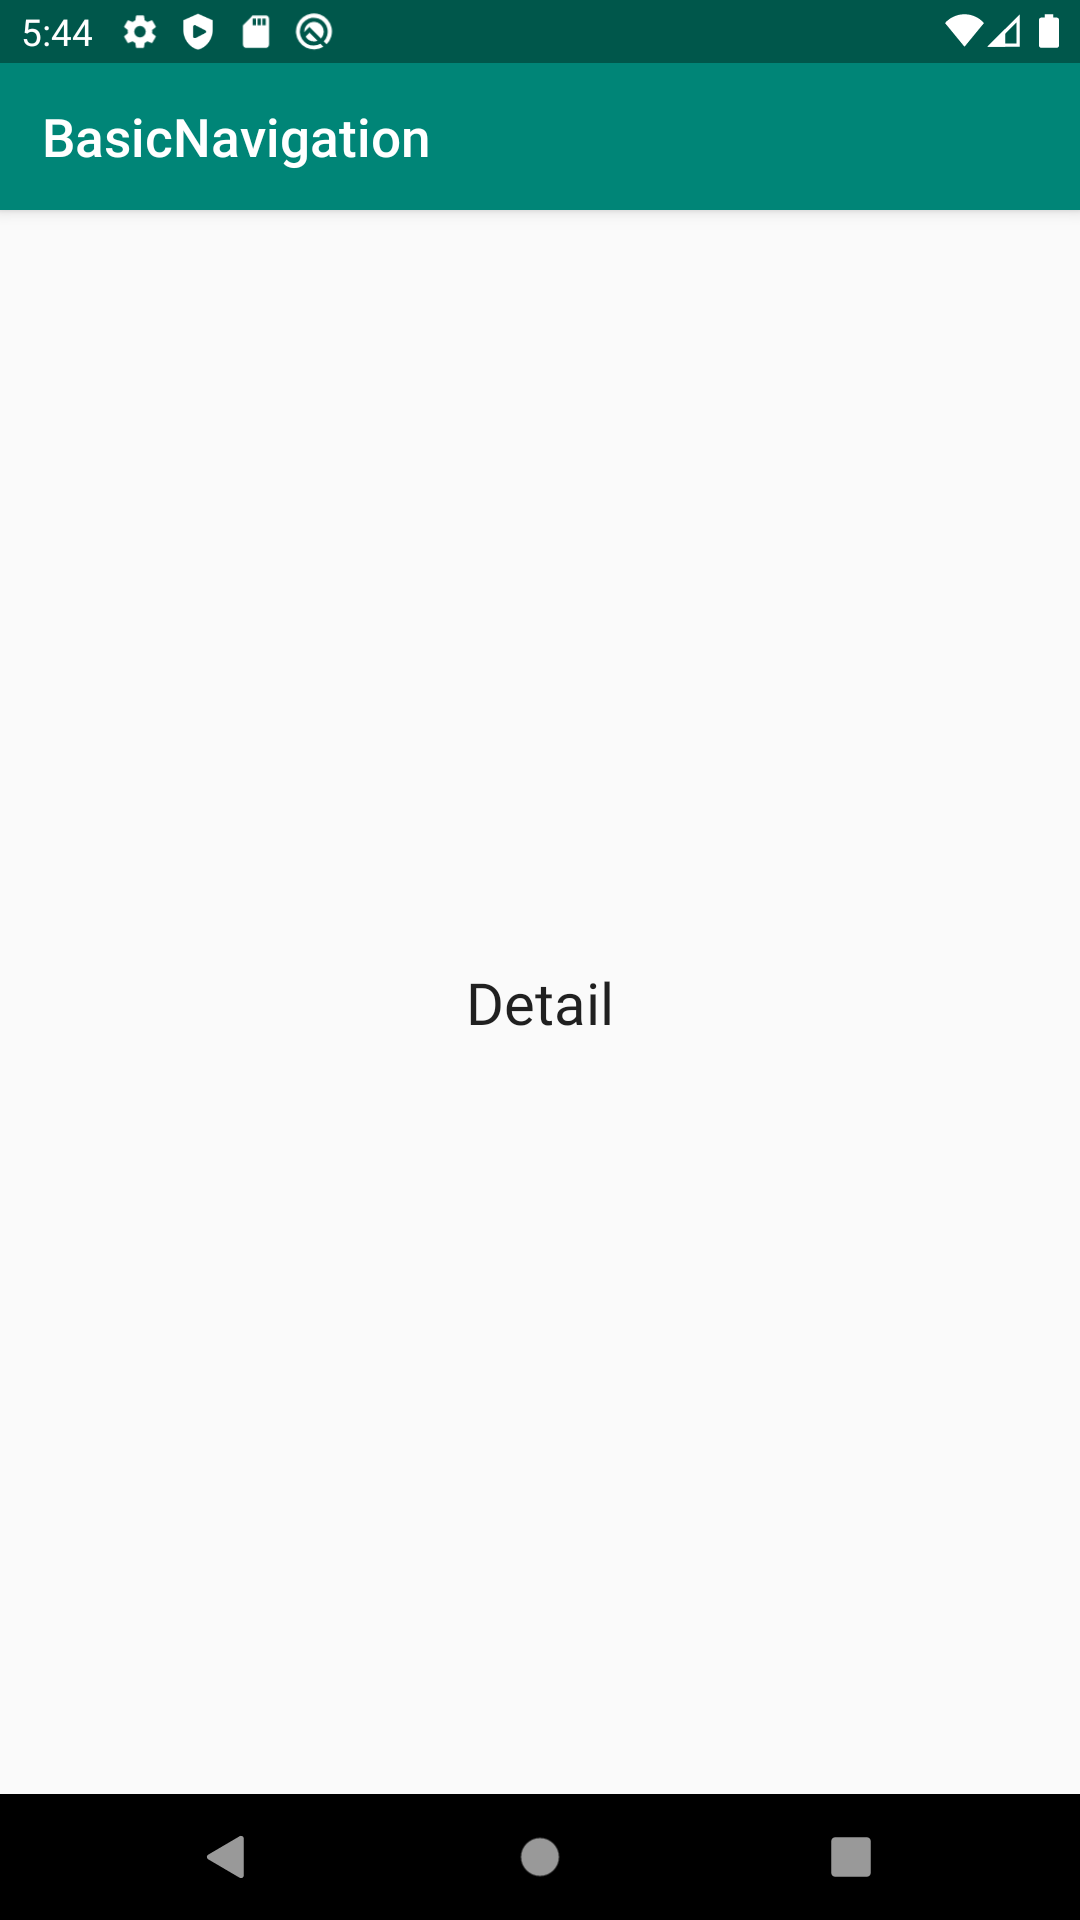
So, it’s trivial to push detail fragment responding to a button tap:
因此,推送细节片段以响应按钮轻触是很简单的:
Now, what about navigation bar? I know, it doesn’t exist in Android. But I want top bar to behave like that! First of all, we disable global action bar by changing adding these attributes to theme in res/values/styles.xml.
现在,导航栏如何? 我知道,它在Android中不存在。 但我希望顶部栏的行为像这样! 首先,我们通过更改将这些属性添加到res/values/styles.xml主题来禁用全局操作栏。
Then, add a Toolbar inside activity_main.xml.
然后,在activity_main.xml内添加一个Toolbar 。
This is much more flexible than iOS counterpart, because you could place bar wherever you like. You could also insert toolbars inside fragment, if you don’t need a fixed navigation bar on top. In MainActivity you need to configure navigation controller to hook to this toolbar:
这比iOS版本要灵活得多,因为您可以将bar放置在任意位置。 如果不需要顶部的固定导航栏,也可以在片段内插入工具栏。 在MainActivity您需要配置导航控制器以挂钩到此工具栏:
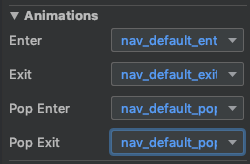
You can animate transitions by selecting action in navigation graph, and picking you animation type from right sidebar. You can even design custom transitions.
您可以通过在导航图中选择动作,然后从右侧栏中选择动画类型来为过渡设置动画。 您甚至可以设计自定义过渡 。
传递参数 (Passing Parameters)
When you develop for Android, you have to forget the pass-the-baton approach you would use on other platforms. Fragment initializers are a nightmare — an we are avoiding them completely by using Jetpack Navigation, thumbs up — and activity are recreated from scratch often, even when user rotates its device.
在为Android开发时,您必须忘记在其他平台上使用的“按需通行”方法。 片段初始化器是一场噩梦-我们通过使用Jetpack Navigation完全避免使用它们,竖起大拇指-并且即使用户旋转设备,活动也会从头开始重新创建。
Navigation controller navigate() method can be called with a Directions object. SafeArgs package is able to sythentesize direction objects from navigation graph. If you select a destination in your graph, you can add an argument from editor right sidebar.
可以使用Directions对象调用导航控制器navigation navigate()方法。 SafeArgs程序包可以从导航图中合并方向对象。 如果在图形中选择目标,则可以从编辑器右侧栏中添加参数。

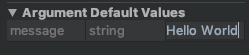
Then, if you select the action, you can set default values for each argument. If an argument type supports null values, you can declare a default value of @null.
然后,如果选择操作,则可以为每个参数设置默认值。 如果参数类型支持空值,则可以声明默认值@null 。
You can pass and receive almost every primitive type that can be serialized inside a bundle. In general, you should strongly prefer passing only the minimal amount of data between destinations. For example, you should pass a key to retrieve an object rather than passing the object itself, as the total space for all saved states is limited: your app will crash if available space finishes.
您几乎可以传递和接收可以在包内序列化的所有基本类型。 通常,强烈建议您仅在目标之间传递最少的数据量。 例如,您应该传递一个键来检索对象而不是传递对象本身,因为所有保存状态的总空间是有限的:如果可用空间结束,您的应用程序将崩溃。
A class is created for each destination where an action originates. The name of this class is the name of the originating destination, appended with the word Directions. Click on Build > Rebuild Project, if necessary to see the autogenerated class. This class has a method for each action defined in the originating destination.
将为操作起源的每个目的地创建一个类。 此类的名称是始发目的地的名称,后跟单词Directions 。 如果需要,请单击Build> Rebuild Project ,以查看自动生成的类。 此类为始发目标中定义的每个操作都有一个方法。
A class is created for the receiving destination. The name of this class is the name of the destination, appended with the word Args. You can use Kotlin delegation to grab arguments:
为接收目的地创建一个类。 此类的名称是目的地的名称, 后跟单词Args 。 您可以使用Kotlin委托获取参数:
Then, you will use them in your code:
然后,您将在代码中使用它们:
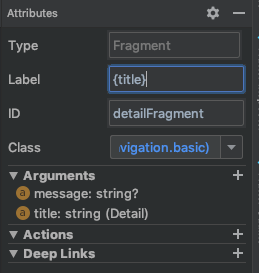
This technique could be used to get custom titles for screens. Insert {title} as label for destination. Then, you can use it as a parameter in direction class
此技术可用于获取屏幕的自定义标题 。 插入{title}作为目的地标签。 然后,您可以将其用作方向类中的参数
回传结果 (Passing Back Results)
Because we cannot keep references of fragments, we cannot even think about delegation or to set callback to communicate results from detail to master.
因为我们无法保留片段的引用,所以我们甚至无法考虑委托或设置回调以将结果从详细信息传递到主要信息。
First option you have is to pass back an elementary value inside the backstack entry. You should not abuse this feature, because space is limited — but it could be handy. In master fragment you start observing a key:
您的第一个选择是在Backstack条目内传递一个基本值。 您不应滥用此功能,因为空间有限-但这可能很方便。 在主片段中,您开始观察密钥:
Detail fragment can update result value when it desires:
细节片段可以在需要时更新结果值:
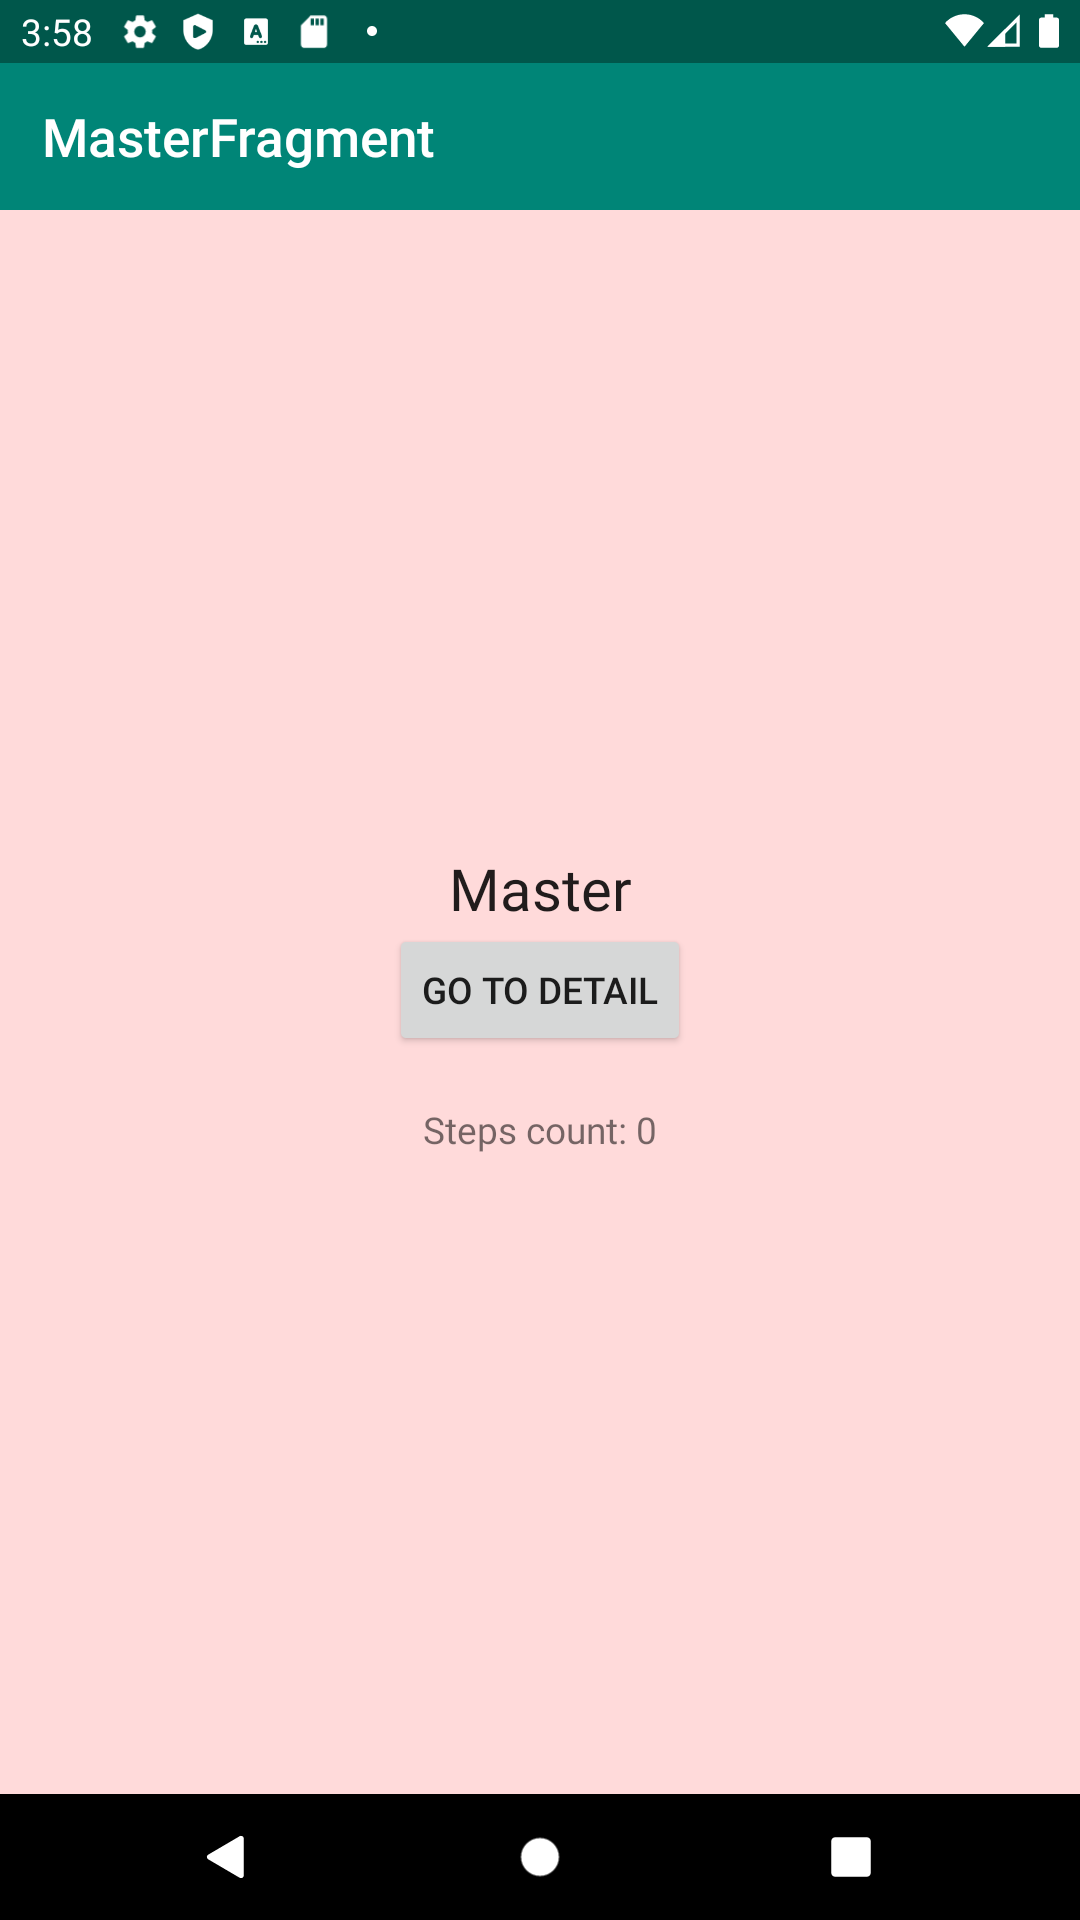
Suggested option is to create a shared ViewModel. I’m not too excited about this architecture, because it smells like glorified global state to me. Not to mention the waste of memory in a deep navigation tree. But, if you structure you data properly, this pattern could be quite powerful.
建议的选项是创建一个共享的ViewModel 。 我对这种体系结构不太兴奋,因为它闻起来对我来说就像是荣耀的全球状态。 更不用说在深度导航树中浪费内存了。 但是,如果您正确地构造数据,此模式可能会非常强大。
First of all let’s create a ViewModel. I will adopt the more recent variant, the one with SavedStateHandle in order to support process death, not only configuration changes (like device rotation). Because you are writing inside this handle, you still need to be aware of bundle size when you pass around state. If you don’t save to bundle, say for volatile data, you have no limit except RAM size. I want to expose only immutable LiveData and to provide methods to update values: this will help sooner than you think.
首先让我们创建一个ViewModel 。 我将采用更新的变体,即带有SavedStateHandle变体,以支持进程SavedStateHandle ,而不仅仅是配置更改(例如设备旋转)。 因为您是在此句柄中编写的,所以在传递状态时仍需要注意捆绑包的大小。 如果您不保存捆绑包,例如对于易失性数据,则除了RAM大小外没有其他限制。 我只想公开不可变的LiveData并提供更新值的方法:这将比您想象的要早。
For simplicity, let’s create view model in our single activity scope:
为简单起见,让我们在单个活动范围内创建视图模型:
Then master fragment could subscribe to view model in order to update an example text view:
然后主片段可以订阅视图模型以更新示例文本视图:
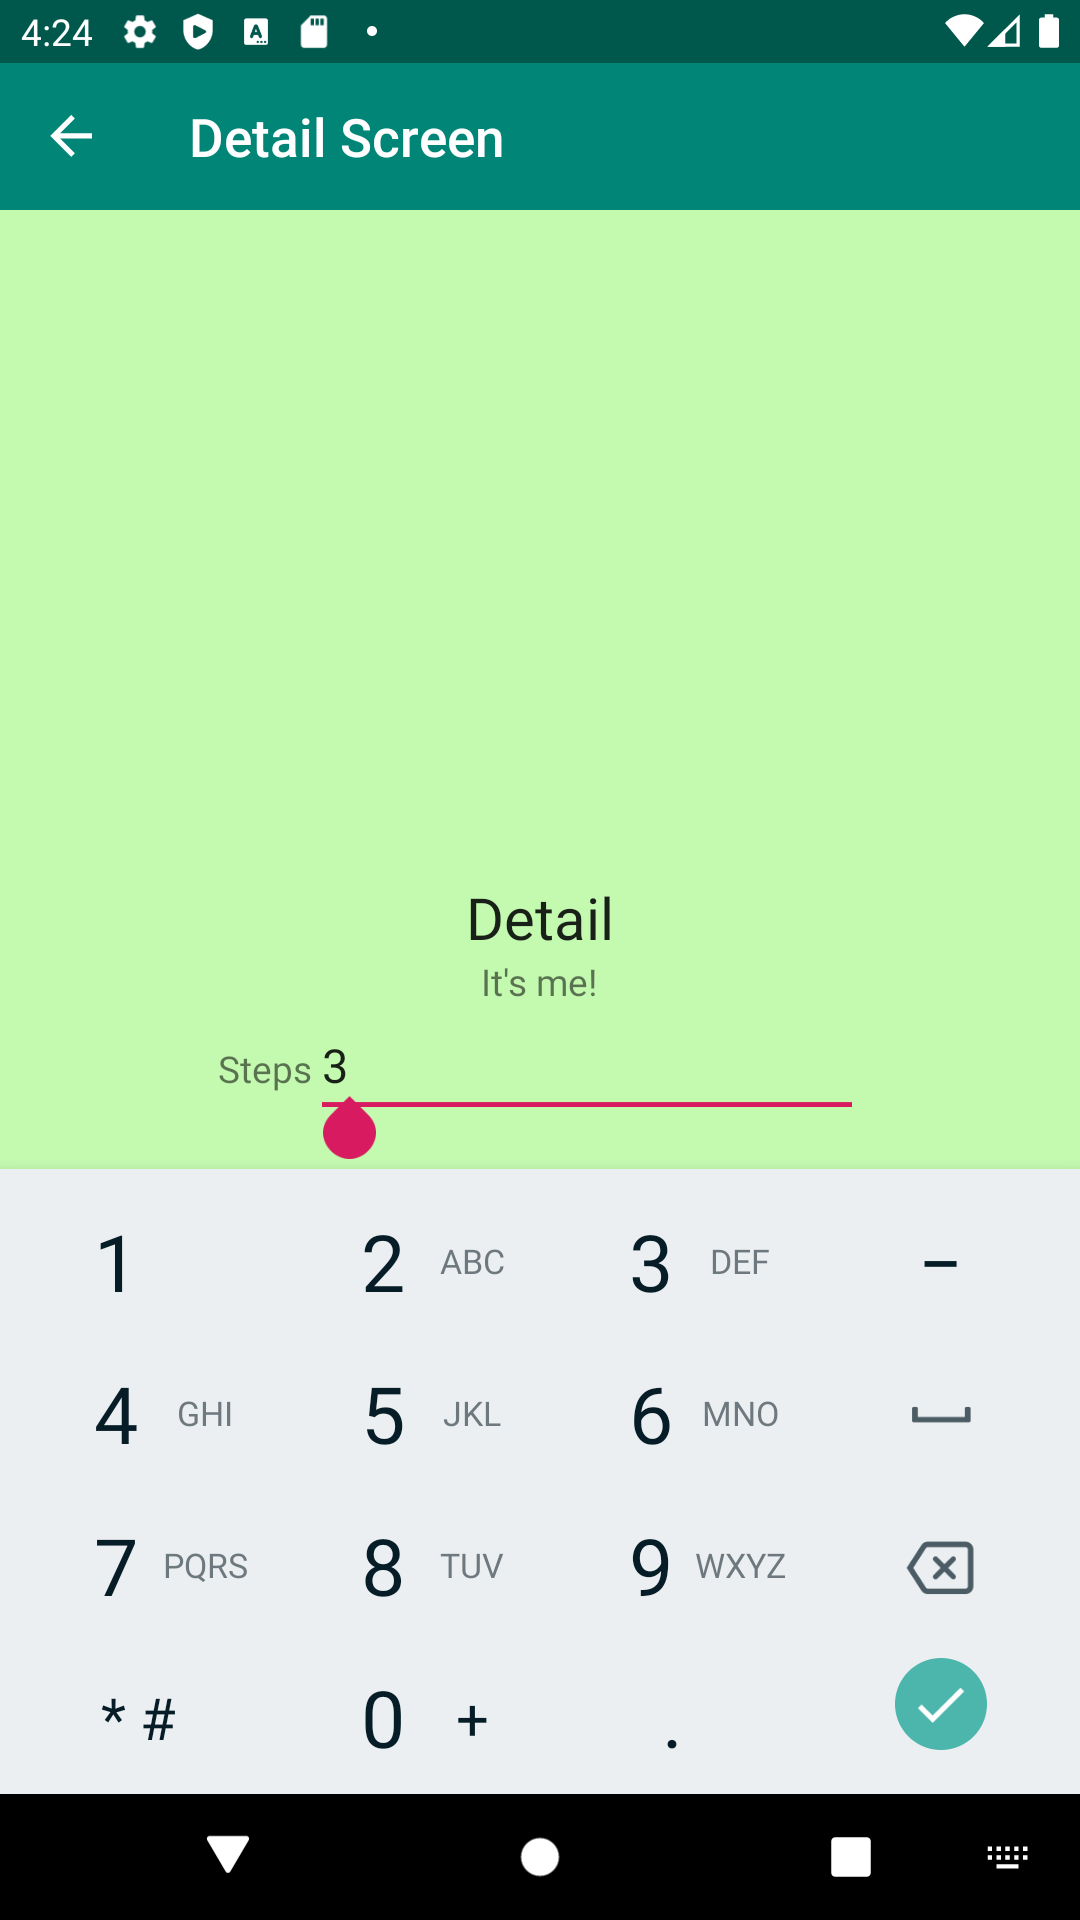
Also detail fragment should be completely driven by view model observation, even for first EditText field content:
同样,细节片段也应完全由视图模型观察驱动,即使对于第一个EditText字段内容也是如此:
Whenever text field is edited, view model has to remain the single source of truth.
无论何时编辑文本字段,视图模型都必须保持真理的唯一来源 。
Since master fragment is observing a shared view model instance, label value is automatically correct as soon as we come back.
由于主片段正在观察一个共享的视图模型实例,因此标签值一回到我们就自动正确。
模态流量 (Modal flow)
Even if modal presentation of screens is not a Material Design concept, we can simulate a modal flow with nested navigation graphs.
即使屏幕的模态表示不是“材料设计”概念,我们也可以使用嵌套的导航图模拟模态流。
Say we have a wizard: it could be a checkout flow, a login flow. Suppose we want to collect name and surname of a user. I create two fragments in main navigation graph.
假设我们有一个向导:它可以是结帐流程,登录流程。 假设我们要收集用户的姓名和姓氏。 我在主导航图中创建了两个片段。
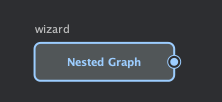
Then, I group them in a nested graph using the little button on Android Studio editor: I’ll call this nested graph wizard.
然后,我使用Android Studio编辑器上的小按钮将它们分组在一个嵌套图中:我将这个嵌套图向导称为。
If you double click this nested graph, you will see inside, and you can connect destinations with an action.
如果双击此嵌套图,您将在里面看到,并且可以将目标与操作连接起来。

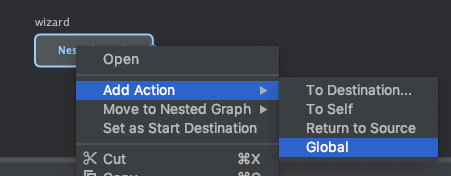
More interesting is the action you can create to bring the wizard on screen: I want a global action, because I would like to display wizard both from master and detail fragments.
您可以创建使向导显示在屏幕上的操作,这更有趣:我需要一个全局操作,因为我想同时显示主片段和详细片段中的向导。
I don’t want to enter too much inside specific code implementation, I only want to cover main aspects. First of all, wizard needs a view model. It will have name and surname live data fields, with associated methods to mutate contents. This view model will be shared inside sub-navigation graph to cover all wizard steps. Once navigation inside nested graph will be finished, view model will be disposed. This is good not to waste resources.
我不想在特定的代码实现中投入太多,我只想覆盖主要方面。 首先,向导需要一个视图模型。 它将具有name和surname实时数据字段,以及用于更改内容的关联方法。 该视图模型将在子导航图中共享,以涵盖所有向导步骤。 嵌套图内部的导航一旦完成,就将放置视图模型。 这很好,不要浪费资源。
Wizard results will be delivered by activity shared view model, like before.
向导结果将像以前一样通过活动共享视图模型传递。
So, coming back to navigation, you present this dedicated flow by firing global action:
因此,回到导航,您将通过触发全局操作来呈现此专用流程:
First wizard step can navigate to second step in the classic way. More interesting is the final step of navigation: back stack is popped until the head of the nested graph, including last screen.
向导的第一步可以以经典方式导航到第二步。 导航的最后一步更加有趣:弹出后退堆栈,直到嵌套图形的头部(包括最后一个屏幕)。
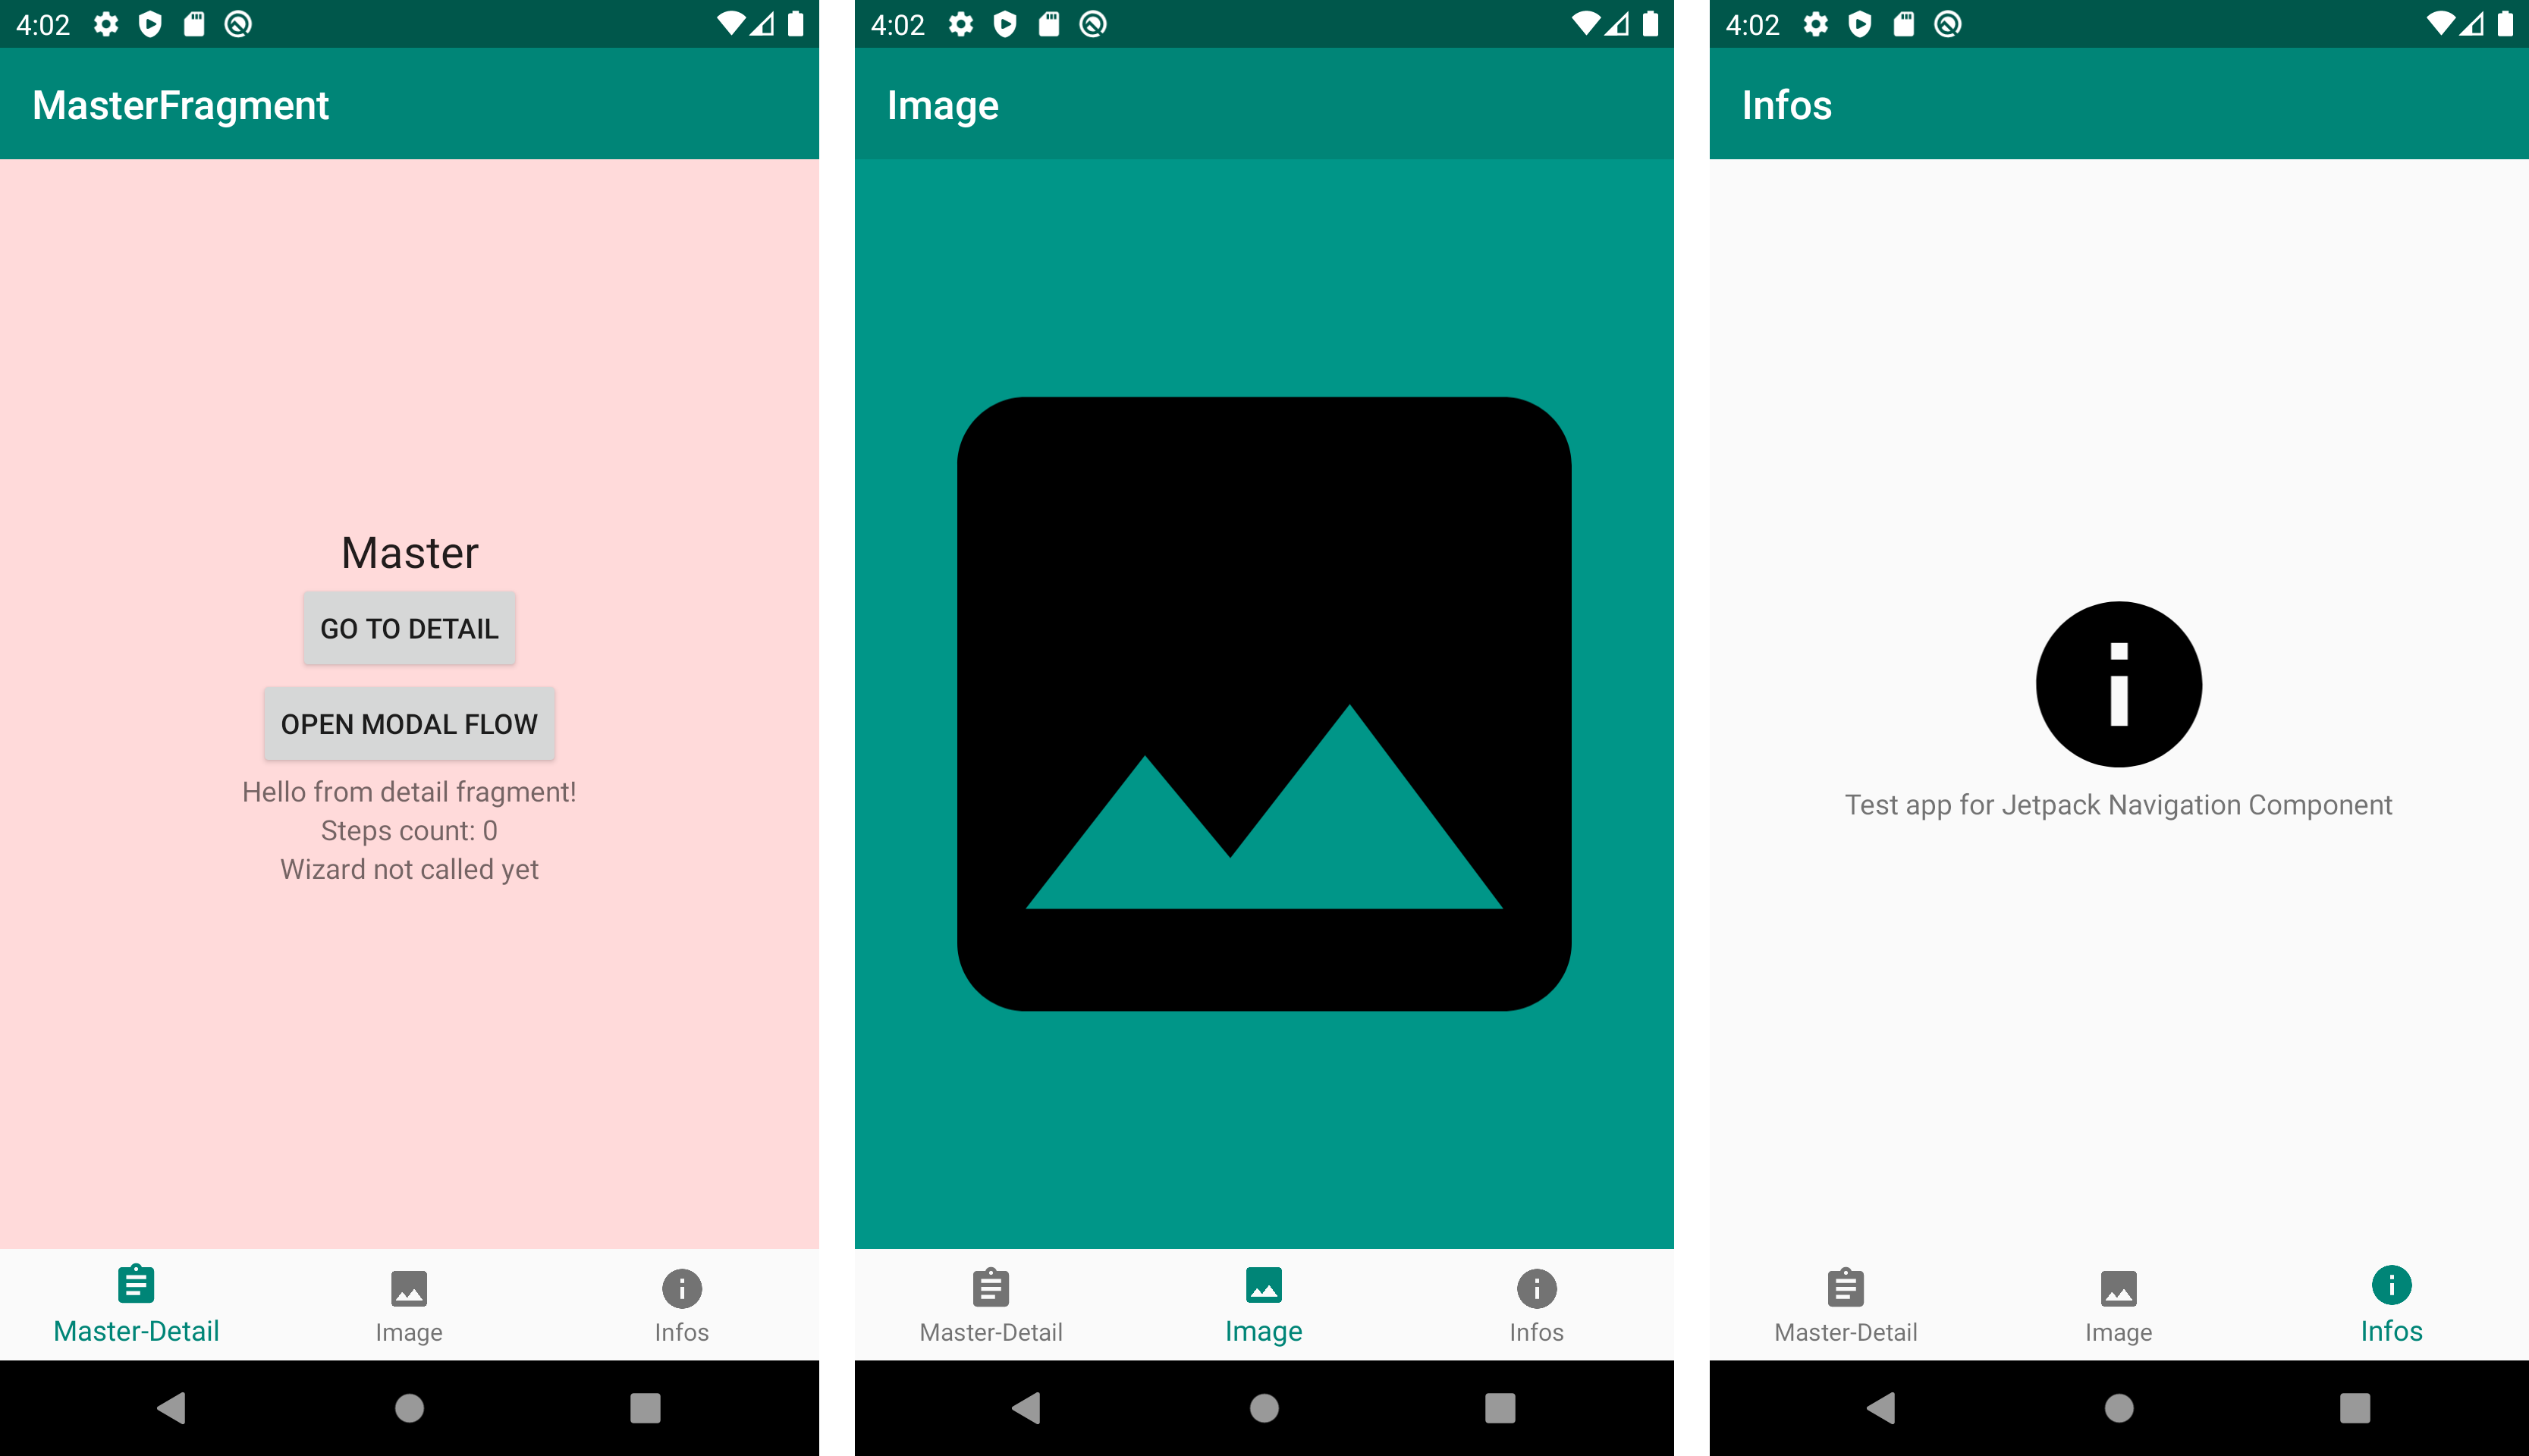
标签栏 (Tab Bar)
Tab bar in Material Design is called bottom navigation. First of all, you create a menu that will be used to populate bar of tabs. You can specify secondary menu category for item, if you want to navigate back in the reverse order in which you have clicked the icons.
材料设计中的选项卡栏称为底部导航 。 首先,创建一个菜单,该菜单将用于填充选项卡栏。 如果要以单击图标的相反顺序导航回去, 可以为item指定辅助菜单类别 。
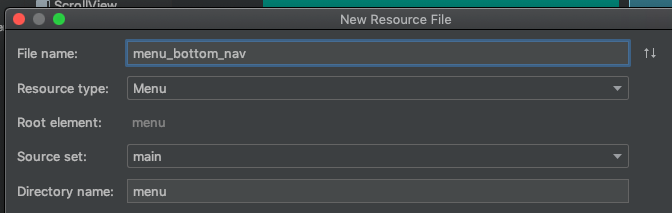
You specify items of menu, then you insert a BottomNavigationView in activity layout, and associate it with menu_bottom_nav.
您指定菜单项,然后在活动布局中插入BottomNavigationView ,并将其与menu_bottom_nav关联。

Then, you insert destinations inside navigation graph. It’s key to use same identifiers both for destinations and menu items.
然后,将目的地插入导航图内。 对目标和菜单项使用相同的标识符是关键 。
When you configure top bar, you need to specify destinations reachable via global navigation UI, not to show back button icon. Note start destination is always considered a top-level destination.
配置顶部栏时,需要指定可通过全局导航UI到达的目的地,而不是显示后退按钮图标。 注释开始目标始终被视为顶级目标。
If you execute app, you will see navigation is automatically handled horizontally between tabs:
如果执行应用程序,您会看到导航在选项卡之间自动进行水平处理:
If you navigate to detail, you switch to another tab, and you return to the first one, you will notice navigation stack state is lost. If you read to Material Design guidelines, it seems it is a desired behaviour:
如果导航到详细信息,则切换到另一个选项卡,然后返回第一个选项卡,您将注意到导航堆栈状态丢失。 如果您阅读了《 材料设计指南》 ,那似乎是一种期望的行为:
When you select a bottom navigation item (one that’s not currently selected), […] the app navigates to a destination’s top-level screen. Any prior user interactions and temporary screen states are reset, such as scroll position, tab selection, and in-line search.
当选择底部导航项(当前未选择的一项)时,[…]应用程序将导航到目标的顶级屏幕。 任何先前的用户交互和临时屏幕状态都会重置,例如滚动位置,选项卡选择和嵌入式搜索。
If you want to circumvent this silly behavior, you just need to use a different NavHostFragment. This way, each tab would have a different NavigationController, a separated navigation graph and a different toolbar to show. Outer navigation controller would be in charge only to orchestrate tab changes. Anyway, I don’t want to implement this, because it’s a bit off this article intent.
如果要避免这种愚蠢的行为, 只需使用其他NavHostFragment 。 这样,每个选项卡将具有不同的NavigationController ,单独的导航图和要显示的不同工具栏。 外部导航控制器仅负责协调选项卡更改。 无论如何,我不想实现这一点,因为它与本文的意图有点不同。
侧面菜单 (Side menu)
Discouraged by Apple, hamburger menu is widely embraced by Material Design.
苹果公司不建议汉堡包菜单被Material Design广泛采用。
First of all, you need to change activity layout, in order to have a root DrawerLayout. Remember this layout expects to have two children: first one is content; second one is a NavigationView. I’ll use same menu resource created for bottom navigation:
首先,您需要更改活动布局,以便拥有根DrawerLayout 。 请记住,这种布局期望有两个孩子:第一个是内容;第二个是内容。 第二个是NavigationView 。 我将使用为底部导航创建的相同菜单资源:
Now we just need to hook drawer to navigation controller:
现在我们只需要将抽屉钩到导航控制器即可:
You launch app, et voilà: drawer displays if you tap hamburger menu, items in drawer drives you to correct destination, and hamburger menu mutates to a back arrow if you push a destination on stack.
你启动应用程序, 等瞧 :抽屉显示如果点击菜单汉堡,在抽屉促使你正确的目的地,和汉堡包菜单项变异来一回,如果你在栈上推的目的地箭头。
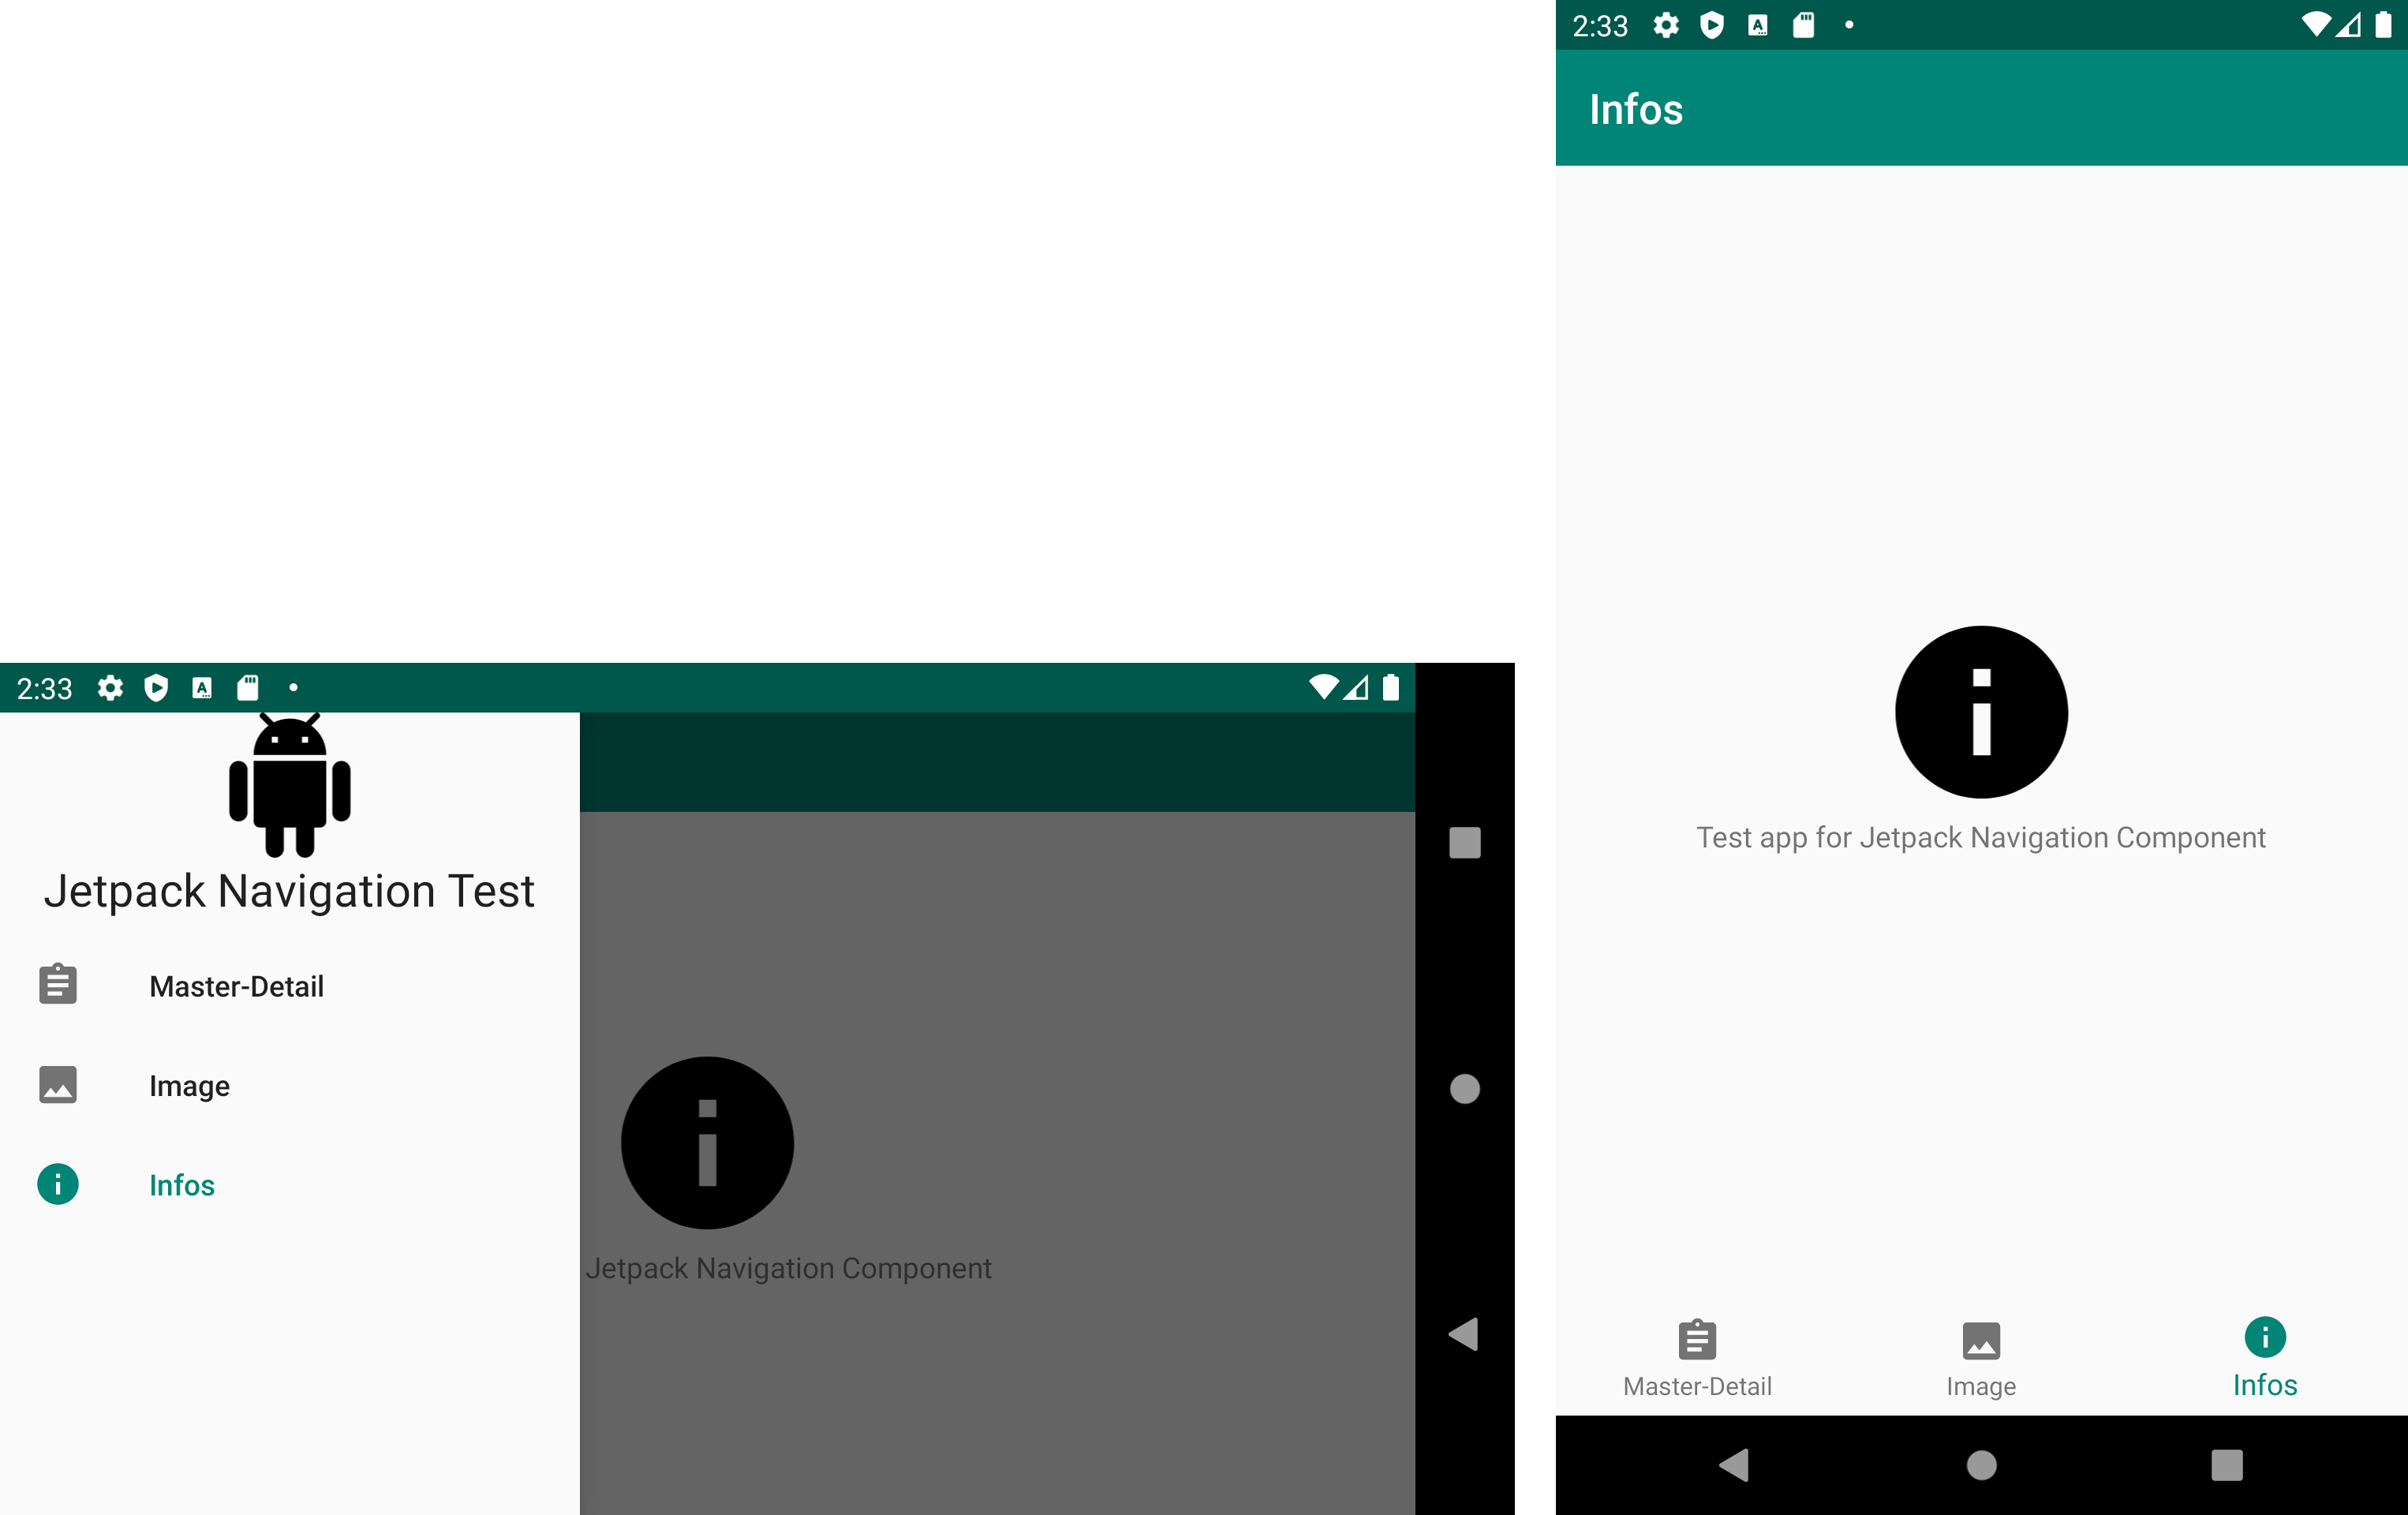
Having both tab bar and hamburger menu at the same time, it’s kind of dumb. It would be smart to display bottom navigation bar only in portrait orientation. It’s possible by moving things a little bit around. First of all, I isolate top bar and navigation host in a separate layout file. Then, I create a separate layout for activity in landscape orientation.
同时具有选项卡栏和汉堡菜单,这有点愚蠢。 仅以纵向显示底部导航栏会很聪明。 可以通过稍微移动一些东西来实现。 首先,我将顶部栏和导航主机隔离在一个单独的布局文件中。 然后,为横向活动创建单独的布局。
In normal activity_main.xml I have left an <include> to content, plus the BottomNavigationView, everything contained inside a root ConstraintLayout. In landscape variant, I’ve kept the root DrawerLayout. Activity code now produces two warnings, since bottomNavigationView and drawerNavigationView are now optional. This is easy fixed using ? syntax.
在普通的activity_main.xml我对内容加上了<include> ,加上BottomNavigationView ,所有内容都包含在根ConstraintLayout 。 在风景变体中,我保留了DrawerLayout根DrawerLayout 。 活动代码现在会产生两个警告,因为bottomNavigationView和drawerNavigationView现在是可选的。 这很容易解决? 句法。
快讯 (Alerts)
To show alert popups, you use DialogFragment destinations. It’s just like another push:
要显示警报弹出窗口,请使用DialogFragment destinations 。 就像另一推:
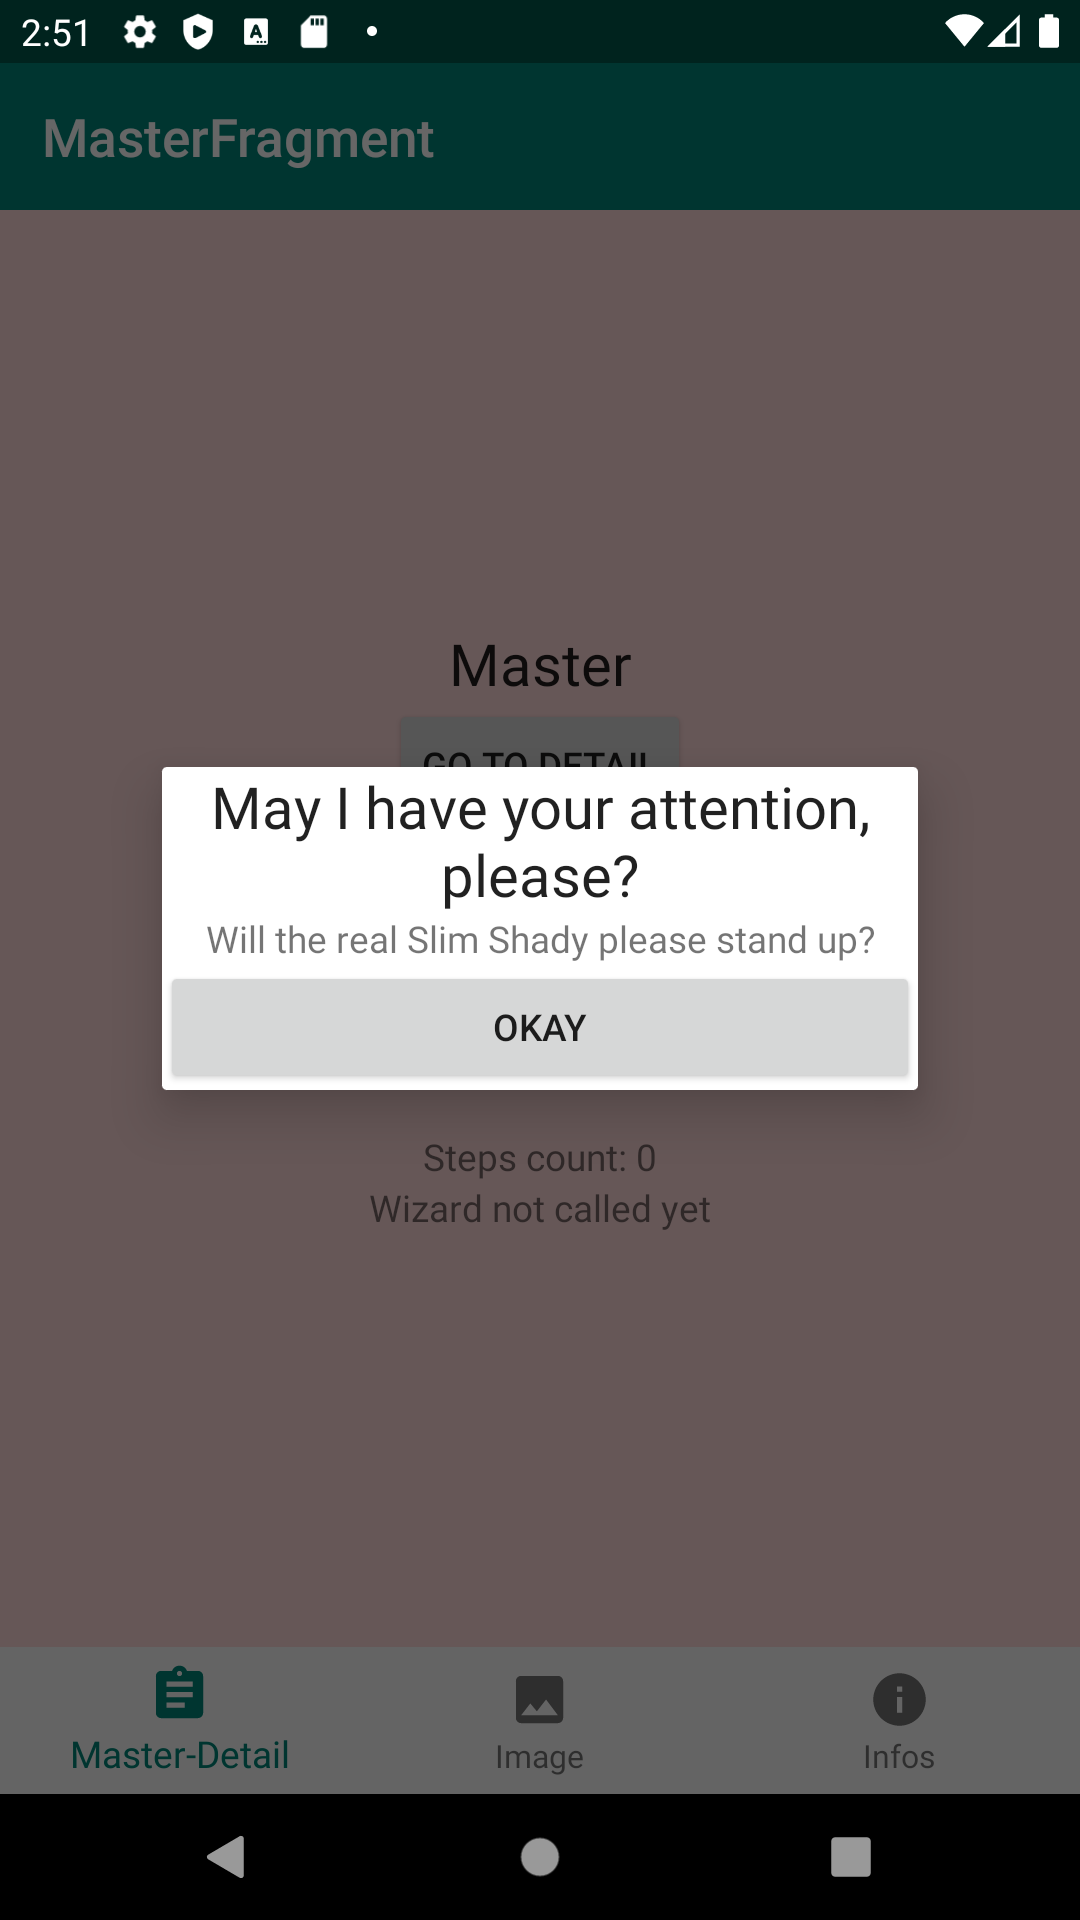
To come back, user can tap on shadowed space or on a custom OK button:
要返回,用户可以点击阴影区域或自定义的确定按钮:
This presentation is much more similar to iOS modal view controller: nothing stands on your way if you would like to implement a wizard inside a dialog.
该演示文稿与iOS模态视图控制器非常相似:如果您想在对话框中实现向导,则不会遇到任何障碍。
底页 (Bottom sheets)
To show bottom sheets, you need to create a subclass of BottomSheetDialogFragment. You reference it in navigation graph as a normal destination. Every piece of code is identical to alert case.
要显示底部工作表,您需要创建BottomSheetDialogFragment的子类。 您在导航图中将其引用为常规目标。 每段代码都与警报情况相同。

源代码 (Source code)
You can see Android Studio test project checking out this Git repo.
您可以看到Android Studio测试项目正在检查此Git存储库 。
翻译自: https://medium.com/swlh/android-jetpack-navigation-from-ios-developer-perspective-ddbdcee6f224


 1329
1329


 被折叠的 条评论
为什么被折叠?
被折叠的 条评论
为什么被折叠?
 到【灌水乐园】发言


