


Firebase和Flutter入门 (Getting Started with Firebase and Flutter)
In this post, I will be demonstrating how to do the basic database operations in Cloud Firestore in a Flutter app, using a published app I built as a practical example.
在本文中,我将使用我作为实际示例构建的已发布应用程序,演示如何在Flutter应用程序中执行Cloud Firestore中的基本数据库操作。
You will learn how to implement the core database operations in Cloud Firestore: how to get (read), add (write), edit, and delete data in the database in a Flutter app.
您将学习如何在Cloud Firestore中实施核心数据库操作:如何在Flutter应用程序中获取(读取),添加(写入),编辑和删除数据库中的数据。
Note: This article does not cover setting up Cloud Firestore, Firebase Authentication/Sign in for Flutter, and documents/collections in Cloud Firestore, which are prerequisites for this tutorial. If you are unfamiliar with these topics, I highly encourage you to read the Cloud Firestore plugin’s Readme and check out this code lab to setup Firebase with Flutter, check out the _Reply project as a guide, and watch this video to learn about documents and collections in Cloud Firestore before returning to this article.
注意: 本文不涵盖设置Cloud Firestore,Flutter的Firebase身份验证/登录以及Cloud Firestore中的文档/集合,这是本教程的先决条件。 如果您不熟悉这些主题, 我强烈建议您阅读Cloud Firestore插件的自述文件,并检查此代码实验室以使用Flutter设置Firebase,以_Reply项目作为指南 ,并观看此视频以了解Cloud Firestore中的文档和集合,然后再返回本文。 。
_回复应用程序背景 (_Reply App Background)

_Reply is a Flutter app I built from scratch and published to the Google Play Store and Apple App Store. This is a rebuild of my previous native Android app “Reply”; I rebuilt it using Flutter to make it available on both iOS and Android.
_ Reply是我从头开始构建并发布到Google Play商店和Apple App Store的Flutter应用。 这是我以前的本地Android应用“ Reply”的重建; 我使用Flutter对其进行了重建,以使其在iOS和Android上均可用。
I will use this app to provide clear, practical examples of how to implement the core Cloud Firestore operations.
我将使用此应用程序提供有关如何实施核心Cloud Firestore操作的清晰,实用的示例。
I have the code available on Github and you can download the app on the Google Play Store and the Apple App Store.
我在Github上有可用的代码 ,您可以在Google Play商店和Apple App Store中下载该应用程序 。
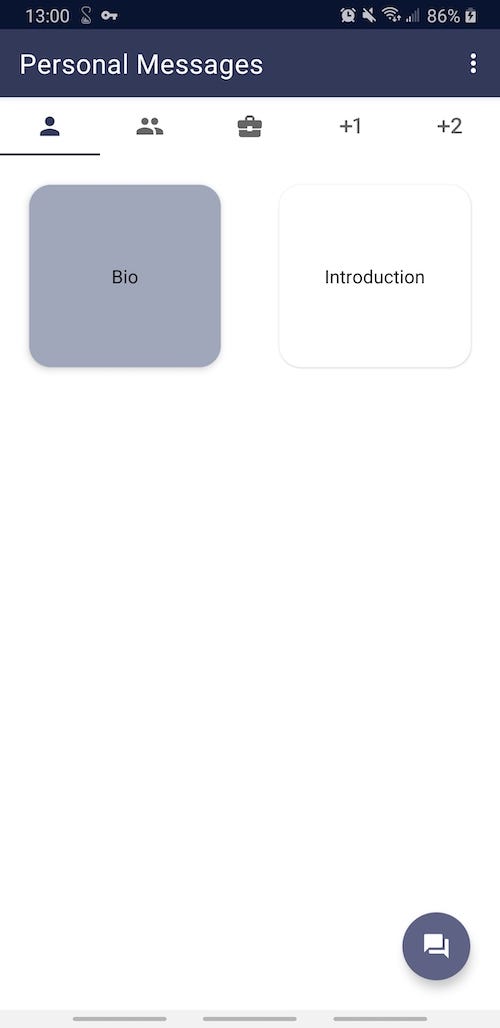
_Reply helps you easily create your own custom, pre-defined messages through any platform.
_Reply帮助您通过任何平台轻松创建自己的自定义,预定义消息。
With the app, you create your custom message templates which you can categorize based on the type of message (i.e. personal, social, and business messages). Each tab corresponds to a category.
使用该应用程序,您可以创建自定义消息模板,可以根据消息类型(即个人消息,社交消息和公司消息)进行分类。 每个选项卡都对应一个类别。
Once you create your own messages, you can preview, send, edit, and delete them using the main button in the bottom right corner.
创建自己的消息后,您可以使用右下角的主按钮预览,发送,编辑和删除它们。

注册并登录用户 (Registering and Signing in Users)
You can also use Firebase Authentication to register and sign in users. If you are implementing Firebase Authentication for the first time, I recommend reading the _Reply source code, which will show you how to implement the following:
您还可以使用Firebase身份验证来注册和登录用户。 如果您是第一次实施Firebase身份验证,建议阅读_Reply源代码 ,它将向您展示如何实现以下功能:
- Sign in with email and password 使用电子邮件和密码登录
- Sign in with Google 使用Google登录
- Sign in with Apple 使用Apple登录
- Sign out 登出
- Register with email and password 用电子邮件和密码注册
All of these methods can be found in the project’s AuthService.dart class.
所有这些方法都可以在项目的AuthService.dart类中找到 。
❗️❗️Please note that authenticating/signing/registering a user does NOT create a user for you in the database.
note️❗️请注意,对用户进行身份验证/签名/注册不会在数据库中为您创建用户。
Signing in a user and creating a user in the database are two separate operations you must implement.
登录用户和在数据库中创建用户是您必须实现的两个单独的操作。
This can be confusing because once a user has signed in, you will see an authenticated user with a uid within the Authentication tab in the Firebase console. These are the Firebase users. After a successful initial sign in or registration, a FirebaseUser is created and signed into the app. A FirebaseUser contains data such as name (called ‘display name’), email, and an automatically generated uid to identify the FirebaseUser.
这会造成混乱,因为一旦用户登录,您将在Firebase控制台的“身份验证”选项卡中看到带有uid的经过身份验证的用户。 这些是Firebase用户。 成功进行初始登录或注册后,将 创建 FirebaseUser 并登录到应用程序。 FirebaseUser包含诸如名称(称为“显示名称”),电子邮件和自动生成的uid以标识FirebaseUser 。

Before we start adding user data to the database, we first need to create users which we will save the user data to in the database. This should be done after registering/signing in to the app and only if it is a new user.
在开始将用户数据添加到数据库之前,我们首先需要创建用户,然后将用户数据保存到数据库中。 该操作应在注册/登录该应用程序之后进行,并且仅在该应用程序是新用户的情况下进行 。
To create users in our actual database, we will use the data provided by the FirebaseUsers to create users in our database; namely, we will use the uid and the name.
要在实际数据库中创建用户, 我们将使用 FirebaseUser 提供的数据 在数据库中创建用户。 即,我们将使用 uid 和名称。
检查新用户 (Checking For New Users)
After a successful sign in, we should have a FirebaseUser signed in.
成功登录后,我们应该已登录FirebaseUser 。
We do not need to check if it is a new user when signing in with email, because if the account does not exist, we will show a message to first register the account:
使用电子邮件登录时,我们不需要检查它是否是新用户,因为如果该帐户不存在,我们将显示一条消息,首先注册该帐户:

To check if it is a new user when signing in, we will compare the creation time stamp and last sign in time stamp of the FirebaseUser. This is what we will do for the sign in with Google and sign in with Apple options. We can do this like so:
要检查登录时是否是新用户,我们将 比较 FirebaseUser 的创建时间戳和上次登录时间戳 。 这就是我们为使用Google登录和使用Apple选项登录所做的工作。 我们可以这样做:
if (firebaseUser.metadata.creationTime
        .difference(firebaseUser
            .metadata.lastSignInTime)
        .abs() <
    Duration(seconds: 1))
Let’s take a look at how this is done when signing in with Google.
让我们看看使用Google登录时如何完成此操作。

When the sign in with Google button is pressed, we will execute the following. Notice how after the user has been authenticated (signed in) with Google, we compare the creation time and last sign in time to check if it is a new user. If a user is signing in for the first time, we create a new user in the database, passing the FirebaseUser to the method so we can utilize the data it contains.
当按下“使用Google登录”按钮时,我们将执行以下操作。 请注意,在用户通过Google身份验证(登录)后,我们将比较创建时间和上次登录时间以检查该用户是否为新用户。 如果用户是首次登录,我们将在数据库中创建一个新用户,将FirebaseUser传递给该方法,以便我们可以利用其中包含的数据。
Note: I ran into a quirk when comparing the creation time and last sign in time. For some reason during the initial sign in, the time stamps were off by a thousandth of a second, when they should have been the same. Thus, I could not compare them using equality, because they were always off. To address this, I compared the difference between the two, checking to see if there is at least a one second difference.
注意: 比较创建时间和上次登录时间时,我遇到了一个怪癖。 出于某种原因,在初始登录期间,时间戳应该相差千分之一秒。 因此,我无法使用相等来比较它们,因为它们总是不可用。 为了解决这个问题,我比较了两者之间的差异,检查是否存在至少一秒钟的差异。
在数据库中创建新用户 (Creating a New User in the Database)
To create a new user in the database, we will do the following:
要在数据库中创建一个新用户,我们将执行以下操作:
- Use the authenticated FirebaseUser to get the user’s name and email. 使用经过身份验证的FirebaseUser可以获取用户的名称和电子邮件。
- Create a collection called “users” and add a user (a document) to it, setting the document id as the FirebaseUser uID, the name field as the FirebaseUser’s display name, and the email field as the FirebaseUser’s email. 创建一个名为“用户”的集合,并向其添加用户(文档),将文档ID设置为FirebaseUser uID,将名称字段设置为FirebaseUser的显示名称,将电子邮件字段设置为FirebaseUser的电子邮件。
If done successfully, we should see a users collection with a user document:
如果成功完成,我们应该看到带有用户文档的用户集合:

Each document in Cloud Firestore has a document ID to identify it. We use the setData method instead of the add method so we can explicitly set a document ID instead of it being automatically generated. We do this to easily retrieve the document later. However, please be aware this could cause potential conflicts.
Cloud Firestore中的每个文档都有一个用于标识它的文档ID。 我们使用 setData 方法而不是 add 方法,因此我们可以显式设置文档ID,而不是自动生成它。 我们这样做是为了以后方便地检索文档。 但是,请注意,这可能会导致潜在的冲突。
When a user is signed to our app, we can call:
当用户登录我们的应用后,我们可以调用:
FirebaseUser firebaseUser = FirebaseAuth.instance.currentUser()
FirebaseUser firebaseUser = FirebaseAuth.instance.currentUser()
Since we set the document ID (for the document of the FirebaseUser) to be the same as the corresponding FirebaseUser uID , we can simply retrieve the document using the FirebaseUser’s uid:
由于我们将文档ID(用于FirebaseUser的文档)设置为与相应的FirebaseUser uID相同,因此我们可以简单地使用FirebaseUser的uid来检索文档:
firestoreInstance.collection(USERS_COLLECTION).document(firebaseUser.uid).updateData({
// Update document
)}
Now let’s get to the meat of this article and learn how to work with data and the database.
现在,让我们开始本文的重点,学习如何使用数据和数据库。
将数据添加到数据库 (Adding Data to the Database)
设置安全规则 (Setting Up Security Rules)
Setting up Cloud Firestore Security Rules is important to keep your users’ data secure. Furthermore, if you don’t change the initial security rules, your app‘s Cloud Firestore database access will expire after 30 days. I recommend reading how to structure security rules to apply the appropriate restrictions to your app. The following set of rules ensure that only authenticated users can read and write their own data:
设置Cloud Firestore安全规则对于确保用户数据安全很重要。 此外,如果您不更改初始安全规则,则您的应用程序对Cloud Firestore数据库的访问将在30天后过期。 我建议阅读如何构造安全规则,以将适当的限制应用于您的应用。 以下规则集确保只有经过身份验证的用户才能读取和写入自己的数据:
添加初始数据 (Adding Initial Data)
Before we get into the add feature of _Reply, let’s learn how to add data when we first create users in the database. This is useful to have placeholder data, such as welcome messages when the user first signs in:
在开始使用_Reply的添加功能之前 ,让我们学习在数据库中首次创建用户时如何添加数据。 这对于拥有占位符数据很有用,例如用户首次登录时的欢迎消息:

In this case, we want to add placeholder messages when the user is first created so we can show welcome messages.
在这种情况下,我们希望在首次创建用户时添加占位符消息,以便显示欢迎消息。
We are going to use the MessageCard model class to add messages. Notice the toJson() and fromJson() methods. To add custom objects to Cloud Firestore in Flutter, we must first serialize the data. In this case, we are serializing the inside the MessageCard model class, converting our objects into a map that Cloud Firestore will accept.
我们将使用MessageCard模型类添加消息。 注意toJson()和fromJson()方法。 要将自定义对象添加到Flutter中的Cloud Firestore,我们必须首先序列化数据。 在这种情况下,我们正在对内部的 MessageCard 模型类 进行序列化 ,将我们的对象转换为Cloud Firestore将接受的地图。
If you would like to read more about serialization in Flutter, check out this post.
如果您想了解有关Flutter中序列化的更多信息,请查看这篇文章 。
Now we can simply add fields when we are saving the user to the database. Here we are adding 5 new fields, one for each category of messages, and adding MessageCards (messages) that display the user’s name, using the toJson() method to serialize the data.
现在,当我们将用户保存到数据库时,我们只需添加字段即可。 在这里,我们添加了5个新字段,每个消息类别一个,并使用toJson()方法序列化数据,添加了显示用户名的MessageCard(消息)。
将数据添加到现有文档 (Adding Data to an Existing Document)
Adding data to Cloud Firestore can be implemented in multiple different ways.
可以通过多种不同方式将数据添加到Cloud Firestore。
The add, setData, and updateData, and updateData + FieldArray.union methods can all be used to add data.
的 add , setData ,和 updateData ,和 updateData + FieldArray.union 方法都可以用于添加数据。
I recommend reading the documentation to fully understand when to use each add method, but here is a brief overview:
我建议阅读文档以完全了解何时使用每种添加方法,但是这里是一个简要概述:
add(): Add a document with an auto-generated idadd():添加具有自动生成的ID的文档setData(): Add or overwrite a document with an explicit id. If the document does not exist, it will be created. If the document does exist, its contents will be overwritten with the newly provided datasetData():添加或覆盖具有明确ID的文档。 如果文档不存在,将创建它。 如果文档确实存在,其内容将被新提供的数据覆盖updateData(): Add fields to document without overwriting the entire documentupdateData():将字段添加到文档中而不覆盖整个文档updateData() + FieldArray.union():Add an element to an array field of a document.updateData() + FieldArray.union():将元素添加到文档的数组字段中。
将新数据添加到现有数组字段 (Adding New Data to an Existing Array Field)
Now we are going to learn how to add data. This is how data is added in _Reply when a user adds a new message.
现在,我们将学习如何添加数据。 这是用户添加新消息时在_Reply中添加数据的方式。
Since we created placeholder data, we already have a fields for the messages, which are lists. In Cloud Firestore, lists are stored as arrays, so we are actually working with an array field.
自创建占位符数据以来,我们已经有一个用于消息的字段,即列表。 在Cloud Firestore中,列表存储为数组,因此我们实际上是在使用数组字段。
In this case, we have to update an existing array field; we must add an element (message) to the list while retaining the existing elements (messages). To do this, we use updateData + FieldArray.arrayUnion.
在这种情况下,我们必须更新现有的数组字段。 我们必须在列表中添加一个元素(消息),同时保留现有的元素(消息)。 为此,我们使用updateData + FieldArray.arrayUnion 。
Notice we must first serialize the data using the toJson() method to save the data to the database. To store it as a list of items instead of a map, we convert the map to a list.
注意,我们必须首先使用 toJson() 方法 序列化数据, 以将数据保存到数据库。 要将其存储为项目列表而不是地图,我们将地图转换为列表。
If executed correctly, we should see the new message added to the existing array field. (In this case, the personalMessages field)
如果正确执行,我们应该看到新消息添加到现有数组字段中。 (在这种情况下,为personalMessages字段)

从数据库中删除数据 (Deleting Data From the Database)

Deleting data from Cloud Firestore can be implemented in multiple different ways.
从Cloud Firestore删除数据可以通过多种不同方式实现。
Again, I recommend reading the documentation to get a full grasp of when to use each method. Here is a brief overview:
同样,我建议阅读文档以全面了解何时使用每种方法。 这里是一个简短的概述:
delete():Delete data from a documentdelete():从文档中删除数据updateData() + FieldValue.delete():Delete a field from a documentupdateData() + FieldValue.delete():从文档中删除字段updateData() + FieldArray.remove():Remove an element from an array field within a documentupdateData() + FieldArray.remove():从文档中的数组字段中删除元素
Similar to the add message case, we need to update an existing array field; we must remove an element (message) from the list while retaining the existing elements (messages). To do this, we use updateData() + FieldArray.remove().
与添加消息的情况类似,我们需要更新现有的数组字段。 我们必须从列表中删除一个元素(消息),同时保留现有元素(消息)。 为此,我们使用updateData() + FieldArray.remove().
If implemented correctly, the message should be deleted and the field, personalMessages, should still contain the other messages. Here we removed the the “Get Together” message, which happened to be 1st element in the array field.
如果正确实现,则应删除该消息,并且personalMessages字段仍应包含其他消息。 在这里,我们删除了“ Get Together”消息,该消息恰好是数组字段中的第一个元素。

在数据库中编辑数据 (Editing Data in the Database)

Continuing with our trend, editing data also has multiple implementations and use cases. Let’s take a look:
顺应我们的趋势,编辑数据还具有多种实现和用例。 让我们来看看:
updateData():Update fields of a document without overwriting the entire documentupdateData():更新文档的字段,而不会覆盖整个文档setData() with merge:trueUpdate fields in a document or create it if it do not existsetData() with merge:true更新文档中的字段或在不存在的情况下创建它updateData() + FieldValue.arrayRemove() + updateData() + FieldValue.arrayUnion():Update elements in an array field within a documentupdateData() + FieldValue.arrayRemove() + updateData() + FieldValue.arrayUnion():更新文档中数组字段中的元素updateData() + FieldValue.increment():Increment a numeric field within a documentupdateData() + FieldValue.increment():增加文档中的数字字段
For the _Reply app, what we need to do is replace the old message with the new message. To do this, we will use updateData() + FieldValue.arrayRemove() + updateData() + FieldValue.arrayUnion():
对于_Reply应用,我们需要做的是用新消息替换旧消息。 为此,我们将使用updateData() + FieldValue.arrayRemove() + updateData() + FieldValue.arrayUnion():
Notice what is going on here. To update the message, we are actually just deleting the old value, then adding a new one- a clever way to edit something.
注意这里发生了什么。 要更新消息,实际上我们只是删除旧值,然后添加新值-一种巧妙的方式来编辑内容。
从数据库获取数据 (Getting Data From the Database)
Now that we have data in the database, we can retrieve it. I saved getting data for last because it is the most cumbersome and complex data operation to implement.
现在我们已经在数据库中有了数据,我们可以检索它了。 我节省了最后获取数据的时间,因为这是最麻烦,最复杂的数据操作。
Fortunately, there is really only one method we need to know when getting data: get().
幸运的是,获取数据时实际上只需要知道一种方法: get() 。
Here is what we need to do to retrieve our data:
我们需要执行以下操作来检索数据:
We first create an empty
Listto hold the data we will get from our database我们首先创建一个空
List来保存将从数据库中获取的数据- We then query the database for the data we need 然后,我们在数据库中查询所需的数据
Since the data is returned to us as a
Map, we need to convert it toMessageCardobjects so we can easily retrieve the data; to do this, we use thefromJson()method in our MessageCard class由于数据是作为
Map返回给我们的,因此我们需要将其转换为MessageCard对象,以便我们轻松地检索数据; 为此,我们在MessageCard类中使用fromJson()方法Once our data is converted to
MessageCardobjects, we can get the data we need; in this case, we are retrieving theMessageCards and adding them to a list.一旦我们的数据转换为
MessageCard对象,我们就可以获取所需的数据。 在这种情况下,我们将检索MessageCard并将它们添加到列表中。- Finally, we return the list of messages to show them in the UI 最后,我们返回消息列表以在UI中显示它们
Since the data returned from Cloud Firestore will be a Map, we need to convert it to deserialize it and convert it to a custom object. This is the opposite of what we had to do when saving the MessageCard objects to Cloud Firestore. We use the fromJson() method to do this.
由于从Cloud Firestore返回的数据将是Map,因此我们需要将其转换为反序列化并将其转换为自定义对象。 这与将MessageCard对象保存到Cloud Firestore时所要做的相反。 我们使用fromJson()方法执行此操作。
结论 (Conclusion)
Let’s recap. We learned how to:
让我们回顾一下。 我们学习了如何:
- Check for new users upon sign in 登录后检查新用户
- Create new users in a Cloud Firestore Database 在Cloud Firestore数据库中创建新用户
- Set basic security rules 设置基本安全规则
- Add placeholder data for our users 为我们的用户添加占位符数据
- Add new data to the database 向数据库添加新数据
- Delete data in the database 删除数据库中的数据
- Edit data in the database 编辑数据库中的数据
- Get data from the database 从数据库获取数据
I know that was a lot, but you made it!
我知道很多,但您做到了!
Now you can truly be a (Fire)base User. 🔥
现在,您可以真正成为(Fire)基本用户。 🔥
资源资源 (Resources)
翻译自: https://medium.com/firebase-developers/cloud-firestore-basics-in-flutter-68c7ec42eeca


 701
701

 被折叠的 条评论
为什么被折叠?
被折叠的 条评论
为什么被折叠?
 到【灌水乐园】发言


