


Docker is an enterprise-ready container platform that enables organizations to seamlessly build, share, and run any application, anywhere. Almost every company is containerizing its applications for faster production workloads so that they can deploy anytime and sometimes several times a day. There are so many ways we can build a React App. One way is to dockerize the React app with nodejs backend and create a docker image so that we can deploy that image any time or sometimes several times a day.
Docker是企业就绪的容器平台,使组织可以在任何地方无缝地构建,共享和运行任何应用程序。 几乎每家公司都在对其应用程序进行容器化,以加快生产工作负载,以便它们可以随时随地部署,有时一天可以部署几次。 我们可以使用多种方法来构建React App。 一种方法是使用nodejs后端对React应用进行docker化并创建一个docker映像,以便我们可以每天或有时每天多次部署该映像。
In this post, we look at the example project and see the step by step guide on how we can dockerize the React app with nodejs as a server.
在本文中,我们将查看示例项目,并逐步了解如何使用nodejs作为服务器对React应用进行泊坞操作。
Introduction
介绍
Example Project
示例项目
Dockerizing the App
Docker化应用
Running The App on Docker
在Docker上运行应用程序
Summary
摘要
Conclusion
结论
介绍 (Introduction)
Nowadays, it’s very common to dockerize and deploy the Docker image in the production with the help of container orchestration engines such as Docker Swarn or Kubernetes. We are going to Dockerize the app and create an image and run it on Docker on our local machine. We could also push that Image into Docker hub and pull it whenever and wherever we need it.
如今,借助容器编排引擎(例如Docker Swarn或Kubernetes)在生产中对Docker映像进行Docker化和部署是非常普遍的。 我们将对应用程序进行Docker化并创建映像,然后在本地计算机上的Docker上运行它。 我们还可以将该映像推送到Docker中心,并在需要时随时随地将其拉出。
Here is the complete guide on how to develop a React app with nodejs as a backend server. If you are not familiar with the process or you want to know before studying this guide, I would recommend you going through it.
这是有关如何使用nodejs作为后端服务器开发React应用的完整指南。 如果您不熟悉此过程,或者想在学习本指南之前先了解一下,建议您仔细阅读。
Javascript版本 (Javascript Version)
先决条件 (Prerequisite)
As a prerequisite, you have to install Docker for Desktop (whatever your OS is). Please follow this link to install Docker on your laptop. Once installed you can check the Docker info or version with the following commands.
前提条件是,必须安装Docker for Desktop(无论您的操作系统是什么)。 请点击此链接在笔记本电脑上安装Docker。 安装后,您可以使用以下命令检查Docker信息或版本。
docker info
docker --version
示例项目 (Example Project)
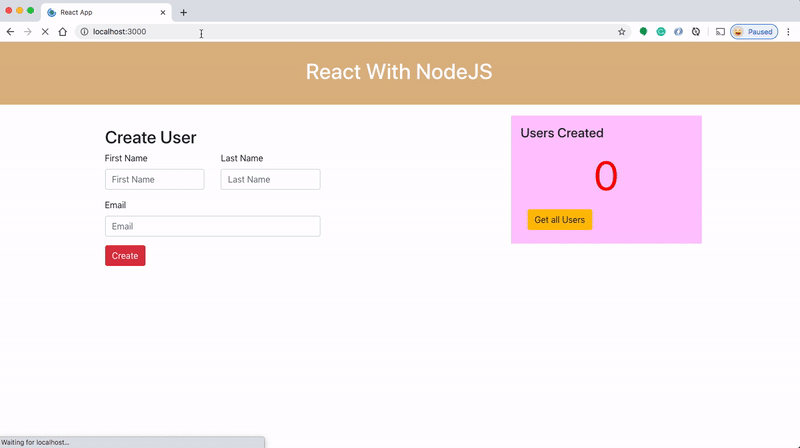
This is a simple project which demonstrates developing and running React application with NodeJS. We have a simple app in which we can add users, count, and display them at the side, and retrieve them whenever you want.
这是一个简单的项目,演示了如何使用NodeJS开发和运行React应用程序。 我们有一个简单的应用程序,可以在其中添加用户,计数并在侧面显示它们,并在需要时检索它们。
Here is a Github link to this project. You can clone it and run it on your machine.
这是该项目的Github链接。 您可以克隆它并在计算机上运行它。
// clone the project
git clone https://github.com/bbachi/react-nodejs-typescript-example.git// React Code
cd my-app
npm install
npm start// API code
cd api
npm install
npm run start:dev
If you want to create a Docker image and run it on the local Docker, here are the steps.
如果要创建Docker映像并在本地Docker上运行,请执行以下步骤。
// create an image
docker build -t react-node-ts-image .// running on Image
docker run -d -it -p  3080:3080 --name react-node-ui react-node-ts-image
Docker化应用 (Dockerizing the App)
We use the multi-stage builds for efficient docker images. Building efficient Docker images are very important for faster downloads and lesser surface attacks. In this multi-stage build, building a React project and put those static assets in the build folder is the first step. The second step involves building an API server bundle and the third step involves copying from these two stages and run the code.
我们使用多阶段构建来获得高效的docker映像。 构建有效的Docker映像对于加快下载速度和减少表面攻击非常重要。 在此多阶段构建中,第一步是构建一个React项目并将这些静态资产放在build文件夹中。 第二步涉及构建API服务器捆绑软件,第三步涉及从这两个阶段进行复制并运行代码。
Let’s build an image with the Dockerfile. Here are the things we need for building an image.
让我们使用Dockerfile构建映像。 这是我们构建图像所需的东西。
阶段1 (Stage 1)
Start from the base image
node:10从基本映像
node:10We are naming this stage as ui-build
我们将此阶段命名为ui-build
Make the working directory as /usr/src/app
将工作目录设置为/ usr / src / app
- We need to copy React code into the Docker file system and install all the dependencies. 我们需要将React代码复制到Docker文件系统中并安装所有依赖项。
- Copy all the source files. 复制所有源文件。
- React uses react-scripts to build the app. So, install all the dependencies. React使用react-scripts来构建应用程序。 因此,安装所有依赖项。
Run
npm run buildto build the React App and all the assets will be created underbuilda folder within a my-app folder.运行
npm run build来构建React App,所有资产将在my-app文件夹内的build文件夹下build。
第二阶段 (Stage 2)
Start from the base image
node:10从基本映像
node:10We are naming this stage as server-build
我们将此阶段命名为服务器构建
- Make the working directory as /usr/src/app 将工作目录设置为/ usr / src / app
- Copy all the api code into Docker file system 将所有api代码复制到Docker文件系统中
- Install all the dependencies and build the server code 安装所有依赖项并构建服务器代码
第三阶段 (Stage 3)
Start from the base image
node:10从基本映像
node:10Make the working directory as /usr/src/app
将工作目录设置为/ usr / src / app
Copy all the code from the stage ui-build to the Docker file system ./my-app/build
将所有代码从ui-build阶段复制到Docker文件系统./my-app/build
Copy all the code from the stage server-build to the Docker file system ./
将所有代码从阶段服务器构建复制到Docker文件系统./
Finally, have this command node api.bundle.js with the CMD. This automatically runs when we run the image.
最后,将此命令node api.bundle.js与CMD一起使用。 当我们运行图像时,它将自动运行。
Here is the complete Dockerfile
这是完整的Dockerfile
Let’s build the image with the following command.
让我们使用以下命令构建映像。
// build the image
docker build -t react-node-ts-image .// check the images
docker images
在Docker上运行应用程序 (Running The App on Docker)
Once the Docker image is built. You can run the image with the following command.
构建Docker映像后。 您可以使用以下命令运行该映像。
// run the image
docker run -d -it -p  3080:3080 --name react-node-ui react-node-ts-image// check the container
docker ps
You can access the application on the web at this address http://localhost:3080.
您可以通过以下地址访问Web上的应用程序:http:// localhost:3080。

执行到正在运行的容器中 (Exec into a running container)
You can exec into the running container with this command and explore the file system.
您可以使用此命令执行到正在运行的容器中,并浏览文件系统。
docker exec -it react-node-ui /bin/sh日志 (Logs)
You can view the logs form the docker with the following command
您可以使用以下命令查看来自docker的日志
docker logs <container id>摘要 (Summary)
- Nowadays, it’s very common to dockerize and deploy the Docker image in the production with the help of container orchestration engines such as Docker Swarn or Kubernetes. 如今,借助诸如Docker Swarn或Kubernetes之类的容器编排引擎在生产中对Docker镜像进行Docker化和部署已经非常普遍。
- We use the multi-stage builds for efficient docker images. 我们使用多阶段构建来获得高效的docker映像。
- Building efficient Docker images are very important for faster downloads and lesser surface attacks. 构建有效的Docker映像对于加快下载速度和减少表面攻击非常重要。
- We maintain separate folders for React and nodejs code for maintainability, clean architecture, etc. 我们为React和nodejs代码维护单独的文件夹,以实现可维护性,简洁的体系结构等。
- Since the API code is in typescript you need a webpack to transpile the typescript code into the javascript bundle. 由于API代码位于打字稿中,因此您需要一个Webpack将打字稿代码转换为javascript捆绑包。
结论 (Conclusion)
Always use multi-stage builds with this type of architecture. It makes Docker images smaller and less prone to attacks.
始终将多阶段构建与此类型的体系结构一起使用。 它使Docker映像更小并且更不容易受到攻击。


 447
447

 被折叠的 条评论
为什么被折叠?
被折叠的 条评论
为什么被折叠?
 到【灌水乐园】发言


