


一、在HUD中显示消息
1) 在MyHUD.h中定义一个结构来表示我们的消息:
#pragma once
#include "GameFramework/HUD.h"
#include "MyHUD.generated.h"
//该结构体表示我们要显示的消息属性
struct Message
{
FString m_Message; //消息内容
float m_Time; //显示的时间
FColor m_Color; //文本的颜色
Message() : m_Time(6.0f), m_Color(FColor::White) //默认属性
{
}
Message(FString message, float time, FColor color)
:m_Message(message), m_Time(time), m_Color(color)
{
}
};
2) 添加消息数组。UE4中用TArray来表示动态数组,因此将我们的AMyHUD类修改成:
UCLASS()
class DEMO1_API AMyHUD : public AHUD
{
GENERATED_UCLASS_BODY()
public:
// 下面这个重载函数每帧会被调用一次,在这个函数的定义里面来渲染字体
virtual void DrawHUD() override;
void AddMessage(Message msg);
// 添加字体属性(随后我们在蓝图编辑器中设置字体类型)
UPROPERTY(EditAnywhere, BlueprintReadWrite, Category = HUDFont) UFont* hudFont;
private:
TArray m_Messages;
};
上面定义了一个表示消息的TArray数组,当有消息要被显示的时候,将其添加到该数组中。当该消息经过了一段时间后消息,就会从TArray数组中删除。有关TArray的知识,后面也会继续介绍。
在AMyHUD.cpp中添加如下代码:
#include "Demo1.h"
#include "MyHUD.h"
AMyHUD::AMyHUD(const class FObjectInitializer& PCIP) : Super(PCIP)
{
}
void AMyHUD::DrawHUD()
{
// 先调用父类DrawHUD()函数
Super::DrawHUD();
// 从后往前迭代数组,这样做的好处是可以避免删除一个元素引起因为当前的迭代器无效引起的错误
for (int i = m_Messages.Num() - 1; i >= 0; --i)
{
float outputWidth, outputHeight, pad = 10.0f; //pad是文本和消息框的间距
//下面的函数根据字体和字体大小计算当前这段消息的宽度、高度,用于计算其消息框的宽度和高度
GetTextSize(m_Messages[i].m_Message, outputWidth, outputHeight, hudFont, 1.0f);
float messageH = outputHeight + 2.0f*pad;
float x = 0.0f, y = i*messageH;
//黑色背景
DrawRect(FLinearColor::Black, x, y, Canvas->SizeX, messageH);
DrawText(m_Messages[i].m_Message, m_Messages[i].m_Color, x + pad, y + pad, hudFont);
// 消耗显示时间
m_Messages[i].m_Time -= GetWorld()->GetDeltaSeconds();
//如果显示时间已消耗完,将其移除
if (m_Messages[i].m_Time < 0)
{
m_Messages.RemoveAt(i);
}
}
}
void AMyHUD::AddMessage(Message msg)
{
m_Messages.Add(msg);
}
二、在NPC中添加触发事件
为了让我们靠近NPC才显示对话框,我们需要创建一个比角色原来的碰撞体要大一点的碰撞盒用来检测是否靠近NPC。我们会创建一个大的球体包围住NPC,这样当我们靠近NPC它就会作出反应并显示消息出来。

1) 在NPC.h文件中添加如下代码:
#pragma once
#include "GameFramework/Character.h"
#include "NPC.generated.h"
UCLASS()
class DEMO1_API ANPC : public ACharacter
{
GENERATED_UCLASS_BODY()
public:
//在目录Collision下创建球体属性(随处可见,蓝图只读),用于靠近NPC的碰撞体检测
UPROPERTY(VisibleAnywhere, BlueprintReadOnly, Category = Collision)
USphereComponent* ProxSphere;
//在目录NPCMessage下创建字符串属性(随处可见,蓝图可读写)
UPROPERTY(EditAnywhere, BlueprintReadWrite, Category = NPCMessage)
FString NpcMessage;
//接近NPC时调用该函数
UFUNCTION(BlueprintNativeEvent, Category = "Collision")
void Prox(AActor* OtherActor, UPrimitiveComponent* OtherComp, int32 otherBodyIndex, bool bFromSweep,
const FHitResult & SweepResut);
};
2) 在NPC.cpp中添加如下代码:
#include "Demo1.h"
#include "NPC.h"
#include "Avatar.h"
#include "MyHUD.h"
ANPC::ANPC(const class FObjectInitializer& PCIP)
: Super(PCIP),
ProxSphere(PCIP.CreateDefaultSubobject(this, TEXT("Proximity Sphere"))),
NpcMessage("Hi!!") //设置默认消息,而且它是可以在UE4中被编辑的
{
//把球体贴合到根组件,这样球体就会跟随着NPC
ProxSphere->AttachTo(RootComponent);
//设置球体半径
ProxSphere->SetSphereRadius(200.0f);
//将检测靠近球体跟Prox函数进行重叠绑定。当球体与其他actor有交叉时就会调用Prox函数
ProxSphere->OnComponentBeginOverlap.AddDynamic(this, &ANPC::Prox);
}
//注意!虽然我们的头文件中声明是ANPC::Prox(),但是这里要写ANPC::Prox_Implementation
//当球体与其他actor发生重叠时就会调用该函数
void ANPC::Prox_Implementation(AActor* otherActor, UPrimitiveComponent* otherComp, int32 otherBodyIndex, bool bFromSweep,
const FHitResult & sweepResult)
{
//通过强制转换成AAVatar是否成功来判断是否玩家角色
if (Cast(otherActor) == nullptr)
{
return;
}
//获得第一人称控制器
APlayerController* PController = GetWorld()->GetFirstPlayerController();
if (PController)
{
//获得HUD界面
AMyHUD* hud = Cast(PController->GetHUD());
hud->AddMessage(Message(NpcMessage, 5.f, FColor::White));
}
}
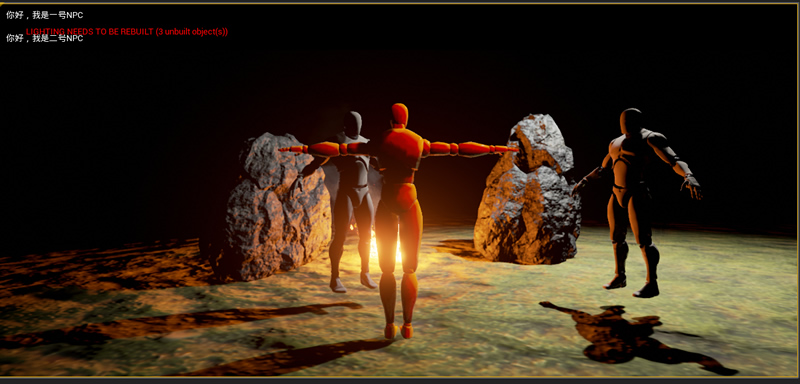
三、运行
最后你可以编译看看自己的代码是否没有问题,如果没有问题,在打开的UE4编辑器中点击运行,每当你靠近一个NPC,左上角就会显示其消息,如下图所示:


 1560
1560


 被折叠的 条评论
为什么被折叠?
被折叠的 条评论
为什么被折叠?
 到【灌水乐园】发言


