


前言
在第 6 节内容中,实现了游戏结束逻辑与玩家图片化,但跳跳兔只是一张简单的图片,显得比较呆板,本节会为跳跳兔添加上相应的动画效果,并将平台替换成相应的图片。
添加动画
跳跳兔在站立时,希望有上下蹲的动画,在走动时,希望有左右走动的动画,在跳跃时,希望有跳跃动画。
动画的本质就是不同图片间的切换,在 pygame 中要实现动画,只需要在不同帧使用不同的图片则可。
在 Player 的__init__() 方法中定义多个变量用于记录不同的状态,代码如下
# sprites.pyclassPlayer(pg.sprite.Sprite):def __init__(self, game):pg.sprite.Sprite.__init__(self)self.game = game# 不同的状态self.walking =Falseself.jumping =False# 当前帧(用于判断当前要执行哪个动画)self.current_frame =0self.last_update =0self.load_images()# 加载图片self.image = self.standing_frames[0]self.rect = self.image.get_rect()self.rect.center =(WIDTH /2, HEIGHT /2)self.pos = vec(WIDTH /2, HEIGHT /2)self.vel = vec(0,0)# 速度self.acc = vec(0,0)# 加速度
在__init__() 方法中,定义了 self.walking 与 self.jumping 状态,用于表示玩家对象是在行走状态还是跳跃状态,接着定义了 self.currentframe 用于表示当前帧,定义了 self.lastupdate 用于记录上一次的时间点,随后,编调用了 load_images () 方法来载入图片,该方法代码如下
# sprites.py/Playerdef load_images(self):# 站立状态self.standing_frames =[self.game.spritesheet.get_image(614,1063,120,191),self.game.spritesheet.get_image(690,406,120,201)]for frame in self.standing_frames:frame.set_colorkey(BLACK)# 将图像矩阵中除图像外周围的元素都设置为透明的# 走动状态self.walk_frames_r =[self.game.spritesheet.get_image(678,860,120,201),self.game.spritesheet.get_image(692,1458,120,207)]self.walk_frames_l =[]for frame in self.walk_frames_r:frame.set_colorkey(BLACK)# 水平翻转self.walk_frames_l.append(pg.transform.flip(frame,True,False))# 跳跃状态self.jump_frame = self.game.spritesheet.get_image(382,763,150,181)self.jump_frame.set_colorkey(BLACK)
在 load_images () 方法中,为不同的状态载入了不同的图片,其中,走动状态的图片还做了水平翻转处理,这是因为原始的大图中,走动的图片只有一个方向的,而走动可以往左走也可以往右走,所以需要将图片水平翻转一下。
调用 pygame.transform.flip (Surface, xbool, ybool) 用于翻转,xbool => True 为水平翻转,ybool => True 为垂直翻转。
图片准备好后,动画效果的基本素材就准备好了,在 Player 类的 update () 方法中调用动画方法。
# sprites.py/Playerdef update(self):# 动画self.animate()...def animate(self):# 获得当前过了多少毫秒now = pg.time.get_ticks()if self.vel.x !=0:# 判断速度在x轴方向是否为0,从而判断玩家对象是否移动self.walking =Trueelse:self.walking =False# 走动状态下的动画if self.walking:# 当前时间 - 上次时间 大于 180,即间隔时间大于180时if now - self.last_update >180:self.last_update = now# 当前帧 加一 与 walk_frames_l 长度取余,从而得到当前要做哪个东西self.current_frame =(self.current_frame +1)% len(self.walk_frames_l)bottom = self.rect.bottom# 向左走还是向右走if self.vel.x >0:# 当前帧要做的动作self.image = self.walk_frames_r[self.current_frame]else:self.image = self.walk_frames_l[self.current_frame]self.rect = self.image.get_rect()self.rect.bottom = bottom# 站立状态下的动画ifnot self.jumping andnot self.walking:if now - self.last_update >350:self.last_update = nowself.current_frame =(self.current_frame +1)% len(self.standing_frames)bottom = self.rect.bottomself.image = self.standing_frames[self.current_frame]self.rect = self.image.get_rect()self.rect.bottom = bottom
在 pygame 中的时间是以毫秒(千分之一秒)表示的,通过 pygame.time.get_ticks 函数可以获得 pygame.init 后经过的时间的毫秒数。
随后的逻辑通过注释可以比较简单的理解。判断当前时间与上一层记录时间的间隔,如果满足条件,则只需图片的切换逻辑,注意,时间都是毫秒级的。
切换图片的核心逻辑就是当前帧与图片列表长度取余,获得下标,通过下标去取列表中的图片。
走动时效果如下:

有个细节需要注意,在判断玩家对象是否是走动状态时,利用了速度变量的 x 轴是否为 0 来判断
if self.vel.x !=0:# 判断速度在x轴方向是否为0,从而判断玩家对象是否移动self.walking =Trueelse:self.walking =False
但 self.vel.x 通常不会为 0,所以需要处理一下,修改一下 update () 方法中的逻辑,代码如下
def update(self):# 动画self.animate()self.acc = vec(0, PLAYER_GRAV)keys = pg.key.get_pressed()if keys[pg.K_LEFT]:self.acc.x =-PLAYER_ACCif keys[pg.K_RIGHT]:self.acc.x = PLAYER_ACC# 获得加速度self.acc.x += self.vel.x * PLAYER_FRICTION# 速度与加速度self.vel += self.acc# 如果速度小于0.1,则速度为0(比如这样设置,不然速度永远无法0)if abs(self.vel.x)<0.1:self.vel.x =0self.pos += self.vel +0.5* self.acc# wrap around the sides of the screenif self.pos.x > WIDTH:self.pos.x =0if self.pos.x <0:self.pos.x = WIDTHself.rect.midbottom = self.pos
如果 self.vel.x 的绝对值小于 0.1,则让 self.vel.x 为 0。
平台图片化
跳跳兔要跳跃到相应的平台上,现在平依旧是方块,这里以相同的方式将平台替换成相应的图片。
在 Platform 的__init__() 中,实现载入图片的逻辑,代码如下
classPlatform(pg.sprite.Sprite):def __init__(self, game, x, y):pg.sprite.Sprite.__init__(self)self.game = game# 载入图片images =[self.game.spritesheet.get_image(0,288,380,94),self.game.spritesheet.get_image(213,1662,201,100)]# 随机选择一种self.image = random.choice(images)self.image.set_colorkey(BLACK)self.rect = self.image.get_rect()self.rect.x = xself.rect.y = y
载入完图片,随机选择一个图片作为样式,需要注意,我们修改了__init__() 的参数,此时该方法只需要获得 (x,y) 坐标以及 game 实例则可。
因为__init__() 被修改了,所以实例化逻辑也要修改一下。
#setting.py# 起始平台PLATFORM_LIST =[(0, HEIGHT -60),(WIDTH /2-50, HEIGHT *3/4-50),(125, HEIGHT -350),(350,200),(175,100)]# main.py/Gamedef new(self):self.score =0self.all_sprites = pg.sprite.Group()self.platforms = pg.sprite.Group()self.player =Player(self)self.all_sprites.add(self.player)for plat in PLATFORM_LIST:p =Platform(self,*plat)self.all_sprites.add(p)self.platforms.add(p)self.run()def update(self):# ...# 判断平台数,产生新的平台while len(self.platforms)<6:width = random.randrange(50,100)# 平台虽然是随机生成的,但会生成在某一个范围内p =Platform(self, random.randrange(0, WIDTH - width),random.randrange(-75,-30))self.platforms.add(p)self.all_sprites.add(p)
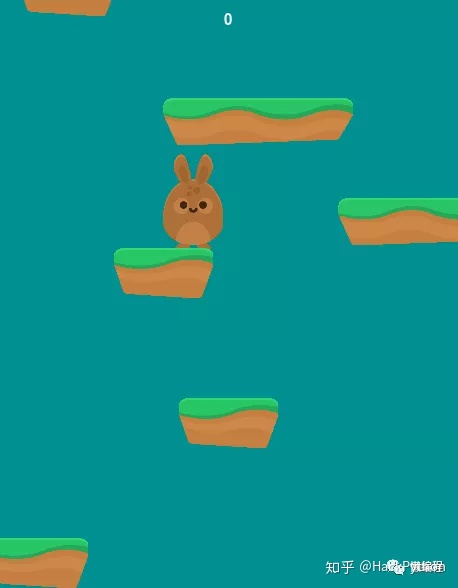
最终效果如下
尾
在本节中,我们实现了玩家对象的动画效果以及平台的图片化。
因为考虑到篇幅,文中没有给出完整的代码,但为了方便大家理解,我将相应的代码上传到了 github
https://github.com/ayuLiao/jumprabbit
如果文章对你有帮助或你觉得有点意思,点击「在看」支持作者一波。


 5887
5887

 被折叠的 条评论
为什么被折叠?
被折叠的 条评论
为什么被折叠?
 到【灌水乐园】发言


