


petalinux的文件系统为 INITRAMFS 配置比较简单,官方文档有对应的配置,可以按照文档进行配置,但是配置为jffs2会有一些问题;
下面是配置INITRAMFS后对应一些修改
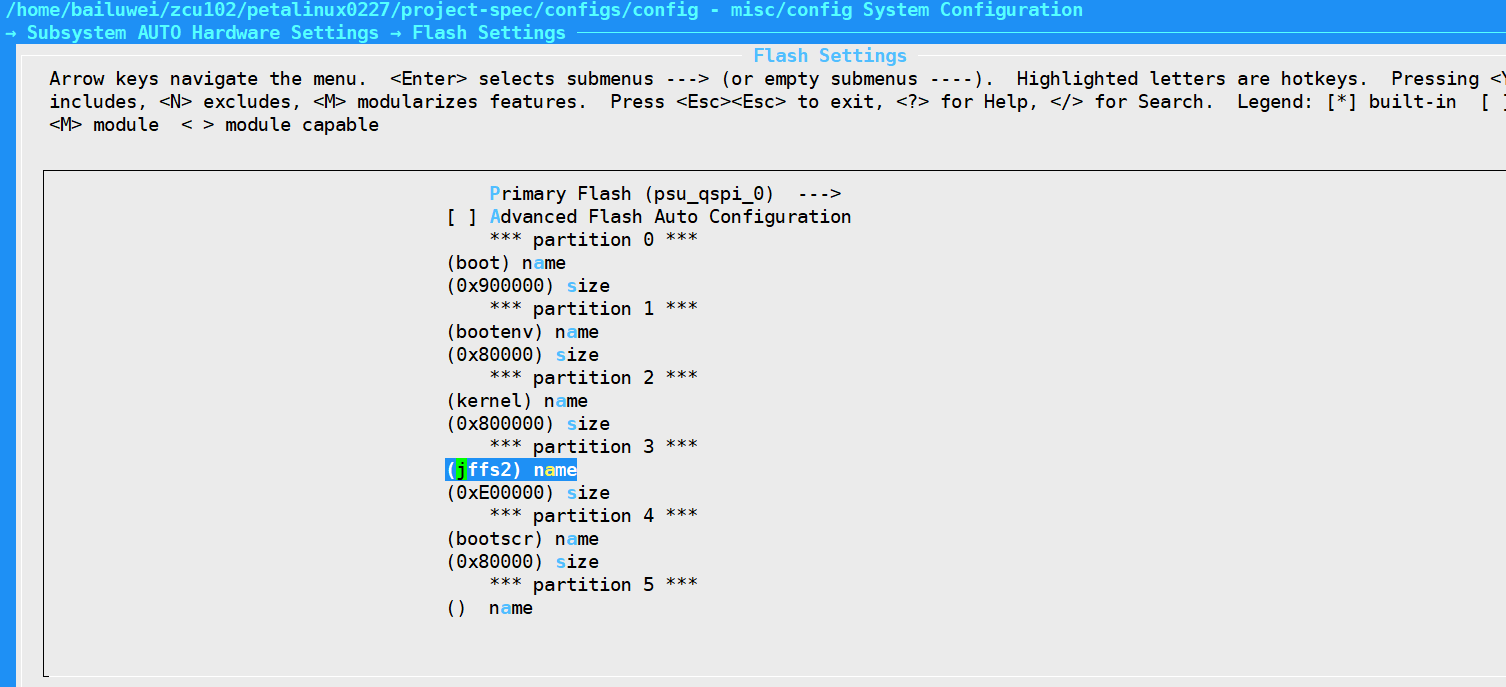
1.需要配置petalinux-config配置flash分区,添加jffs2和bootscr
2.bootargs可以使用默认或者自己配置
earlycon console=ttyPS0,115200 clk_ignore_unused root=mtd:jffs2 rw rootfstype=jffs2
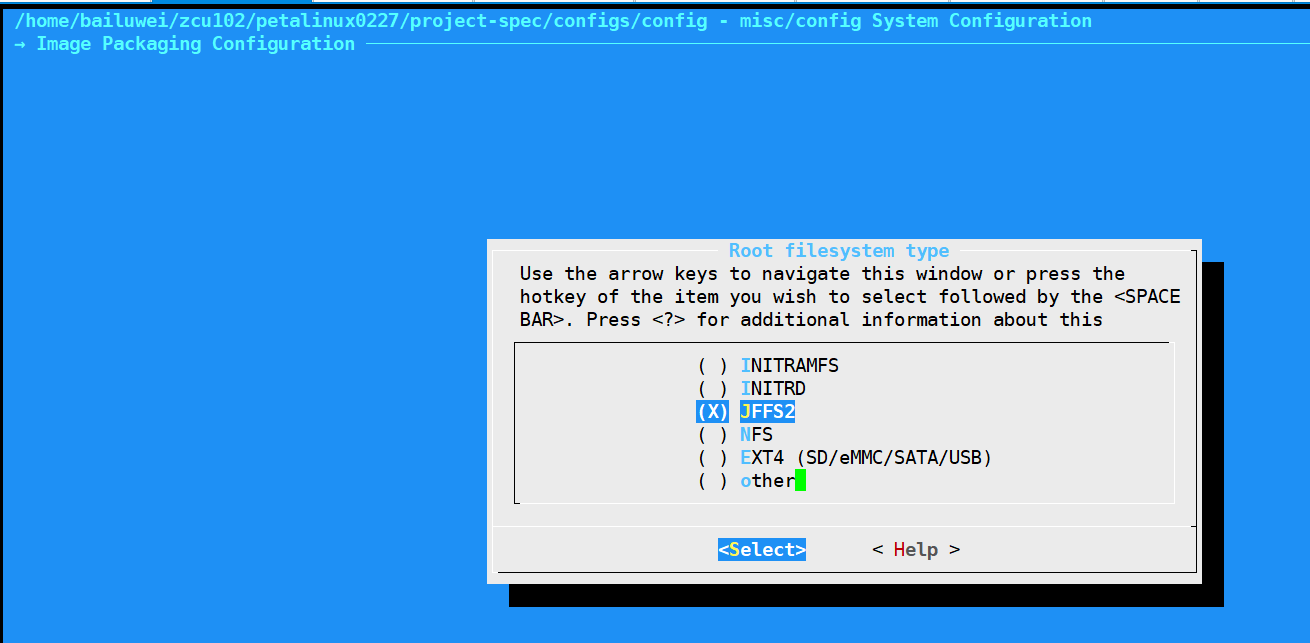
3.配置文件系统格式
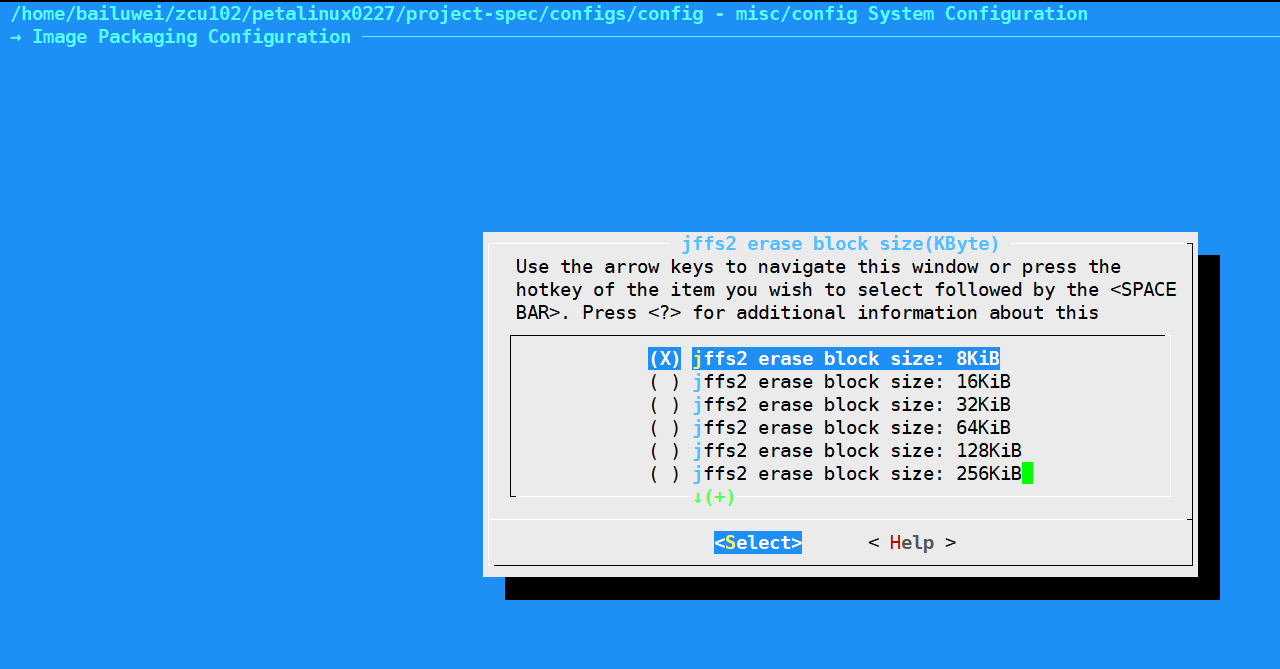
配置文件系统擦除block大小,很多文旦说是64K,但是我验证有问题,修改为8K后功能正常;
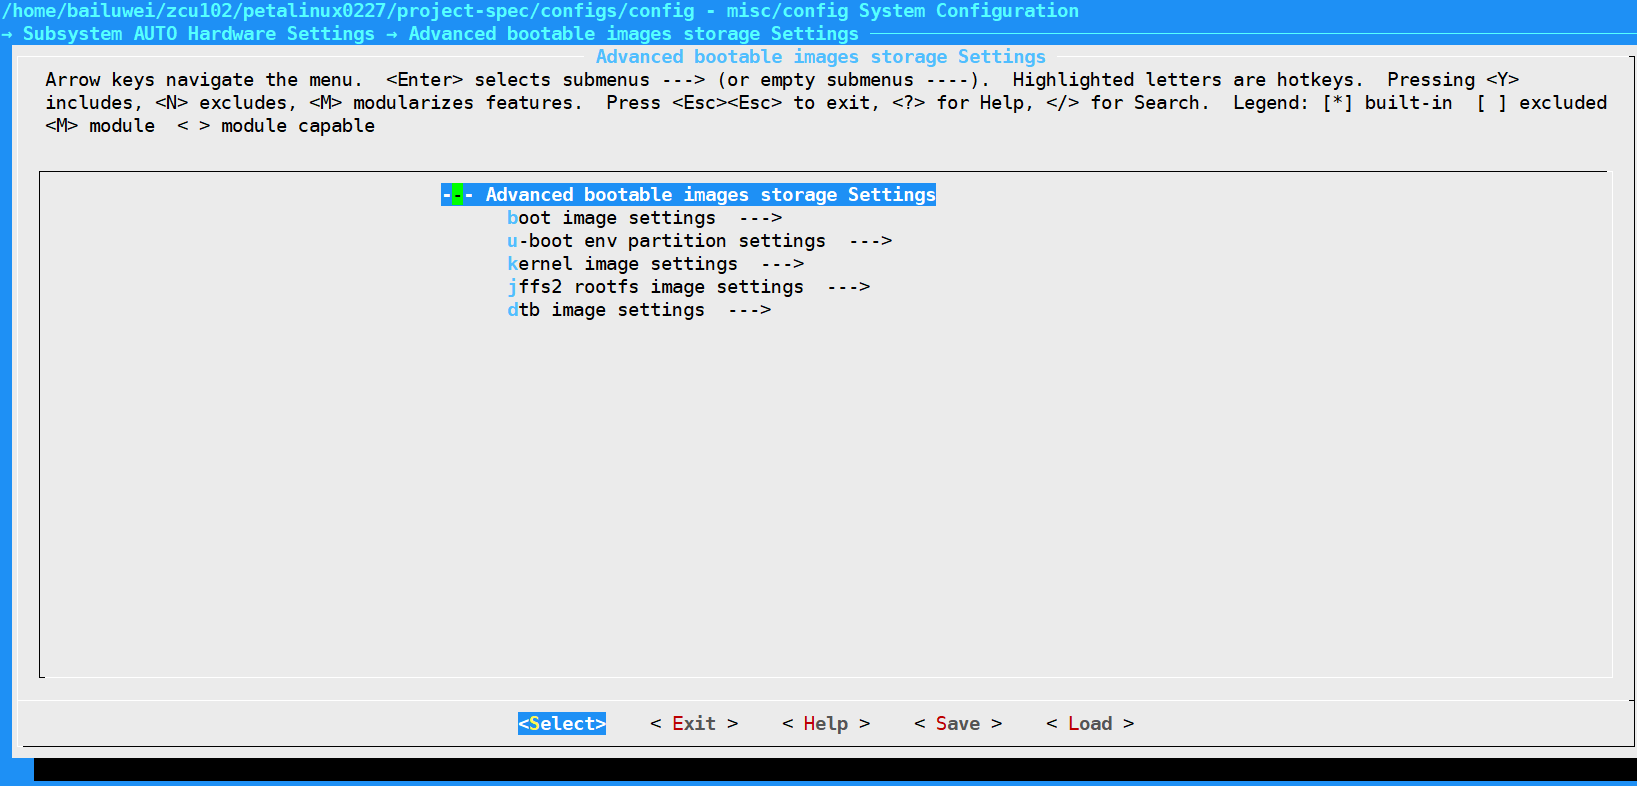
4.配置启动介质,下面的bootimage和kernel image setting都选择flash
5.设备树的修改:
文件project-spec/meta-user/recipes-bsp/device-tree/files/system-user.dtsi中添加如下:
&qspi {
status = "okay";
flash@0 {
compatible = "m25p80";
#address-cells = <1>;
#size-cells = <1>;
reg = <0x0>;
spi-tx-bus-width = <1>;
spi-rx-bus-width = <4>;
spi-max-frequency = <108000000>;
partition@0 {
reg = <0x00000000 0x00900000>;
label = "boot";
};
partition@1 {
reg = <0x00900000 0x00080000>;
label = "bootenv";
};
partition@2 {
reg = <0x00980000 0x00800000>;
label = "kernel";
};
partition@3 {
reg = <0x01180000 0x00e00000>;
label = "jffs2";
};
partition@4 {
reg = <0x01f80000 0x00080000>;
label = "bootscr";
};
};
};
配置和上面flash分区一样即可;
6.修改kernel启动地址和大小
文件project-spec/meta-user/recipes-bsp/u-boot/u-boot-zynq-scr.bbappend,下面红色方框内分别对应kernel启动地址和大小和分区表中一致

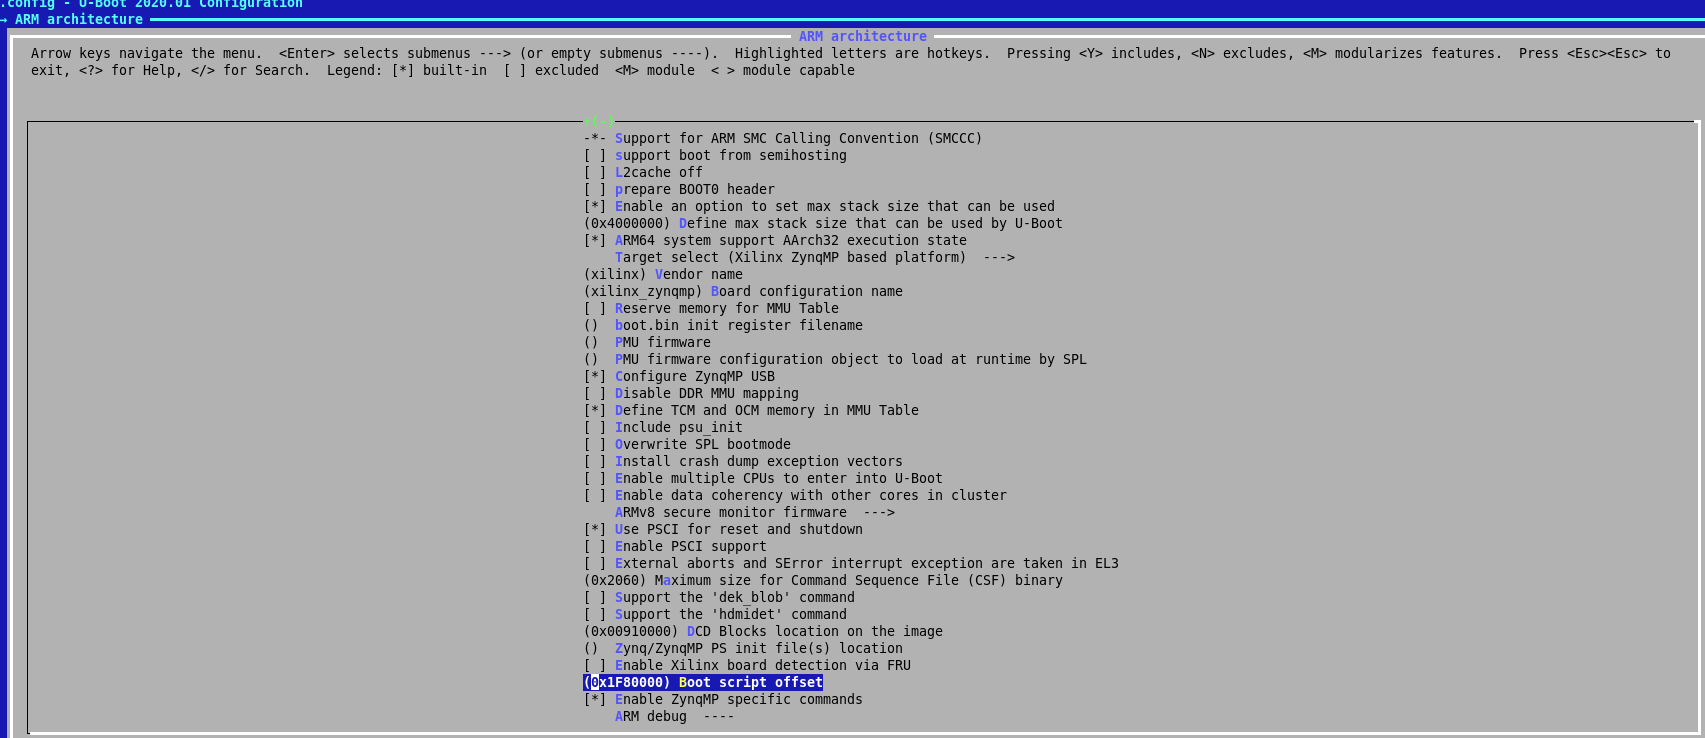
7.修改uboot启动后加载地址
petalinux-config -c u-boot命令进入uboot配置,配置地址为bootscr的起始地址
8.petalinux-build编译程序,成功后使用petalinux-package --boot --fsbl ./images/linux/zynqmp_fsbl.elf --u-boot --kernel --add images/linux/rootfs.jffs2 --offset 0x01180000 --add ./images/linux/boot.scr --offset 0x01f80000 --force
打包程序,然后下载到板子中运行,会出现下面的错误
[ 12.798039] jffs2: Perhaps the file system was created with the wrong erase size?
[ 12.805633] jffs2: jffs2_scan_eraseblock(): Magic bitmask 0x1985 not found at 0x00084000: 0xa164 instead
[ 12.815108] jffs2: jffs2_scan_eraseblock(): Magic bitmask 0x1985 not found at 0x00084004: 0x7699 instead
[ 12.824576] jffs2: jffs2_scan_eraseblock(): Magic bitmask 0x1985 not found at 0x00084008: 0xca28 instead
解决这个问题需要进入编译工程的images/linux中,用下面命令重新打包root.jffs2
tar zxvf rootfs.tar.gz -C rootfs
mkfs.jffs2 --root=rootfs --eraseblock=0x2000 -p -o rootfs.jffs2
然后重新打包编译程序为BOOT.BIN下载到板子后运行正常;


 4051
4051


 被折叠的 条评论
为什么被折叠?
被折叠的 条评论
为什么被折叠?
 到【灌水乐园】发言


