


文章目录
实验环境
完成初始化集群的环境:
(vms21)192.168.26.21——master1
(vms22)192.168.26.22——worker1
(vms23)192.168.26.23——worker2
一、什么是helm?为什么需要helm?
当我们搭建一个应用时,如搭建一个wordpress应用,同时需要连接mysql数据库
如下图:
我们需要给mysql应用配置一个pvc(持久卷),也需要给mysql应用配置一个svc(dbsvc),同样,对于wordpress应用也需要配一个pvc(持久卷)和一个svc(websvc)

这样的一个部署流程,稍显得有些繁琐,有没有更简便的方式呢?
——能否把部署这些应用的过程,及所需要的参数文件等放在一个文件夹里,部署的时候,直接运行此文件夹,即可按照文件夹里所定义的步骤去实施(类似一键安装)
也许把部署的步骤写入此文件夹的时候比较麻烦,但部署的时候就方便很多了
——helm可以帮助我们来实现这个功能(一键安装)
打包了许多东西的这个文件夹称为chart
把chart再打包成一个压缩文件package,在互联网中,有许多人家写好的、开放的chart的package源、仓库
helm是类似于kubectl的一个客户端工具
在k8s环境中,helm来设置应用哪个package源、仓库,就可以根据需要,从远端仓库中直接拉取chart下来进行一键部署

二、helm安装
(1)下载地址:https://github.com/helm/helm/releases/tag/v3.2.1
下载helm-v3.2.1-linux-amd64.tar.gz
(2)拷贝到vms21家目录中
(3)解压
tar zxf helm-v3.2.1-linux-amd64.tar.gz
(4)只需要解压出来的linux-amd64/helm这个文件,将其拷贝到/usr/bin/下
cp linux-amd64/helm /usr/bin/
(5)测试
查看helm版本
helm version
#输出:
version.BuildInfo{Version:"v3.2.1", GitCommit:"fe51cd1e31e6a202cba7dead9552a6d418ded79a", GitTreeState:"clean", GoVersion:"go1.13.10"}
(6)设置helm可以使用tab键补全子命令
编辑 /etc/profile
vim /etc/profile
#在“# /etc/profile”下插入:
source <(helm completion bash)
生效设置
source /etc/profile
三、配置helm的chart仓库
添加源的语法
helm repo add [名称] [URL地址]
添加一个阿里镜像源
helm repo add ali https://kubernetes.oss-cn-hangzhou.aliyuncs.com/charts
再添加一个azure的源
helm repo add azure http://mirror.azure.cn/kubernetes/charts
查看当前仓库(源)列表
helm repo list
#输出:
NAME 	URL
ali  	https://kubernetes.oss-cn-hangzhou.aliyuncs.com/charts
azure	http://mirror.azure.cn/kubernetes/charts
删除某个源
helm repo remove [名称]
四、拉取chart压缩包(package)、一键部署
假设我们要拉取mysql的一键部署的包
首先搜索mysql有关的包
helm search repo mysql

#输出:
NAME                           	CHART VERSION	APP VERSION	DESCRIPTION
ali/mysql                      	0.3.5        	           	Fast, reliable, scalable, and easy to use open-...
azure/mysql                    	1.6.9        	5.7.30     	DEPRECATED - Fast, reliable, scalable, and easy...
azure/mysqldump                	2.6.2        	2.4.1      	DEPRECATED! - A Helm chart to help backup MySQL...
azure/prometheus-mysql-exporter	0.7.1        	v0.11.0    	DEPRECATED A Helm chart for prometheus mysql ex...
ali/percona                    	0.3.0        	           	free, fully compatible, enhanced, open source d...
ali/percona-xtradb-cluster     	0.0.2        	5.7.19     	free, fully compatible, enhanced, open source d...
azure/percona                  	1.2.3        	5.7.26     	DEPRECATED - free, fully compatible, enhanced, ...
azure/percona-xtradb-cluster   	1.0.8        	5.7.19     	DEPRECATED - free, fully compatible, enhanced, ...
azure/phpmyadmin               	4.3.5        	5.0.1      	DEPRECATED phpMyAdmin is an mysql administratio...
ali/gcloud-sqlproxy            	0.2.3        	           	Google Cloud SQL Proxy
ali/mariadb                    	2.1.6        	10.1.31    	Fast, reliable, scalable, and easy to use open-...
azure/gcloud-sqlproxy          	0.6.1        	1.11       	DEPRECATED Google Cloud SQL Proxy
azure/mariadb                  	7.3.14       	10.3.22    	DEPRECATED Fast, reliable, scalable, and easy t...
这里我们选择azure/mysql(chart version:1.6.9,app version:5.7.30)这个包
可以直接进行一键部署
helm install [名字] zaure/mysql
或者,我们认为这上面的并不符合我们的需求,那么我们可以设置更多的自定义参数,来拉取特定的包
例如不指定版本号,则默认拉取最新的1.6.9的版本,但是我们想拉取1.6.4的版本的包,如下:
helm pull azure/mysql --version=1.6.4
解压这个包
tar zxf mysql-1.6.4.tgz
#输出:
tar: mysql/Chart.yaml:不可信的旧时间戳 1970-01-01 08:00:00
tar: mysql/values.yaml:不可信的旧时间戳 1970-01-01 08:00:00
tar: mysql/templates/NOTES.txt:不可信的旧时间戳 1970-01-01 08:00:00
tar: mysql/templates/_helpers.tpl:不可信的旧时间戳 1970-01-01 08:00:00
tar: mysql/templates/configurationFiles-configmap.yaml:不可信的旧时间戳 1970-01-01 08:00:00
tar: mysql/templates/deployment.yaml:不可信的旧时间戳 1970-01-01 08:00:00
tar: mysql/templates/initializationFiles-configmap.yaml:不可信的旧时间戳 1970-01-01 08:00:00
tar: mysql/templates/pvc.yaml:不可信的旧时间戳 1970-01-01 08:00:00
tar: mysql/templates/secrets.yaml:不可信的旧时间戳 1970-01-01 08:00:00
tar: mysql/templates/serviceaccount.yaml:不可信的旧时间戳 1970-01-01 08:00:00
tar: mysql/templates/servicemonitor.yaml:不可信的旧时间戳 1970-01-01 08:00:00
tar: mysql/templates/svc.yaml:不可信的旧时间戳 1970-01-01 08:00:00
tar: mysql/templates/tests/test-configmap.yaml:不可信的旧时间戳 1970-01-01 08:00:00
tar: mysql/templates/tests/test.yaml:不可信的旧时间戳 1970-01-01 08:00:00
tar: mysql/.helmignore:不可信的旧时间戳 1970-01-01 08:00:00
tar: mysql/README.md:不可信的旧时间戳 1970-01-01 08:00:00
解压后,就获得了chart文件夹,这里即“mysql”
ls

#输出:
mysql mysql-1.6.4.tgz

#mysql-1.6.4.tgz用不到了,删除它
rm -rf mysql-1.6.4.tgz
若想重新给chart文件夹打包,语法为:
helm package [chart文件名]
#这里为:
helm package mysql/
一键部署
helm install [名称] [chart目录名]
在部署前我们先来查看chart文件夹里的内容,并做一些自定义修改
五、查看helm部署的应用列表
helm ls
六、chart文件夹结构
结合之前的例子,我们查看mysql的chart文件结构
ls mysql/
#输出:
Chart.yaml  README.md  templates  values.yaml
一、Chart.yaml文件结构如下:
apiVersion: v1
appVersion: 5.7.30
description: Fast, reliable, scalable, and easy to use open-source relational database
  system.
engine: gotpl
home: https://www.mysql.com/
icon: https://www.mysql.com/common/logos/logo-mysql-170x115.png
keywords:
- mysql
- database
- sql
maintainers:
- email: o.with@sportradar.com
  name: olemarkus
- email: viglesias@google.com
  name: viglesiasce
name: mysql
sources:
- https://github.com/kubernetes/charts
- https://github.com/docker-library/mysql
version: 1.6.4
description——定义描述信息,可以随便自己写
version——定义版本号
README.md文件中给我们提供了一些帮助、文档
二、values.yaml文件中可以定义持久性存储、svc、pod、变量、探针等
## mysql image version
## ref: https://hub.docker.com/r/library/mysql/tags/
##
image: "mysql"
imageTag: "5.7.30"

strategy:
  type: Recreate

busybox:
  image: "busybox"
  tag: "1.31.1"

testFramework:
  enabled: true
  image: "dduportal/bats"
  tag: "0.4.0"

## Specify password for root user
##
## Default: random 10 character string
# mysqlRootPassword: testing

## Create a database user
##
# mysqlUser:
## Default: random 10 character string
# mysqlPassword:

## Allow unauthenticated access, uncomment to enable
##
# mysqlAllowEmptyPassword: true

## Create a database
##
# mysqlDatabase:

## Specify an imagePullPolicy (Required)
## It's recommended to change this to 'Always' if the image tag is 'latest'
## ref: http://kubernetes.io/docs/user-guide/images/#updating-images
##
imagePullPolicy: IfNotPresent

## Additionnal arguments that are passed to the MySQL container.
## For example use --default-authentication-plugin=mysql_native_password if older clients need to
## connect to a MySQL 8 instance.
args: []

extraVolumes: |
  # - name: extras
  #   emptyDir: {}

extraVolumeMounts: |
  # - name: extras
  #   mountPath: /usr/share/extras
  #   readOnly: true

extraInitContainers: |
  # - name: do-something
  #   image: busybox
  #   command: ['do', 'something']

# Optionally specify an array of imagePullSecrets.
# Secrets must be manually created in the namespace.
# ref: https://kubernetes.io/docs/concepts/containers/images/#specifying-imagepullsecrets-on-a-pod
# imagePullSecrets:
  # - name: myRegistryKeySecretName

## Node selector
## ref: https://kubernetes.io/docs/concepts/configuration/assign-pod-node/#nodeselector
nodeSelector: {}

## Affinity
## ref: https://kubernetes.io/docs/concepts/configuration/assign-pod-node/#affinity-and-anti-affinity
affinity: {}

## Tolerations for pod assignment
## Ref: https://kubernetes.io/docs/concepts/configuration/taint-and-toleration/
##
tolerations: []

livenessProbe:
  initialDelaySeconds: 30
  periodSeconds: 10
  timeoutSeconds: 5
  successThreshold: 1
  failureThreshold: 3

readinessProbe:
  initialDelaySeconds: 5
  periodSeconds: 10
  timeoutSeconds: 1
  successThreshold: 1
  failureThreshold: 3

## Persist data to a persistent volume
persistence:
  enabled: true
  ## database data Persistent Volume Storage Class
  ## If defined, storageClassName: <storageClass>
  ## If set to "-", storageClassName: "", which disables dynamic provisioning
  ## If undefined (the default) or set to null, no storageClassName spec is
  ##   GKE, AWS & OpenStack)
  ##
  # storageClass: "-"
  accessMode: ReadWriteOnce
  size: 8Gi
  annotations: {}

## Use an alternate scheduler, e.g. "stork".
## ref: https://kubernetes.io/docs/tasks/administer-cluster/configure-multiple-schedulers/
##
# schedulerName:

## Security context
securityContext:
  enabled: false
  runAsUser: 999
  fsGroup: 999

## Configure resource requests and limits
## ref: http://kubernetes.io/docs/user-guide/compute-resources/
##
resources:
  requests:
    memory: 256Mi
    cpu: 100m

# Custom mysql configuration files path
configurationFilesPath: /etc/mysql/conf.d/

# Custom mysql configuration files used to override default mysql settings
configurationFiles: {}
#  mysql.cnf: |-
#    [mysqld]
#    skip-name-resolve
#    ssl-ca=/ssl/ca.pem
#    ssl-cert=/ssl/server-cert.pem
#    ssl-key=/ssl/server-key.pem

# Custom mysql init SQL files used to initialize the database
initializationFiles: {}
#  first-db.sql: |-
#    CREATE DATABASE IF NOT EXISTS first DEFAULT CHARACTER SET utf8 DEFAULT COLLATE utf8_general_ci;
#  second-db.sql: |-
#    CREATE DATABASE IF NOT EXISTS second DEFAULT CHARACTER SET utf8 DEFAULT COLLATE utf8_general_ci;

metrics:
  enabled: false
  image: prom/mysqld-exporter
  imageTag: v0.10.0
  imagePullPolicy: IfNotPresent
  resources: {}
  annotations: {}
    # prometheus.io/scrape: "true"
    # prometheus.io/port: "9104"
  livenessProbe:
    initialDelaySeconds: 15
    timeoutSeconds: 5
  readinessProbe:
    initialDelaySeconds: 5
    timeoutSeconds: 1
  flags: []
  serviceMonitor:
    enabled: false
    additionalLabels: {}

## Configure the service
## ref: http://kubernetes.io/docs/user-guide/services/
service:
  annotations: {}
  ## Specify a service type
  ## ref: https://kubernetes.io/docs/concepts/services-networking/service/#publishing-services---service-types
  type: ClusterIP
  port: 3306
  # nodePort: 32000
  # loadBalancerIP:

## Pods Service Account
## ref: https://kubernetes.io/docs/tasks/configure-pod-container/configure-service-account/
serviceAccount:
  ## Specifies whether a ServiceAccount should be created
  ##
  create: false
  ## The name of the ServiceAccount to use.
  ## If not set and create is true, a name is generated using the mariadb.fullname template
  # name:

ssl:
  enabled: false
  secret: mysql-ssl-certs
  certificates:
#  - name: mysql-ssl-certs
#    ca: |-
#      -----BEGIN CERTIFICATE-----
#      ...
#      -----END CERTIFICATE-----
#    cert: |-
#      -----BEGIN CERTIFICATE-----
#      ...
#      -----END CERTIFICATE-----
#    key: |-
#      -----BEGIN RSA PRIVATE KEY-----
#      ...
#      -----END RSA PRIVATE KEY-----

## Populates the 'TZ' system timezone environment variable
## ref: https://dev.mysql.com/doc/refman/5.7/en/time-zone-support.html
##
## Default: nil (mysql will use image's default timezone, normally UTC)
## Example: 'Australia/Sydney'
# timezone:

# Deployment Annotations
deploymentAnnotations: {}

# To be added to the database server pod(s)
podAnnotations: {}
podLabels: {}

## Set pod priorityClassName
# priorityClassName: {}


## Init container resources defaults
initContainer:
  resources:
    requests:
      memory: 10Mi
      cpu: 10m
(1)image、imageTag——定义镜像及标签,可以按需要修改为自己本地的镜像
这里我们修改为自己的mysql镜像
...
image: "hub.c.163.com/library/mysql"
imageTag: "latest"
...
busybox的镜像也改为我们本地的
...
busybox:
  image: "busybox"
  tag: "latest"
...
(2)将testFramework改为false
...
testFramework:
  enabled: false
  image: "dduportal/bats"
  tag: "0.4.0"
...
(3)将mysqlRootPassword注释取消,并赋值为root
...
mysqlRootPassword: root
...
(4)将persistence改为false,不配置持久性存储
...
persistence:
  enabled: false
...
三、templates目录下为模板,定义了各种资源的模板
ls templates/
#输出:
configurationFiles-configmap.yaml  _helpers.tpl                        NOTES.txt  secrets.yaml         servicemonitor.yaml  tests
deployment.yaml                    initializationFiles-configmap.yaml  pvc.yaml   serviceaccount.yaml  svc.yaml
例如我们查看svc.yaml
apiVersion: v1
kind: Service
metadata:
  name: {{ template "mysql.fullname" . }}
  namespace: {{ .Release.Namespace }}
  labels:
    app: {{ template "mysql.fullname" . }}
    chart: "{{ .Chart.Name }}-{{ .Chart.Version }}"
    release: "{{ .Release.Name }}"
    heritage: "{{ .Release.Service }}"
  annotations:
{{- if .Values.service.annotations }}
{{ toYaml .Values.service.annotations | indent 4 }}
{{- end }}
{{- if and (.Values.metrics.enabled) (.Values.metrics.annotations) }}
{{ toYaml .Values.metrics.annotations | indent 4 }}
{{- end }}
spec:
  type: {{ .Values.service.type }}
  {{- if (and (eq .Values.service.type "LoadBalancer") (not (empty .Values.service.loadBalancerIP))) }}
  loadBalancerIP: {{ .Values.service.loadBalancerIP }}
  {{- end }}
  ports:
  - name: mysql
    port: {{ .Values.service.port }}
    targetPort: mysql
    {{- if .Values.service.nodePort }}
    nodePort: {{ .Values.service.nodePort }}
    {{- end }}
  {{- if .Values.metrics.enabled }}
  - name: metrics
    port: 9104
    targetPort: metrics
  {{- end }}
  selector:
    app: {{ template "mysql.fullname" . }}
这里面的配置的值,都是以变量的方式,并没有写死
如spec.type的值为{{ .Values.service.type }},意味取values.yaml文件中的service.type字段的值
一键部署这个mysql
helm install db mysql
#输出:
NAME: db
LAST DEPLOYED: Wed Aug 10 12:01:50 2022
NAMESPACE: default
STATUS: deployed
REVISION: 1
TEST SUITE: None
NOTES:
MySQL can be accessed via port 3306 on the following DNS name from within your cluster:
db-mysql.default.svc.cluster.local

To get your root password run:

    MYSQL_ROOT_PASSWORD=$(kubectl get secret --namespace default db-mysql -o jsonpath="{.data.mysql-root-password}" | base64 --decode; echo)

To connect to your database:

1. Run an Ubuntu pod that you can use as a client:

    kubectl run -i --tty ubuntu --image=ubuntu:16.04 --restart=Never -- bash -il

2. Install the mysql client:

    $ apt-get update && apt-get install mysql-client -y

3. Connect using the mysql cli, then provide your password:
    $ mysql -h db-mysql -p

To connect to your database directly from outside the K8s cluster:
    MYSQL_HOST=127.0.0.1
    MYSQL_PORT=3306

    # Execute the following command to route the connection:
    kubectl port-forward svc/db-mysql 3306

    mysql -h ${MYSQL_HOST} -P${MYSQL_PORT} -u root -p${MYSQL_ROOT_PASSWORD}
查看当前一键部署的应用
helm ls
#输出:
NAME	NAMESPACE	REVISION	UPDATED                                	STATUS  	CHART      	APP VERSION
db  	default  	1       	2022-08-10 12:01:50.031656616 +0800 CST	deployed	mysql-1.6.4	5.7.30
查看pod、svc,可以看到一键部署自动创建了一系列的资源
kubectl get pods
#输出:
NAME                       READY   STATUS     RESTARTS   AGE
db-mysql-fbb49f99d-shtkt   1/1     Running    0          2m57s

kubectl get svc
#输出:
NAME         TYPE        CLUSTER-IP     EXTERNAL-IP   PORT(S)    AGE
db-mysql     ClusterIP   10.100.227.1   <none>        3306/TCP   3m1s
测试连接这个mysql服务
mysql -u root -p root -h 10.100.227.1
七、helm删除某个一键部署的应用
helm del [应用名称]
删除刚刚部署的mysql应用
helm del db
实验:搭建私有的chart仓库
首先需要一个web服务器,这里实验就将vms23作为服务器,在vms23上创建一个容器,在vms23上创建一个数据卷,映射到容器中的/usr/share/nginx/html/mycharts,将这个路径作为chart存储路径

(1)vms23上创建目录/mycharts
mkdir /mycharts
(2)安装cni网络插件
wget https://github.com/containernetworking/plugins/releases/download/v1.1.1/cni-plugins-linux-amd64-v1.1.1.tgz

mkdir -p /opt/cni/bin/
tar zxf cni-plugins-linux-amd64-v1.1.1.tgz -C /opt/cni/bin/
(3)使用nginx镜像创建一个容器
名为web1、容器端口80映射宿主机端口8080、创建数据卷容器路径/usr/share/nginx/html/mycharts映射宿主机/mycharts
nerdctl run -d --name=web1 --restart=always -p 8080:80 -v /mycharts:/usr/share/nginx/html/mycharts nginx
查看容器是否创建成功
nerdctl ps
#输出:
CONTAINER ID    IMAGE                             COMMAND                   CREATED          STATUS    PORTS                   NAMES
54d206e3ea04    docker.io/library/nginx:latest    "/docker-entrypoint.…"    6 seconds ago    Up        0.0.0.0:8080->80/tcp    web1
(4)来到master上,将mysql这个chart文件夹打包为mysql-1.6.4.tgz,并建立这个chart包的索引
#打包
helm package mysql/
#创建索引,因为包文件在当前目录,所以用".",--url 指定chart私有仓库地址
helm repo index . --url http://192.168.26.23:8080/mycharts
索引创建后,会生成一个index.yaml索引文件
index.yaml文件内容如下:
apiVersion: v1
entries:
  mysql:
  - apiVersion: v1
    appVersion: 5.7.30
    created: "2022-08-10T14:23:59.744727339+08:00"
    description: Fast, reliable, scalable, and easy to use open-source relational
      database system.
    digest: de00724d86a6d2ee84e0429ad9c665e83b721908ba8205b4278bf1c896716813
    home: https://www.mysql.com/
    icon: https://www.mysql.com/common/logos/logo-mysql-170x115.png
    keywords:
    - mysql
    - database
    - sql
    maintainers:
    - email: o.with@sportradar.com
      name: olemarkus
    - email: viglesias@google.com
      name: viglesiasce
    name: mysql
    sources:
    - https://github.com/kubernetes/charts
    - https://github.com/docker-library/mysql
    urls:
    - http://192.168.26.23:8080/mycharts/mysql-1.6.4.tgz
    version: 1.6.4
generated: "2022-08-10T14:23:59.743589025+08:00"
索引文件里记录了包的信息
如果后面增加了新的包的话,需要重新建立这样的索引文件
(5)将索引文件index.yaml、chart包文件mysql-1.6.4.tgz拷贝至vms23的mycharts数据卷下
scp index.yaml mysql-1.6.4.tgz 192.168.26.23:/mycharts
(6)来到vms23上,检验宿主机/mycharts目录下文件、容器/usr/share/nginx/html/mycharts下文件
ls /mycharts/
nerdctl exec -it web1 ls /usr/share/nginx/html/mycharts
(7)master上helm工具添加chart仓库源(添加这个私有的仓库源)
helm repo add mychart http://192.168.16.23:8080/mycharts
现在查看当前仓库(源)列表,就有了我们自己私有chart仓库mychart
helm repo list
#输出:
NAME 	URL
ali  	https://kubernetes.oss-cn-hangzhou.aliyuncs.com/charts
azure	http://mirror.azure.cn/kubernetes/charts
mychart http://192.168.26.23:8080/mycharts
八、使用helm部署监控
所有的监控软件的架构都类似如下:

普罗米修斯(prometheus)监控工具
prometheus框架如下图:

监控的项目叫做target
exporter:收集数据、提供metrics数据接口
prometheus server:服务端,进行数据汇总,内置画图工具,但是比较粗糙,因此使用更专业的工具grafana
grafana:第三方画图工具
alertmanager:报警器
prometheus的框架更适用于传统架构,并不太适合k8s架构(k8s中可能需要监测不同的pod、不同的命名空间、节点等)
所以基于prometheus,改编出了prometheus operator框架,专门应用于k8s的环境
prometheus operator架构如下:

部署prometheus operator:
(1)各个节点上拉取prometheus operator所需镜像
nerdctl pull quay.io/prometheus/alertmanager:v0.22.2
nerdctl pull quay.io/prometheus-operator/prometheus-config-reloader:v0.52.0
nerdctl pull quay.io/prometheus-operator/prometheus-operator:v0.52.0
nerdctl pull quay.io/prometheus/node-exporter:v1.2.2
nerdctl pull quay.io/kiwigrid/k8s-sidecar:1.14.2
nerdctl pull quay.io/prometheus/prometheus:v2.28.1
nerdctl pull k8s.gcr.io/kube-state-metrics/kube-state-metrics:v2.2.0
nerdctl pull docker.io/grafana/grafana:8.2.3
nerdctl pull k8s.gcr.io/ingress-nginx/kube-webhook-certgen:v1.0
(2)拉取prometheus operator的chart包
由于阿里的和azure中的prometheus的chart源都比较老了,因此我们可以去官方仓库中存在源
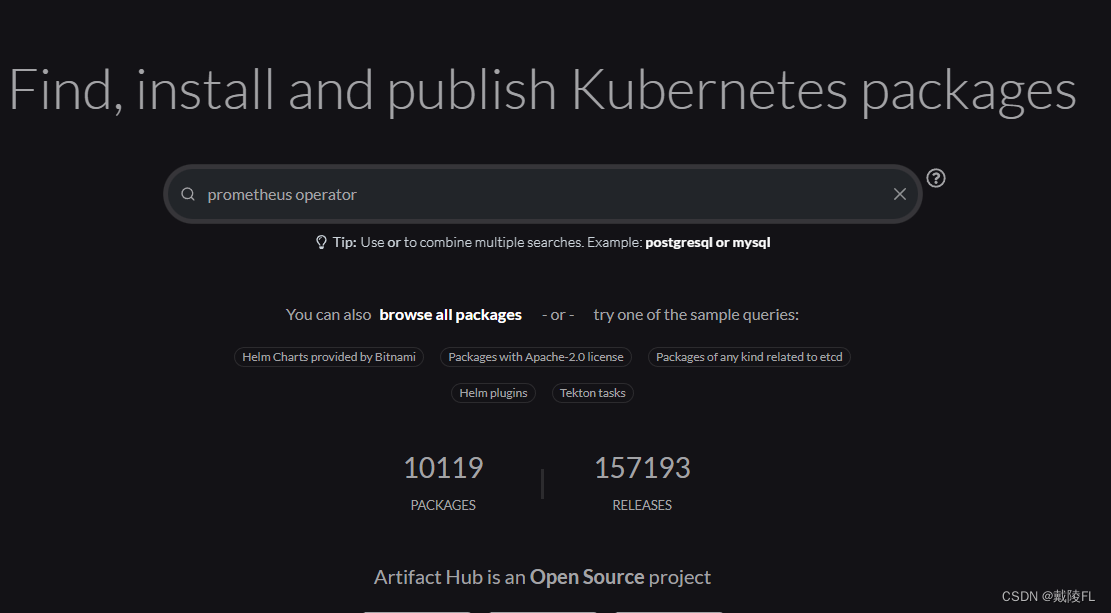
来到helm的官网https://helm.sh/
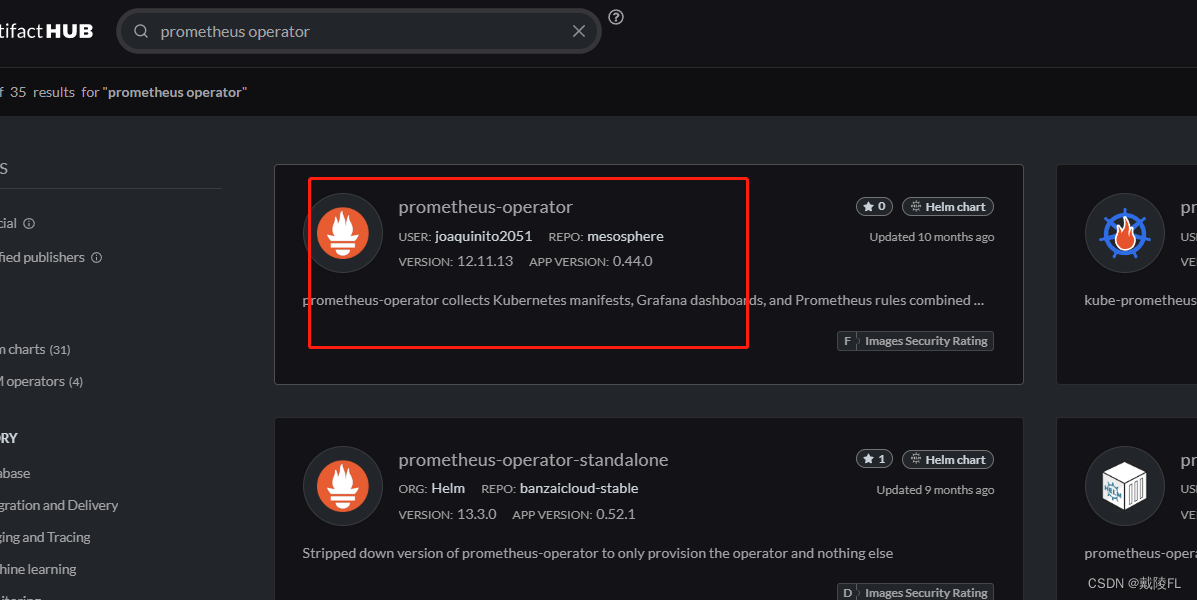
进入charts官方仓库,搜索prometheus operator
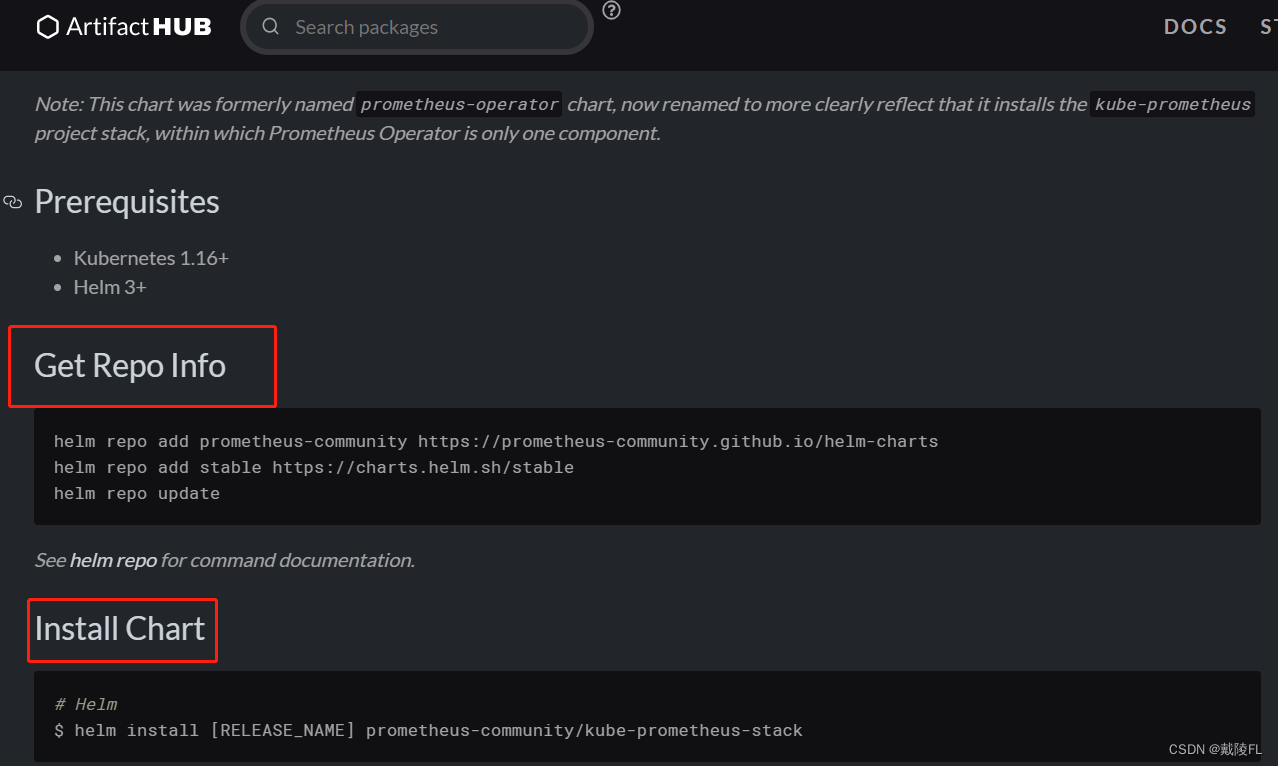
#添加仓库源
helm repo add prometheus-community https://prometheus-community.github.io/helm-charts

#拉取chart包,这里我们拉取20.0.1版本
helm pull prometheus-community/kube-prometheus-stack --version=20.0.1
这里拉取的是20.0.1版,然后解压
tar zxf kube-prometheus-stack-20.0.1.tgz
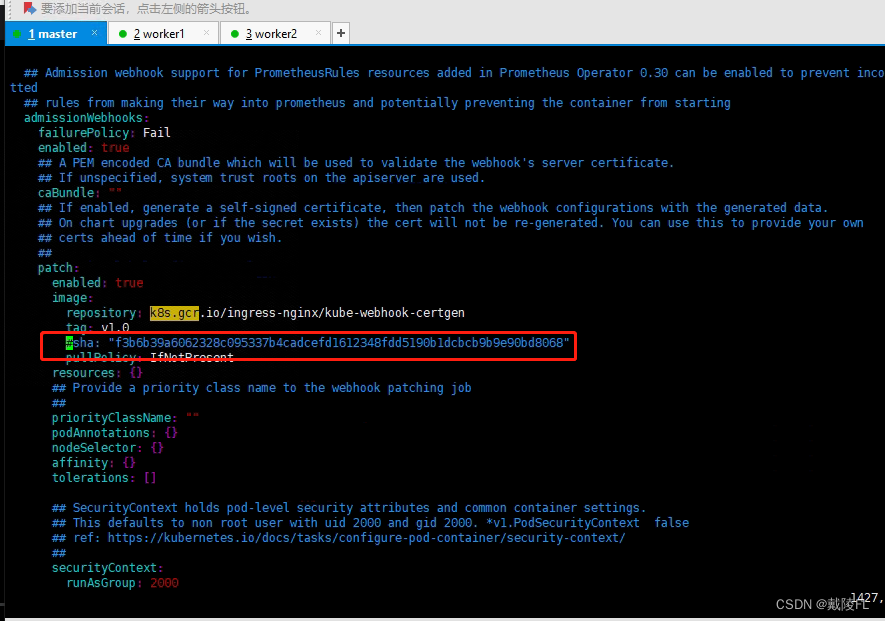
解压后,编辑values.yaml,将k8s.gcr.io/igress-nginx/kube-webhook-certgen这个镜像的信息下的sha注释
进入chart文件夹下,进行一键部署,应用名为“mon”
cd  kube-prometheus-stack/
helm install mon .
部署好后,查看svc
NAME                                     TYPE        CLUSTER-IP       EXTERNAL-IP   PORT(S)                      AGE
alertmanager-operated                    ClusterIP   None             <none>        9093/TCP,9094/TCP,9094/UDP   46s
mon-grafana                              ClusterIP   10.106.106.182   <none>        80/TCP                       48s
mon-kube-prometheus-stack-alertmanager   ClusterIP   10.100.176.80    <none>        9093/TCP                     48s
mon-kube-prometheus-stack-operator       ClusterIP   10.103.57.188    <none>        443/TCP                      48s
mon-kube-prometheus-stack-prometheus     ClusterIP   10.106.97.170    <none>        9090/TCP                     48s
mon-kube-state-metrics                   ClusterIP   10.107.152.232   <none>        8080/TCP                     48s
mon-prometheus-node-exporter             ClusterIP   10.102.1.77      <none>        9100/TCP                     48s
prometheus-operated                      ClusterIP   None             <none>        9090/TCP                     45s
修改mon-grafana的TYPE为NodePort
kubectl edit svc mon-grafana
如下:
...
  selector:
    app.kubernetes.io/instance: mon
    app.kubernetes.io/name: grafana
  sessionAffinity: None
  type: NodePort
statue:
...
此时mon-grafana的服务的端口变成了30750
在浏览器访问:192.168.26.21:30750/login
查看secrets获取登录密码
kubectl get secrets
找到名为mon-grafana的这项secret,通过yaml文件查看
kubectl get secrets mon-grafana -o yaml
在yaml文件中找到admin-password和admin-user的值
通过base64解码得到登录名和密码
echo YWRtaW4= | base64 -d
#输出:
admin

echo cHJvbS1vcGVyYXRvcg== | base64 -d
#输出:
prom-operator
模板的使用:https://grafana.com/dashboards/315
九、日志管理系统EFK介绍
k8s环境中有很多的节点、很多的pod,要管理这些pod的日志,就非常麻烦,就可以使用一个中央的日志管理系统——ELK
Elasticsearch——是个开源分布式搜索引擎,存储日志及提供查询接口
Logstash——是一个完全开源的工具,他可以对日志进行收集发送给Elaticsearch
Kibana——是一个开源和免费的web界面工具,可以让用户浏览Elaticsearch里的日志
logstash——性能低,消耗资源,且存在不支持消息队列缓存及存在数据丢失的问题
所以logstash一般可以用fluentd或者filebeat替代

logstash是用java实现的,因此会有性能问题,用fluentd替代,也就是EFK框架


 418
418


 被折叠的 条评论
为什么被折叠?
被折叠的 条评论
为什么被折叠?
 到【灌水乐园】发言


