


提示:文章写完后,目录可以自动生成,如何生成可参考右边的帮助文档
目录
风格迁移
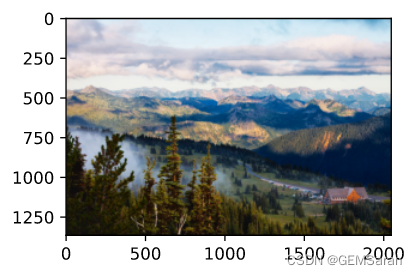
风格迁移: 使用卷积神经网络自动将某图像中的样式应用在另一图像之上;这里我们需要两张输入图像,一张是内容图像,另一张是样式图像,我们将使用神经网络修改内容图像使其在样式上接近样式图像。

一、方法
<1> 首先,我们初始化合成图像,例如将其初始化成内容图像。该合成图像是样式迁移过程中唯一需要更新的变量,即样式迁移所需迭代的模型参数。
<2> 然后,我们选择一个预训练的卷积神经网络来抽取图像的特征,其中的模型参数在训练中无须更新。深度卷积神经网络凭借多个层逐级抽取图像的特征。我们可以选择其中某些层的输出作为内容特征或样式特征。
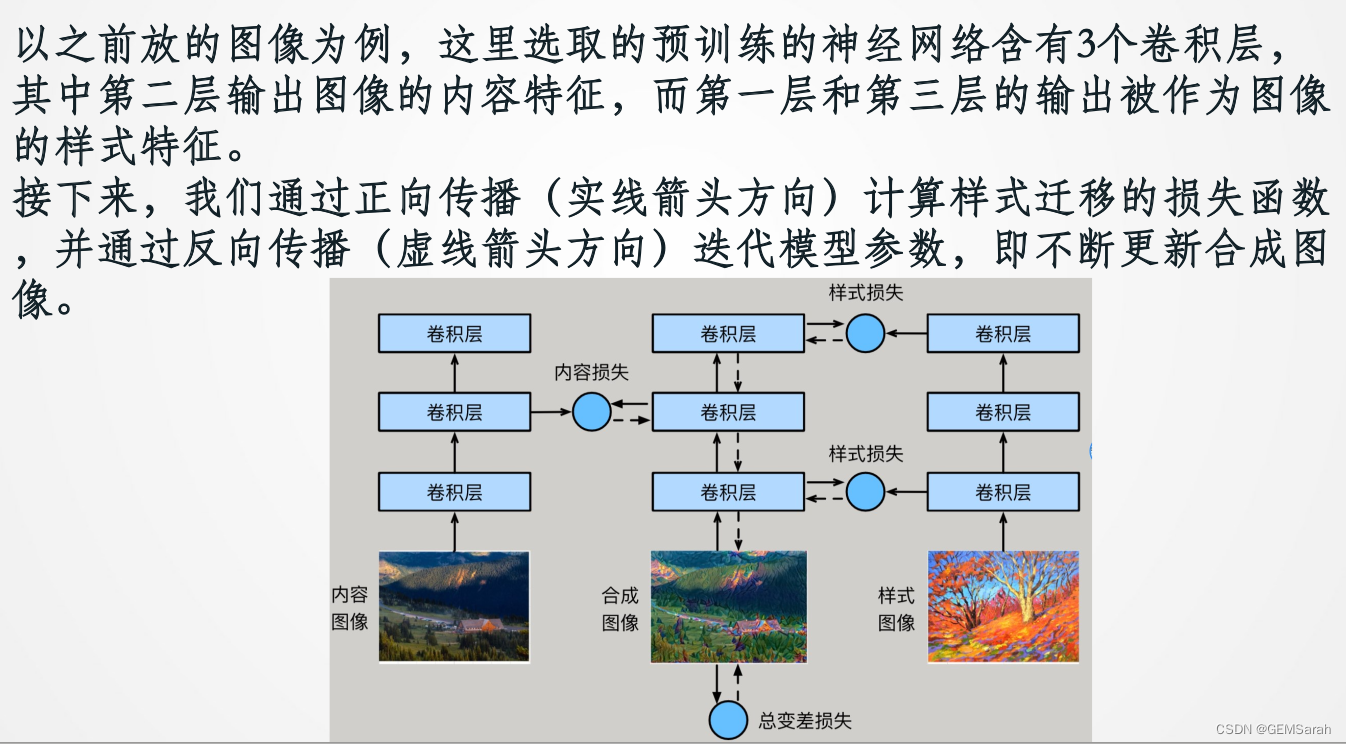
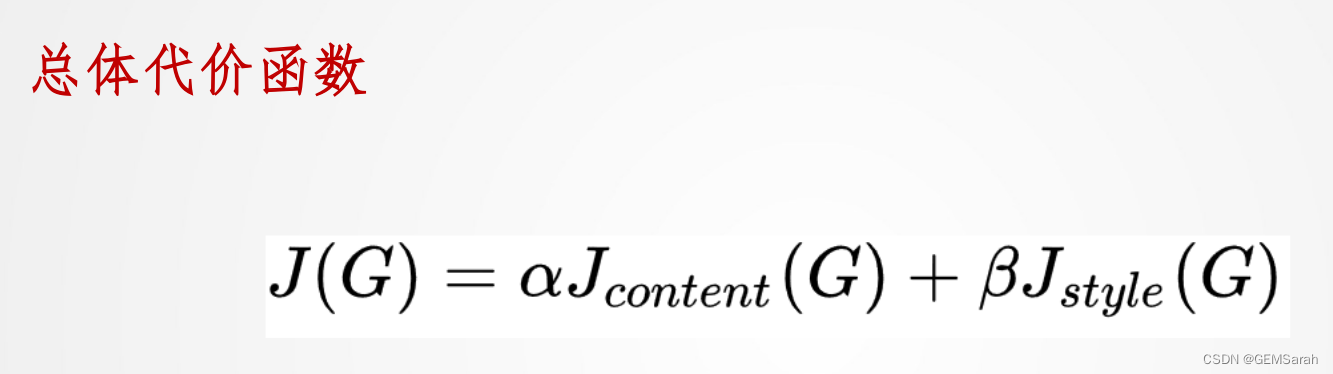
二、损失函数
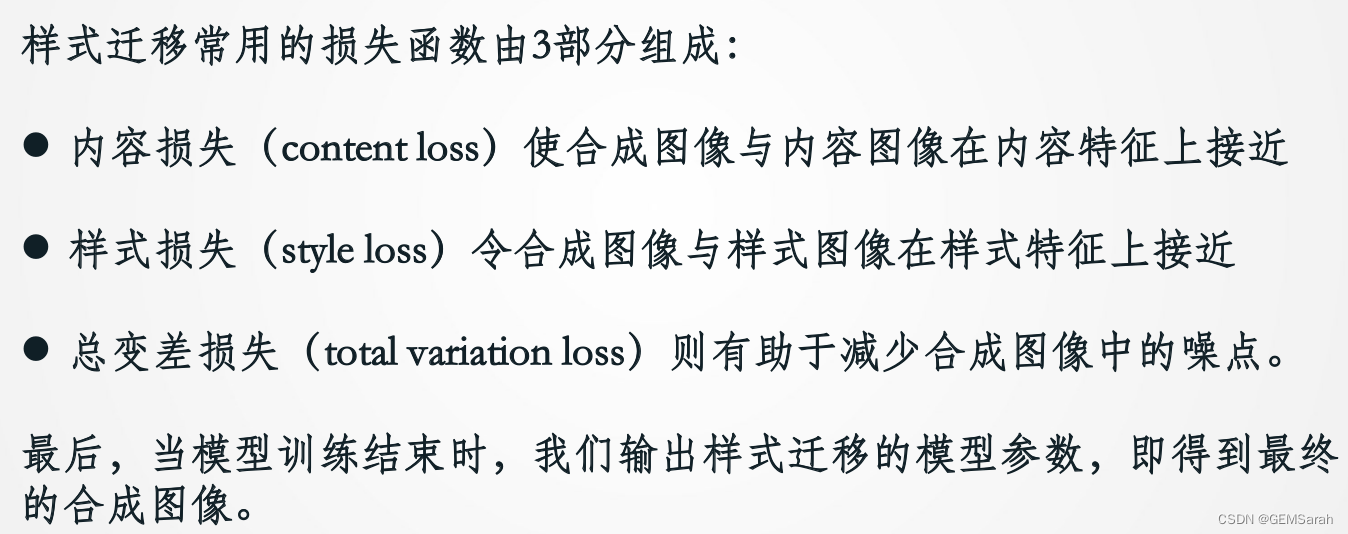
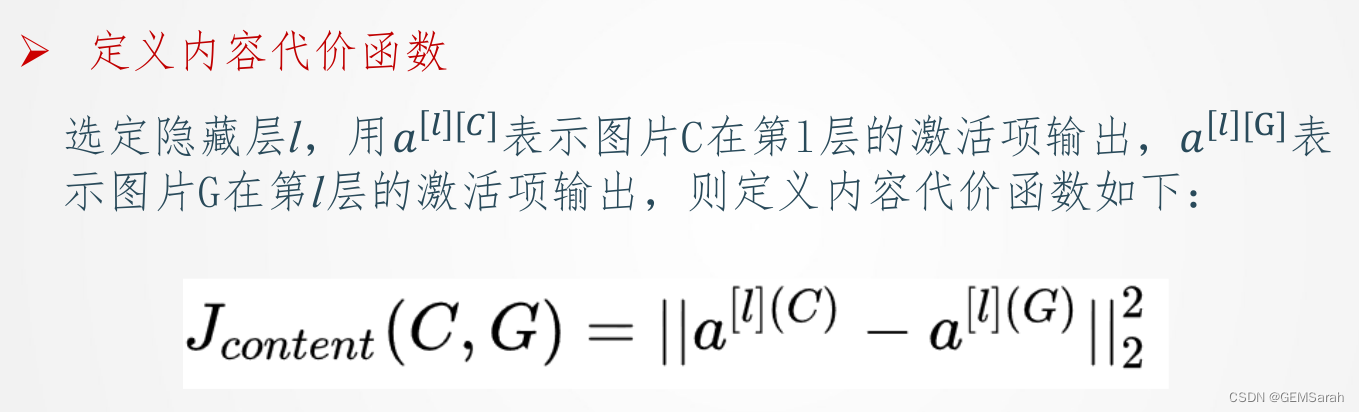
1. 内容代价函数
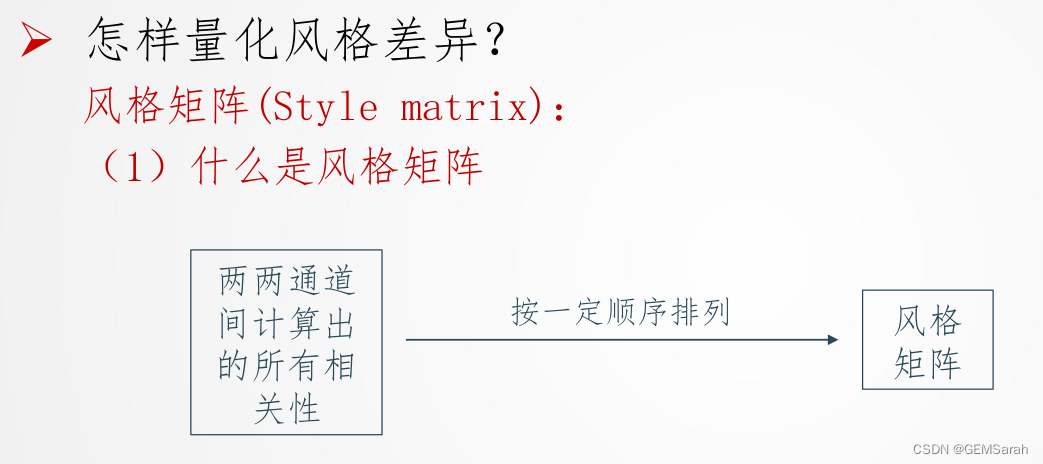
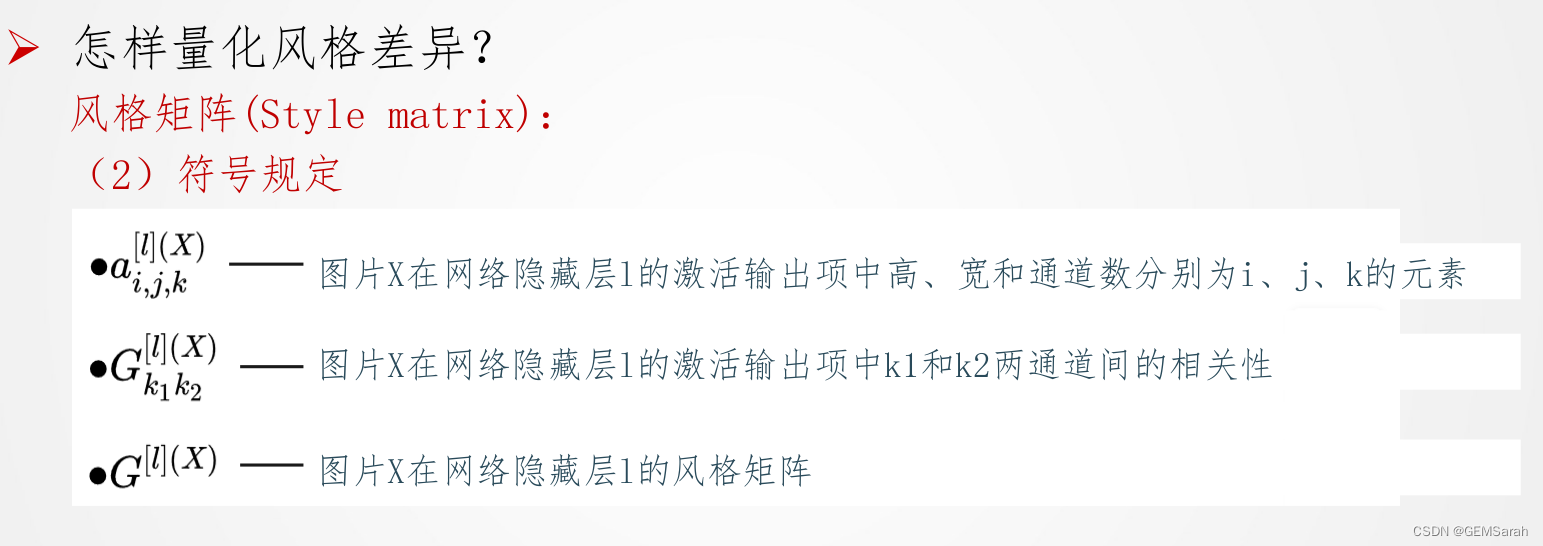
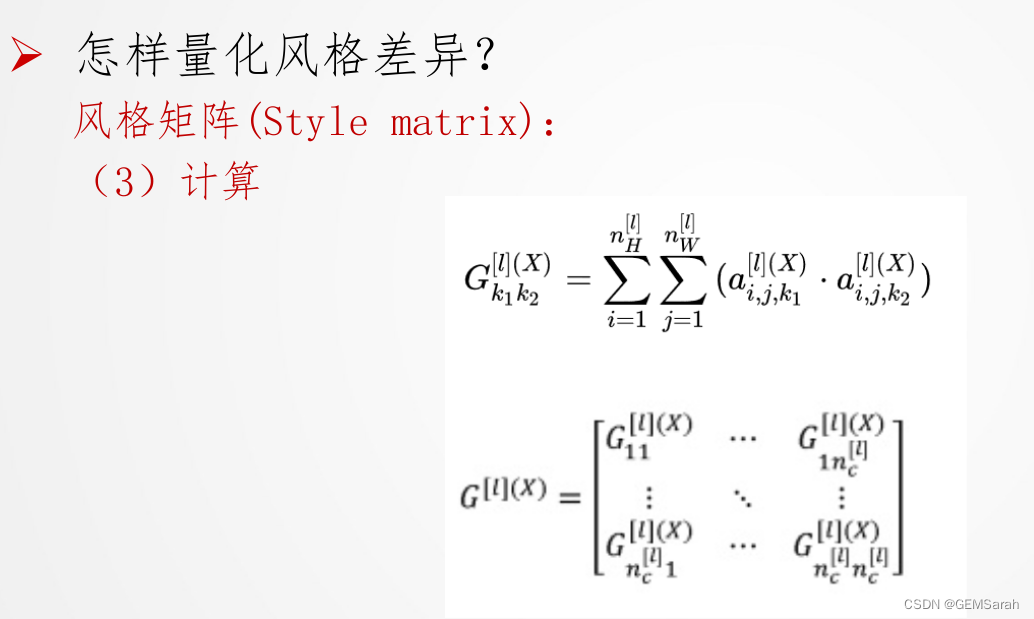
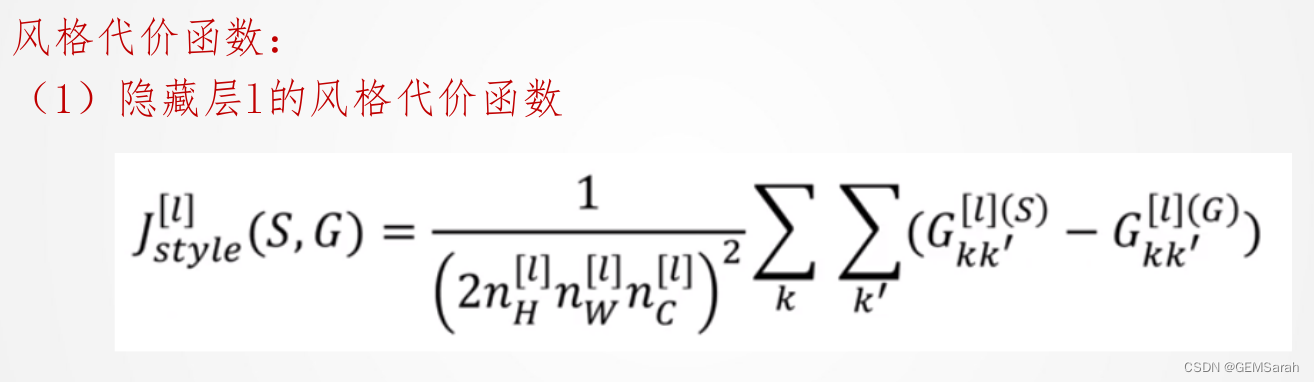
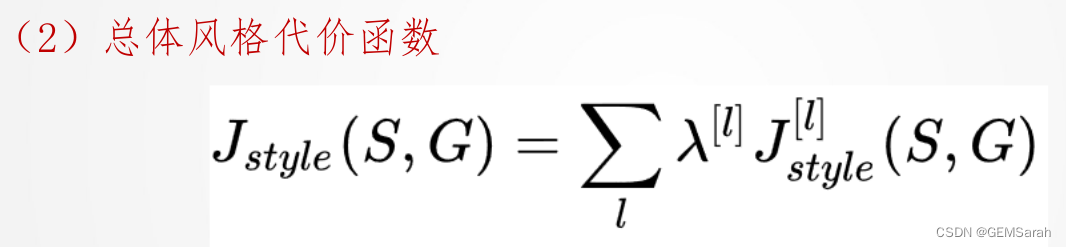
2. 风格代价函数
代码PyTorch如下(示例):
%matplotlib inline
import torch
import torchvision
from torch import nn
from d2l import torch as d2l
d2l.set_figsize()
content_img = d2l.Image.open('../img/rainier.jpg')
d2l.plt.imshow(content_img);
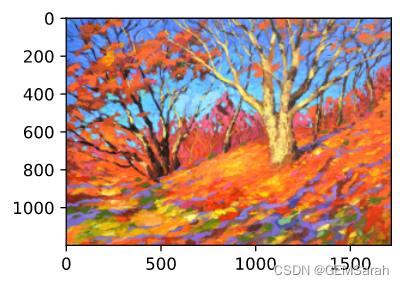
style_img = d2l.Image.open('../img/autumn-oak.jpg')
d2l.plt.imshow(style_img);left: content_img; right: style_img
rgb_mean = torch.tensor([0.485, 0.456, 0.406])
rgb_std = torch.tensor([0.229, 0.224, 0.225])

def preprocess(img, image_shape):
    transforms = torchvision.transforms.Compose([
        torchvision.transforms.Resize(image_shape),
        torchvision.transforms.ToTensor(),
        torchvision.transforms.Normalize(mean=rgb_mean, std=rgb_std)])
    return transforms(img).unsqueeze(0)

def postprocess(img):
    img = img[0].to(rgb_std.device)
    img = torch.clamp(img.permute(1, 2, 0) * rgb_std + rgb_mean, 0, 1)
    return torchvision.transforms.ToPILImage()(img.permute(2, 0, 1))

pretrained_net = torchvision.models.vgg19(pretrained=True)

style_layers, content_layers = [0, 5, 10, 19, 28], [25]

net = nn.Sequential(*[pretrained_net.features[i] for i in
                      range(max(content_layers + style_layers) + 1)])

def extract_features(X, content_layers, style_layers):
    contents = []
    styles = []
    for i in range(len(net)):
        X = net[i](X)
        if i in style_layers:
            styles.append(X)
        if i in content_layers:
            contents.append(X)
    return contents, styles

def get_contents(image_shape, device):
    content_X = preprocess(content_img, image_shape).to(device)
    contents_Y, _ = extract_features(content_X, content_layers, style_layers)
    return content_X, contents_Y

def get_styles(image_shape, device):
    style_X = preprocess(style_img, image_shape).to(device)
    _, styles_Y = extract_features(style_X, content_layers, style_layers)
    return style_X, styles_Y

def content_loss(Y_hat, Y):
    # 我们从动态计算梯度的树中分离目标:
    # 这是一个规定的值,而不是一个变量。
    return torch.square(Y_hat - Y.detach()).mean()

def gram(X):
    num_channels, n = X.shape[1], X.numel() // X.shape[1]
    X = X.reshape((num_channels, n))
    return torch.matmul(X, X.T) / (num_channels * n)

def style_loss(Y_hat, gram_Y):
    return torch.square(gram(Y_hat) - gram_Y.detach()).mean()

def tv_loss(Y_hat):
    return 0.5 * (torch.abs(Y_hat[:, :, 1:, :] - Y_hat[:, :, :-1, :]).mean() +
                  torch.abs(Y_hat[:, :, :, 1:] - Y_hat[:, :, :, :-1]).mean())

content_weight, style_weight, tv_weight = 1, 1e3, 10

def compute_loss(X, contents_Y_hat, styles_Y_hat, contents_Y, styles_Y_gram):
    # 分别计算内容损失、风格损失和全变分损失
    contents_l = [content_loss(Y_hat, Y) * content_weight for Y_hat, Y in zip(
        contents_Y_hat, contents_Y)]
    styles_l = [style_loss(Y_hat, Y) * style_weight for Y_hat, Y in zip(
        styles_Y_hat, styles_Y_gram)]
    tv_l = tv_loss(X) * tv_weight
    # 对所有损失求和
    l = sum(10 * styles_l + contents_l + [tv_l])
    return contents_l, styles_l, tv_l, l

class SynthesizedImage(nn.Module):
    def __init__(self, img_shape, **kwargs):
        super(SynthesizedImage, self).__init__(**kwargs)
        self.weight = nn.Parameter(torch.rand(*img_shape))

    def forward(self):
        return self.weight

def get_inits(X, device, lr, styles_Y):
    gen_img = SynthesizedImage(X.shape).to(device)
    gen_img.weight.data.copy_(X.data)
    trainer = torch.optim.Adam(gen_img.parameters(), lr=lr)
    styles_Y_gram = [gram(Y) for Y in styles_Y]
    return gen_img(), styles_Y_gram, trainer

def train(X, contents_Y, styles_Y, device, lr, num_epochs, lr_decay_epoch):
    X, styles_Y_gram, trainer = get_inits(X, device, lr, styles_Y)
    scheduler = torch.optim.lr_scheduler.StepLR(trainer, lr_decay_epoch, 0.8)
    animator = d2l.Animator(xlabel='epoch', ylabel='loss',
                            xlim=[10, num_epochs],
                            legend=['content', 'style', 'TV'],
                            ncols=2, figsize=(7, 2.5))
    for epoch in range(num_epochs):
        trainer.zero_grad()
        contents_Y_hat, styles_Y_hat = extract_features(
            X, content_layers, style_layers)
        contents_l, styles_l, tv_l, l = compute_loss(
            X, contents_Y_hat, styles_Y_hat, contents_Y, styles_Y_gram)
        l.backward()
        trainer.step()
        scheduler.step()
        if (epoch + 1) % 10 == 0:
            animator.axes[1].imshow(postprocess(X))
            animator.add(epoch + 1, [float(sum(contents_l)),
                                     float(sum(styles_l)), float(tv_l)])
    return X

device, image_shape = d2l.try_gpu(), (300, 450)
net = net.to(device)
content_X, contents_Y = get_contents(image_shape, device)
_, styles_Y = get_styles(image_shape, device)
output = train(content_X, contents_Y, styles_Y, device, 0.3, 500, 50)

我们可以看到,合成图像保留了内容图像的风景和物体,并同时迁移了风格图像的色彩。例如,合成图像具有与风格图像中一样的色彩块,其中一些甚至具有画笔笔触的细微纹理。
人脸识别
一、两类问题的区别
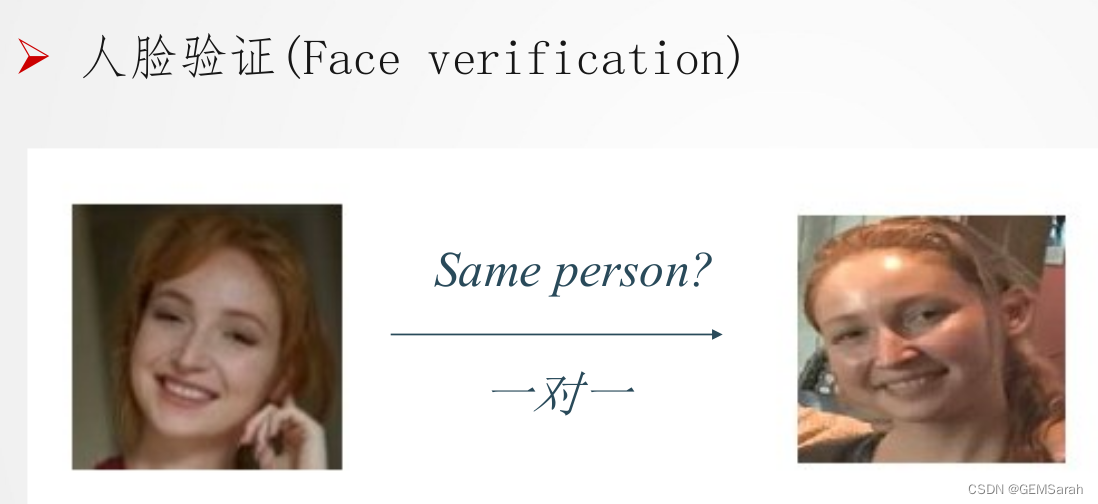

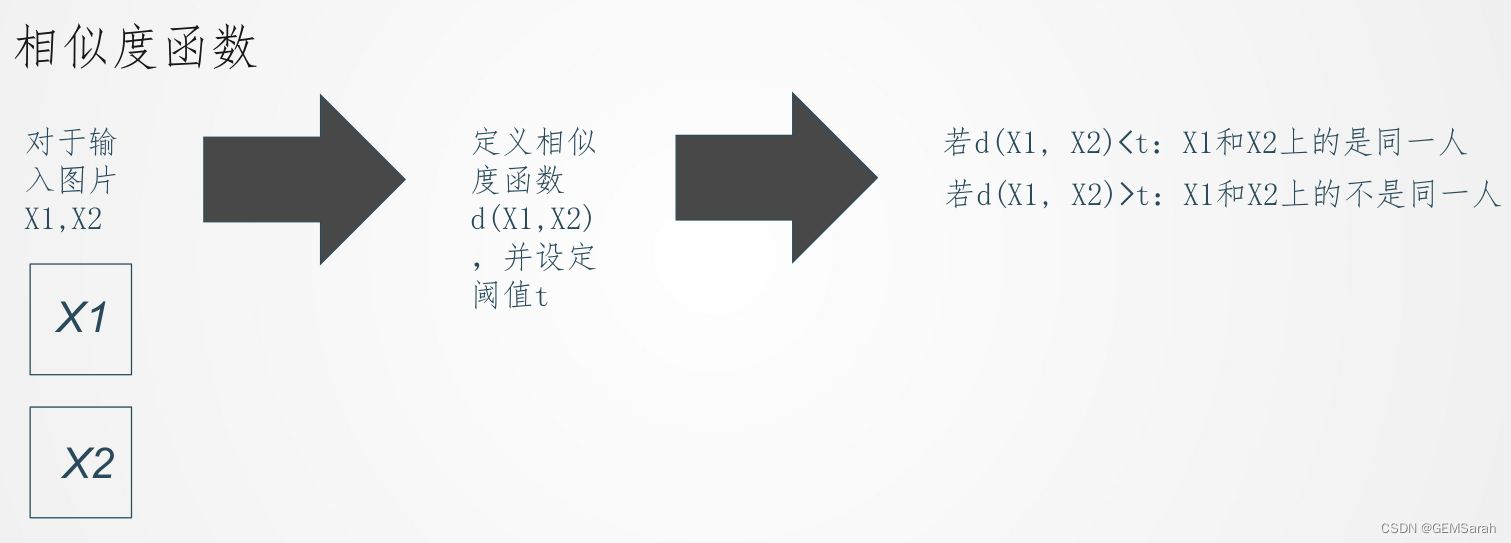
二、人脸验证
1. 构建神经网络
旧有思路: 转化为分类问题; 局限性: One-shot learning;
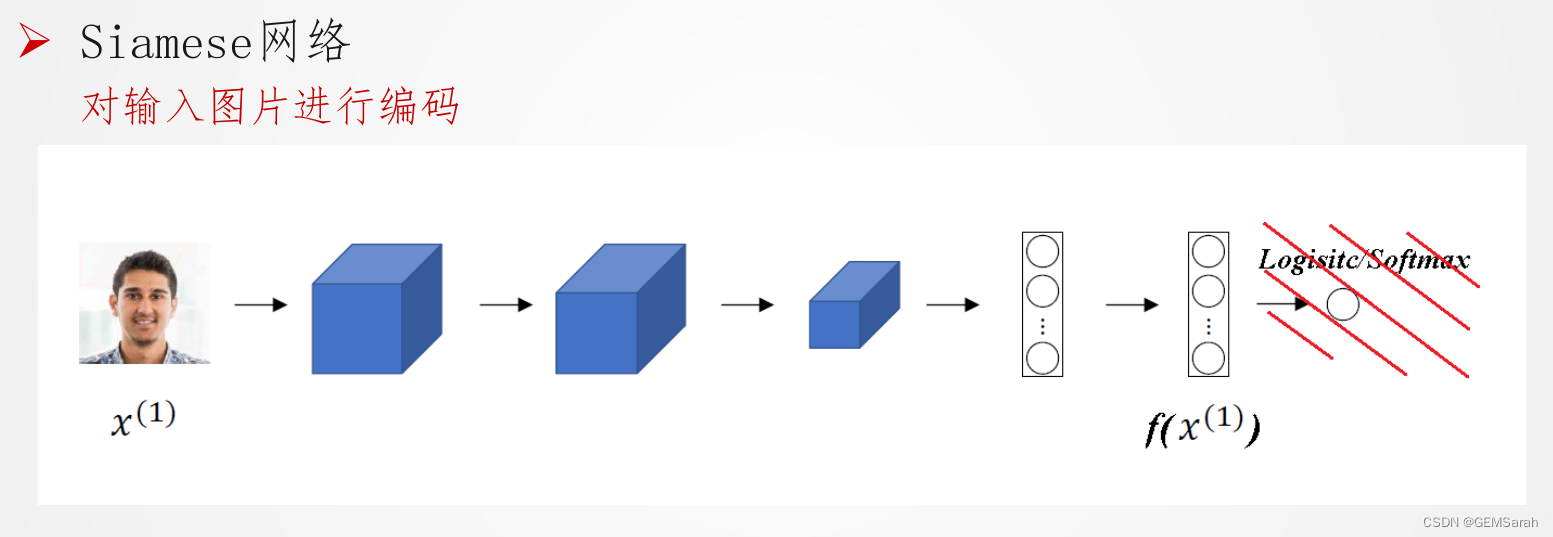
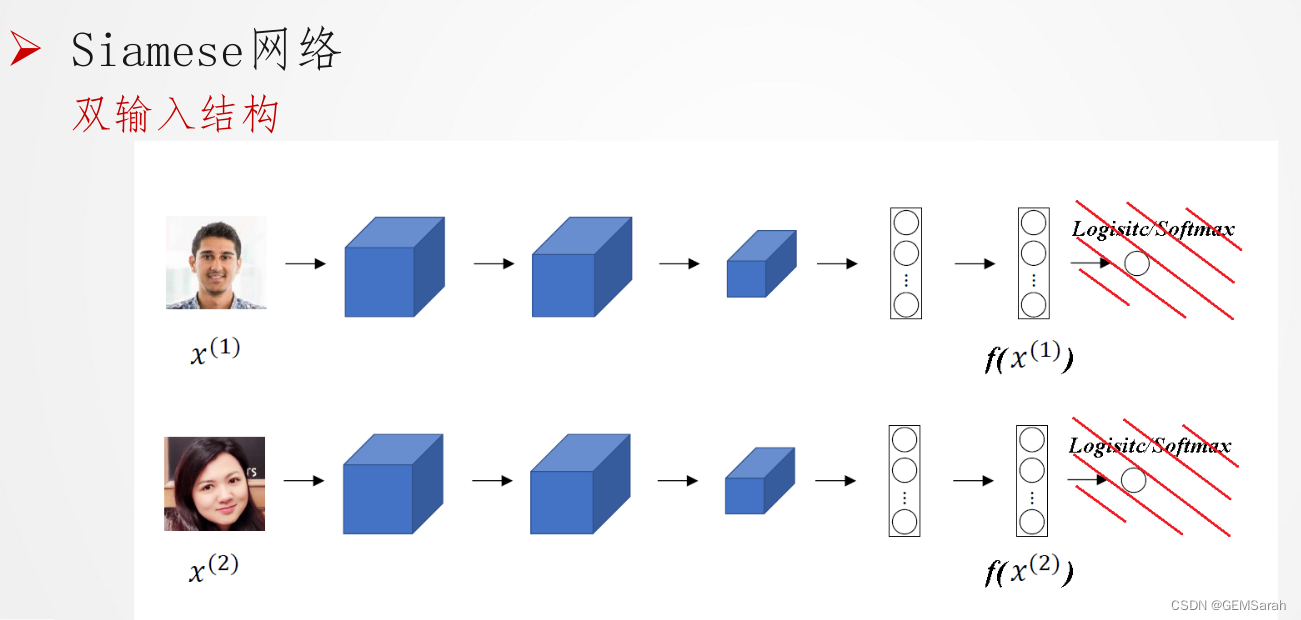
孪生神经网络是一类包含两个或更多个相同子网络的神经网络架构。这里相同是指他们具有相同的配置即相同的参数和权重。参数更新在两个子网上共同进行。
孪生神经网络在涉及发现相似性或两个可比较的事物之间的关系的任务中留下。一些例子是复述评分,其中输入是两个句子,输出是他们是多么相似的得分;或者签名验证,确定两个签名是否来自同一个人。通常,在这样的任务中,使用两个相同的子网络来处理两个输入,并且另一个模型将取得他们的输出并产生最终输出。
2. 训练神经网络
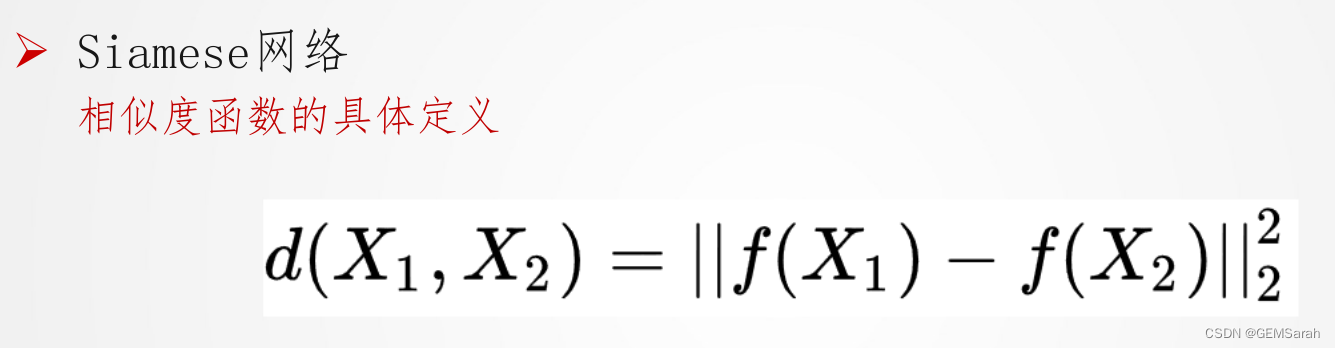
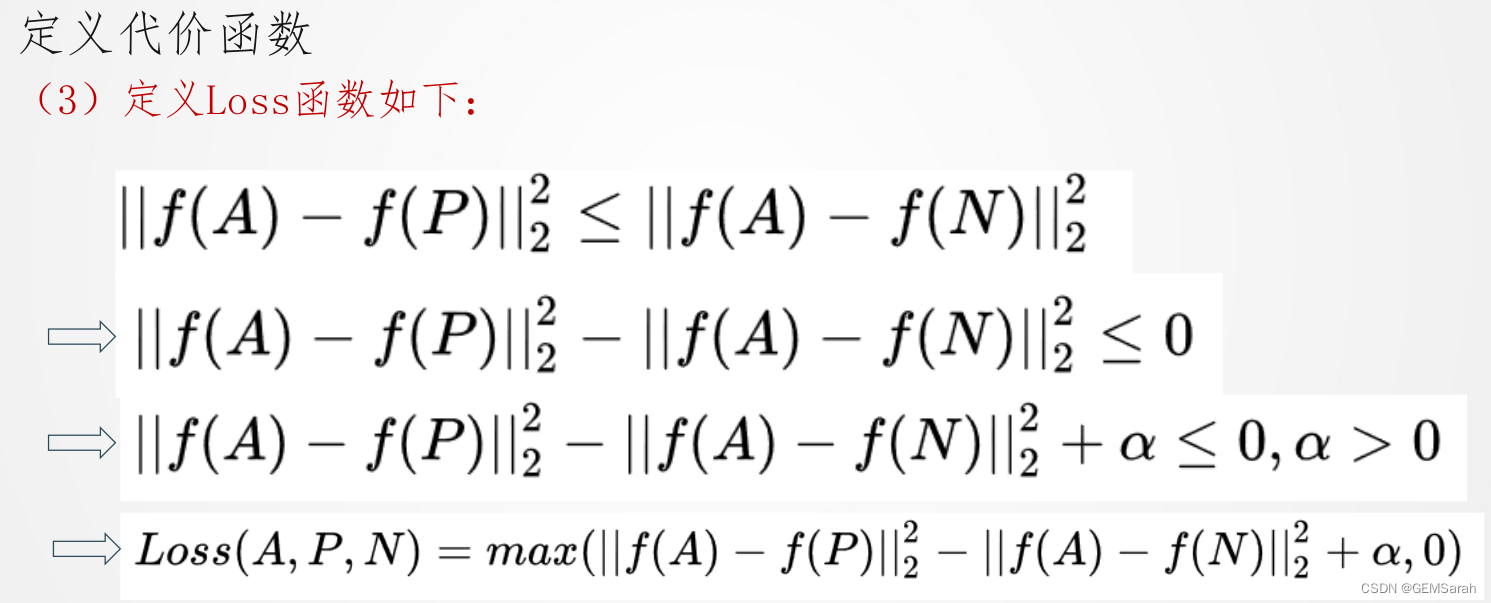
训练目的: 通过训练神经网络,我们希望同一人的两张照片间的相似度函数值尽可能小,不同人的两张片间的相似度函数值尽可能大,下以此为目标制作训练集、定义Loss函数。

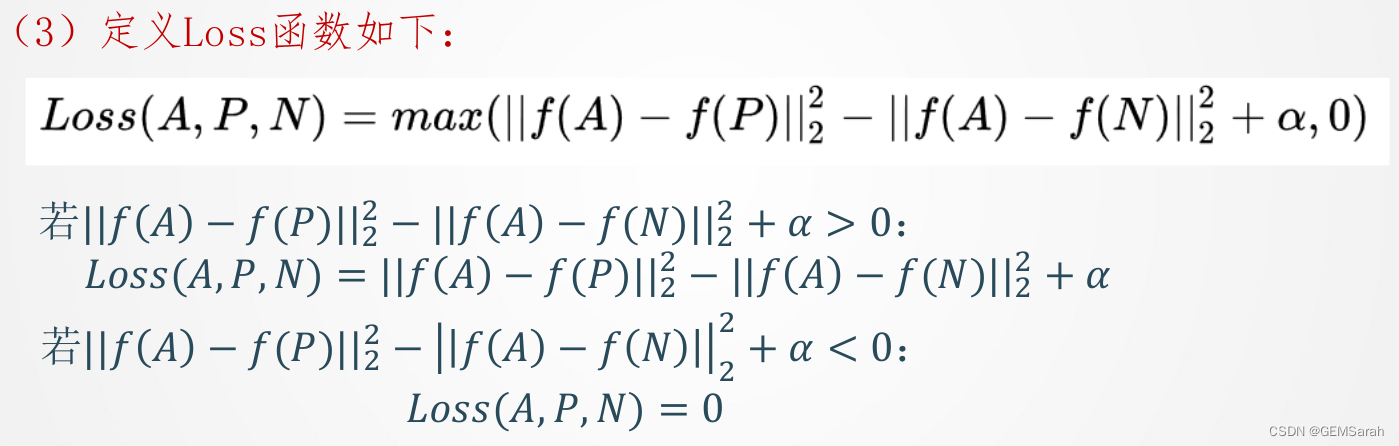
定义代价函数(1)符号规定:A—待测照片; P—同一人照片; N—不同人照片; 我们希望A与P的差距永远不超过A与N,即
将所有样本的loss函数累加得到cost函数如下: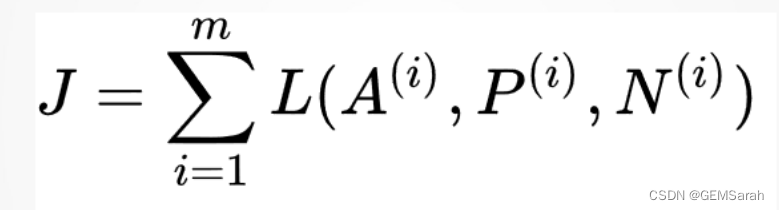
3. 运行神经网络
利用人脸验证实现人脸识别: 对于训练完毕的神经网络,输入照片,通过简单的for循环语句遍历数据库中存储的所有照片,依次通过相似度函数进行计算,记录遍历过程中相似程度最大的值,在遍历结束后与预先设定的阈值进行比较,得出预测结果,完成人脸识别。
Code: Face Recognition with Siamese Networks, Keras, and TensorFlow - PyImageSearch
视觉应用展望
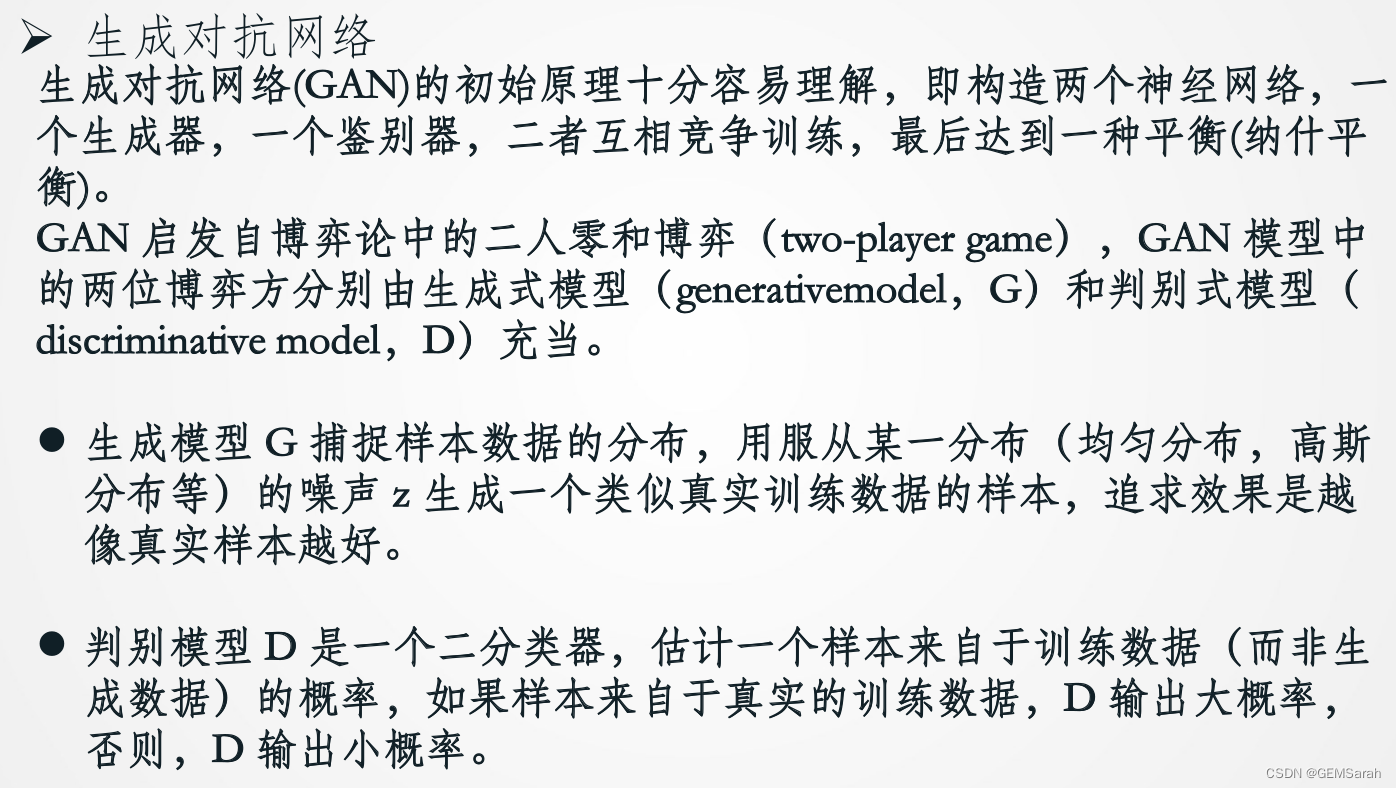
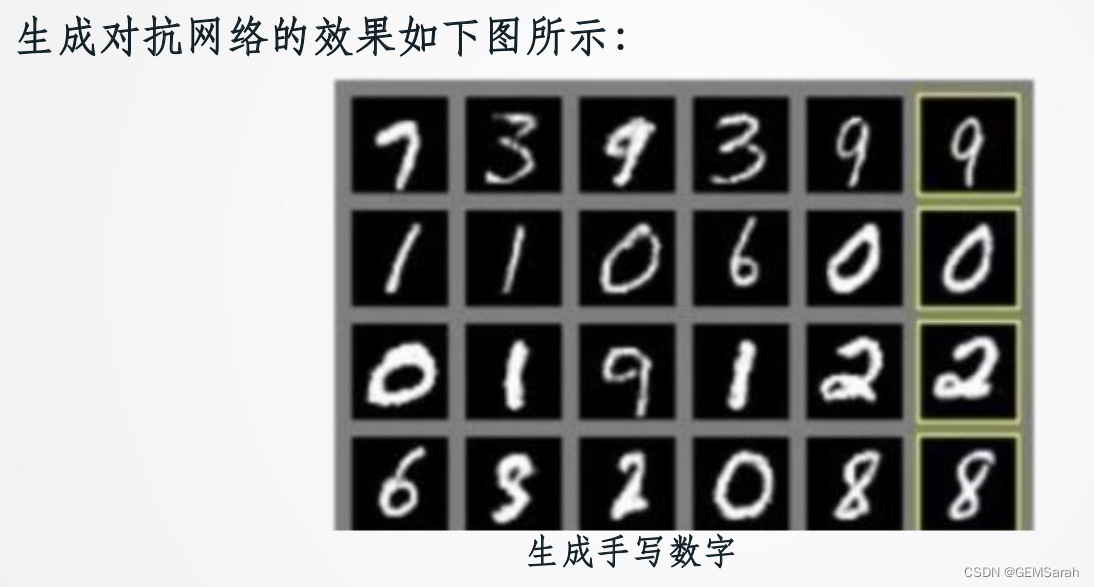
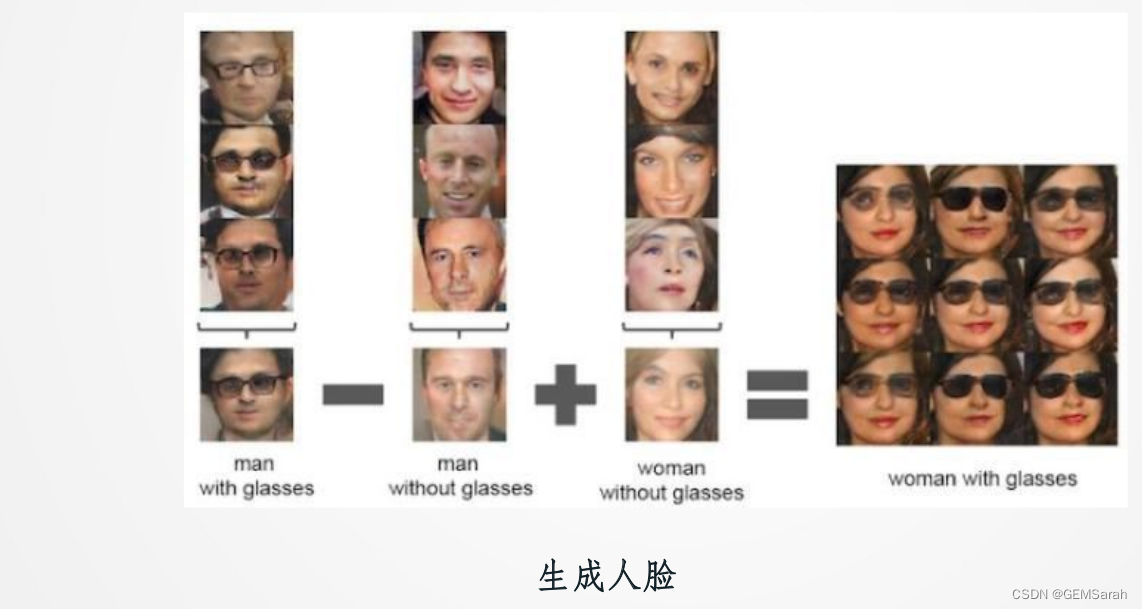
生成对抗网络
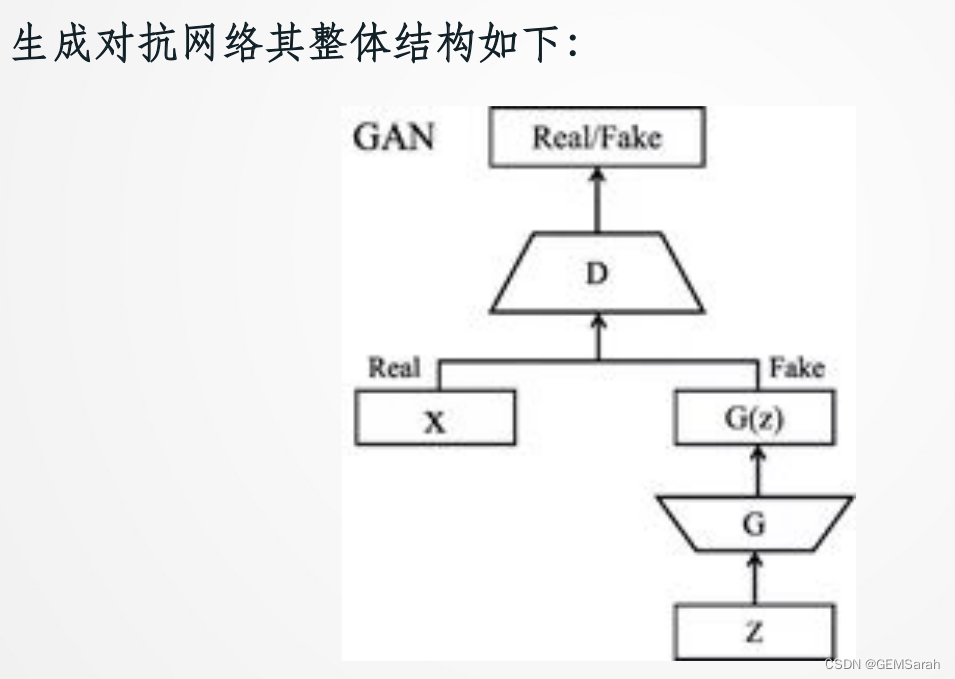
Code: How to Code the GAN Training Algorithm and Loss Functions - MachineLearningMastery.com
总结
以上就是今天要讲的内容,本文简单介绍了风格迁移(PyTorch 代码示例), 人脸验证, 人脸识别和视觉应用展望(生成对抗网络GAN)。


 83
83


 被折叠的 条评论
为什么被折叠?
被折叠的 条评论
为什么被折叠?
 到【灌水乐园】发言


