


解决.tiff文件转.pcd文件滤波后转回.tiff文件点的序列被打乱的问题
解决思路
1、.tiff转点云.pcd格式,定义数据结构记录对应点的三轴坐标与对应的行列信息
.tiff存放点云信息,将点的三轴坐标作为Mat的三个通道的值,三个通道分别对应了点的Z、Y、X坐标
struct pointindex{
    float x;
    float y;
    float z;
    int i;
    int j;
};

std::vector<pointindex> pointList;


//tiff转点云
pcl::PointCloud<pcl::PointXYZ>::Ptr tiff2Cloud(cv::Mat src)
{
    //创建点云
    pcl::PointCloud<pcl::PointXYZ>::Ptr cloud (new pcl::PointCloud<pcl::PointXYZ>);
    if (src.type() == CV_32FC3){
        for (int i = 0; i < src.rows; i++){
            const float *p_src = src.ptr<float>(i);

            for (int j = 0; j < src.cols; j++){
                if(p_src[3*j]!=0){
                    pcl::PointXYZ point;
                    point.x = p_src[3*j+2];
                    point.y = p_src[3*j+1];
                    point.z = p_src[3*j];
                    cloud->push_back(point);
                    pointindex point_;
                    point_.x = point.x = p_src[3*j+2];
                    point_.y = p_src[3*j+1];
                    point_.z = p_src[3*j];
                    point_.i = i;
                    point_.j = j;
                    pointList.push_back(point_);
                }
            }
        }
    }
    return cloud;
}
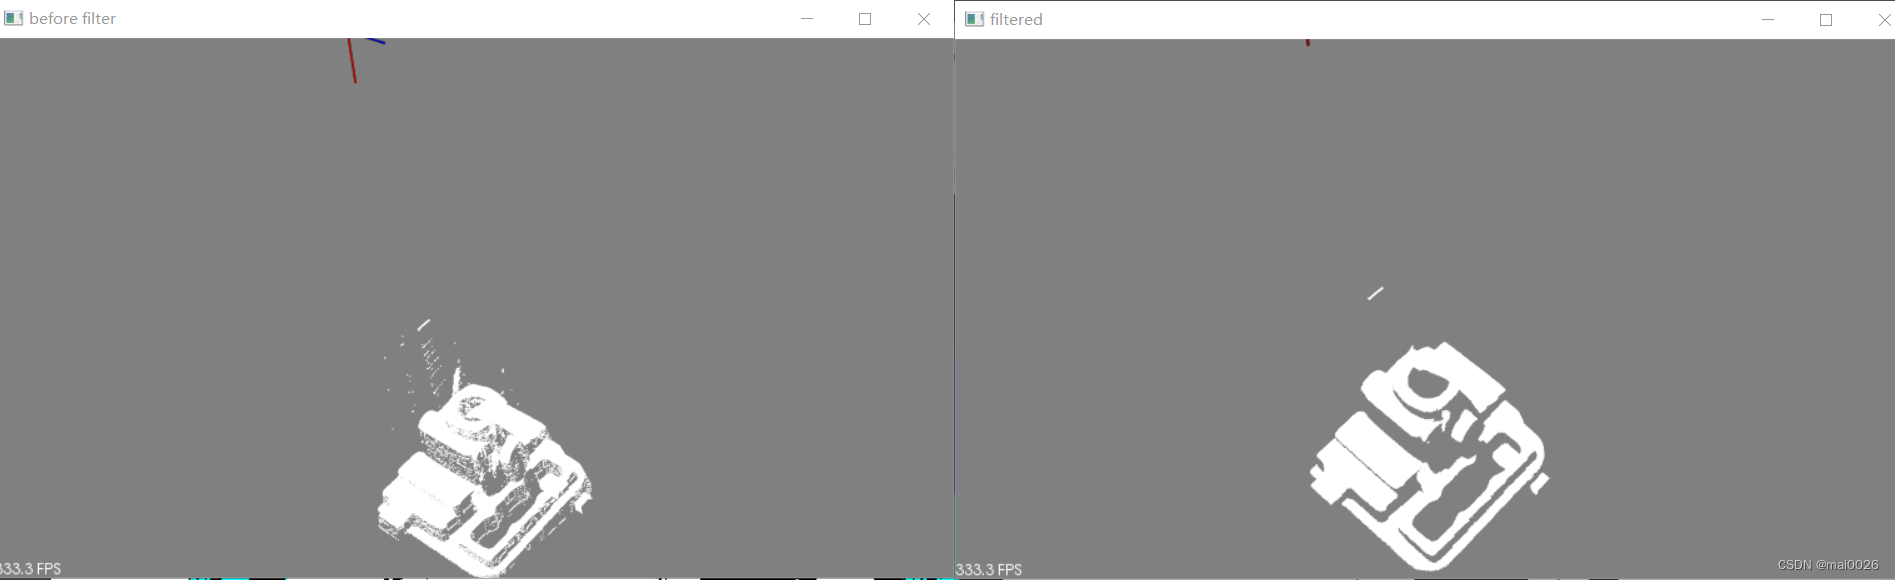
2、点云离群滤波
点云的可视化尽量采用pcl::visualization::PCLVisualizer::Ptr这个类
//点云可视化
void showCloud(std::string windowname,pcl::PointCloud<pcl::PointXYZ>::Ptr cloud){
    pcl::visualization::PCLVisualizer::Ptr viewer (new pcl::visualization::PCLVisualizer (windowname));
    viewer->setBackgroundColor (0.5, 0.5, 0.5);  //设置背景
    viewer->addPointCloud<pcl::PointXYZ> (cloud, "sample cloud");  //显示点云
    viewer->setPointCloudRenderingProperties (pcl::visualization::PCL_VISUALIZER_POINT_SIZE, 1, "sample cloud");  //设置点尺寸
    viewer->addCoordinateSystem (100.0);  //设置坐标轴尺寸
//    while (!viewer->wasStopped ())
//    {
//      viewer->spinOnce (100);
//      boost::this_thread::sleep (boost::posix_time::microseconds (100000));
//    }
    cout<<"Point couting in "<<windowname<<": "<<cloud->size()<<endl;
}


//离群滤波
    pcl::PointCloud<pcl::PointXYZ>::Ptr cloud_filtered (new pcl::PointCloud<pcl::PointXYZ>);
    pcl::PointCloud<pcl::PointXYZ>::Ptr remove (new pcl::PointCloud<pcl::PointXYZ>);
    pcl::StatisticalOutlierRemoval<pcl::PointXYZ> sor;
    sor.setInputCloud (cloud);
    sor.setMeanK (50);
    sor.setStddevMulThresh (1.0);
    sor.filter(*cloud_filtered);
    showCloud("filtered",cloud_filtered);
    sor.setNegative(true);
    sor.filter(*remove);
3、拿离群点的X、Y、Z三轴坐标与前面记录的作比对,找出离群点在原Mat中对应的行列信息,复原离群点在原图中的情况
//点云转tiff
cv::Mat cloud2Tiff(std::vector<pointindex> list,int width,int height){
    cv::Mat output = cv::Mat::zeros(cv::Size(height,width) ,CV_32FC3);
    for(auto&p:list){
        output.ptr<float>(p.i)[3*p.j+2] = p.x;
        output.ptr<float>(p.i)[3*p.j+1] = p.y;
        output.ptr<float>(p.i)[3*p.j] = p.z;
    }
    return output;
}


std::vector<pointindex> filteredpoints;
    for(int num = 0;num<remove->points.size();num++){
        for (int index = 0;index<pointList.size();index++){
            if (std::abs(remove->points[num].x - pointList[index].x) < 0.000001
                && std::abs(remove->points[num].y - pointList[index].y) < 0.000001
                && std::abs(remove->points[num].z - pointList[index].z) < 0.000001){
                filteredpoints.push_back(pointList[index]);
            }
        }
    }
    //离群点云转图
    cv::Mat src = cloud2Tiff(filteredpoints,img.rows,img.cols);
4、离群点Mat与原Mat通道相减
//通道相减
cv::Mat channelSubtract(cv::Mat img,cv::Mat src){
    if (src.rows==img.rows && src.cols==img.cols){
        for(int i=0;i<src.rows;i++){
            for(int j=0;j<src.cols;j++){
                src.ptr<float>(i)[3*j] = img.ptr<float>(i)[3*j] - src.ptr<float>(i)[3*j];
                src.ptr<float>(i)[3*j+1] = img.ptr<float>(i)[3*j+1] - src.ptr<float>(i)[3*j+1];
                src.ptr<float>(i)[3*j+2] = img.ptr<float>(i)[3*j+2] - src.ptr<float>(i)[3*j+2];
            }
        }
    }
    return src;
}

//离群点云图与原图通道相减
    src = channelSubtract(img,src);
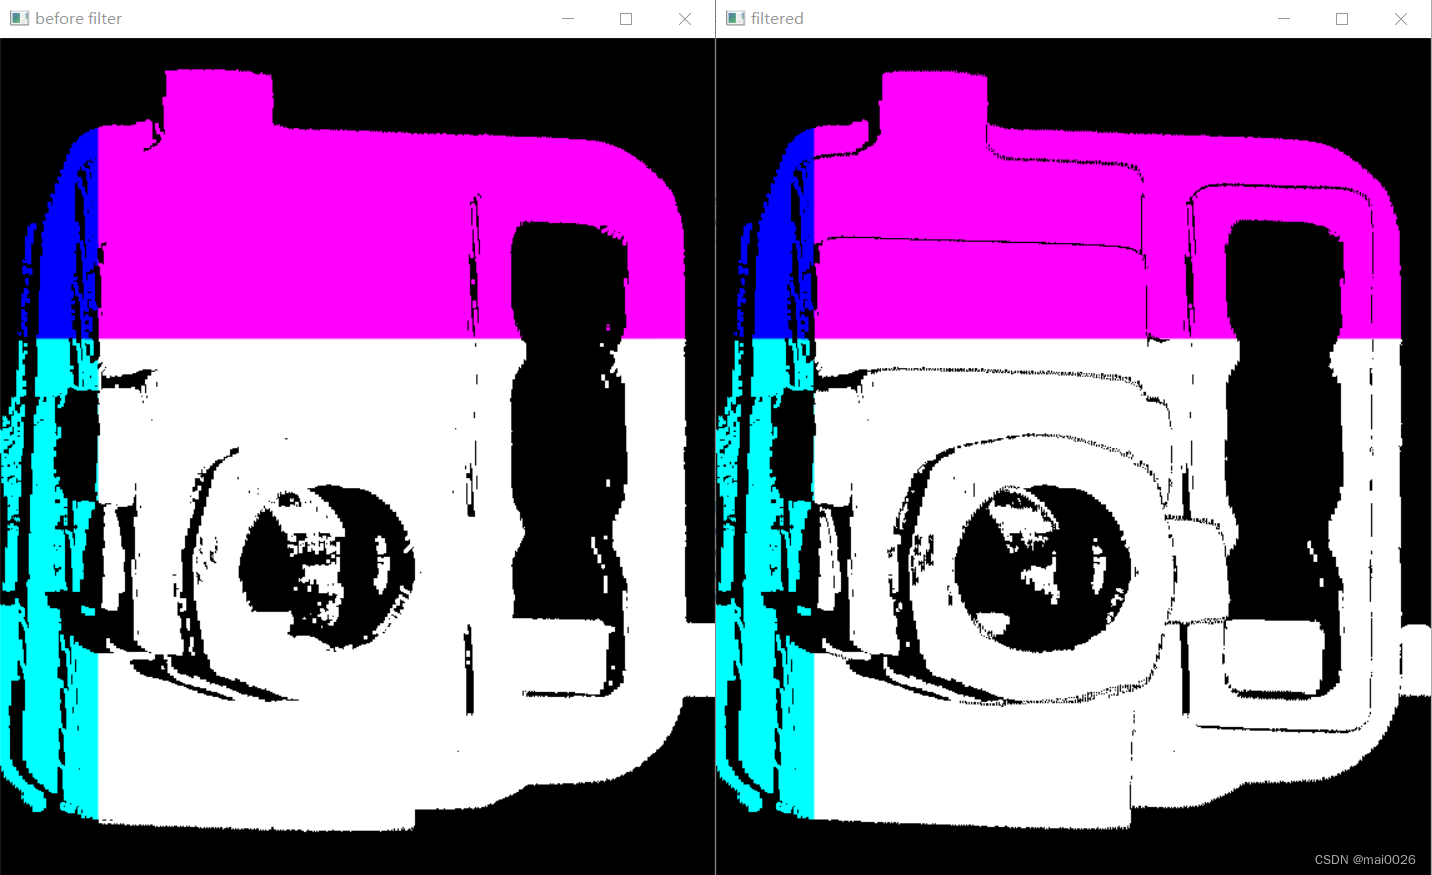
效果
完整代码
#include <QCoreApplication>
#include<opencv2/opencv.hpp>
#include <pcl/visualization/pcl_visualizer.h>
#include<iostream>//标准C++库中的输入输出类相关头文件。
#include<pcl/io/io.h>
#include<pcl/io/pcd_io.h>//pcd 读写类相关的头文件。
#include<pcl/io/ply_io.h>
#include<pcl/point_types.h> //PCL中支持的点类型头文件。
#include <pcl/filters/statistical_outlier_removal.h>
#include <string.h>


struct pointindex{
    float x;
    float y;
    float z;
    int i;
    int j;
};

std::vector<pointindex> pointList;


//tiff转点云
pcl::PointCloud<pcl::PointXYZ>::Ptr tiff2Cloud(cv::Mat src)
{
    //创建点云
    pcl::PointCloud<pcl::PointXYZ>::Ptr cloud (new pcl::PointCloud<pcl::PointXYZ>);
    if (src.type() == CV_32FC3){
        for (int i = 0; i < src.rows; i++){
            const float *p_src = src.ptr<float>(i);

            for (int j = 0; j < src.cols; j++){
                if(p_src[3*j+2]>0){
                    pcl::PointXYZ point;
                    point.x = p_src[3*j];
                    point.y = p_src[3*j+1];
                    point.z = p_src[3*j+2];
                    cloud->push_back(point);
                    pointindex point_;
                    point_.x = point.x = p_src[3*j];
                    point_.y = p_src[3*j+1];
                    point_.z = p_src[3*j+2];
                    point_.i = i;
                    point_.j = j;
                    pointList.push_back(point_);
                }
            }
        }
    }
    return cloud;
}


//点云转tiff
cv::Mat cloud2Tiff(std::vector<pointindex> list,int width,int height){
    cv::Mat output = cv::Mat::zeros(cv::Size(height,width) ,CV_32FC3);
    for(auto&p:list){
        output.ptr<float>(p.i)[3*p.j] = p.x;
        output.ptr<float>(p.i)[3*p.j+1] = p.y;
        output.ptr<float>(p.i)[3*p.j+2] = p.z;
    }
    return output;
}


//点云可视化
void showCloud(std::string windowname,pcl::PointCloud<pcl::PointXYZ>::Ptr cloud){
    pcl::visualization::PCLVisualizer::Ptr viewer (new pcl::visualization::PCLVisualizer (windowname));
    viewer->setBackgroundColor (0.5, 0.5, 0.5);  //设置背景
    viewer->addPointCloud<pcl::PointXYZ> (cloud, "sample cloud");  //显示点云
    viewer->setPointCloudRenderingProperties (pcl::visualization::PCL_VISUALIZER_POINT_SIZE, 1, "sample cloud");  //设置点尺寸
    viewer->addCoordinateSystem (100.0);  //设置坐标轴尺寸
//    while (!viewer->wasStopped ())
//    {
//      viewer->spinOnce (100);
//      boost::this_thread::sleep (boost::posix_time::microseconds (100000));
//    }
    cout<<"Point couting in "<<windowname<<": "<<cloud->size()<<endl;
}


//通道相减
cv::Mat channelSubtract(cv::Mat img,cv::Mat src){
    if (src.rows==img.rows && src.cols==img.cols){
        for(int i=0;i<src.rows;i++){
            for(int j=0;j<src.cols;j++){
                src.ptr<float>(i)[3*j] = img.ptr<float>(i)[3*j] - src.ptr<float>(i)[3*j];
                src.ptr<float>(i)[3*j+1] = img.ptr<float>(i)[3*j+1] - src.ptr<float>(i)[3*j+1];
                src.ptr<float>(i)[3*j+2] = img.ptr<float>(i)[3*j+2] - src.ptr<float>(i)[3*j+2];
            }
        }
    }
    return src;
}


int main(int argc, char *argv[])
{
    QCoreApplication a(argc, argv);

    //tiff转pcd
    cv::Mat img = cv::imread("D:\\Qt_Project\\model123.tiff",cv::IMREAD_UNCHANGED|cv::IMREAD_ANYCOLOR|cv::IMREAD_ANYDEPTH);

    cv::imshow("before filter",img);

    pcl::PointCloud<pcl::PointXYZ>::Ptr cloud (new pcl::PointCloud<pcl::PointXYZ>);
    //图转点云
    cloud = tiff2Cloud(img);

    //显示点云
    showCloud("before filter",cloud);

    //离群滤波
    pcl::PointCloud<pcl::PointXYZ>::Ptr cloud_filtered (new pcl::PointCloud<pcl::PointXYZ>);
    pcl::PointCloud<pcl::PointXYZ>::Ptr remove (new pcl::PointCloud<pcl::PointXYZ>);
    pcl::StatisticalOutlierRemoval<pcl::PointXYZ> sor;
    sor.setInputCloud (cloud);
    sor.setMeanK (50);
    sor.setStddevMulThresh (1.0);
    sor.filter(*cloud_filtered);
    showCloud("filtered",cloud_filtered);
    sor.setNegative(true);
    sor.filter(*remove);


    std::vector<pointindex> filteredpoints;
    for(int num = 0;num<remove->points.size();num++){
        for (int index = 0;index<pointList.size();index++){
            if (std::abs(remove->points[num].x - pointList[index].x) < 0.000001
                && std::abs(remove->points[num].y - pointList[index].y) < 0.000001
                && std::abs(remove->points[num].z - pointList[index].z) < 0.000001){
                filteredpoints.push_back(pointList[index]);
            }
        }
    }
    //离群点云转图
    cv::Mat src = cloud2Tiff(filteredpoints,img.rows,img.cols);
    //离群点云图与原图通道相减
    src = channelSubtract(img,src);
    cv::imshow("filtered",src);

    return a.exec();
}
这篇博客解决的问题是如何将.tiff文件转.pcd文件滤波后再转回.tiff文件同时保持像素的一致,下方链接中的源码仅解决了将.tiff文件转.pcd文件这个问题,注意甄别。
tiff转PCL
里面有完整的tiff转pcl代码以及用到的数据集


 172
172


 被折叠的 条评论
为什么被折叠?
被折叠的 条评论
为什么被折叠?
 到【灌水乐园】发言


