


内容来自百度百科和CS230作业
Keras是一个由Python编写的开源人工神经网络库,可以作为Tensorflow、Microsoft-CNTK和Theano的高阶应用程序接口,进行深度学习模型的设计、调试、评估、应用和可视化 。
Keras在代码结构上由面向对象方法编写,完全模块化并具有可扩展性,其运行机制和说明文档有将用户体验和使用难度纳入考虑,并试图简化复杂算法的实现难度。Keras支持现代人工智能领域的主流算法,包括前馈结构和递归结构的神经网络,也可以通过封装参与构建统计学习模型。在硬件和开发环境方面,Keras支持多操作系统下的多GPU并行计算,可以根据后台设置转化为Tensorflow、Microsoft-CNTK等系统下的组件。
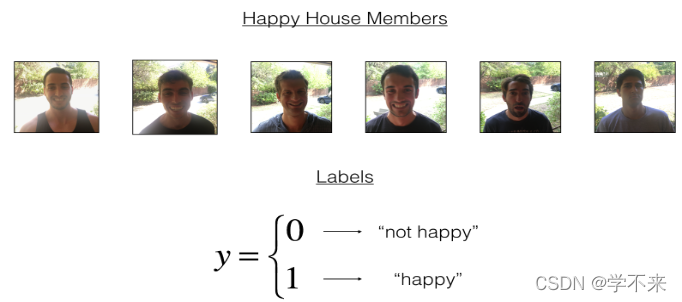
Keras tutorial - the Happy House
For your next vacation, you decided to spend a week with five of your friends from school. It is a very convenient house with many things to do nearby. But the most important benefit is that everybody has commited to be happy when they are in the house. So anyone wanting to enter the house must prove their current state of happiness.
As a deep learning expert, to make sure the "Happy" rule is strictly applied, you are going to build an algorithm which that uses pictures from the front door camera to check if the person is happy or not. The door should open only if the person is happy.
You have gathered pictures of your friends and yourself, taken by the front-door camera. The dataset is labbeled.
Building a model in Keras
Keras is very good for rapid prototyping. In just a short time you will be able to build a model that achieves outstanding results.
Exercise: Implement a HappyModel(). This assignment is more open-ended than most. We suggest that you start by implementing a model using the architecture we suggest, and run through the rest of this assignment using that as your initial model. But after that, come back and take initiative to try out other model architectures. For example, you might take inspiration from the model above, but then vary the network architecture and hyperparameters however you wish. You can also use other functions such as AveragePooling2D(), GlobalMaxPooling2D(), Dropout().
# GRADED FUNCTION: HappyModel

def HappyModel(input_shape):
    """
    Implementation of the HappyModel.

    Arguments:
    input_shape -- shape of the images of the dataset

    Returns:
    model -- a Model() instance in Keras
    """

    ### START CODE HERE ###
    # Feel free to use the suggested outline in the text above to get started, and run through the whole
    # exercise (including the later portions of this notebook) once. The come back also try out other
    # network architectures as well.

    X_input = Input(input_shape)
    X = ZeroPadding2D((1, 1))(X_input)
    # 66*66*3
    print(X.shape)
    X = Conv2D(8, (5, 5), strides = (1, 1))(X)
    X = BatchNormalization(axis = 3)(X)
    # 62*62*8
    print(X.shape)
    X = Activation('relu')(X)
    X = MaxPooling2D((2, 2), strides=(2, 2))(X)
    # 31*31*8
    print(X.shape)


    X = ZeroPadding2D((1, 1))(X)
    # 32*32*8
    print(X.shape)
    X = Conv2D(16, (3, 3), strides = (1, 1))(X)
    X = BatchNormalization(axis = 3)(X)
    # 30*30*16
    print(X.shape)
    X = Activation('relu')(X)
    X = MaxPooling2D((2, 2), strides=(2, 2))(X)
    # 15*15*16
    print(X.shape)

    X = ZeroPadding2D((1, 1))(X)
    # 16*16*16
    print(X.shape)
    X = Conv2D(32, (3, 3), strides = (1, 1))(X)
    X = BatchNormalization(axis = 3)(X)
    # 14*14*32
    print(X.shape)
    X = Activation('relu')(X)
    X = MaxPooling2D((2, 2), strides=(2, 2))(X)
    # 7*7*32
    print(X.shape)


    # FLATTEN X (means convert it to a vector) + FULLYCONNECTED
    X = Flatten()(X)
    Y = Dense(1, activation='sigmoid', name='fc')(X)

    # Create model. This creates your Keras model instance, you'll use this instance to train/test the model.
    model = Model(inputs = X_input, outputs = Y, name='HappyModel')


    ### END CODE HERE ###

    return model
create the model
happyModel = HappyModel((64,64,3))compile the model to configure the learning process
adam = keras.optimizers.Adam(lr=0.0001, beta_1=0.9, beta_2=0.999)
happyModel.compile(optimizer="adam", loss=keras.losses.mean_squared_error, metrics = ["accuracy"])
train the model. Choose the number of epochs and the batch size.
happyModel.fit(x=X_train, y=Y_train, epochs=20)![]()
![]()
![]()
test/evaluate the model.
preds = happyModel.evaluate(x=X_test, y=Y_test)

print()
print ("Loss = " + str(preds[0]))
print ("Test Accuracy = " + str(preds[1]))![]()
怀疑过拟合,减少迭代数
happyModel.fit(x=X_train, y=Y_train, epochs=10)![]()
测试自己的图片
img_path = 'images/my_image.jpg'
img = image.load_img(img_path, target_size=(64, 64))
imshow(img)

x = image.img_to_array(img)
x = np.expand_dims(x, axis=0)
x = preprocess_input(x)

print(happyModel.predict(x))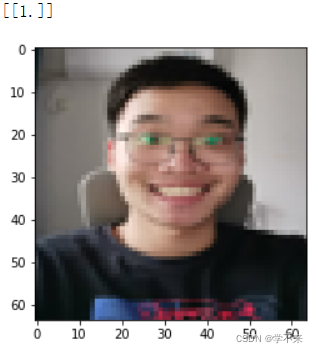


 697
697


 被折叠的 条评论
为什么被折叠?
被折叠的 条评论
为什么被折叠?
 到【灌水乐园】发言


