


目录
源码下载:
GitHub - 1578630119/Single_Object_Detection
目标检测是计算机视觉领域的一个核心任务,其目的是识别图像中的目标对象,并给出它们的类别和位置。将从最简单的单目标检测带大家简单认识目标检测任务,再到多目标检测任务,最后到少样本目标检测。
本章将先用一个最简单的单目标检测对目标检测例子来初步认识,单目标检测即每个样本中感兴趣的任务目标只有一个,训练神经网络模型预测出样本中目标对应的位置,即模型预测出一个边界框,用于定位目标对象的矩形框(通常是一个左上角坐标和一个右下角坐标)。最终目的是找出每张图片中小黄人的坐标位置。
一、数据集
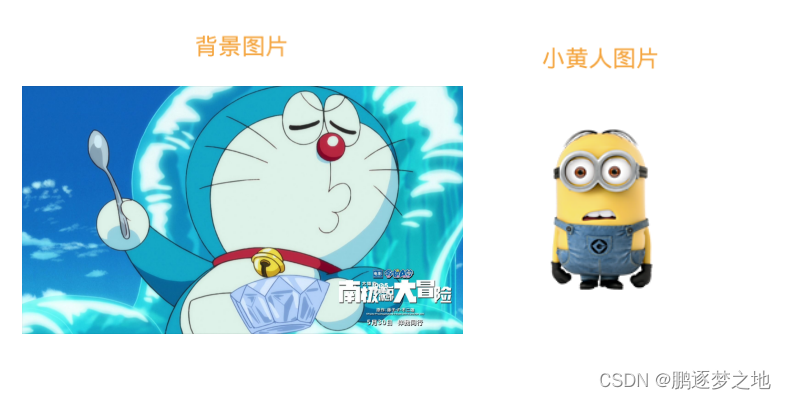
注:本章使用的数据集将用代码生成。背景图片在利用爬虫在网上下载,目标对象使用小黄人图片(共有20张图片),最终生成的图片是将小黄人粘贴在背景图片中。
1.爬取网上图片作为背景图片
import re
import requests
from urllib import error
import os
import cv2

num = 0
numPicture = 0
file = 'Crawling_result'
List = []
headers = {
    'Accept-Language': 'zh-CN,zh;q=0.8,zh-TW;q=0.7,zh-HK;q=0.5,en-US;q=0.3,en;q=0.2',
    'Connection': 'keep-alive',
    'User-Agent': 'Mozilla/5.0 (X11; Linux x86_64; rv:60.0) Gecko/20100101 Firefox/60.0',
    'Upgrade-Insecure-Requests': '1'
}
A = requests.Session()
A.headers = headers


def dowmloadPicture(html, keyword):
    global num
    # t =0
    pic_url = re.findall('"objURL":"(.*?)",', html, re.S)  #正则表达式找到目标图片的url
    for each in pic_url:
        print('下载第' + str(num + 1) + '张图片')
        try:
            if each is not None:
                pic = requests.get(each, timeout=7)
            else:
                continue
        except BaseException:
            continue
        else:
            string = file + r'/' + str(num) + '.jpg'
            print(string)
            fp = open(string, 'wb')
            fp.write(pic.content)
            fp.close()
            num += 1
        if num >= numPicture:
            return

def Crawling_images():
    word = input("请输入搜索词: ")
    url = 'https://image.baidu.com/search/flip?tn=baiduimage&ie=utf-8&word=' + word + '&pn='
    numPicture = int(input('请输入下载的数量 '))
    t = 0
    tmp = url
    while t < numPicture:
        try:
            url = tmp + str(t)
            # 这里搞了下
            result = A.get(url, timeout=10, allow_redirects=False)

        except error.HTTPError as e:
            print('网络错误')
            t = t + 1
        else:
            dowmloadPicture(result.text, word)
            t = t + 1

def Arrange_image():
    i=0
    for img_name in os.listdir("Crawling_result"):
        img=cv2.imread("Crawling_result/"+img_name)
        if img is not None:
            i_name=str(i).zfill(6)
            cv2.imwrite('Background/'+i_name+'.jpg',img)
            i=i+1
        os.remove("Crawling_result/"+img_name)


if __name__=="__main__":
    Crawling_images() #在网上爬取图片
    Arrange_image() #整理下载好的图像,只保留可以加载的图片
利用爬虫爬取图片,这些图片作为背景使用,所以可以随便下载自己喜欢的类型,但不能和小黄人图片类型相同。下载的数量也由自己决定。由于网上爬取的图片并非是每一张都能正常加载,存在部分图片显示错误无法加载,需要将这部分图片删除。
2.生成图片和标签
import os
import random

from PIL import Image
import numpy as np

bg_path = "Background"
bg_names = os.listdir(bg_path)
bg_w=416
bg_h=320


def Dataset_generate():
    #背景图片中前80%和小黄人图片中前80%用来生成训练集和验证集,后百分之20用来生成测试集
    nums = len(bg_names)
    x = 0
    ftrain = open('data/train.txt', 'w')
    ftest = open('data/test.txt', 'w')
    for i in range(nums):
        background = Image.open("{0}/{1}".format(bg_path, bg_names[i]))
        shape = np.shape(background)    #检测背景通道数
        if len(shape) == 3:
            background = background
        else:
            background=background.convert('RGB')
        background_resize = background.resize((bg_w,bg_h))   #统一背景图片大小
        for k in range(random.randint(5, 9)):   #针对每一张背景图片,随机和小黄人图片生成n张图片
            background_new=background_resize.copy()
            name = np.random.randint(1, 21) #随机选择小黄人图片
            img_font = Image.open("yellow/{0}.png".format(name))
            ran_w = np.random.randint(60, 150)
            ran_h = np.random.randint(80, 200)
            img_new = img_font.resize((ran_w, ran_h))

            ran_x1 = np.random.randint(0, bg_w - ran_w)      #小黄人随机粘贴在背景图片上的坐标
            ran_y1 = np.random.randint(0, bg_h - ran_h)

            r, g, b, a = img_new.split()
            background_new.paste(img_new, (ran_x1, ran_y1), mask=a)  #小黄人粘贴在背景图片上

            ran_x2 = ran_x1 + ran_w
            ran_y2 = ran_y1 + ran_h #小黄人右下角坐标

            background_new.save("data/{0}.jpg".format(str(x).zfill(6)))  #保存图片
            if i < int(nums * 0.8):
                ftrain.write("{}.jpg".format(str(x).zfill(6)) + " " + str(ran_x1) + "," + str(ran_y1) + "," + str(
                    ran_x2) + "," + str(ran_y2) + "," + str(name-1) + "\n")
            else:
                ftest.write("{}.jpg".format(str(x).zfill(6)) + " " + str(ran_x1) + "," + str(ran_y1) + "," + str(
                    ran_x2) + "," + str(ran_y2) + "," + str(name-1) + "\n")   #保存标签
            x += 1
    ftrain.close()
    ftest.close()

if __name__ == "__main__":
    Dataset_generate() #生成图片
生成结果如下:

将小黄人作为前景图粘贴到背景图中,利用Pillow库中Paste可以实现小黄人中的背景在粘贴时不会出现在生成图片中,Paste中的mask参数:遮罩、掩膜图像,即透明区域的不合成。
将前面爬取的80%图片和80%小黄人图片用于生成训练集和验证集,后20%用于生成测试集。
3.自定义一个数据集
import numpy as np
from PIL import Image
from torch.utils.data.dataset import Dataset

def cvtColor(image):
    if len(np.shape(image)) == 3 and np.shape(image)[2] == 3:
        return image
    else:
        image = image.convert('RGB')
        return image
def preprocess_input(image):
    image /= 255.0      #数据归一化
    return image


class ImgDataset(Dataset):
    def __init__(self, annotation_lines, input_shape=[320, 416]):
        self.annotation_lines = annotation_lines
        self.length = len(annotation_lines)
        self.input_shape = input_shape      #设定图片的尺寸

    def __len__(self):
        return self.length

    def __getitem__(self, index):
        index = index % self.length
        image, y = self.get_random_data(self.annotation_lines[index], self.input_shape[0:2])
        image = np.transpose(preprocess_input(np.array(image, dtype=np.float32)), (2, 0, 1))
        box = y[:4]
        label = y[-1]
        return image, box


    def get_random_data(self, annotation_line, input_shape):
        line = annotation_line.split()

        image = Image.open('data/'+line[0])
        image = cvtColor(image)     #确保图片是三通道,如果不是则转换成三通道格式

        iw, ih = image.size #图片原始尺寸
        h, w = input_shape  #设定图片的高宽

        box = np.array(list(map(int, line[1].split(','))))
        scale = min(w / iw, h / ih)
        nw = int(iw * scale)
        nh = int(ih * scale)
        dx = (w - nw) // 2
        dy = (h - nh) // 2  #计算图片尺寸调整比例
        # ---------------------------------#
        #   将图像多余的部分加上灰条
        # ---------------------------------#
        image = image.resize((nw, nh), Image.Resampling.BICUBIC)
        new_image = Image.new('RGB', (w, h), (128, 128, 128))
        new_image.paste(image, (dx, dy))
        image_data = np.array(new_image, np.float32)

        # ---------------------------------#
        #   因对原图像进行尺寸调整,还需对真实框进行调整
        # ---------------------------------#
        box[0] = box[0] * nw / iw + dx
        box[2] = box[2] * nw / iw + dx
        box[1] = box[1] * nh / ih + dy
        box[3] = box[3] * nh / ih + dy
        box[0:2][box[0:2] < 0] = 0
        box[2:3][box[2:3] > w] = w
        box[3:4][box[3:4] > h] = h

        return image_data, box
使用此类时,可以创建一个 DataLoader 来轻松迭代和批量处理数据集。
二、搭建网络模型
注:由于任务比较简单,简单搭建几层卷积层和全连接层即可。
from torch import nn
import torch.nn.functional as F

class Net(nn.Module):
    def __init__(self):
        super(Net, self).__init__()
        self.conv1 = nn.Conv2d(3, 32, 3, padding=1, stride=2)
        self.conv2 = nn.Conv2d(32, 32, 3, padding=1, stride=2)
        self.conv3 = nn.Conv2d(32, 128, 3, padding=1, stride=2)
        self.conv4 = nn.Conv2d(128, 128, 3, padding=1, stride=2)
        self.conv5 = nn.Conv2d(128, 512, 3, padding=1, stride=2)
        self.avgpool = nn.AvgPool2d((2, 2))
        self.fc1 = nn.Linear(512 * 10 * 13, 512)
        self.fc2 = nn.Linear(512, 4)
        self._initialize_weights()

    def _initialize_weights(self):
        for m in self.modules():
            if isinstance(m, nn.Conv2d):
                nn.init.kaiming_normal_(m.weight, a=0, mode='fan_in', nonlinearity='leaky_relu')

                if m.bias is not None:
                    nn.init.zeros_(m.bias)
            elif isinstance(m, nn.Linear):
                nn.init.kaiming_normal_(m.weight, a=0, mode='fan_in', nonlinearity='leaky_relu')
                if m.bias is not None:
                    nn.init.zeros_(m.bias)

    def forward(self, x):  # x (3,h,w)
        x = F.leaky_relu(self.conv1(x))  # 32,h/2,w/2
        x = F.leaky_relu(self.conv2(x))  # 32,h/4,w/4
        x = F.leaky_relu(self.conv3(x))  # 128,h/8,w/8
        x = F.leaky_relu(self.conv4(x))  # 128,h/16,w/16
        x = F.leaky_relu(self.conv5(x))  # 512,h/32,w/32

        x = x.view(-1, 512 * 10 * 13)
        x = F.leaky_relu(self.fc1(x))
        x = self.fc2(x)
        return x
网络模型中包含五层卷积层和两层全连接层,网络模型的输入是图像数据,输出是模型预测结果,模型的预测结果为目标的坐标,左上角坐标(x1,y1)和右下角坐标(x2,y2),全连接层的输出为4。由于搭建的网络模型相对简单,最终的检测效果也相对一般,后面会使用更好的模型来重新训练。
优化器和损失函数分别选的Adam和均L1Loss。
三、训练模型
import os
import numpy as np
from Dataloader import ImgDataset
from model import Net
from torch import nn,utils,optim
import torch
from tqdm import tqdm
import cv2


train_batch_size=8  #训练集、验证集、测试集批大小
eval_batch_size=32
test_batch_size=32

with open('data/train.txt') as f:
    train_lines=f.readlines()
with open('data/test.txt') as f:
    test_lines=f.readlines()
eval_lines=train_lines[:int(len(train_lines)*0.2)]  #将原本的训练集划分为训练集和验证集,训练集:验证集=4:1
train_lines=train_lines
train_dataset=ImgDataset(train_lines)
eval_dataset=ImgDataset(eval_lines)
test_dataset=ImgDataset(test_lines)

# 创建数据加载器
train_loader = utils.data.DataLoader(train_dataset, batch_size=train_batch_size, shuffle=True)
eval_loader = utils.data.DataLoader(eval_dataset, batch_size=eval_batch_size, shuffle=False)
test_loader = utils.data.DataLoader(test_dataset, batch_size=test_batch_size)


device = torch.device('cuda' if torch.cuda.is_available() else 'cpu')
model=Net()
model=model.to(device)
criterion=nn.L1Loss()
criterion=criterion.to(device)
optimizer=optim.Adam(model.parameters(),lr=1e-3,weight_decay=1e-3)


def train(epoch, epochs):
    # 训练模型
    train_loss = 0
    model.train()
    pbar = tqdm(total=len(train_loader), desc=f'Epoch {epoch + 1}/{epochs}', mininterval=0.3)
    for batch_idx, (data, target) in enumerate(train_loader):  # 批次,输入数据,标签
        data = data.to(device)
        target = target.to(device)
        optimizer.zero_grad()
        output = model(data)
        loss = criterion(output, target.float())
        loss.backward()
        optimizer.step()
        train_loss += loss.item()
        pbar.set_postfix(**{'train loss': train_loss / (batch_idx + 1)})
        pbar.update(1)
    return train_loss / (batch_idx + 1)

def eval(epoch,epochs):
    #测试模型
    model.eval()
    pbar = tqdm(total=len(eval_loader), desc=f'Epoch {epoch + 1}/{epochs}', mininterval=0.3)
    eval_loss = 0
    with torch.no_grad(): #仅测试模型,禁用梯度计算
        for batch_idx, (data, target) in enumerate(eval_loader):
            data=data.to(device)
            target=target.to(device)
            output = model(data)
            eval_loss += criterion(output, target).item()
            pbar.set_postfix(**{'eval loss': eval_loss / (batch_idx + 1)})
            pbar.update(1)
    return eval_loss/(batch_idx + 1)


def model_fit(epochs):
    best_loss = 1e7
    for epoch in range(epochs):
        train_loss = train(epoch, epochs)
        eval_loss = eval(epoch, epochs)
        print('\nEpoch: {}\tTrain Loss: {:.6f}\tEval Loss: {:.6f}'.format(epoch + 1, train_loss, eval_loss))
        if eval_loss < best_loss:
            best_loss = eval_loss
        torch.save(model.state_dict(), 'model.pth')#保存在验证集上预测效果最好的模型权重
用训练集训练模型,保存在验证集上预测效果最好的模型权重。
三、测试模型
def test():
    #如果已经训练好了权重,模型直接加载权重文件进行测试#
    model_test=Net()
    model_test.load_state_dict(torch.load('model.pth',map_location=device))
    model_test.eval()
    model_test=model_test.to(device)
    test_loss = 0
    with torch.no_grad():  # 仅测试模型,禁用梯度计算
        for batch_idx, (data, target) in enumerate(eval_loader):
            data = data.to(device)
            target = target.to(device)
            output = model_test(data)
            test_loss += criterion(output, target).item()
    print('Test Loss:',test_loss/(batch_idx+1))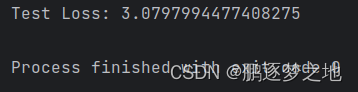
使用测试集测试模型,最终测试损失为3.08,相当于预测框和真实框的每个坐标平均损失为3个像素点。
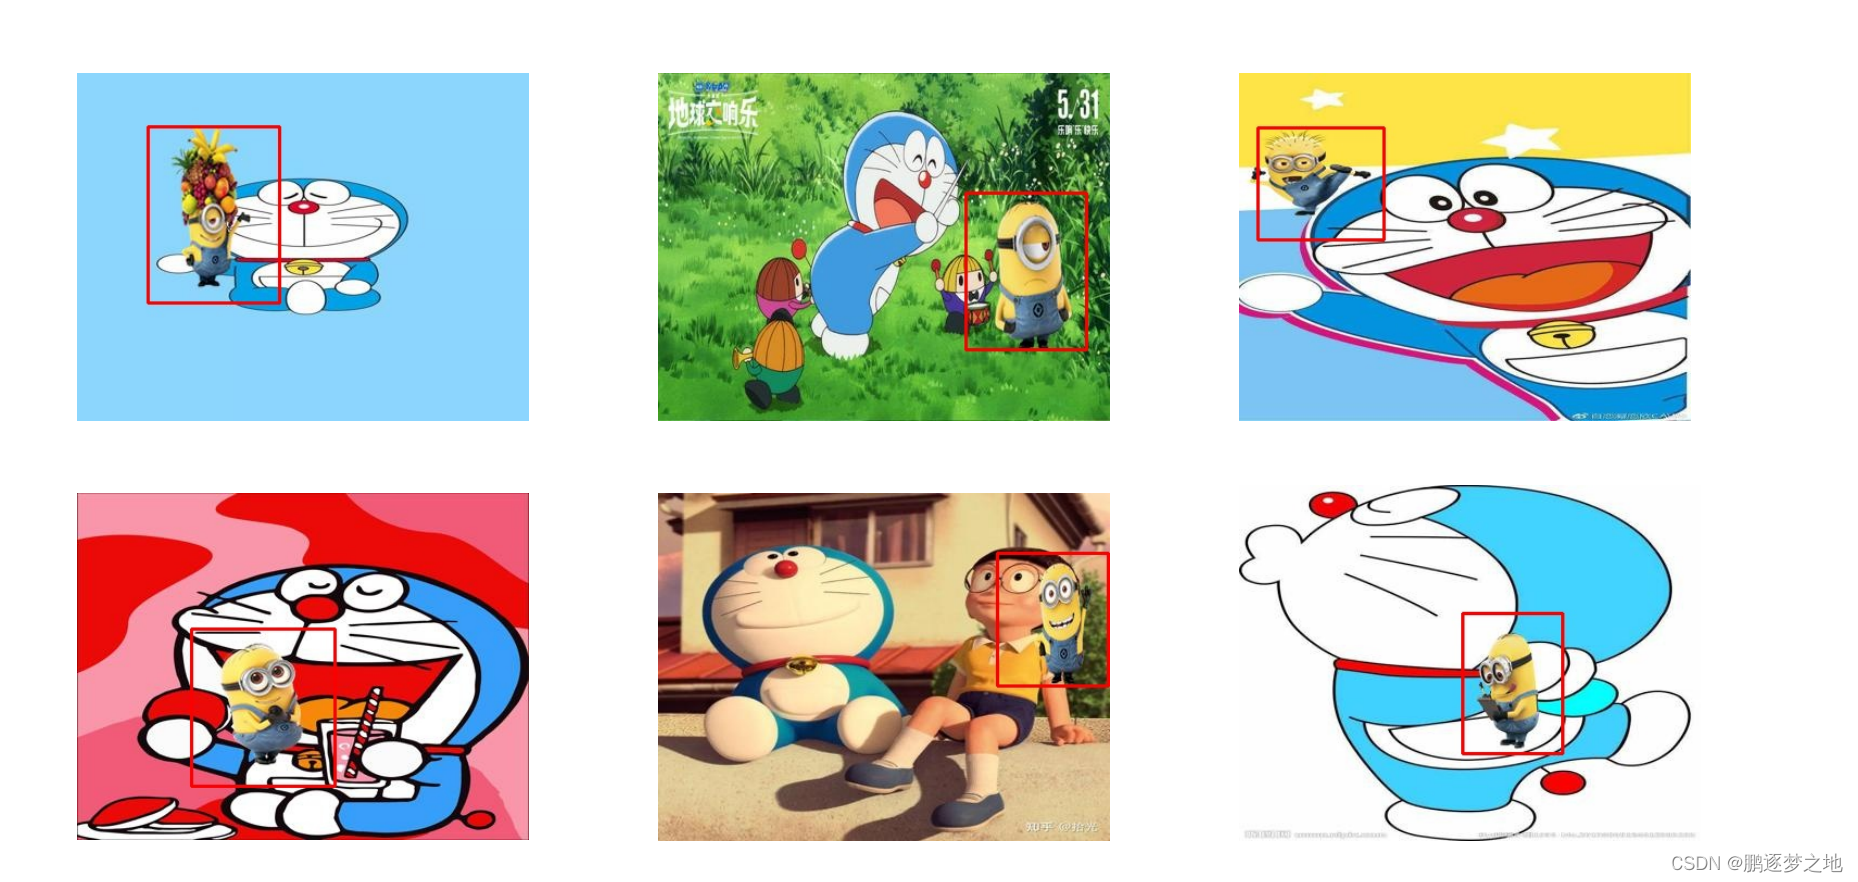
以下是一些模型预测结果展示。


 1460
1460

 被折叠的 条评论
为什么被折叠?
被折叠的 条评论
为什么被折叠?
 到【灌水乐园】发言


