


在 WSL 环境中配置:WSL2 (2.3.26.0) + Oracle Linux 8.7 官方镜像
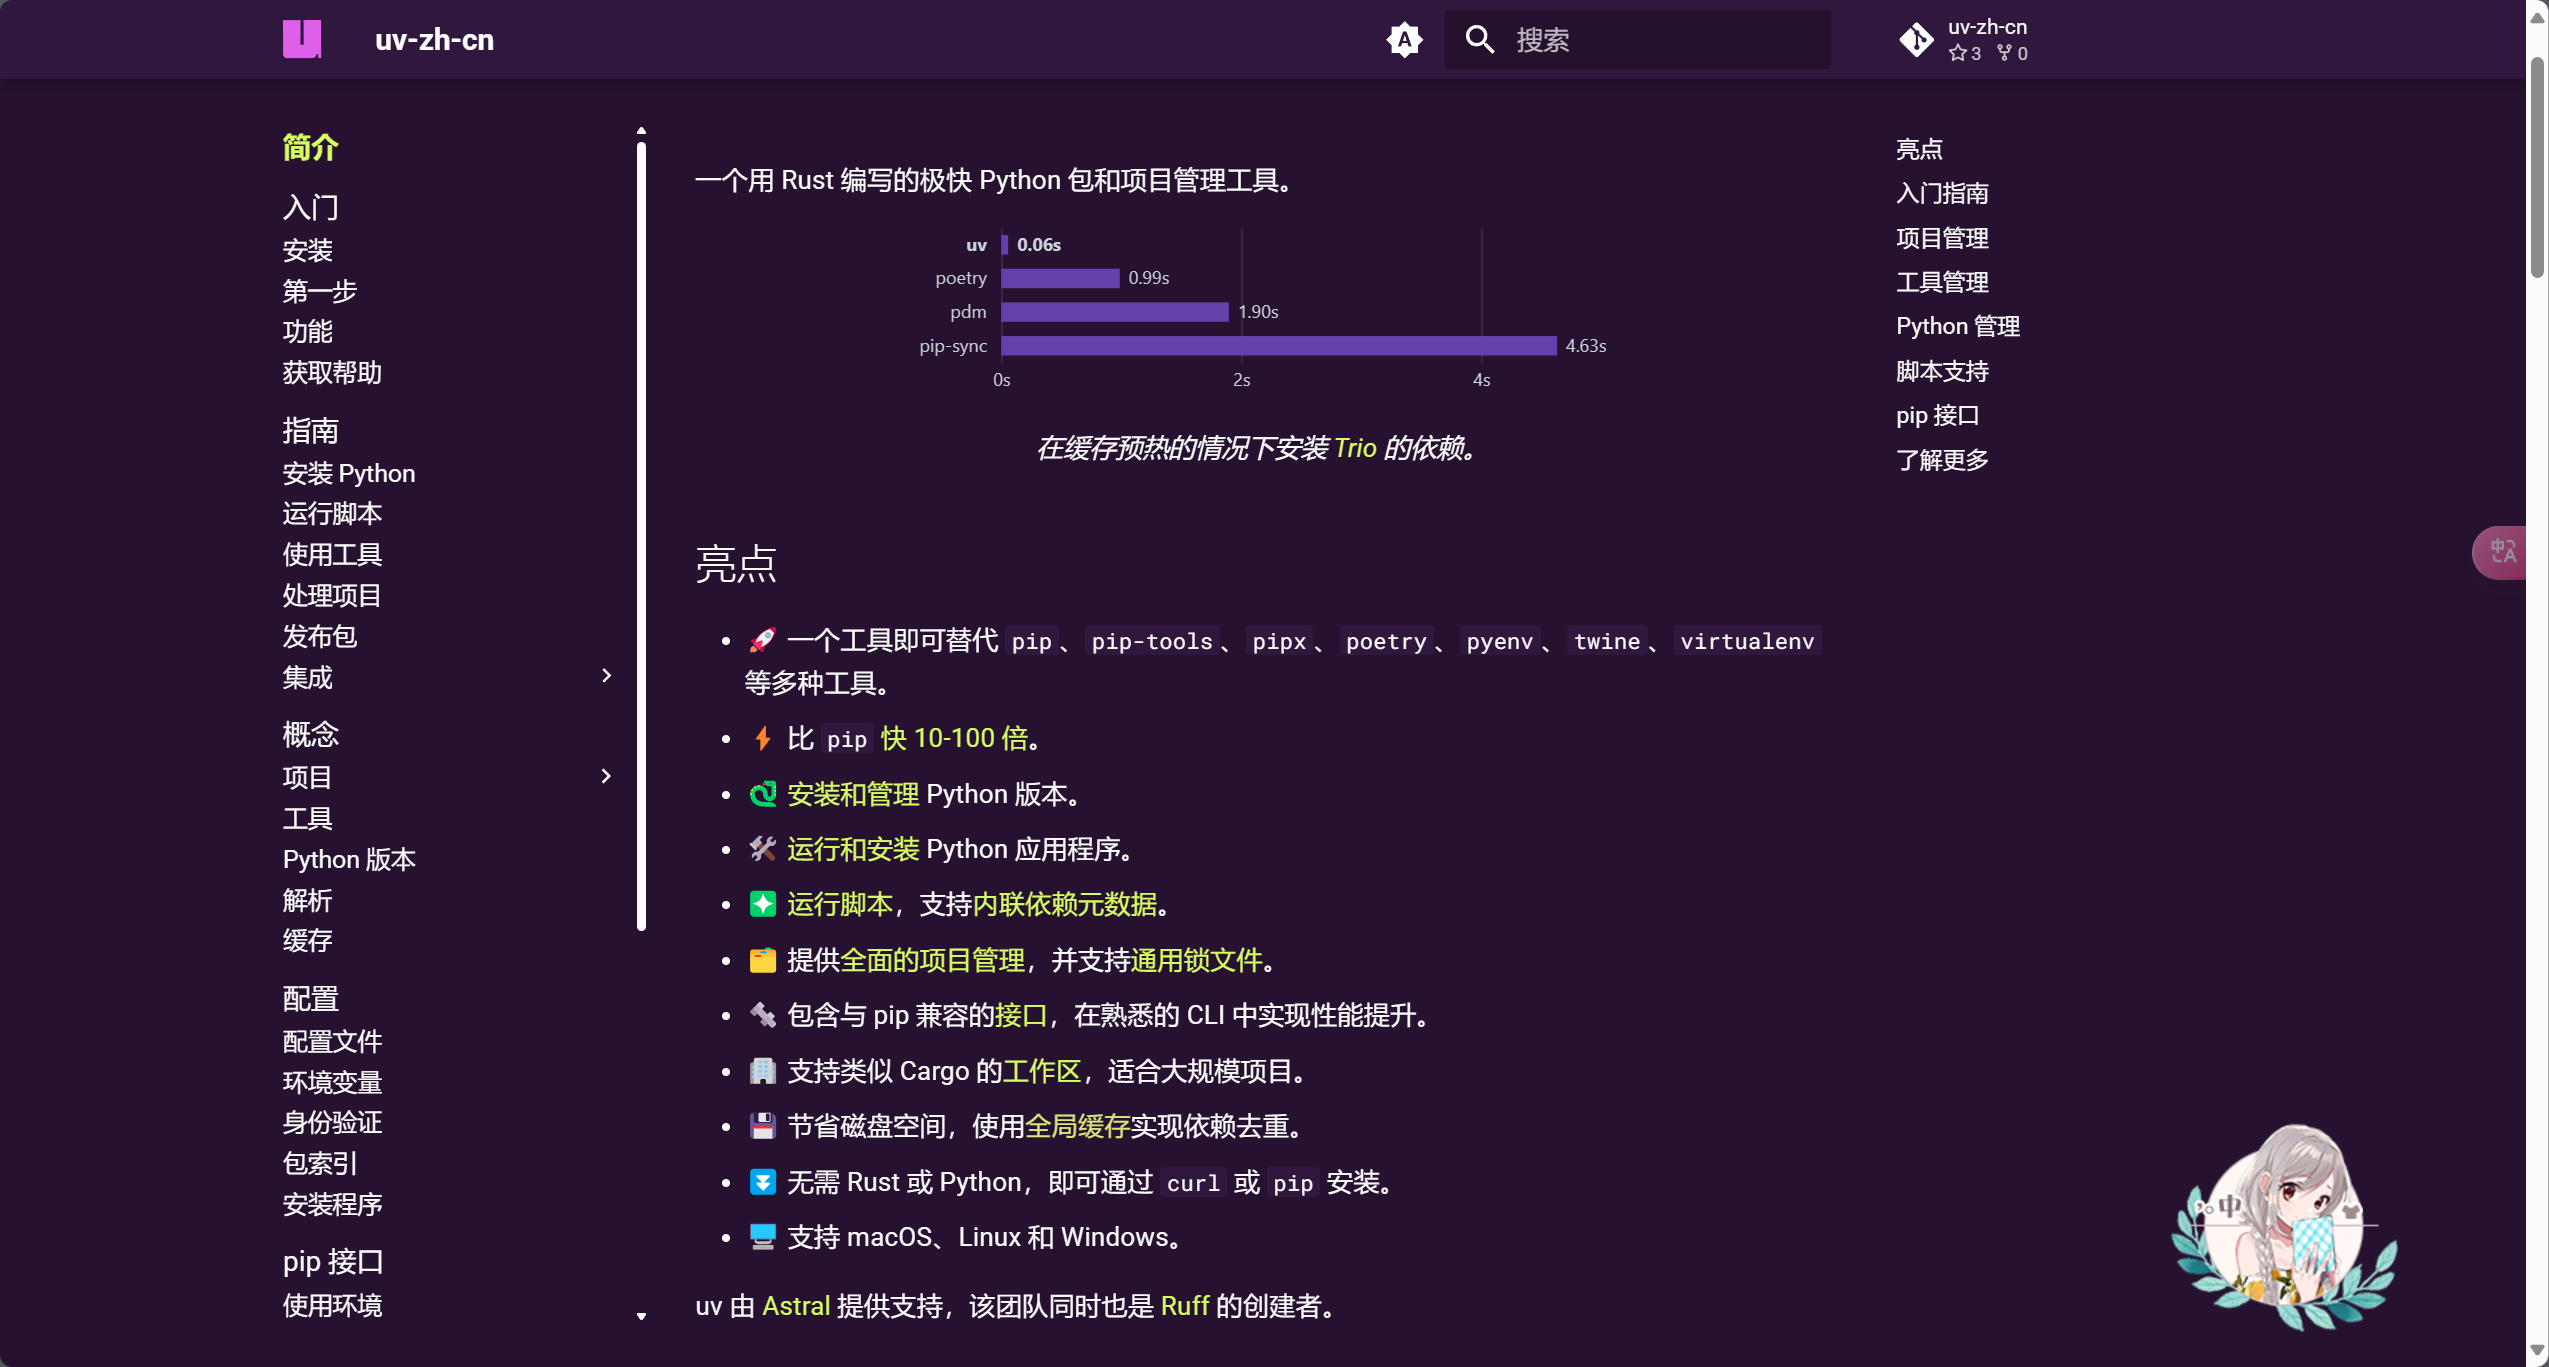
UV 介绍
uv软件官网(github 需要梯子,没错这个软件的官网真就是 github 页面):https://github.com/astral-sh/uv
中文官网(github 需要梯子,是官网的个人汉化):https://hellowac.github.io/uv-zh-cn/
为啥选择uv?
- 快,相比 pip 超快
- 一条龙管理:可管理项目、 python 版本、pip 软件包、依赖
(类似于 conda 的功能)
使用参考:
uv 安装
这里使用独立安装包进行安装(这样日后可以独立升级uv)

在WSL中执行以下指令
curl -LsSf https://astral.sh/uv/install.sh | sh
执行过程中如果出现问题,也可以先尝试下载保存 .sh文件,然后再执行文件
# 1. 将文件下载并保存,保存文件名为 install.sh
curl -LsSf https://astral.sh/uv/install.sh -o install.sh

# 2. 执行下载的文件
chmod a+x install.sh
./install.sh
安装完成会提示everything's installed!

重新刷新一下环境变量,保证上面安装的程序指令能找到
source ~/.bashrc
检验安装成功:输入uv会输出 uv 指令的帮助信息
root@23454276f8ea:~/py-project# uv
An extremely fast Python package manager.

Usage: uv [OPTIONS] <COMMAND>

Commands:
  run      Run a command or script
  init     Create a new project
  add      Add dependencies to the project
  remove   Remove dependencies from the project
  sync     Update the project's environment
  lock     Update the project's lockfile
  export   Export the project's lockfile to an alternate format
  tree     Display the project's dependency tree
  tool     Run and install commands provided by Python packages
  python   Manage Python versions and installations
  pip      Manage Python packages with a pip-compatible interface
  venv     Create a virtual environment
  build    Build Python packages into source distributions and wheels
  publish  Upload distributions to an index
  cache    Manage uv's cache
  self     Manage the uv executable
  version  Display uv's version
  help     Display documentation for a command

Cache options:
  -n, --no-cache               Avoid reading from or writing to the cache, instead
                               using a temporary directory for the duration of the
                               operation [env: UV_NO_CACHE=]
      --cache-dir <CACHE_DIR>  Path to the cache directory [env: UV_CACHE_DIR=]

Python options:
      --python-preference <PYTHON_PREFERENCE>
          Whether to prefer uv-managed or system Python installations [env:
          UV_PYTHON_PREFERENCE=] [possible values: only-managed, managed, system,
          only-system]
      --no-python-downloads
          Disable automatic downloads of Python. [env: "UV_PYTHON_DOWNLOADS=never"]

Global options:
  -q, --quiet
          Do not print any output
  -v, --verbose...
          Use verbose output
      --color <COLOR_CHOICE>
          Control the use of color in output [possible values: auto, always, never]
      --native-tls
          Whether to load TLS certificates from the platform's native certificate store
          [env: UV_NATIVE_TLS=]
      --offline
          Disable network access [env: UV_OFFLINE=]
      --allow-insecure-host <ALLOW_INSECURE_HOST>
          Allow insecure connections to a host [env: UV_INSECURE_HOST=]
      --no-progress
          Hide all progress outputs [env: UV_NO_PROGRESS=]
      --directory <DIRECTORY>
          Change to the given directory prior to running the command
      --project <PROJECT>
          Run the command within the given project directory
      --config-file <CONFIG_FILE>
          The path to a `uv.toml` file to use for configuration [env: UV_CONFIG_FILE=]
      --no-config
          Avoid discovering configuration files (`pyproject.toml`, `uv.toml`) [env:
          UV_NO_CONFIG=]
  -h, --help
          Display the concise help for this command
  -V, --version
          Display the uv version

Use `uv help` for more details.
uv 创建项目
使用uv创建一个 Python 项目:uv init 项目路径(路径+名称)
这里以官方的示例项目为例,在当前目录下创建项目文件夹
uv init example

文件夹中包含依赖、虚拟环境的配置清清单、程序代码文件等

依赖清单(pyproject.toml)中的内容

指定了 python 版本(>=3.13)、依赖(dependencies)
创建 python 虚拟环境
类似 conda 的创建环境指令:conda create -n your_env_name python=X.X
语法:uv venv 环境名称 --python 版本
环境名称、版本可省略:uv venv
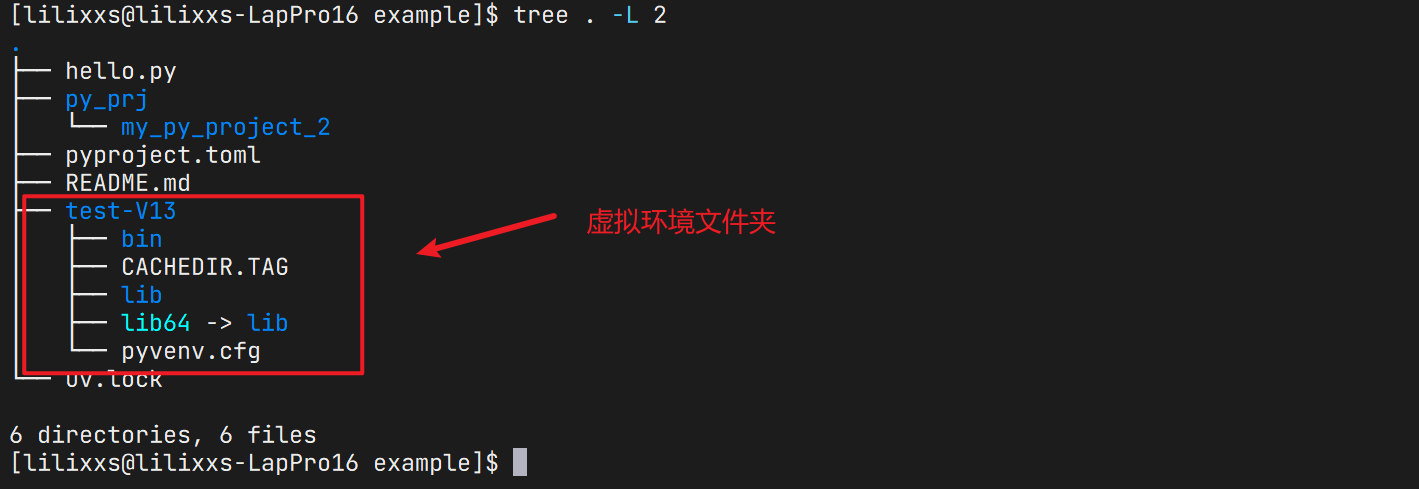
uv venv test-V13 --python 3.13
提示创建成功,激活可以输入下面绿色文字

会在当前项目下创建虚拟环境文件夹
激活虚拟环境
类似 conda 的环境切换指令:source activate your_env_name
激活前需要先创建对应的虚拟环境
语法:source 虚拟环境文件夹路径/bin/activate
source
激活成功后,命令行左侧多出一个()区域,显示当前激活的 python 虚拟环境
验证当前 python 指令是否可以执行

uv 配置 pip 加速
类似使用 pip 时在 pip.conf 中配置的 [global] index-url = XXX 配置
虚拟环境激活后,相当于正常使用 python
python 默认的包管理工具 pip 会向国外网站获取数据,速度较慢,需要换成国内的源,加速 pip
参考官方文档,设置uv的全局加速
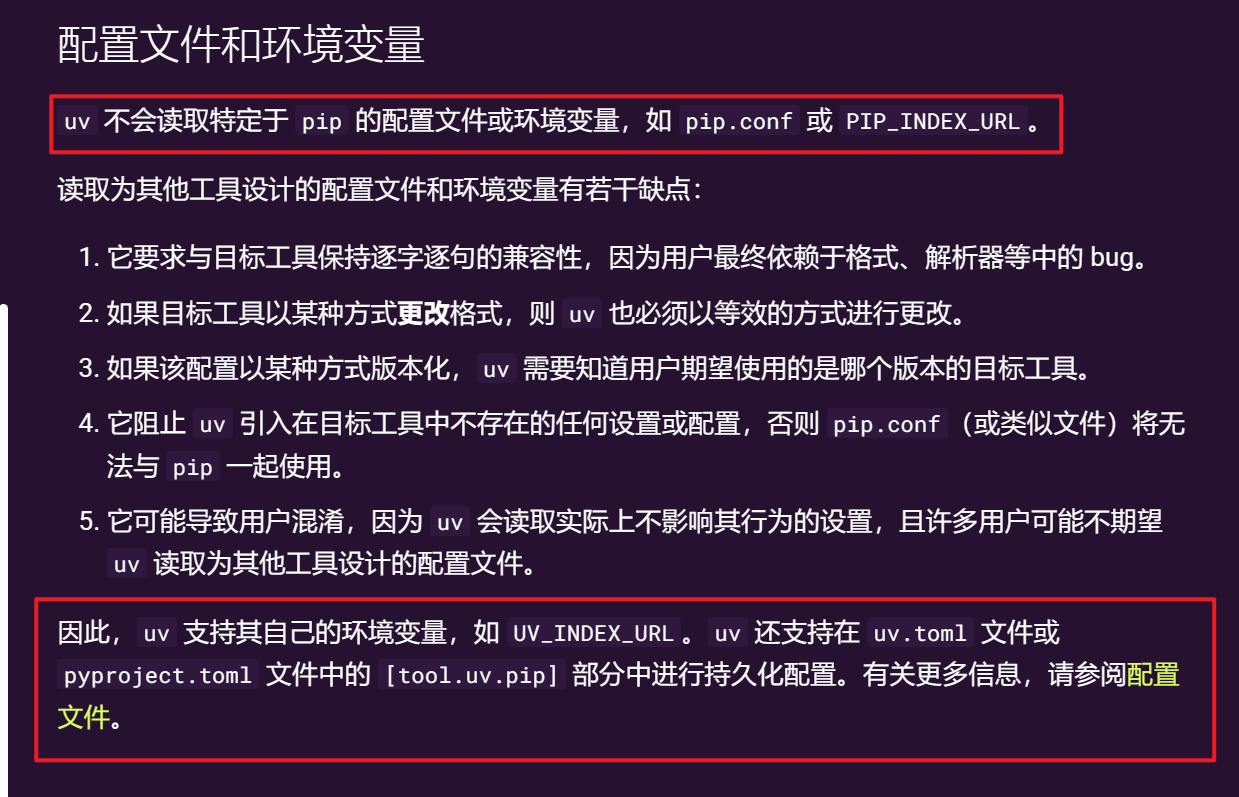
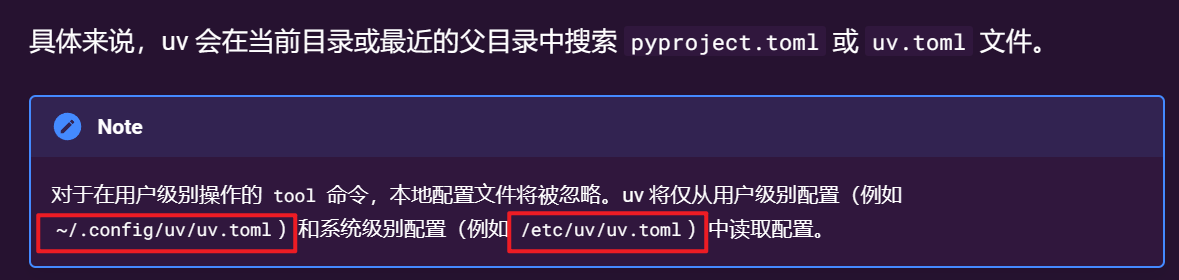
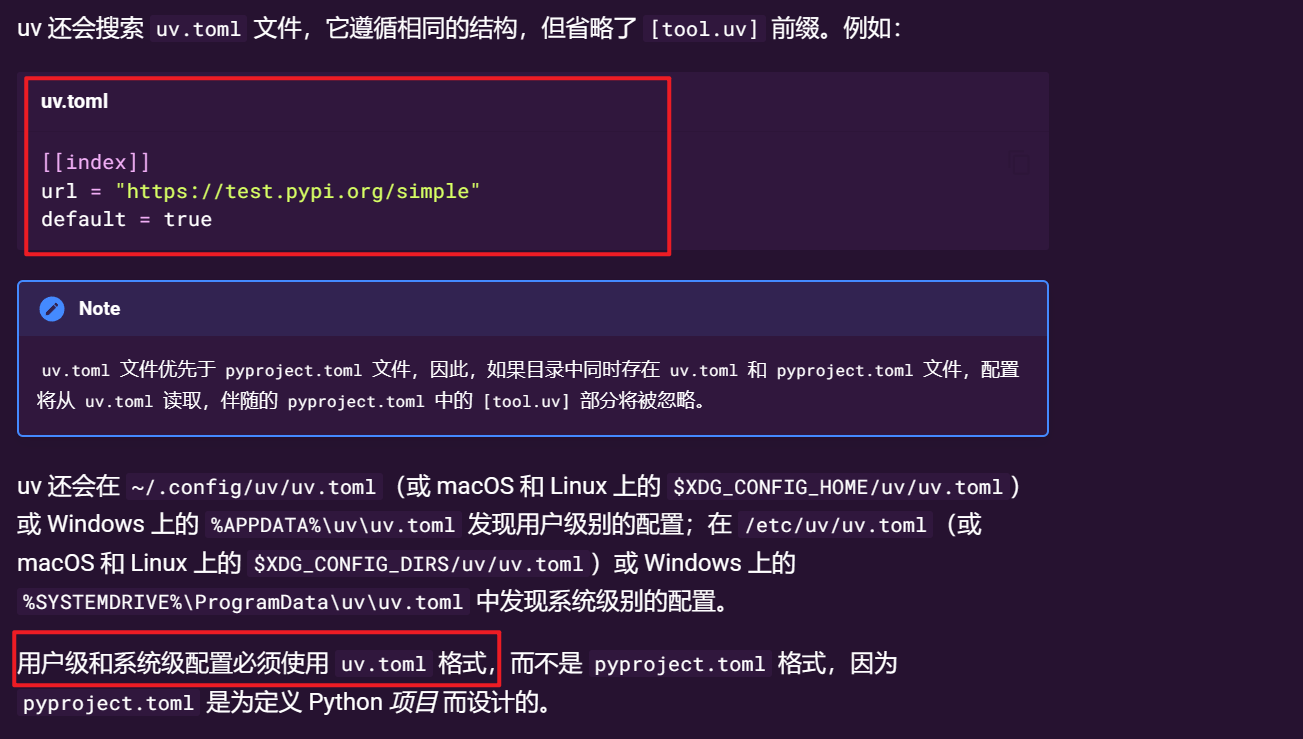
在~/.config/uv/uv.toml文件中,添加以下内容(如果没有这个文件就大胆新建)
vim ~/.config/uv/uv.toml
修改并保存配置,这里使用清华源

[[index]]
url = "https://pypi.tuna.tsinghua.edu.cn/simple"
default = true
其他源可参考:https://blog.csdn.net/HandsomeHong/article/details/123963679
安装项目依赖包(对于 Python 项目也可装 python 依赖包)
cd example
uv add ruff
这里可见,uv使用uv add添加 python 依赖包
- 这个 API 更偏向于项目管理
会自动将软件包的信息记录到pyproject.toml中(类似原 python 中的requirements.txt),有利于项目管理(如根据此文件快速检查依赖关系、锁定各依赖包版本、批量安装相关依赖…) - 实际上用
uv pip也能装软件包,但不会自动生成以上的项目文件,不利于项目内各个依赖的管理
安装 python 依赖包
类似 pip install XXX
注意:这个操作需要先激活一个虚拟环境
语法:uv pip install 包名
示例,安装一个requests包(体验极快的速度)

编写程序文件
这里打开示例项目中的hello.py文件,相当于我们编写的程序
vim hello.py
示例程序会输出一句:Hello from example!

执行 Python 脚本
执行示例项项目中的 python 程序
- 示例项目路径:
/opt/uv-py/example. - python 文件名称:
hello.py
cd /opt/uv-py/example
python hello.py
执行结果,与上面的代码逻辑一致

注意:这里执行的前提是先激活一个 Python 环境,否则无法执行python这个指令
总结:使用 uv 创建 Python 项目的整体流程
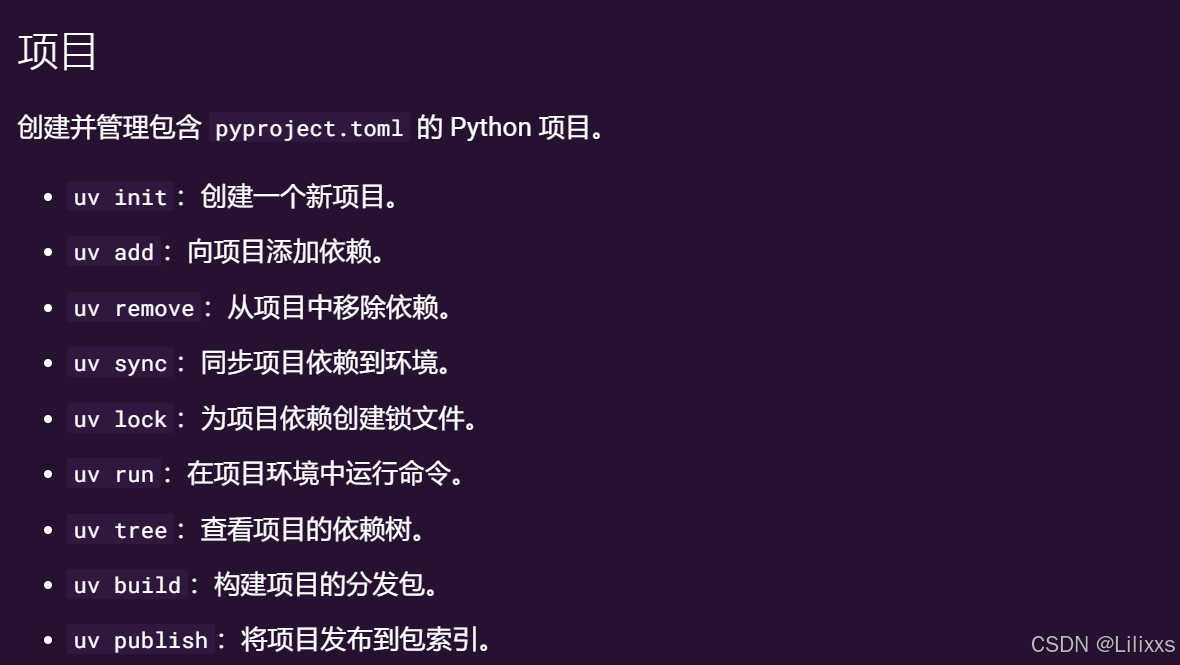
- 初始化环境:
uv init - 创建虚拟环境用于运行 Python(这里不创建则执行
run指令时会自动创建):uv venv - 为项目添加 / 删除依赖包:
uv add/uv remove - 编写程序代码
- 运行项目:
uv run - 固定项目依赖包,保证在其他新环境上安装的依赖相同:
uv lock - 将uv的项目文件夹移到新的电脑上,并安装 uv、使用 uv 创建虚拟环境
- 为新的 Python 环境批量安装特定版本的软件依赖:
uv sync - 项目打包(whl包):
uv build - 项目发布到 index(比如 pypi.org):
uv publish


 189
189

 被折叠的 条评论
为什么被折叠?
被折叠的 条评论
为什么被折叠?
 到【灌水乐园】发言


