


一、65536x8位的单端口RAM
`timescale 1ns / 1ps
//SPRF Single Port Read/Write Function
//65535 是RAM中总的字数,也就是存储深度,X8表示每个字是8位的
module SPRF65536X8(
  Q,
  CLK,
  CEN,
  WEN,
  A,
  D
);

  //输出寄存器Q
  output [7:0]	Q;
  input 		CLK;
  //chip enable 片上使能
  input			CEN;
  //write enable 写使能
  input			WEN;
  //16位地址输入
  input [15:0]	A;
  //8位数据输入
  input [7:0]	D;

  reg [7:0] 	mem[0:65535];
  reg [7:0] 	Q;

 //控制存储体men[]
 //低电平触发CEN和WEN
  always @ (posedge CLK)
	if(!CEN & !WEN)
	  mem[A] <= D;


  always @ (posedge CLK)
  //片上使能OK,写使能不OK的时候
	if(!CEN & WEN)
	  Q <= mem[A];
	else if(!CEN & !WEN)
	  Q <= D;
	else
	  Q <= Q;

endmodule
二、256*11的双端口RAM
双端口RAM相比单端口RAM,允许同时进行读写操作,读写过程不会相互影响。这使得它更适用于需要并行读写访问的应用场景,如FIFO(先进先出队列)、缓存等。但相应的,双端口RAM的资源消耗也更高。
`timescale 1ns / 1ps

// Two Port Read/Write Function
// 256 deep , 11bit
// AA: 8位读地址输入端口A
// AB: 8位写地址输入端口B
// DB: 11位数据输入端口B
// CENA: 读使能端口A
// CENB: 写使能端口B
// CLKA: 读时钟输入端口A
// CLKB: 写时钟输入端口B
// QA: 11位数据输出端口A
module TPRF256X11 (
  AA,
  AB,
  DB,
  CENA,
  CENB,
  CLKA,
  CLKB,
  QA
);

  input [7:0]	AA;
  input [7:0]	AB;
  input			CENA;
  input			CENB;
  input 		CLKA;
  input 		CLKB;
  input [10:0]	DB;
  output [10:0]	QA;

  reg [10:0] 	mem[0:255];
  reg [10:0] 	QA;

 //当B写使能OK时,(DB: 11位数据输入端口B)把值给到
 //存储器的men(AB) ,(AB: 8位写地址输入端口B)
  always @ (posedge CLKB)
	if(!CENB)
	  mem[AB] <= DB;


 //当A读使能OK时,(AA: 8位读地址输入端口A)把值给到
 //QA (QA: 11位数据输出端口A)
  always @ (posedge CLKA)
	if(!CENA)
	  QA <= mem[AA];
	else
	  QA <= QA;

endmodule
//最终实现在CLKA和CLKB两个时钟域里面完成写和读的同时进行
三、直方图均衡代码
代码中有四处需要修改的地方,可以在vscode搜索“修改”即可找到需要修改的参数,需要根据灰度图的分辨率,调整相应的参数。以下是200*200灰度图直方图均衡的代码。
`timescale 1ns / 1ps
//*****************************************************************************
//
// Project           	: FPGA image process class
// Module	    		: histogram_equalization
// Description			: This module is the histogram equalization of image.
//
// FileName	     		: histogram_equalization.v
// Call Modules      	: -
// Called by Modules 	: histogram_equalization_tb.v
//
// --------------------------------------------------------------------------
//
// Created Date      	: 2022.06.27
// Author            	:     Tester:        Supervisor:
// Revision History  	: V1.0 2022.06.27
//
//****************************************************************************

module histogram_equalization
//======================<port>=====================
(
//======================<input>====================
  input					clk,
  input					rst_n,
  input					valid_in,
  input					image_write_done,
  input					bmp_write_done,
  input			[7:0]	point_data_in,
//======================<output>===================
  output		[7:0]	point_data_out,
  output	reg			init_done,
  output	reg			data_read_start,
  output	reg			data_read_done

);

  parameter				ST_IDLE = 3'd0;
  parameter				ST_INIT = 3'd1;
  parameter				ST_SAMPLE = 3'd2;
  parameter				ST_COUNT = 3'd3;
  parameter				ST_UPDATE = 3'd4;
  parameter				ST_WRITE_BMP = 3'd5;

//======================<signal>===================
  reg 			[2:0]	state;
  reg 			[2:0]	count;
  reg 					count_done;
  reg 			[15:0]	count_sum;
  reg 					update_done;

  wire 					image_process_done;
  wire 			[27:0]	update_conut_temp;
  wire 			[7:0]	update_conut;

  // sample memory
  //采样使能信号
  reg 					sample_cen;
  reg 					sample_wen;
  reg 			[15:0]	sample_addr;
  wire 			[7:0]	sample_wr_data;
  wire 			[7:0]	sample_rd_data;
  reg 			[7:0]	sample_rd_data_d1;
  reg 			[7:0]	sample_rd_data_d2;

  // count memory
  reg 					count_wr_cen;
  reg 			[7:0]	count_wr_addr;
  reg 			[10:0]	count_wr_data;

  reg 					count_rd_cen;
  reg 			[7:0]	count_rd_addr;
  wire 			[10:0]	count_rd_data;

  reg 			[7:0]	count_rd_addr_d1;

  assign sample_wr_data = point_data_in;

  always @ (posedge clk or negedge rst_n) begin
	if(!rst_n) begin
		state <= ST_IDLE;
	end
	else
		case(state)
			ST_IDLE: begin
				if(valid_in)
					state <= ST_INIT;
				else
					state <= ST_IDLE;
			end
			ST_INIT: begin
				if(init_done)
					state <= ST_SAMPLE;
				else
					state <= ST_INIT;
			end
			ST_SAMPLE: begin
				if(bmp_write_done)
					state <= ST_COUNT;
				else
					state <= ST_SAMPLE;
			end
			ST_COUNT: begin
				if(count_done)
					state <= ST_UPDATE;
				else
					state <= ST_COUNT;
			end
			ST_UPDATE: begin
				if(update_done)
					state <= ST_WRITE_BMP;
				else
					state <= ST_UPDATE;
			end
			ST_WRITE_BMP: begin
				if(data_read_done)
					state <= ST_IDLE;
				else
					state <= ST_WRITE_BMP;
			end
		endcase
  end

  always @ (posedge clk or negedge rst_n) begin
	if(!rst_n) begin
		count_wr_cen <= 1'b1;
		count_wr_addr <= 8'b0;
		count_wr_data <= 11'b0;
		count_rd_cen <= 1'b1;
		count_rd_addr <= 8'b0;
		init_done <= 1'b0;
		sample_cen <= 1'b1;
		sample_wen <= 1'b0;
		sample_addr <= 16'b0;
		//读地址计数器,d1应该是delay 1个周期
		count_rd_addr_d1 <= 8'b0;
		count_done <= 1'b0;
		count <= 3'b0;
		count_sum <= 16'b0;
		update_done <= 1'b0;
		sample_rd_data_d1 <= 8'b0;
		sample_rd_data_d2 <= 8'b0;
		data_read_start <= 1'b0;
		data_read_done <= 1'b0;
	end
	else
		case(state)
			ST_IDLE: begin
				count_wr_cen <= 1'b0;
			end
			ST_INIT: begin
				// start to init
				count_wr_addr <= count_wr_addr + 1'b1;
				if(count_wr_addr == 255) begin
					// init done
					init_done <= 1'b1;
					// finish init
					count_wr_cen <= 1'b1;
					count_wr_addr <= 0;
					// start to sample
					sample_cen <= 1'b0;
				end
			end
			ST_SAMPLE: begin
				// sample


				sample_addr <= sample_addr + 1'b1;
				if(bmp_write_done) begin
					//需要修改
					sample_addr <= 1078;  // 数据起始索引地址data_start_index,由BMP图片格式规定
					sample_wen <= 1'b1;
					// start to count
					count <= count + 1'b1;
				end

			end
			ST_COUNT: begin
				// count
				count <= count + 1'b1;
				if(count == 5)
					count <= 0;

				case(count)
					// read the sample data
					0: begin
						sample_cen <= 1'b0;
						sample_addr <= sample_addr + 1'b1;
					end
					// read the count
					1: begin
						sample_cen <= 1'b1;
					end
					// count the data
					2: begin
						count_rd_cen <= 1'b0;
						count_rd_addr <= sample_rd_data;
					end
					3: begin
						count_rd_cen <= 1'b1;
					end
					// write back
					4: begin
						count_wr_cen <= 1'b0;
						count_wr_data <= count_rd_data + 1'b1;
						count_wr_addr <= count_rd_addr;
						//需要修改
						if(sample_addr == 41078) begin //读入的BMP图片的所有数据地址 file_read = $fread(bmp_data,bmp_file_read)
							sample_addr <= 0;
							count_done <= 1'b1;
							count_wr_addr <= 0;
							count_rd_cen <= 1'b0;
							count_rd_addr <= 0;
							count_wr_cen <= 1'b1;
						end
					end
					5: begin
						count_wr_cen <= 1'b1;
					end
				endcase
			end
			ST_UPDATE: begin
				// read the count data
				count_rd_addr <= count_rd_addr + 1'b1;
				count_sum <= count_sum + count_rd_data;
				// update and write
				count_wr_cen <= count_rd_cen;
				count_rd_addr_d1 <= count_rd_addr;
				count_wr_addr <= count_rd_addr_d1;
				count_wr_data <= update_conut;
				if(count_wr_addr == 255) begin
					update_done <= 1'b1;
					count_rd_cen <= 1'b1;
					count_wr_cen <= 1'b1;
					// start to write bmp
					sample_cen <= 1'b0;
					sample_wen <= 1'b1;
					sample_addr <= 0;
				end

			end
			ST_WRITE_BMP: begin
				//需要修改
				if(sample_addr < 1078) begin // 地址小于1078时为BMP的头文件数据
					sample_addr <= sample_addr + 1;
					sample_rd_data_d1 <= sample_rd_data;
					sample_rd_data_d2 <= sample_rd_data_d1;
					if(sample_addr == 1)
						data_read_start <= 1'b1;
				end
				else begin
					sample_addr <= sample_addr + 1;
					sample_rd_data_d1 <= sample_rd_data;
					sample_rd_data_d2 <= sample_rd_data_d1;

					count_rd_cen <= 1'b0;
					count_rd_addr <= sample_rd_data;
					//修改为400*400的结束数据,这个是200*200的
					if(sample_addr == 41079) begin // 除BMP的头文件数据的其余数据
						data_read_done <= 1'b1;
						data_read_start <= 1'b0;
						sample_cen <= 1'b1;
						count_rd_cen <= 1'b1;
					end
				end
			end
		endcase
  end

  // 255/40000 * count_sum
  // 20bit fixed,这里应该是为了保证灰度的值在255之内,同时又要避免除法
  assign update_conut_temp = 6684 * count_sum; //20240327:255/4000x1024x1024=6684
  assign update_conut = update_conut_temp[27:20];
  //需要修改 1081
  //
  assign point_data_out = ~update_done ? 0 : (sample_addr < 1081)? sample_rd_data_d2 : count_rd_data;


  SPRF65536X8 u_sample_mem(
	.Q		(sample_rd_data),
	.CLK	(clk),
	.CEN	(sample_cen),
	.WEN	(sample_wen),
	.A		(sample_addr),
	.D		(sample_wr_data)
  );


  TPRF256X11 u_count_mem(
	.AA		(count_rd_addr),
	.AB		(count_wr_addr),
	.DB		(count_wr_data),
	.CENA	(count_rd_cen),
	.CENB	(count_wr_cen),
	.CLKA	(clk),
	.CLKB	(clk),
	.QA		(count_rd_data)
  );


endmodule
四、tb文件
因为vivado的testbench使用$open函数的路径问题,详情见我的CSDN博客:https://blog.csdn.net/weixin_44357071/article/details/137203642
,我的操作如下:
-
代码正常放进来,然后点一下vivado里面的"run simulation"仿真(产生sim1这个文件夹)
-
然后把图片放在正确的地方,我的路径如图

`timescale 1ns / 1ps
//*****************************************************************************
//
// Project           	: FPGA image process class
// Module	    		: histogram_equalization_tb
// Description			: This module is the tb module of histogram equalization.
//
// FileName	     		: histogram_equalization_tb.v
// Call Modules      	: histogram_equalization.v
// Called by Modules 	: -
//
// --------------------------------------------------------------------------
//
// Created Date      	: 2022.06.19
// Author            	:     Tester:        Supervisor:
// Revision History  	: V1.0 2022.06.19
//
//****************************************************************************
`define Clock 20

module histogram_equalization_tb;

//======================<port>=================================
  reg						clk;
  reg						rst_n;
  reg		[7:0]			point_data_in;
  reg						image_write_done;
  reg						bmp_write_done;
  reg						valid_in;
  reg 		[7:0] 			bmp_data[0:50000];
  reg						data_read_start_d1;

  wire		[7:0]			point_data_out;
  wire		[7:0]			bmp_data_out;
  wire						init_done;
  wire						data_read_done;
  wire						data_read_start;

//======================<clock and reset>======================
  initial begin
	clk = 1;
	forever
		#(`Clock/2) clk = ~clk;
  end

  initial begin
	rst_n = 0;
	#(`Clock*20 + 1);
	rst_n = 1;
end

// read the bmp data
  integer bmp_file_read;
  integer file_read;
  integer data_start_index;
  integer bmp_size;

  initial begin
	bmp_file_read = $fopen(".\\picture_copy.bmp","rb");
	file_read = $fread(bmp_data,bmp_file_read);
	// get the data start index
	data_start_index = {bmp_data[13], bmp_data[12], bmp_data[11], bmp_data[10]};
	// get the bmp size
	bmp_size = {bmp_data[5], bmp_data[4], bmp_data[3], bmp_data[2]};
  end


//======================<input signal>=========================
  initial begin
  end

  integer index;
  always @ (posedge clk or negedge rst_n) begin
	if(!rst_n) begin
		index <= 0;
		image_write_done <= 0;
		bmp_write_done <= 0;
		point_data_in <= 0;
		valid_in <= 0;
	end
	// when index=data_start_index, it starts to process image
	else begin
		valid_in <= 1;
		if(init_done) begin
			if (index == data_start_index) begin
				image_write_done <= 1;
				index <= index + 1;
				point_data_in <= bmp_data[index];
			end
			else if(index == bmp_size)
				bmp_write_done <= 1;
			else begin
				index <= index + 1;
				point_data_in <= bmp_data[index];
			end
		end
	end
  end

// if not process image, select the point_data_out, else select point_data_in
//  assign bmp_data_out = image_write_done ? point_data_out : point_data_in;
  assign bmp_data_out = point_data_out;

  always @ (posedge clk or negedge rst_n) begin
	if(!rst_n) begin
		data_read_start_d1 <= 1'b0;
	end
	else
		data_read_start_d1 <= data_read_start;
  end


// write the bmp data
  integer bmp_file_write;
  initial begin
	bmp_file_write = $fopen(".\\picture_histogram_equalization.bmp","wb");
  end
  // write the data every clock
  always @ (posedge clk) begin
	if(rst_n) begin
		// when index=0, not write
		if(data_read_start_d1)
			$fwrite(bmp_file_write, "%c", bmp_data_out);
		else if(data_read_done) begin
			$fclose(bmp_file_write);
			$fclose(bmp_file_read);
			$display("Write bmp file complete, Close the file");
			$finish;
		end
	end
  end

//======================<Module Instance>======================
histogram_equalization u_histogram_equalization
  (
    .clk					(clk),
    .rst_n					(rst_n),
    .valid_in				(valid_in),
    .image_write_done		(image_write_done),
    .bmp_write_done			(bmp_write_done),
    .point_data_in			(point_data_in),
    .point_data_out	    	(point_data_out),
    .init_done	  			(init_done),
    .data_read_start	    (data_read_start),
    .data_read_done	    	(data_read_done)
  );


endmodule
五、产生合适的灰度图片
将图片用软件“画图打开”,点击"属性",按照如下设置。
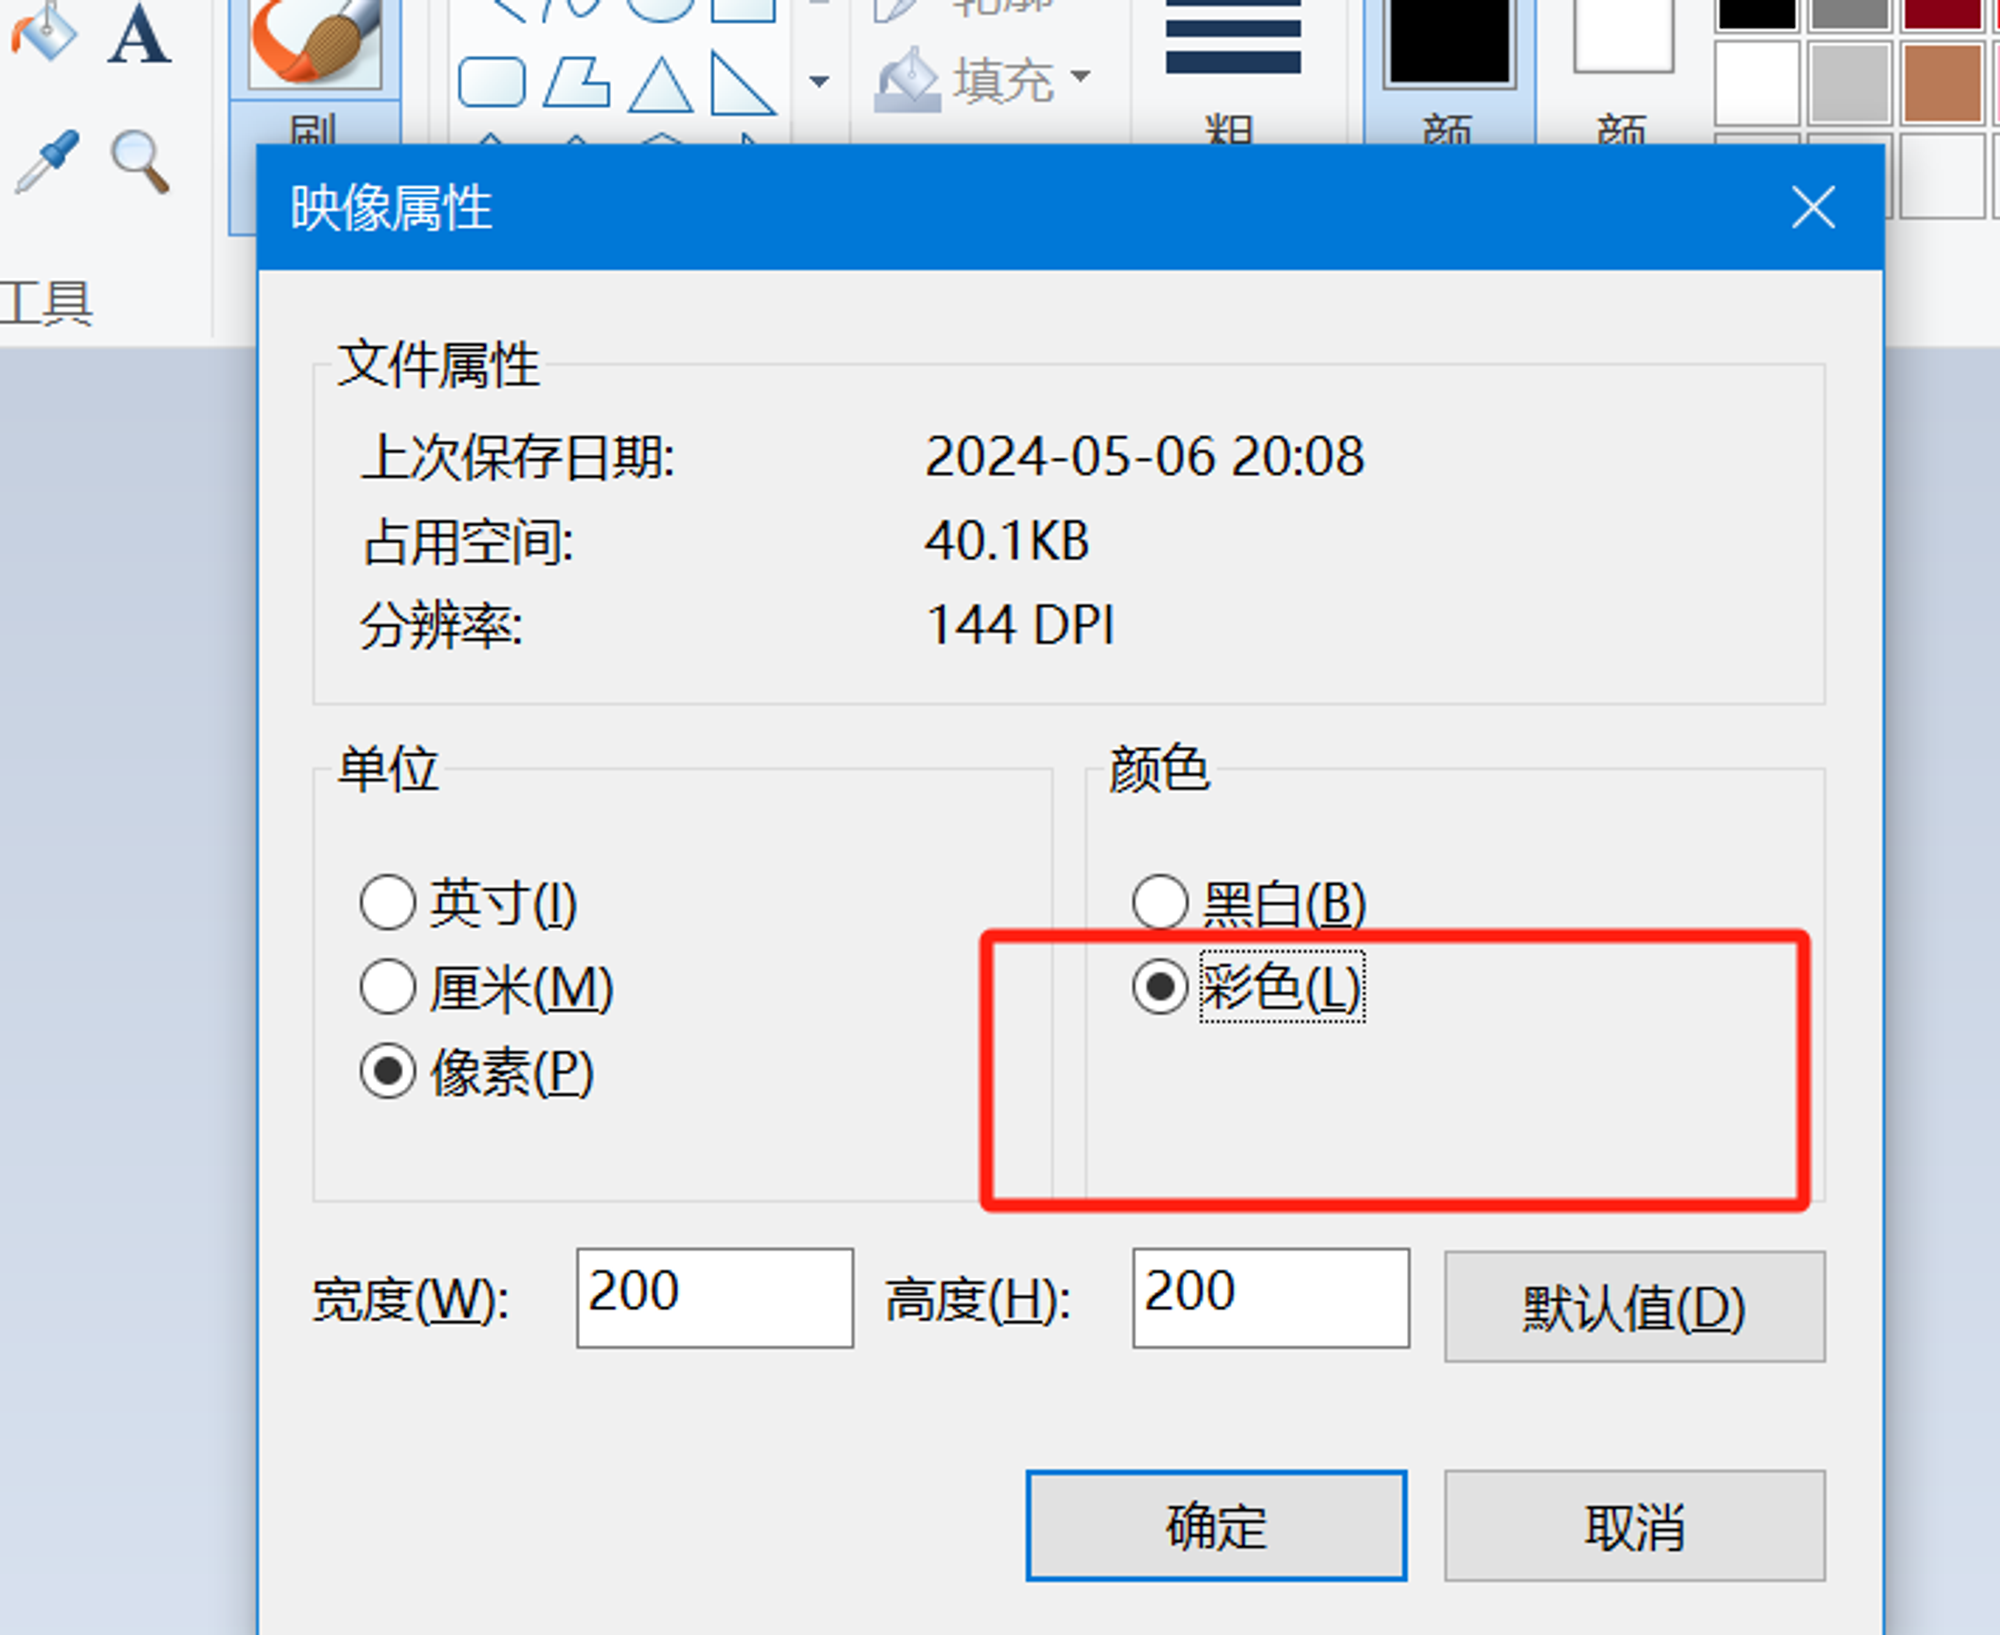
然后将图片另存为bmp图像,256色图,在代码里的图像数据开始位置是由这个参数决定的。

五、直方图均衡效果
均衡前
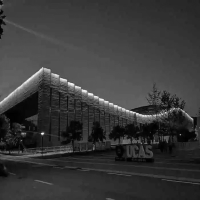
均衡后


 1万+
1万+

 被折叠的 条评论
为什么被折叠?
被折叠的 条评论
为什么被折叠?
 到【灌水乐园】发言


