


结合自己的深度camera输出rgbd图,利用open3d的example(ReconstructionSystem)算法进行三维重建
1、获取rgbd数据
调用自己的rgbd camera API获取rgb图、depth图以及ir图
```cpp
在这里插入代码片// TestApp.cpp : 定义控制台应用程序的入口点。
//

#include "stdafx.h"
#include <stdio.h>
#include <fstream>
#include "OfOmsOperation.h"
#include<string>
#include <opencv2/opencv.hpp>
#include <opencv2/imgcodecs.hpp>
using std::string;
using namespace cv;

int main()
{

	char* pErroMsg = new char[128];
	int ret = Initialize(pErroMsg);

	if (ret != 0)
	{
		printf(pErroMsg);
		return ret;
	}


	IMGINFO imgInfo;

	/*循环抓图*************************************************************************
	for (int i = 0; i < 10; i++) {
		ret = CaptureBuffer(imgInfo, pErroMsg);
		std::string bb = "";
		bb = std::to_string(static_cast<long long>(i));
		if (ret != 0)
		{
			printf(pErroMsg);
			return ret;
		}

		std::fstream depth_file("depth/depth" + bb + ".raw", std::fstream::out | std::ios::binary | std::ios::trunc);
		depth_file.write((char*)imgInfo.depth_buffer, imgInfo.depth_size);
		depth_file.close();

		std::fstream ir_file("ir/ir" + bb + ".raw", std::fstream::out | std::ios::binary | std::ios::trunc);
		ir_file.write((char*)imgInfo.ir_buffer, imgInfo.ir_size);
		ir_file.close();

		std::fstream rgb_file("rgb/rgb" + bb + ".jpg", std::fstream::out | std::ios::binary | std::ios::trunc);
		rgb_file.write((char*)imgInfo.rgb_buffer, imgInfo.rgb_size);
		rgb_file.close();
		cv::Mat img = cv::imread("rgb/rgb" + bb + ".jpg", cv::IMREAD_UNCHANGED);
		cv::imwrite("rgb1/out"+bb+".png", img);
	}
	*/


	for (int i = 0; i < 10; i++) {
		ret = CaptureBuffer(imgInfo, pErroMsg);
		if (ret != 0)
		{
			printf(pErroMsg);
			return ret;
		}
	}

	std::fstream depth_file("./depth2.raw", std::fstream::out | std::ios::binary | std::ios::trunc);
	depth_file.write((char*)imgInfo.depth_buffer, imgInfo.depth_size);
	depth_file.close();

	//处理depth图像使其raw图转为可视得png图*************************************

	FILE* fp;
	fp = fopen("depth2.raw", "rb");//打开文件
	//创建一个大小与文件大小、类型相同的Mat src,h为src.rows,w为src.cols
	Mat src;
	int h = 216; int w = 162;
	src.create(Size(h, w), CV_16UC1);
	fread(src.data, sizeof(unsigned short), h * w, fp);//将文件读入src
	//normalize(src, src, 0, 255, NORM_MINMAX);//将src中0~65535缩放到0~255
	//src.convertTo(src, CV_8UC1);//将src改为8位,用来显示
	//imshow("原图", src);
	imwrite("depth2.png", src);
	waitKey(0);
	//return 0;

	//std::cout << mat2.type() << std::endl;
	//cv::imwrite("depth.png", mat);
	/*
	std::fstream ir_file("./ir2.raw", std::fstream::out | std::ios::binary | std::ios::trunc);
	ir_file.write((char*)imgInfo.ir_buffer, imgInfo.ir_size);
	ir_file.close();
	*/
	std::fstream rgb_file("./rgb2.jpg", std::fstream::out | std::ios::binary | std::ios::trunc);
	rgb_file.write((char*)imgInfo.rgb_buffer, imgInfo.rgb_size);
	rgb_file.close();
	cv::Mat img = cv::imread("./rgb2.jpg", cv::IMREAD_UNCHANGED);
	cv::imwrite("out.png", img);


	if ( imgInfo.ai_size > 0) {
		std::fstream ai_file("./ai.bin", std::fstream::out | std::ios::binary | std::ios::trunc);
		ai_file.write((char*)imgInfo.ai_buffer, imgInfo.ai_size);
		ai_file.close();
	}


	Dispose();
	printf("finished\n");
	int c = getchar();
	return 0;
}
这里应该着重注意depth得图像格式:可参考https://blog.csdn.net/weixin_52238310/article/details/121284234
将输出图像rgb与d得分辨率对其,这里均设置为640*480
from PIL import Image

def transfer(infile, outfile):
    im = Image.open(infile)
    reim=im.resize((640, 480))#宽*高

    reim.save(outfile,dpi=(96.0,96.0)) ##200.0,200.0分别为想要设定的dpi值


if __name__ == '__main__':
    infil=r"rgb2.jpg"
    outfile=r"00000.jpg"
    transfer(infil, outfile)
2、重建
开源代码请下载GitHub(https://github.com/intel-isl/Open3D),然后进到C:\python_rebuild\Open3D-master\Open3D-master\examples\python\reconstruction_system

这里建议建立哟个conda新环境,下载相关的依赖:
建议下载open3d0.16.0之后,它支持python接口得.pipeline后面重建会用到。
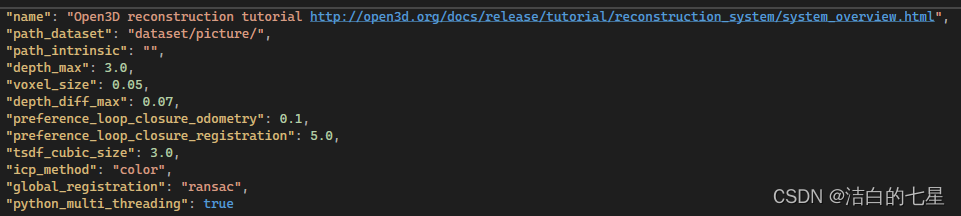
将自己的RGB数据放在image文件夹中,Depth数据放在depth文件夹中,然后把它们放到同一个文件夹下命名picture(自己随意命名),后移动到ReconstructionSystem文件夹的dataset(没有的话自己新建)里。然后在config文件夹下找到tutorial.json文件,修改里面的database数据为dataset/(你的数据名称,与上面创建的文件夹对应),并把它复制到dataset文件夹下后改名为config.json。
最后就按照源码得readme操作重建:
python run_system.py --config dataset\config.json --make
python run_system.py --config dataset\config.json --register
python run_system.py --config dataset\config.json --refine
python run_system.py --config dataset\config.json --integrate
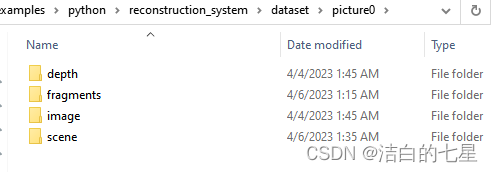
执行以上之后会生成如下几个文件夹:
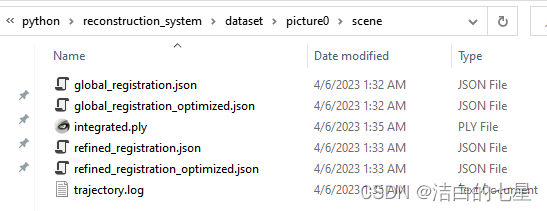
然后重建拼接后的模型在scene中:
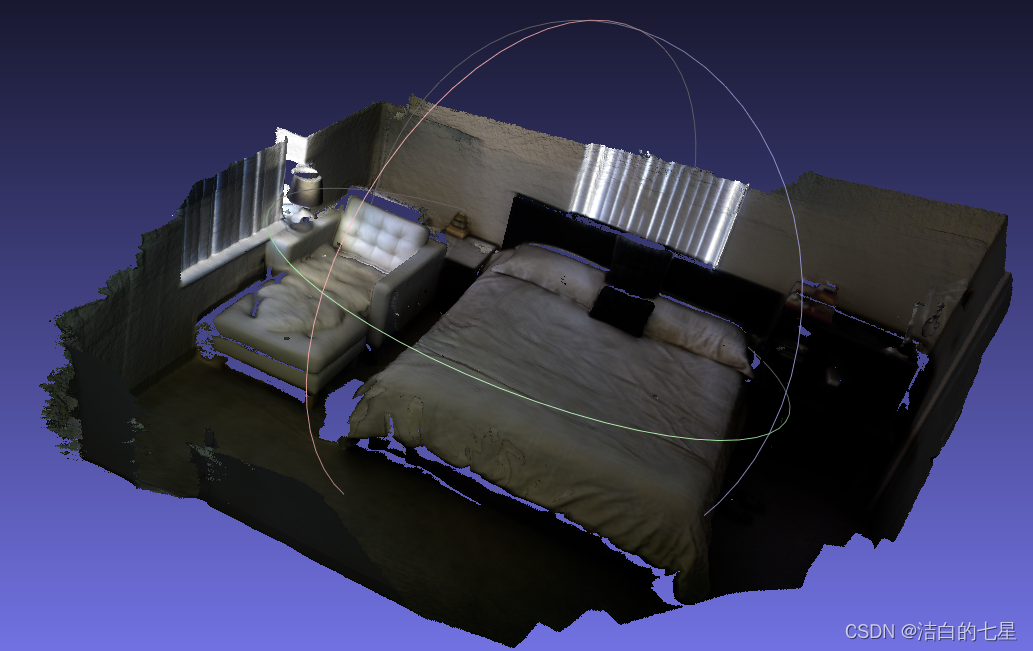
生成模型用meshlab打开如下:
注意:在过程中可能会遇到很多环境依赖问题,根据报错信息会锁定并解决


 3210
3210


 被折叠的 条评论
为什么被折叠?
被折叠的 条评论
为什么被折叠?
 到【灌水乐园】发言


