


minst手写数字识别(带界面)
一、项目简介
1)概述:手写数字识别项目是深度学习入门的基础项目,本项目中采用自己搭建的四层神经网络实现对0-9十个数字的手写数字识别。准确率达95%以上。同时利用QT5书写了一个交互界面,用户直接利用鼠标在画板上进行数字书写即可完成数字识别,十分直观。
2)部分运行效果图:


二、项目结构及环境
提供项目全部源码,在普通电脑CPU/GPU上可以实时检测和识别
整个项目中,主要的文件内容有:
1)MINST文件夹:minst数据集文件
2)model_parameters文件夹:存放已经训练好的模型参数文件
3)image_processing.py文件:实现对输入图像的预处理
4)model.py文件:搭建好的卷积神经网络
5)number_recognition2.py文件:qt5界面文件
6)number_recognition2.ui文件:qt5界面源文件
7)number_recognition_run2_new.py文件:主运行文件
8)paint_board4.py文件:界面画板交互代码
9)requirement.txt文件:所需环境库文件
主要环境库:
kiwisolver==1.3.1
MarkupSafe==2.0.1
matplotlib==3.4.2
matplotlib-inline==0.1.2
mistune==0.8.4
nbclient==0.5.3
nbconvert==6.1.0
nbformat==5.1.3
nest-asyncio==1.5.1
notebook==6.4.0
numpy==1.21.0
packaging==21.0
pandocfilters==1.4.3
parso==0.8.2
pickleshare==0.7.5
Pillow==8.3.1
prometheus-client==0.11.0
prompt-toolkit==3.0.19
pycparser==2.20
Pygments==2.9.0
pyparsing==2.4.7
pyrsistent==0.18.0
python-dateutil==2.8.1
pywin32==301
pywinpty==1.1.3
pyzmq==22.1.0
qtconsole==5.1.1
QtPy==1.9.0
Send2Trash==1.7.1
six==1.16.0
terminado==0.10.1
testpath==0.5.0
torch==1.9.0+cu102
torchaudio==0.9.0
torchvision==0.10.0+cu102
tornado==6.1
traitlets==5.0.5
typing-extensions==3.10.0.0
wcwidth==0.2.5
webencodings==0.5.1
widgetsnbextension==3.5.1
zipp==3.5.0
PyQt5==5.12.3
PyQt5-sip==12.9.0
PyQt5-stubs==5.15.2.0
使用anaconda+pycharm的环境工具搭配更加方便,点击获取工具包:

三、网络结构介绍
model.py
import numpy as np
import torch
from PIL import Image
from torch import nn, optim
from torch.autograd import Variable
from torchvision import datasets, transforms


# 定义网络结构
class Net(nn.Module):
    def __init__(self):
        super(Net, self).__init__()
        # Sequential表示在搭建网络模型中要执行的一系列的步骤
        # Dropout中,p=0.5表示50%的神经元不工作
        # layer3:输出层 一般输出层中不需要加Dropout
        # Conv2d Conv:卷积 2d:表示2维的卷积
        # nn.Conv2d的几个参数
        # 1:输入通道数:1表示黑白的图片 彩色的话就是3
        # 32:输出通道数:表示要生成多少个特征图
        # 5:是卷积核的大小,(5,5)表示是5*5的窗口。可以只写一个5
        # 1表示步长。步长默认值就是1
        # 2表示在padding外面填2圈0 这个相当于samepadding
        # nn.MaxPool2d的几个参数
        # 第一个2是池化的窗口的大小是2*2 第二个2表示步长为2
        self.conv1 = nn.Sequential(nn.Conv2d(1, 32, 5, 1, 2), nn.ReLU(), nn.MaxPool2d(2, 2))
        self.conv2 = nn.Sequential(nn.Conv2d(32, 64, 5, 1, 2), nn.ReLU(), nn.MaxPool2d(2, 2))
        self.fc1 = nn.Sequential(nn.Linear(64 * 7 * 7, 1000), nn.Dropout(p=0.5), nn.ReLU())
        self.fc2 = nn.Sequential(nn.Linear(1000, 10), nn.Softmax(dim=1))
        # dim=1代表对第一个维度,计算概率值
        # 因为batch = 64
        # 所以fc1输出的是(64,10)
        # 所以dim=1,表示对第二个维度进行softmax求值

    def forward(self, x):
        # ([64,1,28,28])变成2维的数据->(64,784) 全连接层做计算,必须是2维的数据
        # x = x.view(x.size()[0],-1)
        # 但是卷积只能对四维的数据进行计算 ([64,1,28,28])
        # 64表示批次的数量,1表示通道数 28表示长宽
        x = self.conv1(x)
        x = self.conv2(x)

        # 将原来x四维的数据,改变为2维的数据
        # (64,64,7,7)
        x = x.view(x.size()[0], -1)

        x = self.fc1(x)
        x = self.fc2(x)
        return x

def onehot_to_num(onehot:torch.Tensor):
    list1 = onehot.detach().numpy()
    list1 = list1[0]
    for index,value in enumerate(list1):
        if value > 0.5:
            return index


if __name__ == '__main__':
    the_model = Net()  # 定义模型
    the_model.load_state_dict(torch.load("model_parameters/parame"))  # 读取参数
    # image =
    im1 = Image.open('111.png').convert("L")
    im2 = im1.copy()
    im2.thumbnail((28,28))
    # im2.save('222.png')
    # print("im1的大小:",im1.size)
    # print("im2的大小:",im2.size)
    im2 = 255 - np.array(im2)
    # for i in im2:
    #     print(i)
    im2 = torch.Tensor(im2)
    im2 = im2.view(1,1,28,28)
    # im2 = Variable(im2)
    result = the_model(im2)
    print(result)
    print(onehot_to_num(result))
四、程序文件介绍
number_recognition2.py
# -*- coding: utf-8 -*-

# Form implementation generated from reading ui file 'number_recognition2.ui'
#
# Created by: PyQt5 UI code generator 5.12.3
#
# WARNING! All changes made in this file will be lost!


from PyQt5 import QtCore, QtGui, QtWidgets
from PyQt5.QtCore import Qt
from paint_board4 import Example


class Ui_Form(object):
    def setupUi(self, Form):
        Form.setObjectName("Form")
        Form.resize(414, 330)
        self.lcdNumber = QtWidgets.QLCDNumber(Form)
        self.lcdNumber.setGeometry(QtCore.QRect(310, 70, 81, 41))
        self.lcdNumber.setObjectName("lcdNumber")
        self.label = QtWidgets.QLabel(Form)
        self.label.setGeometry(QtCore.QRect(310, 30, 81, 31))
        font = QtGui.QFont()
        font.setPointSize(15)
        self.label.setFont(font)
        self.label.setObjectName("label")

        self.pushButton = QtWidgets.QPushButton(Form)
        self.pushButton.setGeometry(QtCore.QRect(310, 150, 75, 41))
        self.pushButton.setObjectName("pushButton")

        self.widget = Example(Form)
        self.widget.setAttribute(Qt.WA_StyledBackground)
        self.widget.setGeometry(QtCore.QRect(20, 10, 280, 280))
        self.widget.setObjectName("widget")
        self.widget.setStyleSheet("border: 1px solid black;background-color: rgb(255,255, 255);")

        self.retranslateUi(Form)
        QtCore.QMetaObject.connectSlotsByName(Form)

    def retranslateUi(self, Form):
        _translate = QtCore.QCoreApplication.translate
        Form.setWindowTitle(_translate("Form", "Form"))
        self.label.setText(_translate("Form", "识别结果"))
        self.pushButton.setText(_translate("Form", "清空画板"))
paint_board4.py
import sys

import torch
from PyQt5.QtWidgets import QApplication, QWidget
from PyQt5.QtGui import QPainter, QPen
from PyQt5.QtCore import Qt, QRect
from image_processing import convert_image_to_array
from model import Net


class Example(QWidget):
    def __init__(self,parent):
        super(Example, self).__init__(parent)
        # resize设置宽高,move设置位置
        self.parent = parent
        self.resize(400, 300)
        self.move(100, 100)
        self.setWindowTitle("简单的画板4.0")
        # setMouseTracking设置为False,否则不按下鼠标时也会跟踪鼠标事件
        self.setMouseTracking(False)
        '''
            要想将按住鼠标后移动的轨迹保留在窗体上
            需要一个列表来保存所有移动过的点
        '''
        self.pos_xy = []

        self.the_model = Net()  # 定义模型
        self.the_model.load_state_dict(torch.load("model_parameters/parame",map_location='cpu'))  # 读取参数
        print("模型加载完毕")


    def paintEvent(self, event):
        painter = QPainter()
        painter.begin(self)
        pen = QPen(Qt.black, 30, Qt.SolidLine)
        painter.setPen(pen)
        '''
            首先判断pos_xy列表中是不是至少有两个点了
            然后将pos_xy中第一个点赋值给point_start
            利用中间变量pos_tmp遍历整个pos_xy列表
                point_end = pos_tmp

                判断point_end是否是断点,如果是
                    point_start赋值为断点
                    continue
                判断point_start是否是断点,如果是
                    point_start赋值为point_end
                    continue
                画point_start到point_end之间的线
                point_start = point_end
            这样,不断地将相邻两个点之间画线,就能留下鼠标移动轨迹了
        '''
        if len(self.pos_xy) > 1:
            point_start = self.pos_xy[0]
            for pos_tmp in self.pos_xy:
                point_end = pos_tmp
                if point_end == (-1, -1):
                    point_start = (-1, -1)
                    continue
                if point_start == (-1, -1):
                    point_start = point_end
                    continue
                painter.drawLine(point_start[0], point_start[1], point_end[0], point_end[1])
                point_start = point_end
        painter.end()

    def mouseMoveEvent(self, event):
        """
            按住鼠标移动事件:将当前点添加到pos_xy列表中
            调用update()函数在这里相当于调用paintEvent()函数
            每次update()时,之前调用的paintEvent()留下的痕迹都会清空
        """
        # 中间变量pos_tmp提取当前点
        pos_tmp = (event.pos().x(), event.pos().y())
        # pos_tmp添加到self.pos_xy中
        self.pos_xy.append(pos_tmp)
        self.update()

    def mouseReleaseEvent(self, event):
        """
            重写鼠标按住后松开的事件
            在每次松开后向pos_xy列表中添加一个断点(-1, -1)
            然后在绘画时判断一下是不是断点就行了
            是断点的话就跳过去,不与之前的连续
        """
        pos_test = (-1, -1)
        self.pos_xy.append(pos_test)
        self.update()

        qRect = QRect(1,1,278,278)
        picture = self.grab(qRect)
        picture.save("./111.png","png")
        # print("保存成功!")

        picture_array = convert_image_to_array("./111.png")
        # print("转换成功")
        # print(picture_array)
        picture_array = torch.Tensor(picture_array)
        picture_array = picture_array.view(1, 1, 28, 28)
        result = self.the_model.forward(picture_array)
        result = self.onehot_to_num(result)
        print(result)
        self.parent.ui.lcdNumber.display(result)


    def onehot_to_num(self,onehot:torch.Tensor):
        list1 = onehot.detach().numpy()
        list1 = list1[0]
        for index, value in enumerate(list1):
            if value > 0.5:
                return index


if __name__ == "__main__":
    app = QApplication(sys.argv)
    pyqt_paint = Example(None)
    pyqt_paint.show()
    app.exec_()
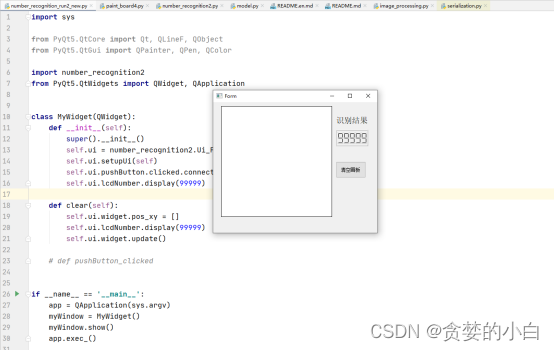
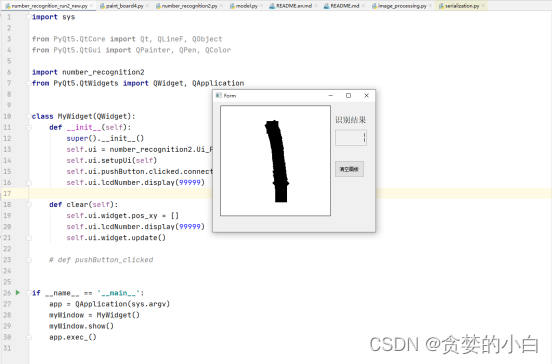
五、使用介绍
直接运行number_recognition_run2_new.py
import sys

from PyQt5.QtCore import Qt, QLineF, QObject
from PyQt5.QtGui import QPainter, QPen, QColor

import number_recognition2
from PyQt5.QtWidgets import QWidget, QApplication


class MyWidget(QWidget):
    def __init__(self):
        super().__init__()
        self.ui = number_recognition2.Ui_Form()
        self.ui.setupUi(self)
        self.ui.pushButton.clicked.connect(self.clear)
        self.ui.lcdNumber.display(99999)

    def clear(self):
        self.ui.widget.pos_xy = []
        self.ui.lcdNumber.display(99999)
        self.ui.widget.update()

    # def pushButton_clicked


if __name__ == '__main__':
    app = QApplication(sys.argv)
    myWindow = MyWidget()
    myWindow.show()
    app.exec_()
在空白画板上用鼠标进行书写即可
六、源代码获取
点击获取源代码
其他问题可留言,相互交流进步!


 2346
2346


 被折叠的 条评论
为什么被折叠?
被折叠的 条评论
为什么被折叠?
 到【灌水乐园】发言


