


我的配置:
I7-9750H;
核显;
Tensorflow1.14—cpu;
Anacode3;
VS2017;
我的文件结构:
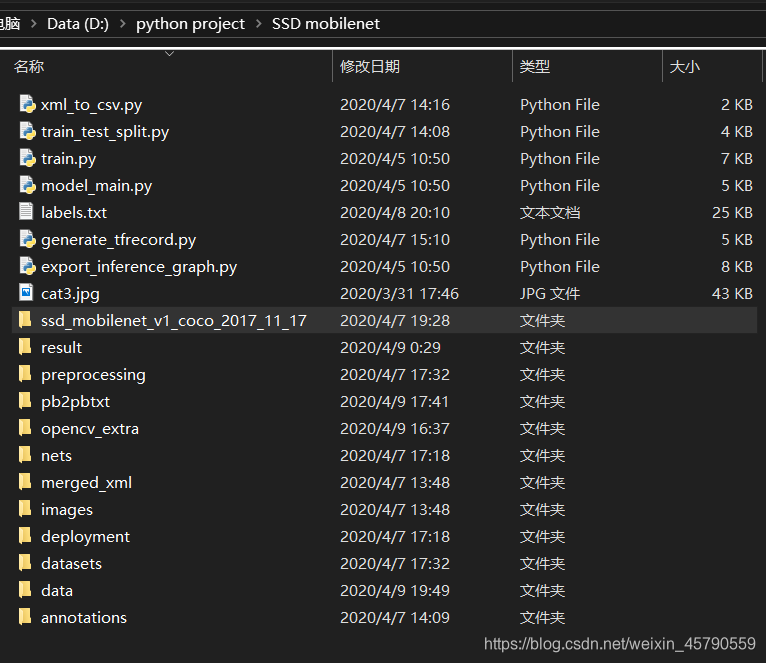
ssd_mobilenet_v1_coco_2017_11_17网上有很多资源下载
不得不说配置Object Detection API就是一项浩大工程,非常之麻烦,配置好了Object Detection API,现在开始训练自己的SSD模型,并用C++调用(数据集只有20张图片,效果不太好)。(过程非常复杂,自己摸索很痛苦);
- 利用labelImg将自己的图片样本(保存在images文件中)标注标签并保存为xml格式,保存在merged_xml文件中。
- 新建train_test_split.py把xml数据集分为了train 、test、 validation三部分,并存储在annotations文件夹中,train为训练集占76.5%,test为测试集10%,validation为验证集13.5%,train_test_split.py代码如下:
# -*- coding: utf-8 -*-
"""
Created on Tue Apr  7 13:54:20 2020

@author: 27522
"""


import os
import random
import time
import shutil

xmlfilepath = r'merged_xml'
saveBasePath = r"./annotations"

trainval_percent = 0.9

train_percent = 0.85
total_xml = os.listdir(xmlfilepath)
num = len(total_xml)
list = range(num)
tv = int(num * trainval_percent)
tr = int(tv * train_percent)
trainval = random.sample(list, tv)
train = random.sample(trainval, tr)

print("train and val size", tv)
print("train size", tr)
# print(total_xml[1])
start = time.time()

# print(trainval)
# print(train)

test_num = 0
val_num = 0
train_num = 0
# for directory in ['train','test',"val"]:
#         xml_path = os.path.join(os.getcwd(), 'annotations/{}'.format(directory))
#         if(not os.path.exists(xml_path)):
#             os.mkdir(xml_path)
#         # shutil.copyfile(filePath, newfile)
#         print(xml_path)
for i in list:
    name = total_xml[i]
    # print(i)
    if i in trainval:  # train and val set
        # ftrainval.write(name)
        if i in train:
            # ftrain.write(name)
            # print("train")
            # print(name)
            # print("train: "+name+" "+str(train_num))
            directory = "train"
            train_num += 1
            xml_path = os.path.join(os.getcwd(), 'annotations/{}'.format(directory))
            if (not os.path.exists(xml_path)):
                os.mkdir(xml_path)
            filePath = os.path.join(xmlfilepath, name)
            newfile = os.path.join(saveBasePath, os.path.join(directory, name))
            shutil.copyfile(filePath, newfile)

        else:
            # fval.write(name)
            # print("val")
            # print("val: "+name+" "+str(val_num))
            directory = "validation"
            xml_path = os.path.join(os.getcwd(), 'annotations/{}'.format(directory))
            if (not os.path.exists(xml_path)):
                os.mkdir(xml_path)
            val_num += 1
            filePath = os.path.join(xmlfilepath, name)
            newfile = os.path.join(saveBasePath, os.path.join(directory, name))
            shutil.copyfile(filePath, newfile)
            # print(name)
    else:  # test set
        # ftest.write(name)
        # print("test")
        # print("test: "+name+" "+str(test_num))
        directory = "test"
        xml_path = os.path.join(os.getcwd(), 'annotations/{}'.format(directory))
        if (not os.path.exists(xml_path)):
            os.mkdir(xml_path)
        test_num += 1
        filePath = os.path.join(xmlfilepath, name)
        newfile = os.path.join(saveBasePath, os.path.join(directory, name))
        shutil.copyfile(filePath, newfile)
        # print(name)

# End time
end = time.time()
seconds = end - start
print("train total : " + str(train_num))
print("validation total : " + str(val_num))
print("test total : " + str(test_num))
total_num = train_num + val_num + test_num
print("total number : " + str(total_num))
print("Time taken : {0} seconds".format(seconds))
- 把xml转换成csv文件,新建xml_to_csv.py,运行代码前,需要建一个data目录,用来放生成的csv文件,结果和代码如下:
import os
import glob
import pandas as pd
import xml.etree.ElementTree as ET


def xml_to_csv(path):
    xml_list = []
    for xml_file in glob.glob(path + '/*.xml'):
        tree = ET.parse(xml_file)
        root = tree.getroot()
        for member in root.findall('object'):
            value = (root.find('filename').text,
                     int(root.find('size')[0].text),
                     int(root.find('size')[1].text),
                     member[0].text,
                     int(member[4][0].text),
                     int(member[4][1].text),
                     int(member[4][2].text),
                     int(member[4][3].text)
                     )
            xml_list.append(value)
    column_name = ['filename', 'width', 'height', 'class', 'xmin', 'ymin', 'xmax', 'ymax']
    xml_df = pd.DataFrame(xml_list, columns=column_name)
    return xml_df


def main():
    for folder in ['train','test','validation']:
        image_path = os.path.join(os.getcwd(), ('annotations/' + folder))
        xml_df = xml_to_csv(image_path)
        xml_df.to_csv(('data/' + folder + '_labels.csv'), index=None)
        print('Successfully converted xml to csv.')


main()
- 生成tfrecords文件,python文件名为generate_tfrecord.py,代码如下:
from __future__ import division
from __future__ import print_function
from __future__ import absolute_import
import os
import io
import pandas as pd
import tensorflow as tf
from PIL import Image
from object_detection.utils import dataset_util
from collections import namedtuple, OrderedDict
flags = tf.app.flags
flags.DEFINE_string('csv_input', '', 'Path to the CSV input')
flags.DEFINE_string('output_path', '', 'Path to output TFRecord')
FLAGS = flags.FLAGS
# TO-DO replace this with label map
def class_text_to_int(row_label,filename):
#类型根据自己的需要改
    if row_label == 'white':
        return 1
    elif row_label == 'black':
        return 2
    elif row_label == 'orange':
        return 3
    elif row_label == 'blue':
        return 4

    else:
        print("------------------nonetype:", filename)
        None
def split(df, group):
    data = namedtuple('data', ['filename', 'object'])
    gb = df.groupby(group)
    return [data(filename, gb.get_group(x))
            for filename, x in zip(gb.groups.keys(), gb.groups)]
def create_tf_example(group, path):
    with tf.gfile.GFile(os.path.join(path, '{}'.format(group.filename)), 'rb') as fid:
        encoded_jpg = fid.read()
    encoded_jpg_io = io.BytesIO(encoded_jpg)
    image = Image.open(encoded_jpg_io)
    width, height = image.size
    filename = group.filename.encode('utf8')
    image_format = b'jpg'
    xmins = []
    xmaxs = []
    ymins = []
    ymaxs = []
    classes_text = []
    classes = []
    for index, row in group.object.iterrows():
        xmins.append(row['xmin'] / width)
        xmaxs.append(row['xmax'] / width)
        ymins.append(row['ymin'] / height)
        ymaxs.append(row['ymax'] / height)
        classes_text.append(row['class'].encode('utf8'))
        classes.append(class_text_to_int(row['class'], group.filename))
    tf_example = tf.train.Example(features=tf.train.Features(feature={
        'image/height': dataset_util.int64_feature(height),
        'image/width': dataset_util.int64_feature(width),
        'image/filename': dataset_util.bytes_feature(filename),
        'image/source_id': dataset_util.bytes_feature(filename),
        'image/encoded': dataset_util.bytes_feature(encoded_jpg),
        'image/format': dataset_util.bytes_feature(image_format),
        'image/object/bbox/xmin': dataset_util.float_list_feature(xmins),
        'image/object/bbox/xmax': dataset_util.float_list_feature(xmaxs),
        'image/object/bbox/ymin': dataset_util.float_list_feature(ymins),
        'image/object/bbox/ymax': dataset_util.float_list_feature(ymaxs),
        'image/object/class/text': dataset_util.bytes_list_feature(classes_text),
        'image/object/class/label': dataset_util.int64_list_feature(classes),
        }))
    return tf_example
def main(_):
    writer = tf.python_io.TFRecordWriter(FLAGS.output_path)
    path = os.path.join(os.getcwd(), 'images')
    examples = pd.read_csv(FLAGS.csv_input)
    grouped = split(examples, 'filename')
    num=0
    for group in grouped:
        num+=1
        tf_example = create_tf_example(group, path)
        writer.write(tf_example.SerializeToString())
        if(num%2==0):
            #每完成2个转换,打印一次
          print(num)
    writer.close()
    output_path = os.path.join(os.getcwd(), FLAGS.output_path)
    print('Successfully created the TFRecords: {}'.format(output_path))
if __name__ == '__main__':
   tf.app.run()
注意:17行和80行根据自己需要修改;
现将训练集转换为tfrecord格式,输入如下命令:
python generate_tfrecord.py --csv_input=data/whsyxt_train_labels.csv --output_path=data/whsyxt_train.tfrecord类似的,我们可以输入如下命令,将验证集和测试集也转换为tfrecord格式,
python generate_tfrecord.py --csv_input=data/whsyxt_validation_labels.csv --output_path=data/whsyxt_validation.tfrecord

python generate_tfrecord.py --csv_input=data/whsyxt_test_labels.csv --output_path=data/whsyxt_test.tfrecord
5、配置管道配置文件,找到 D:\Program Files (x86)\anaconda\Lib\site-packages\tensorflow\models\research\object_detection\samples\configs\ssd_mobilenet_v1_pets.config文件,复制到data文件夹下,修改之后代码如下:
# SSD with Mobilenet v1, configured for Oxford-IIIT Pets Dataset.
# Users should configure the fine_tune_checkpoint field in the train config as
# well as the label_map_path and input_path fields in the train_input_reader and
# eval_input_reader. Search for "PATH_TO_BE_CONFIGURED" to find the fields that
# should be configured.

model {
  ssd {
#改为自己的类别数,不包括background
    num_classes: 4
    box_coder {
      faster_rcnn_box_coder {
        y_scale: 10.0
        x_scale: 10.0
        height_scale: 5.0
        width_scale: 5.0
      }
    }
//匹配规则
    matcher {
      argmax_matcher {
        matched_threshold: 0.5
        unmatched_threshold: 0.5
        ignore_thresholds: false
        negatives_lower_than_unmatched: true
        force_match_for_each_row: true
      }
    }
//区域相似度度量规则
    similarity_calculator {
      iou_similarity {
      }
    }
//预测用的default boxes
    anchor_generator {
      ssd_anchor_generator {
        num_layers: 6
        min_scale: 0.2
        max_scale: 0.95
        aspect_ratios: 1.0
        aspect_ratios: 2.0
        aspect_ratios: 0.5
        aspect_ratios: 3.0
        aspect_ratios: 0.3333
      }
    }
    image_resizer {
      fixed_shape_resizer {
//输入图片高度
        height: 300
//输入图片宽度
        width: 300
      }
    }
//卷积预测层参数
    box_predictor {
      convolutional_box_predictor {
        min_depth: 0
        max_depth: 0
        num_layers_before_predictor: 0
        use_dropout: false
        dropout_keep_probability: 0.8
        kernel_size: 1
        box_code_size: 4
        apply_sigmoid_to_scores: false
        conv_hyperparams {
          activation: RELU_6,
          regularizer {
            l2_regularizer {
              weight: 0.00004
            }
          }
          initializer {
            truncated_normal_initializer {
              stddev: 0.03
              mean: 0.0
            }
          }
          batch_norm {
            train: true,
            scale: true,
            center: true,
            decay: 0.9997,
            epsilon: 0.001,
          }
        }
      }
    }
//卷积特征提取
    feature_extractor {
      type: 'ssd_mobilenet_v1'
      min_depth: 16
      depth_multiplier: 1.0
      conv_hyperparams {
        activation: RELU_6,
        regularizer {
          l2_regularizer {
            weight: 0.00004
          }
        }
        initializer {
          truncated_normal_initializer {
            stddev: 0.03
            mean: 0.0
          }
        }
        batch_norm {
          train: true,
          scale: true,
          center: true,
          decay: 0.9997,
          epsilon: 0.001,
        }
      }
    }
    loss {
//分类损失函数
      classification_loss {
        weighted_sigmoid {
        }
      }
//定位损失函数
      localization_loss {
        weighted_smooth_l1 {
        }
      }
//难样本挖掘规则
      hard_example_miner {
        num_hard_examples: 3000
        iou_threshold: 0.99
        loss_type: CLASSIFICATION
        max_negatives_per_positive: 3
        min_negatives_per_image: 0
      }
      classification_weight: 1.0
      localization_weight: 1.0
    }
//归一化参数
    normalize_loss_by_num_matches: true
//图像后处理,只参与验证,不参与训练
    post_processing {
      batch_non_max_suppression {
        score_threshold: 1e-8
        iou_threshold: 0.6
        max_detections_per_class: 100
        max_total_detections: 100
      }
      score_converter: SIGMOID
    }
  }
}

train_config: {
#视CPU情况而定,每次迭代输入的图片数量
  batch_size: 2
  optimizer {
    rms_prop_optimizer: {
      learning_rate: {
        exponential_decay_learning_rate {
          initial_learning_rate: 0.004
          decay_steps: 100#学习率以基数0.95每100步进行衰减
          decay_factor: 0.95
        }
      }
      momentum_optimizer_value: 0.9
      decay: 0.9
      epsilon: 1.0
    }
  }
#改为自己应用的SSD模型的kept路径
 fine_tune_checkpoint: "D:/python project/SSD mobilenet/ssd_mobilenet_v1_coco_2017_11_17/model.ckpt"
  from_detection_checkpoint: false
  #load_all_detection_checkpoint_vars: true
  # Note: The below line limits the training process to 200K steps, which we
  # empirically found to be sufficient enough to train the pets dataset. This
  # effectively bypasses the learning rate schedule (the learning rate will
  # never decay). Remove the below line to train indefinitely.
#步数200
num_steps: 20000
  data_augmentation_options {
    random_horizontal_flip {
    }
  }
  data_augmentation_options {
    ssd_random_crop {
    }
  }
}

train_input_reader: {
  tf_record_input_reader {
#改为自己路径
    input_path: "D:/python project/SSD mobilenet/data/whsyxt_train.tfrecord"
  }
  label_map_path: "D:/python project/SSD mobilenet/data/label_map.pbtxt"
}

eval_config: {
  metrics_set: "coco_detection_metrics"
  num_examples: 1#改成自己validation的样本数量
}

eval_input_reader: {
  tf_record_input_reader {
#改为自己路径
    input_path: "D:/python project/SSD mobilenet/data/whsyxt_validation.tfrecord"
  }
# label_map.pbtxt自己构建
  label_map_path: "D:/python project/SSD mobilenet/data/label_map.pbtxt"
  shuffle: false
  num_readers: 1

}
注意:修改路径一定要认真仔细,不然训练时会出现错误:
Windows fatal exception: access violation
label_map.pbtxt代码如下:
item {
  id: 1
  name: 'white'
}

item {
  id: 2
  name: 'black'
}

item {
  id: 3
  name: 'orange'
}

item {
  id: 4
  name: 'blue'
}
- 打开D:\Program Files (x86)\anaconda\Lib\site-packages\tensorflow\models\research\object_detection,将model_main.py、nets复制到D:\python project\SSD mobilenet下;打开D:\Program Files (x86)\anaconda\Lib\site-packages\tensorflow\models\research\slim,将datasets、deployment文件复制到D:\python project\SSD mobilenet下;
在D:\python project\SSD mobilenet目录下输入以下命令:
python model_main.py --logtostderr --model_dir=data/ --pipeline_config_path=data/ssd_mobilenet_v1_pets.config在data目录下得到文件:model.ckpt-200.data-00000-of-00001、model.ckpt-200.index、
model.ckpt-200.meta
评价模型:
python eval.py --logtostderr --checkpoint_dir=mydata1/ --pipeline_config_path=data/faster_rcnn_inception_v2_coco.config \ --eval_dir eval1
7、将kept文件转换成pb文件:将D:\Program Files (x86)\anaconda\Lib\site-packages\tensorflow\models\research\object_detection目录下的export_inference_graph.py复制到D:\python project\SSD mobilenet目录下:
执行如下命令:
python export_inference_graph.py \ --input_type image_tensor \ --pipeline_config_path data/ssd_mobilenet_v1_pets.config \ --trained_checkpoint_prefix data/model.ckpt-200 \ --output_directory result8、何获得ssd_mobilenet_v1_pets.pbtxt:打开D:\python project\SSD mobilenet\pb2pbtxt,将上面得到的frozen_inference_graph.pb和ssd_mobilenet_v1_pets.config复制到该目录下,tf_text_graph_ssd.py可以在D:\opencv4.2\opencv4.2.0\samples\dnn下找到。
执行如下命令:
python tf_text_graph_ssd.py --input frozen_inference_graph.pb --config ssd_mobilenet_v1_pets.config --output ssd_mobilenet_v1_pets.pbtxt得到ssd_mobilenet_v1_pets.pbtxt
pb2pbtxt文件的资源可以私聊
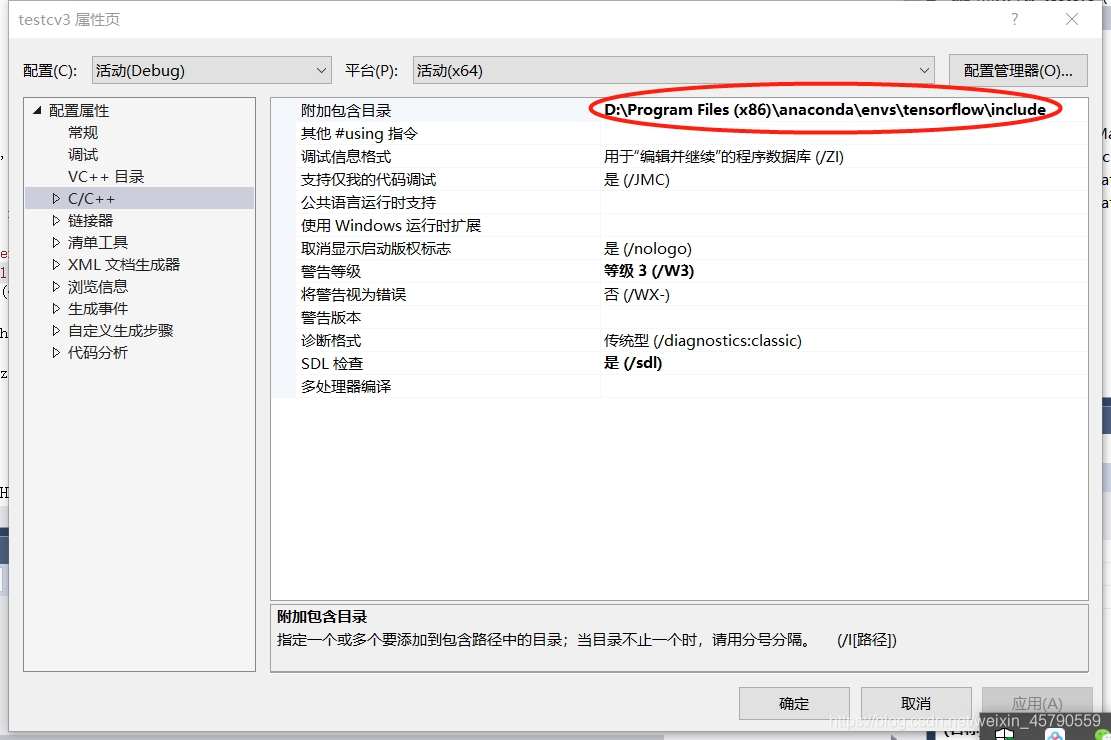
9、VS2017环境配置(opencv4.2已经配置好了),下面进行python环境的配置:
(1)VC++目录——库目录

2)C/C++——附加包含目录
(3)链接器——输入——附加依赖项,输入python36_d.lib
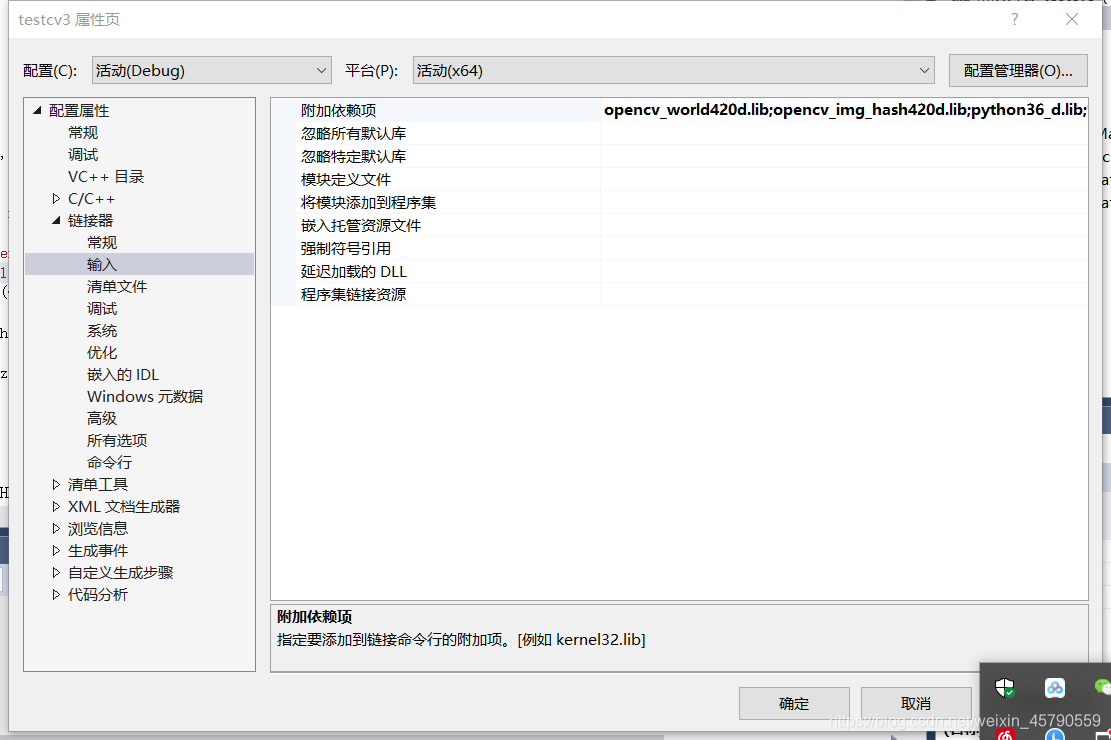
注意:其实打开
D:\Program Files (x86)\anaconda\envs\tensorflow\libs目录下并没有python36_d.lib,将python36.lib复制一份改名字就好
至此,环境配置好了
10:调用程序:
#include <iostream>
#include<opencv2/opencv.hpp>
#include<opencv2/dnn.hpp>
#include <opencv2/highgui/highgui_c.h>
#include "opencv2/imgproc/types_c.h"
using namespace std;
using namespace cv;
const size_t inWidth = 300;
const size_t inHeight = 300;
const float WHRatio = inWidth / (float)inHeight;
const char* classNames[] = { "background","white","black","orange","blue" };//这个需要根据训练的类别定义
int main()
{
	Mat frame = cv::imread("D:/python/SSD mobilenet/cat3.jpg");
	Size frame_size = frame.size();
	String weights = "D:/python/SSD mobilenet/result/frozen_inference_graph.pb";//注意"/"和"\"
	String prototxt = "D:/python/SSD mobilenet/pb2pbtxt/ssd_mobilenet_v1_pets.pbtxt";
	dnn::Net net = cv::dnn::readNetFromTensorflow(weights, prototxt);
	Size cropSize;
//将输入图片尺寸进行修改
	if (frame_size.width / (float)frame_size.height > WHRatio)
	{
		cropSize = Size(static_cast<int>(frame_size.height * WHRatio),
			frame_size.height);
	}
	else
	{
		cropSize = Size(frame_size.width,
			static_cast<int>(frame_size.width / WHRatio));
	}
//Rect类用于存储矩形框左上角坐标、宽度和高度
	Rect crop(Point((frame_size.width - cropSize.width) / 2,
		(frame_size.height - cropSize.height) / 2),
		cropSize);
//blobFromImage函数进行图片预处理:均减值、缩放和通道交换(图片归一化)
	cv::Mat blob = cv::dnn::blobFromImage(frame, 1. / 255, Size(300, 300));//我觉得可以把(300,300)去掉,实验发现加上(300,300)会造成图片显示不全
	//cout << "blob size: " << blob.size << endl;
	net.setInput(blob);//将图片输入到网络中
Mat output = net.forward();//获得向前传播结果
	//cout << "output size: " << output.size << endl;
	Mat detectionMat(output.size[2], output.size[3], CV_32F, output.ptr<float>());
	frame = frame(crop);
	float confidenceThreshold = 0.55;//该参数与能否生成框有关系
//根据置信度绘制矩形框
	for (int i = 0; i < detectionMat.rows; i++)
	{
		float confidence = detectionMat.at<float>(i, 2);//置信度
		if (confidence > confidenceThreshold)
		{
			size_t objectClass = (size_t)(detectionMat.at<float>(i, 1));//标签文件的索引号
			int xLeftBottom = static_cast<int>(detectionMat.at<float>(i, 3) * frame.cols);//矩形框左上点横坐标
			int yLeftBottom = static_cast<int>(detectionMat.at<float>(i, 4) * frame.rows);//矩形框左上点纵坐标
			int xRightTop = static_cast<int>(detectionMat.at<float>(i, 5) * frame.cols);//矩形框右下横坐标
			int yRightTop = static_cast<int>(detectionMat.at<float>(i, 6) * frame.rows);//矩形框右下纵坐标
//ostringstream是C++的一个字符集操作模板类,定义在sstream.h头文件中。ostringstream类通常用于执行C风格的串流的输出操作,格式化字符串,避免申请大量的缓冲区,替代sprintf。
			ostringstream ss;
			ss << confidence;
			String conf(ss.str());
			Rect object((int)xLeftBottom, (int)yLeftBottom,
				(int)(xRightTop - xLeftBottom),
				(int)(yRightTop - yLeftBottom));
			rectangle(frame, object, Scalar(0, 0, 255), 2);
			String label = String(classNames[objectClass]) + ": " + conf;
			int baseLine = 0;
			Size labelSize = getTextSize(label, FONT_HERSHEY_SIMPLEX, 0.5, 1, &baseLine);
			rectangle(frame, Rect(Point(xLeftBottom, yLeftBottom - labelSize.height),
				Size(labelSize.width, labelSize.height + baseLine)),
				Scalar(0, 255, 255), -1);
			putText(frame, label, Point(xLeftBottom, yLeftBottom),
				FONT_HERSHEY_SIMPLEX, 0.5, Scalar(0, 0, 0));
		}
	}
	imshow("image", frame);
	cv::waitKey(0);
	destroyAllWindows();
	return 0;
}
pb2pbtxt文件的百度云盘链接:https://pan.baidu.com/s/1FRXt4v8UM4Z9i-qP9eXeaQ
提取码:x4v3


 506
506


 被折叠的 条评论
为什么被折叠?
被折叠的 条评论
为什么被折叠?
 到【灌水乐园】发言


