


结果
实测使用SGLang速率为30.47 tokens/s,VLLM速率为23.23 tokens/s,快30%
LMDeploy速率为34.96 tokens/s,比VLLM快50%
安装SGLang
前置环境
SGLang 目前只支持 torch 2.5.1,如果版本不一致先升级
升级后会有一个安装包冲突 vllm-flash-attn 2.6.1 requires torch==2.4.0
但是不会影响vllm的运行
pip install torch==2.5.1 torchvision==0.20.1 torchaudio==2.5.1
下面是安装完成并成功运行的环境,我这里cuda是12.4,其他的影响不大
$ python3 -m sglang.check_env
INFO 02-12 15:17:04 __init__.py:190] Automatically detected platform cuda.
Python: 3.11.7 (main, Dec 15 2023, 18:12:31) [GCC 11.2.0]
CUDA available: True
GPU 0,1,2,3,4,5,6,7,8: NVIDIA GeForce RTX 3090
GPU 0,1,2,3,4,5,6,7,8 Compute Capability: 8.6
CUDA_HOME: /usr/local/cuda-12.4
NVCC: Cuda compilation tools, release 12.4, V12.4.99
CUDA Driver Version: 550.54.14
PyTorch: 2.5.1+cu124
sglang: 0.4.2.post4
sgl_kernel: 0.0.3.post3
flashinfer: 0.2.0.post2+cu124torch2.5
triton: 3.1.0
transformers: 4.48.3
torchao: 0.8.0
numpy: 1.26.4
aiohttp: 3.8.6
fastapi: 0.110.3
hf_transfer: Module Not Found
huggingface_hub: 0.24.6
interegular: 0.3.3
modelscope: 1.17.1
orjson: 3.10.7
packaging: 23.2
psutil: 5.9.8
pydantic: 2.9.2
multipart: 0.0.9
zmq: 25.1.2
uvicorn: 0.30.6
uvloop: 0.20.0
vllm: 0.7.2
openai: 1.54.4
anthropic: 0.18.1
litellm: Module Not Found
decord: 0.6.0
NVIDIA Topology:
	GPU0	GPU1	GPU2	GPU3	GPU4	GPU5	GPU6	GPU7	GPU8	CPU Affinity	NUMA Affinity	GPU NUMA ID
GPU0	 X 	PIX	PIX	PIX	PIX	SYS	SYS	SYS	SYS	0-3,8-11	0		N/A
GPU1	PIX	 X 	PIX	PIX	PIX	SYS	SYS	SYS	SYS	0-3,8-11	0		N/A
GPU2	PIX	PIX	 X 	PIX	PIX	SYS	SYS	SYS	SYS	0-3,8-11	0		N/A
GPU3	PIX	PIX	PIX	 X 	PIX	SYS	SYS	SYS	SYS	0-3,8-11	0		N/A
GPU4	PIX	PIX	PIX	PIX	 X 	SYS	SYS	SYS	SYS	0-3,8-11	0		N/A
GPU5	SYS	SYS	SYS	SYS	SYS	 X 	PIX	PIX	PIX	0-3,8-11	0		N/A
GPU6	SYS	SYS	SYS	SYS	SYS	PIX	 X 	PIX	PIX	0-3,8-11	0		N/A
GPU7	SYS	SYS	SYS	SYS	SYS	PIX	PIX	 X 	PIX	0-3,8-11	0		N/A
GPU8	SYS	SYS	SYS	SYS	SYS	PIX	PIX	PIX	 X 	0-3,8-11	0		N/A

Legend:

  X    = Self
  SYS  = Connection traversing PCIe as well as the SMP interconnect between NUMA nodes (e.g., QPI/UPI)
  NODE = Connection traversing PCIe as well as the interconnect between PCIe Host Bridges within a NUMA node
  PHB  = Connection traversing PCIe as well as a PCIe Host Bridge (typically the CPU)
  PXB  = Connection traversing multiple PCIe bridges (without traversing the PCIe Host Bridge)
  PIX  = Connection traversing at most a single PCIe bridge
  NV#  = Connection traversing a bonded set of # NVLinks

ulimit soft: 1024
开始安装
pip install --upgrade pip
pip install sgl-kernel --force-reinstall --no-deps
pip install "sglang[all]>=0.4.2.post4" --find-links https://flashinfer.ai/whl/cu124/torch2.5/flashinfer/
如果flashinfer未安装成功,前往https://flashinfer.ai/whl/cu124/torch2.5/flashinfer/自行下载后安装
然后再进行pip install sglang
下载模型
国内使用modelscope很方便,没有的话可以先pip install modelscope
然后在命令行输入python,再输入下面的命令
from modelscope import AutoModelForCausalLM, AutoTokenizer
model_name = "deepseek-ai/DeepSeek-R1-Distill-Qwen-32B"
tokenizer = AutoTokenizer.from_pretrained(model_name)
model = AutoModelForCausalLM.from_pretrained(model_name,torch_dtype="auto",device_map="auto")
下载完成后目录在
~/.cache/modelscope/hub/deepseek-ai/DeepSeek-R1-Distill-Qwen-32B/
启动模型
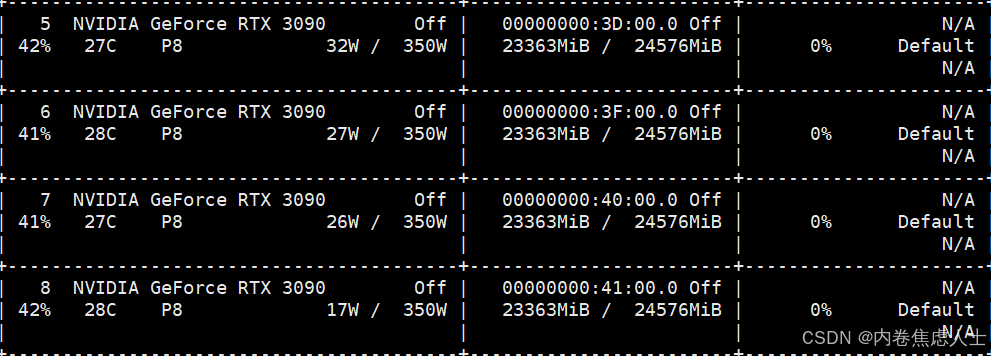
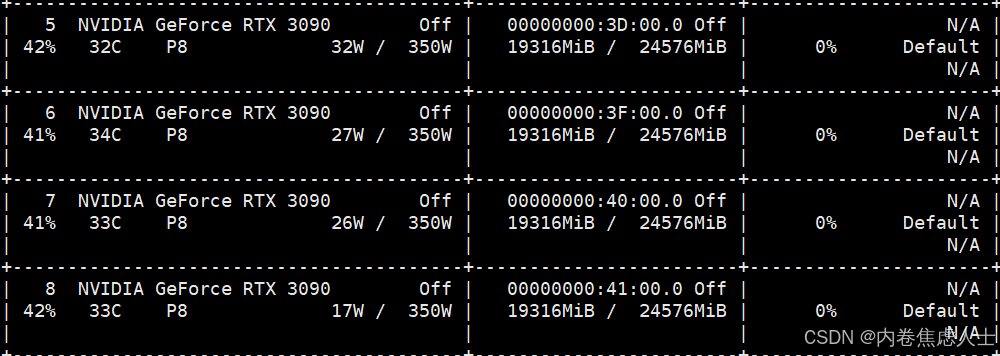
我是9卡3090,运行DeepSeek-R1-Distill-Qwen-32B需要4张卡,使用VLLM可以自定义在随机4张卡上运行,但是SGLang必须是连续的4张
我这里在5,6,7,8卡上运行
SGLang启动
CUDA_VISIBLE_DEVICES=5,6,7,8 python3 -m sglang.launch_server --model ~/.cache/modelscope/hub/deepseek-ai/DeepSeek-R1-Distill-Qwen-32B/ --tp 4 --host 0.0.0.0 --port 8000
VLLM启动
vllm安装极其简单,直接pip install vllm即可
CUDA_VISIBLE_DEVICES=5,6,7,8 vllm serve ~/.cache/modelscope/hub/deepseek-ai/DeepSeek-R1-Distill-Qwen-32B/ --tensor-parallel-size 4 --max-model-len 32768 --enforce-eager --served-model-name DeepSeek-R1-Distill-Qwen-32B --host 0.0.0.0
LMDeply启动
LMDeply安装极其简单,直接pip install lmdeploy即可
环境依然用我上面的环境即可
CUDA_VISIBLE_DEVICES=5,6,7,8 lmdeploy serve api_server ~/.cache/modelscope/hub/deepseek-ai/DeepSeek-R1-Distill-Qwen-32B/ --tp 4 --server-port 8000 --model-name DeepSeek-R1-Distill-Qwen-32B

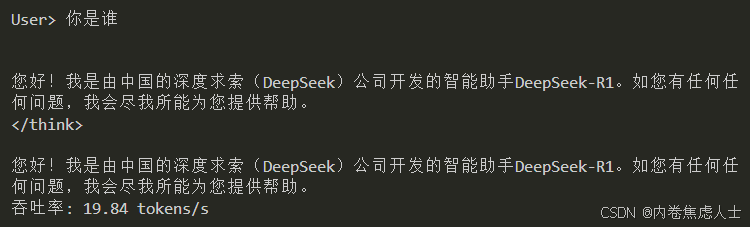
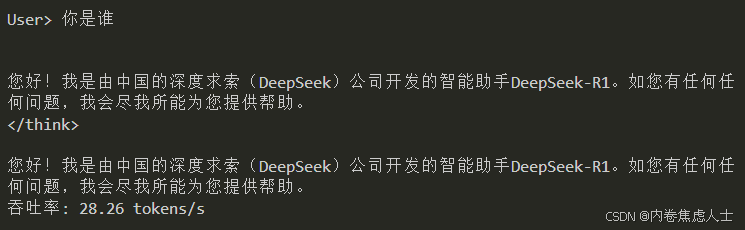
测试
from openai import OpenAI
from transformers import AutoTokenizer
import time
tokenizer = AutoTokenizer.from_pretrained(
    "~/.cache/modelscope/hub/deepseek-ai/DeepSeek-R1-Distill-Qwen-32B/", trust_remote_code=True, resume_download=True
)

client = OpenAI(base_url="http://0.0.0.0:8000/v1", api_key="not used actually")
def cli_main():

    while True:
        query = input("User> ").strip()
        if query.startswith(":"):
            command_words = query[1:].strip().split()
            if not command_words:
                command = ""
            else:
                command = command_words[0]
            if command in ["exit", "quit", "q"]:
                break
            elif command in ["clear", "cl"]:
                    _clear_screen()
                    continue
            else:
                # As normal query.
                pass
        start_time = time.time()
        accumulated_text = ""
        total_tokens = 0
        response = client.chat.completions.create(
            model="DeepSeek-R1-Distill-Qwen-32B",# 这里似乎写什么都行
            messages=[{"role": "user", "content": query}],
            stream=True,
        )
        print('\n')
        for chunk in response:
            content = chunk.choices[0].delta.content
            if content:
                accumulated_text += content
                print(content, end='', flush=True)
        end_time = time.time()
        duration = end_time - start_time
        total_tokens = len(tokenizer.encode(accumulated_text))
        throughput = total_tokens / duration
        print(f"\n吞吐率: {throughput:.2f} tokens/s")
        print('\n')

if __name__ == "__main__":
    cli_main()
vllm
sgLang
LMDeply


 1011
1011

 被折叠的 条评论
为什么被折叠?
被折叠的 条评论
为什么被折叠?
 到【灌水乐园】发言


