


1.首先选择esp32-s3-devkitc-1(8MB QD,NoFLASH)
2.在创建好的项目下,找到platformio.ini,修改代码为:
[env:esp32-s3-devkitc-1]
platform = espressif32
board = esp32-s3-devkitc-1
framework = arduino
; 指定为16MB的FLASH分区表
board_build.arduino.partitions = default_16MB.csv
; 指定FLASH和PSRAM的运行模式
board_build.arduino.memory_type = qio_opi
; 预定义宏,启用PSRAM
build_flags = -DBOARD_HAS_PSRAM
; 指定FLASH容量为16MB
board_upload.flash_size = 16MB
3.同样在项目中找到src,打开找到main.cpp 写入setup()中的4行代码,编译后上传到esp32
#include <Arduino.h>

// put function declarations here:
int myFunction(int, int);

void setup() {
  Serial.begin(115200);
  Serial.printf("Deafult free size: %d\n", heap_caps_get_free_size(MALLOC_CAP_DEFAULT));
  Serial.printf("PSRAM free size: %d\n", heap_caps_get_free_size(MALLOC_CAP_SPIRAM));
  Serial.printf("Flash size: %d bytes\n", ESP.getFlashChipSize());
}

void loop() {
  // put your main code here, to run repeatedly:
}

// put function definitions here:
int myFunction(int x, int y) {
  return x + y;
}
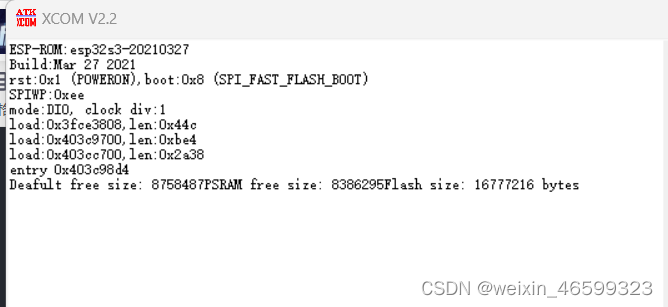
4.烧录成功后,打开串口助手,按下rest 复位键,串口输出值如下。


 1358
1358

 被折叠的 条评论
为什么被折叠?
被折叠的 条评论
为什么被折叠?
 到【灌水乐园】发言


