


前言
语音合成的技术越来越成熟,大家已经不满足于传统千篇一律的 TTS,转而追求更多个性化的声音。复现整理了一下近期的几种主流实现方案,效果各有千秋,有些适合英语口吻有些适合中文语境,有些甚至模仿的惟妙惟肖,几乎能够乱真。给自己的视频配个音,或是在赛博空间里代替一下自己也毫无违和感了。

bark
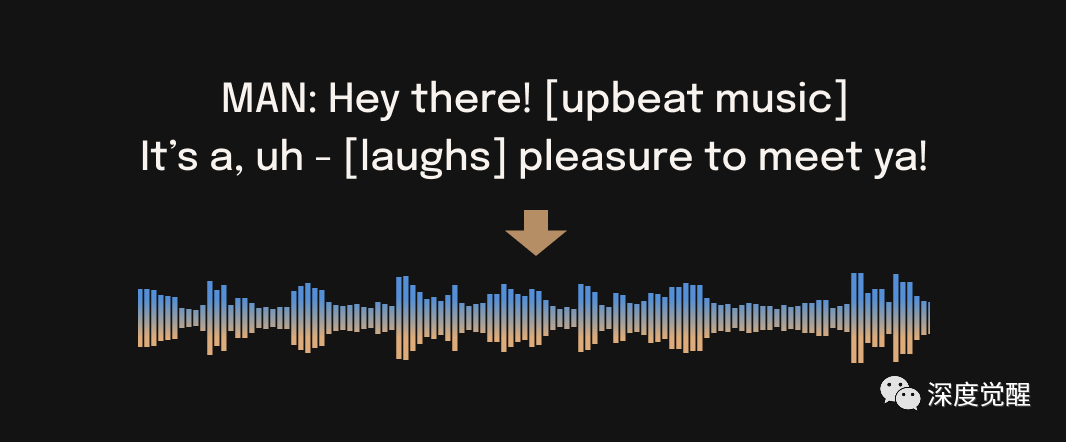
bark 基于 hubert,采用 类似GPT 的结构,直接由文本生成语音,可以生成很多语气和情绪,也能通过标记加入不同的风格。自定义的语音需要的训练素材非常少,仅不到1分钟的语音就能模仿出相似的口吻。finetune 所需要的文件也很小,很方便通过 tts 库来加入自有的语音。
安装依赖
conda create -n bark python=3.10.0
activate bark

git clone https://github.com/suno-ai/bark
cd bark && pip install .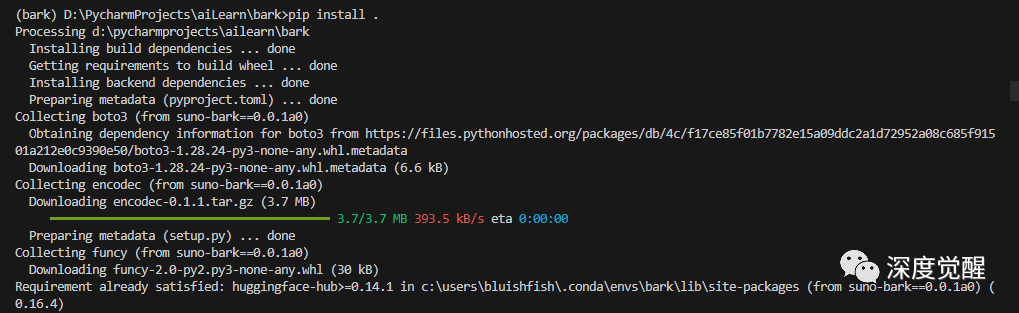
安装 Transformers 库
pip install git+https://github.com/huggingface/transformers.git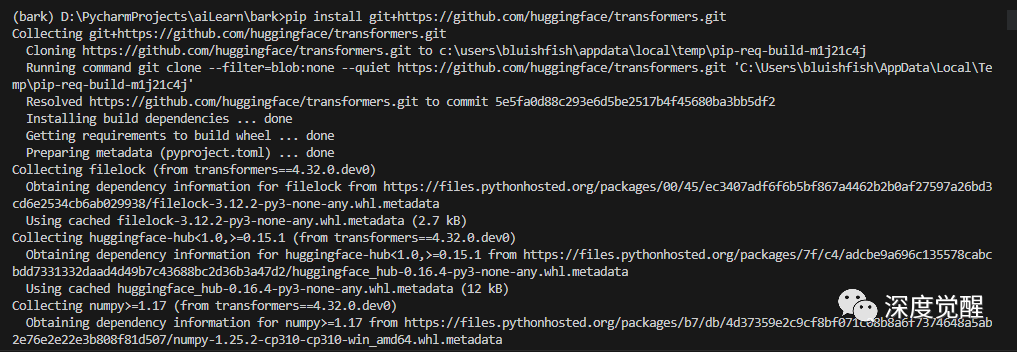
下载基础模型
新建一个目录 suno/bark,将以下链接的文件下载后放入其中(约20G左右,可在文末网盘中加速下载)
https://huggingface.co/suno/bark/tree/main已有的音色库中,选择不同的语言和不同的人物风格
https://suno-ai.notion.site/8b8e8749ed514b0cbf3f699013548683?v=bc67cff786b04b50b3ceb756fd05f68c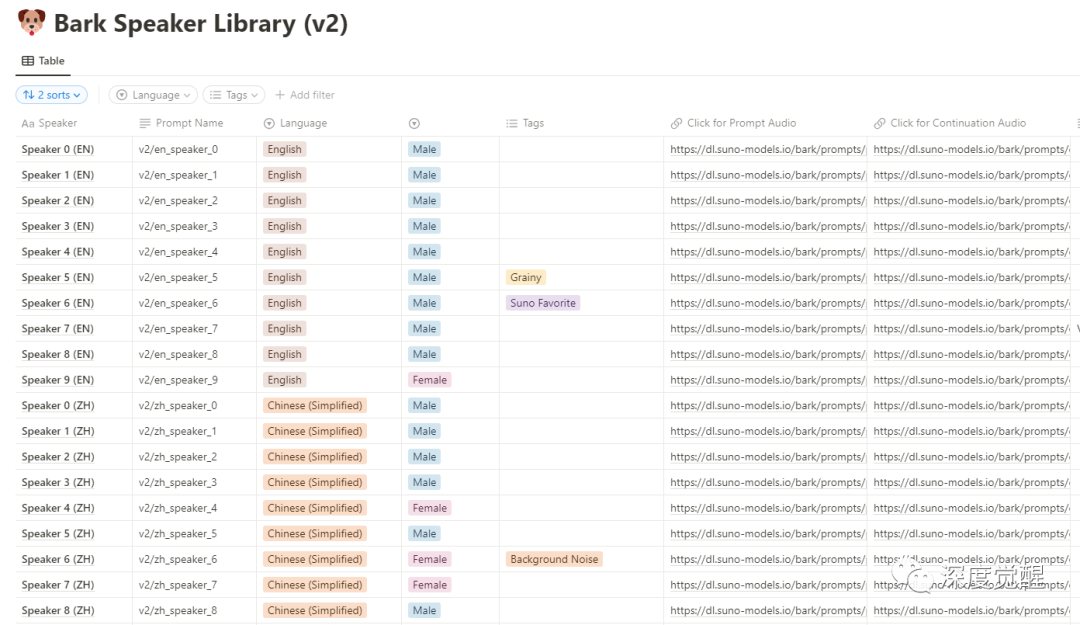
在 voice_preset 中配置后,设置采样频率
from transformers import AutoProcessor, BarkModel
import scipy

processor = AutoProcessor.from_pretrained("./suno/bark")
model = BarkModel.from_pretrained("./suno/bark")

voice_preset = "v2/zh_speaker_4"

inputs = processor("克隆自己的声音,赛博分身必备技能", voice_preset=voice_preset)

audio_array = model.generate(**inputs)
audio_array = audio_array.cpu().numpy().squeeze()

sample_rate = model.generation_config.sample_rate
scipy.io.wavfile.write("bark_out.wav", rate=sample_rate, data=audio_array)
训练自有语音
训练自己的音色,我们需要引入另一个库来实现,TTS。由于bark架构的特殊性,只需要极少量的录音(1分钟左右)就能做到音色迁移。
安装 tts 库
https://github.com/coqui-ai/TTSpip install TTS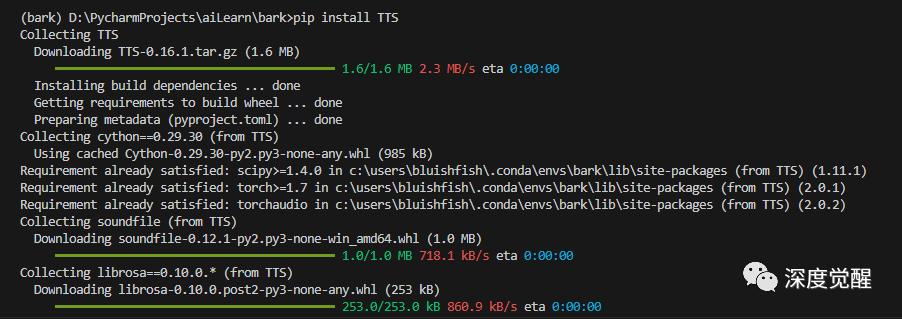
安装依赖
pip install ipython
生成音频
新建目录 bark_voices/speaker,在其中放入录制好的干净的原声,指定 speaker_id 为 speaker,voice_dirs 为 bark_voices
from TTS.tts.configs.bark_config import BarkConfig
from TTS.tts.models.bark import Bark
from scipy.io.wavfile import write as write_wav

# text = "克隆自己的声音,赛博分身必备技能。"  # Hello, my name is Manmay , how are you?
text = "Hello, my name is Manmay , how are you?"  #

config = BarkConfig()
model = Bark.init_from_config(config)
model.load_checkpoint(config, checkpoint_dir="./suno/bark/", eval=True)

# with random speaker
# output_dict = model.synthesize(text, config, speaker_id="random", voice_dirs=None)

# cloning a speaker.
# It assumes that you have a speaker file in `bark_voices/speaker_n/speaker.wav` or `bark_voices/speaker_n/speaker.npz`
output_dict = model.synthesize(text, config, speaker_id="speaker", voice_dirs="bark_voices/")

sample_rate = 24000
write_wav("bark_out_c.wav", sample_rate, output_dict["wav"])
通过调整 BarkConfig 来配置基础模型的参数,bark_out_c.wav 就是最终新合成的音频。
https://huggingface.co/docs/transformers/main/en/model_doc/bark由于基准模型多采用英语素材,采用其他语言的适配,会感觉一股老外的味道。要避免这种情况,则需要使用 CustomHuBERT 导入自己的预训练模型,进一步的资料可以参考:
https://github.com/gitmylo/bark-voice-cloning-HuBERT-quantizer/不过预训练模型需要大量的基础语音素材,如果想省心省力的话,也可以考虑达摩院的 Sambert 模型。
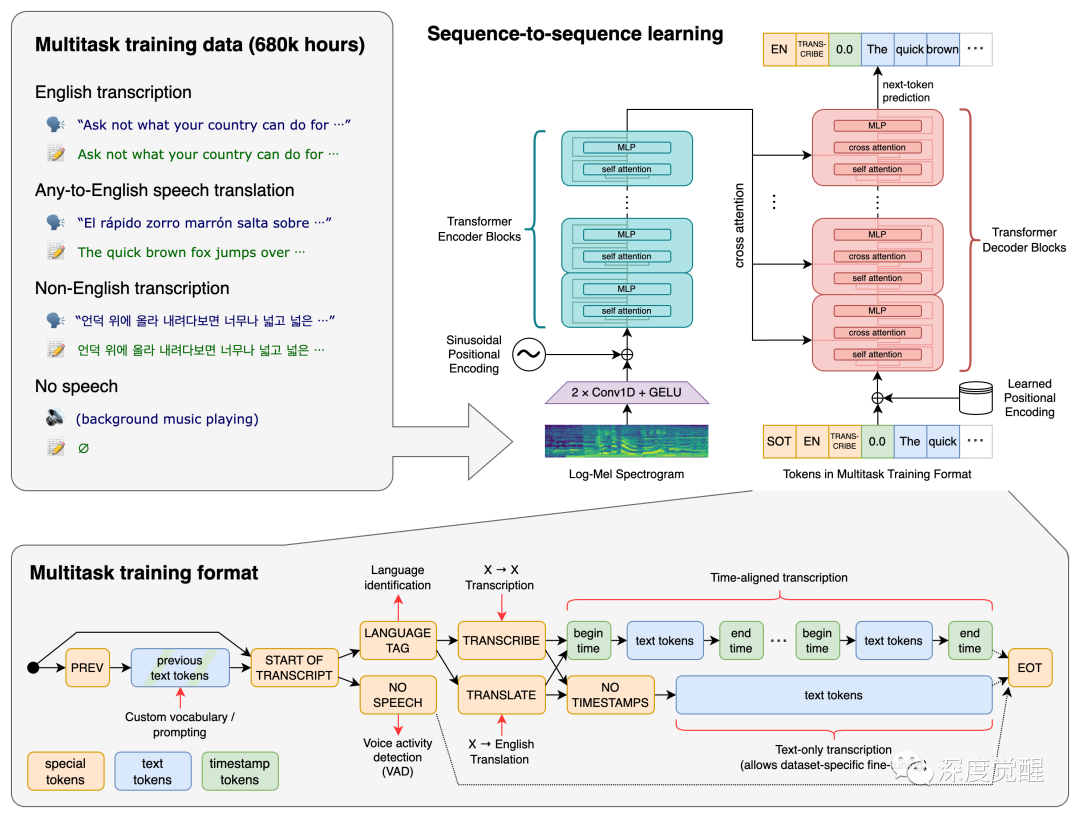
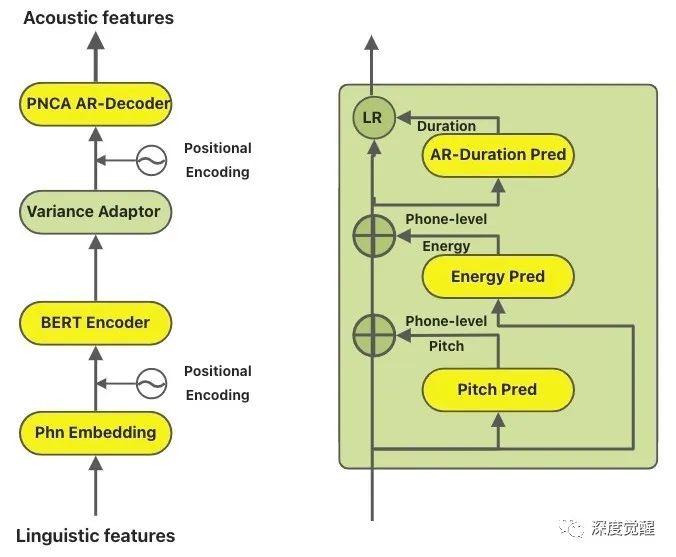
Sambert
要说中文的个性化定制语音,最近达摩院在 KAN-TTS 基础上开源的 Sambert 模型,只需要录制20句话,经过几分钟的训练,就能够获得一个较好的个性化声音。
https://modelscope.cn/models/damo/speech_personal_sambert-hifigan_nsf_tts_zh-cn_pretrain_16k/summary
安装依赖
sudo apt-get install ffmpeg
sudo apt-get install sox
要注意 pandas 和 numpy 的版本匹配,librosa 的 numpy 支持范围
pip install openai-whisper
pip install modelscope
pip install tts-autolabel -f https://modelscope.oss-cn-beijing.aliyuncs.com/releases/repo.html
pip install typeguard==2.3.1
pip install sox
pip install bitstring
pip install pysptk --no-build-isolation
pip install matplotlib
pip install kantts -f https://modelscope.oss-cn-beijing.aliyuncs.com/releases/repo.html
pip install pytorch_wavelets
pip install tensorboardX
pip install pandas==1.5.3

pip install librosa==0.10.0
pip install numpy==1.23.1
准备素材
这里我选用凯叔讲故事里西游记的一小段章节作为输入语音(大约时长 20 分钟)。
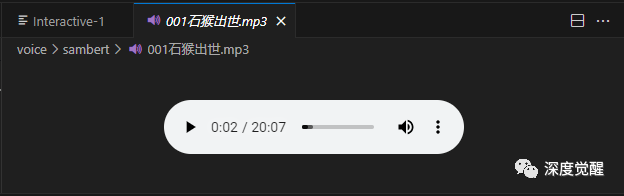
先使用 whisper 模型来做长语音分割,将素材切割成 486 段短语音,存入 test_wavs 目录备用。
import whisper
from pathlib import Path
import librosa
from scipy.io import wavfile
import numpy as np

import sox

whisper_size = "large"
whisper_model = whisper.load_model(whisper_size)

def split_long_audio(model, filepaths, save_dir="data_dir", out_sr=44100):
    if isinstance(filepaths, str):
        filepaths = [filepaths]

    for file_idx, filepath in enumerate(filepaths):

        save_path = Path(save_dir)
        save_path.mkdir(exist_ok=True, parents=True)

        print(f"Transcribing file {file_idx}: '{filepath}' to segments...")
        result = model.transcribe(filepath, word_timestamps=True, task="transcribe", beam_size=5, best_of=5)
        segments = result['segments']

        wav, sr = librosa.load(filepath, sr=None, offset=0, duration=None, mono=True)
        wav, _ = librosa.effects.trim(wav, top_db=20)
        peak = np.abs(wav).max()
        if peak > 1.0:
            wav = 0.98 * wav / peak
        wav2 = librosa.resample(wav, orig_sr=sr, target_sr=out_sr)
        wav2 /= max(wav2.max(), -wav2.min())

        for i, seg in enumerate(segments):
            start_time = seg['start']
            end_time = seg['end']
            wav_seg = wav2[int(start_time * out_sr):int(end_time * out_sr)]
            wav_seg_name = f"{file_idx}_{i}.wav"
            out_fpath = save_path / wav_seg_name
            wavfile.write(out_fpath, rate=out_sr, data=(wav_seg * np.iinfo(np.int16).max).astype(np.int16))

split_long_audio(whisper_model, "001石猴出世.mp3", "test_wavs")
自动标注
采用魔搭的自动标注工具,对原始数据预处理,期间工具会过滤掉背景声音,并将静音的片段删除,标注完成后的数据保存在 output_training_data 下,待训练。
https://modelscope.cn/models/damo/speech_ptts_autolabel_16k/summaryfrom modelscope.tools import run_auto_label
import os
os.makedirs("output_training_data", exist_ok=True)
input_wav = "./test_wavs/"
output_data = "./output_training_data/"
ret, report = run_auto_label(input_wav=input_wav, work_dir=output_data, resource_revision="v1.0.7")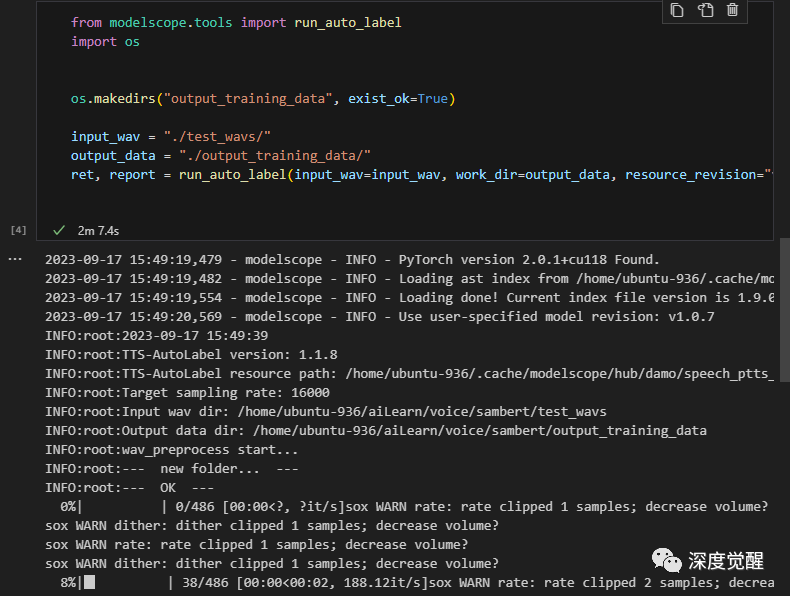
训练模型
万事俱备,指定 sambert 模型的超参数后,就能开始训练了,11g以上的显卡应该都能顺利完成任务。
from modelscope.metainfo import Trainers
from modelscope.trainers import build_trainer
from modelscope.utils.audio.audio_utils import TtsTrainType

pretrained_model_id = 'damo/speech_personal_sambert-hifigan_nsf_tts_zh-cn_pretrain_16k'

dataset_id = "./output_training_data/"
pretrain_work_dir = "./pretrain_work_dir/"

os.makedirs("pretrain_work_dir", exist_ok=True)

# 训练信息,用于指定需要训练哪个或哪些模型,这里展示AM和Vocoder模型皆进行训练
# 目前支持训练:TtsTrainType.TRAIN_TYPE_SAMBERT, TtsTrainType.TRAIN_TYPE_VOC
# 训练SAMBERT会以模型最新step作为基础进行finetune
train_info = {
    TtsTrainType.TRAIN_TYPE_SAMBERT: {  # 配置训练AM(sambert)模型
        'train_steps': 202,               # 训练多少个step
        'save_interval_steps': 200,       # 每训练多少个step保存一次checkpoint
        'log_interval': 10               # 每训练多少个step打印一次训练日志
    }
}

# 配置训练参数,指定数据集,临时工作目录和train_info
kwargs = dict(
    model=pretrained_model_id,                  # 指定要finetune的模型
    model_revision = "v1.0.6",
    work_dir=pretrain_work_dir,                 # 指定临时工作目录
    train_dataset=dataset_id,                   # 指定数据集id
    train_type=train_info                       # 指定要训练类型及参数
)

trainer = build_trainer(Trainers.speech_kantts_trainer,
                        default_args=kwargs)

trainer.train()
合成效果
from modelscope.models.audio.tts import SambertHifigan
from modelscope.pipelines import pipeline
from modelscope.utils.constant import Tasks
def infer(text):
model_dir = os.path.abspath("./pretrain_work_dir")
custom_infer_abs = {
'voice_name':
'F7',
'am_ckpt':
os.path.join(model_dir, 'tmp_am', 'ckpt'),
'am_config':
os.path.join(model_dir, 'tmp_am', 'config.yaml'),
'voc_ckpt':
os.path.join(model_dir, 'orig_model', 'basemodel_16k', 'hifigan', 'ckpt'),
'voc_config':
os.path.join(model_dir, 'orig_model', 'basemodel_16k', 'hifigan',
'config.yaml'),
'audio_config':
os.path.join(model_dir, 'data', 'audio_config.yaml'),
'se_file':
os.path.join(model_dir, 'data', 'se', 'se.npy')
}
kwargs = {'custom_ckpt': custom_infer_abs}
model_id = SambertHifigan(os.path.join(model_dir, "orig_model"), **kwargs)
inference = pipeline(task=Tasks.text_to_speech, model=model_id)
output = inference(input=text)
filename = text + ".wav"
with open(filename, mode='bx') as f:
f.write(output["output_wav"])
return filename
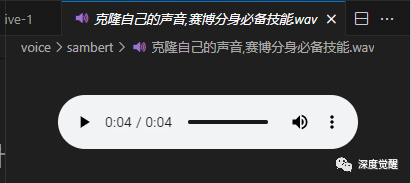
infer("克隆自己的声音,赛博分身必备技能")听一下合成的语音,果然有凯叔那味儿了,KAN-TTS 在中文语音迁移上的效果已经很不错。
VITS
原始语音素材的质量是模型能否提取特征的关键,某种程度上来说,预处理的好坏决定了后续语音合成的效果。
接下来,我们另一个语音合成神器 VITS,底模采用原神数据集和VCTK数据集,支持中日英三种语言,所以非常适合亚洲人的声线。
https://github.com/Plachtaa/VITS-fast-fine-tuning安装依赖
由于环境的版本依赖,建议新建一个虚拟环境,并在 python3.8 下运行。其中 pyopenjtalk 我在 0.3.2 版本下复现成功,如遇到问题,可以参考我的 requirements_vits.txt 文件。
git clone https://github.com/Plachtaa/VITS-fast-fine-tuning.git VITS

conda create -n vits python=3.8
conda activate vits

pip install pyopenjtalk==0.3.2
pip install -r requirements.txt (修改 pyopenjtalk 版本)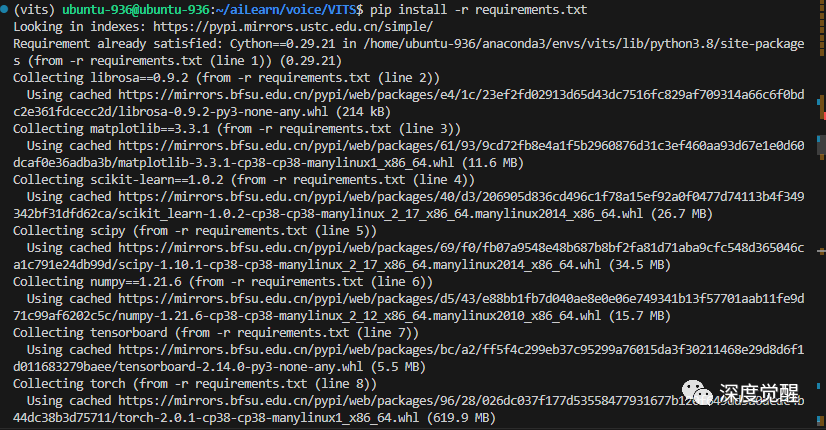
下载中文预训练模型
预训练模型非常的大,还需要墙外访问,有需求的朋友也可以在文末我的网盘中加速下载。
wget https://huggingface.co/datasets/Plachta/sampled_audio4ft/resolve/main/VITS-Chinese/D_0.pth -O ./pretrained_models/D_0.pth
wget https://huggingface.co/datasets/Plachta/sampled_audio4ft/resolve/main/VITS-Chinese/G_0.pth -O ./pretrained_models/G_0.pth
wget https://huggingface.co/datasets/Plachta/sampled_audio4ft/resolve/main/VITS-Chinese/config.json -O ./configs/finetune_speaker.json
下载原始素材
# download data for fine-tuning
wget https://huggingface.co/datasets/Plachta/sampled_audio4ft/resolve/main/sampled_audio4ft_v2.zip
unzip sampled_audio4ft_v2.zip
音频预处理
mkdir video_data
mkdir raw_audio
mkdir denoised_audio
mkdir custom_character_voice
mkdir segmented_character_voice
把原始音频放入 raw_audio 目录,需要 wav 格式,mp3的话先用 ffmpeg 转换一下。
ffmpeg -i "001石猴出世 凯叔.mp3" -acodec pcm_s16le -ac 1 -ar 24000 kai_input.wav降噪处理,采用 demucs 移除背景声
python scripts/denoise_audio.py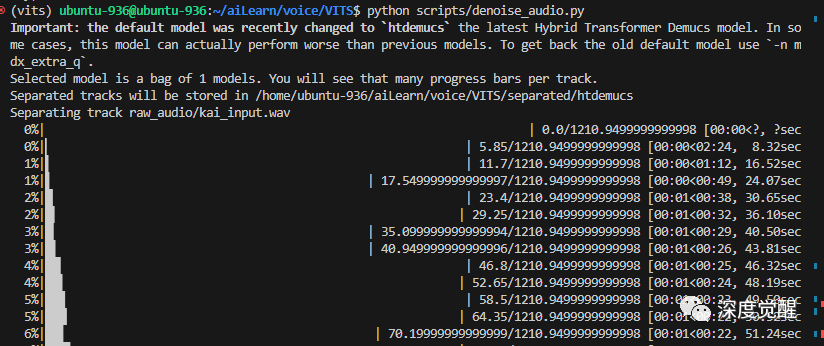
使用 whisper 将长音频分割为短音频,这里和前文 Sambert 的处理方式类似
python scripts/long_audio_transcribe.py --languages C --whisper_size large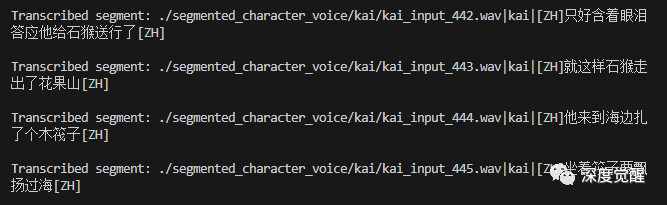
处理训练数据集
其中 add_auxiliary_data 则加入之前下载的 sampled_audio4ft_v2.zip 的素材进行 finetune 训练,可以避免新数据的影响过大。
python preprocess_v2.py --add_auxiliary_data True --languages C
训练模型
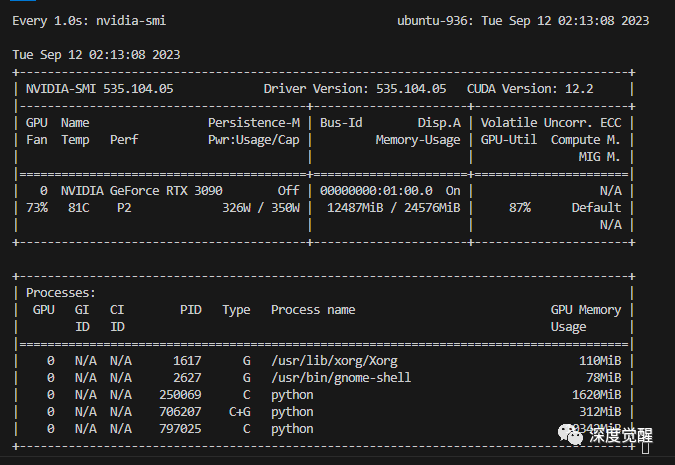
由于我们输入的音频文件比较长,训练 200 个 epoch 之后,模型仍未过拟合,直接选用 G_latest.pth 就行。
python finetune_speaker_v2.py -m ./OUTPUT_MODEL --max_epochs 200 --drop_speaker_embed True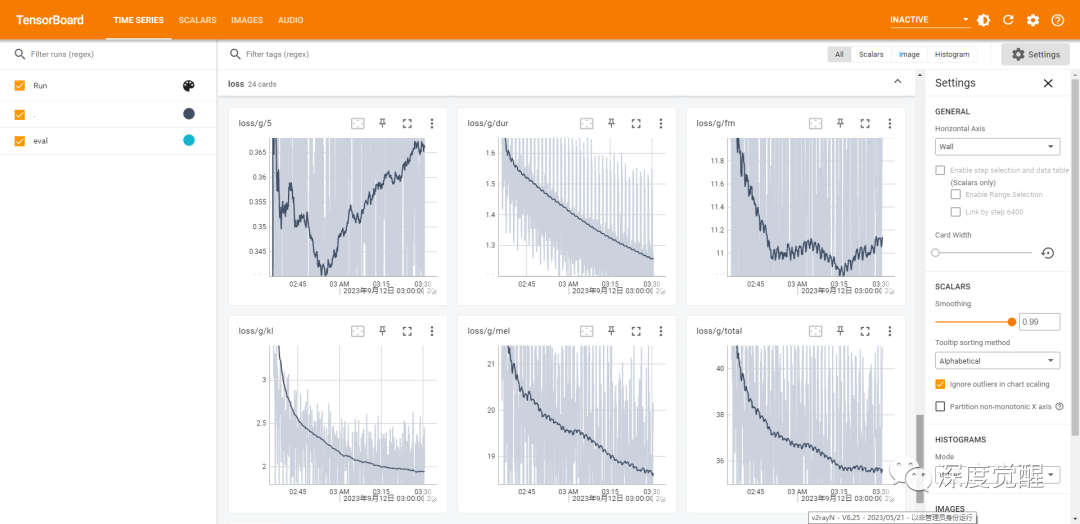
生成音频
试听一下效果,完美!
python VC_inference.py --model_dir ./OUTPUT_MODEL/G_latest.pth --config_dir ./configs/modified_finetune_speaker.json --share True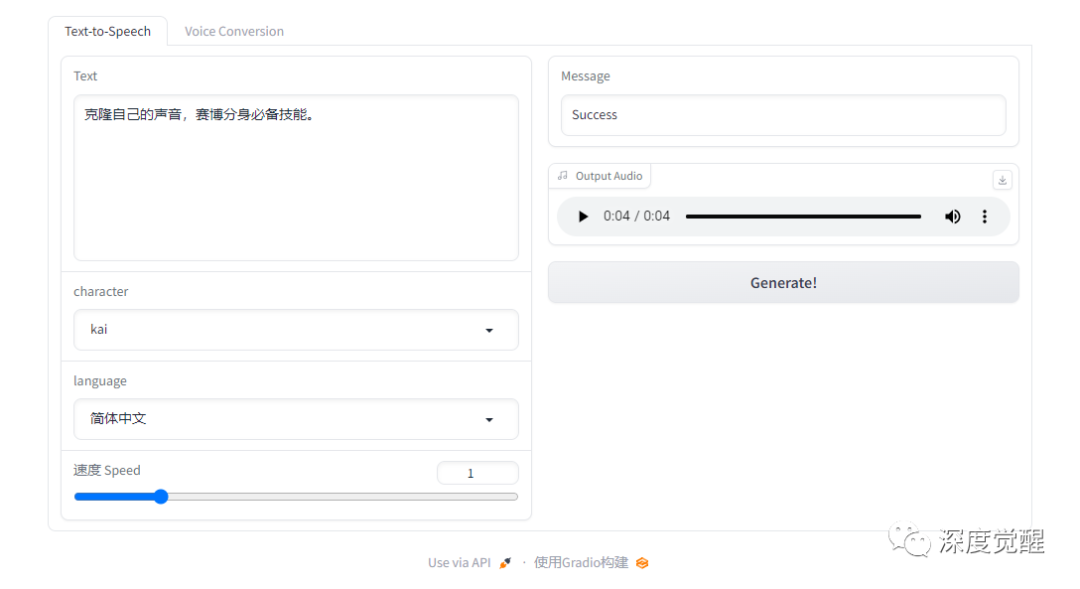
最终训练的结果都在 OUTPUT_MODEL 目录下,依据最小的g_losss保留最佳的权重文件即可。期间产生的临时文件,可以根据情况自行删除。
rm -rf ./custom_character_voice/* ./video_data/* ./raw_audio/* ./denoised_audio/* ./segmented_character_voice/* ./separated/* long_character_anno.txt short_character_anno.txt另外除了文本到音频,还能直接采用语音到语音的方式,那么我们顺便试试替换歌手的效果。
RVC

安装依赖
conda create -n chat python=3.10.0
activate chat

git clone https://github.com/RVC-Project/Retrieval-based-Voice-Conversion-WebUI.git RVC
sudo apt install build-essential
pip install -r requirements.txt
预训练模型
下载预训练模型,由于我是N卡,直接下载 RVC0813Nvidia.7z 包含所有文件(也可在文末网盘下载)。
https://huggingface.co/lj1995/VoiceConversionWebUI/tree/main将 hubert_base.pt 放置到 ./assets/hubert/ 下;
将基础模型放置到 ./assets/pretrained_v2 目录下;
将人声分离模型放置到 ./assets/uvr5_weights 目录下;
将人声音高提取模型放置到 ./assets/rmvpe 目录下。
准备素材
谈到让流行歌曲更换歌手的场景,我们首先要对歌曲做的预处理就是人声分离。我们选用王菲的《匆匆那年》来做测试,将 匆匆那年.mp3 放置到 ./song/ 目录下,先运行
python infer-web.py
人声分离
配置待处理音频文件夹和分割模型,内置的HP2兼容性比较好,其他的模型参考介绍即可。更细致的模型,可以参考后续番外篇 UVR 章节。
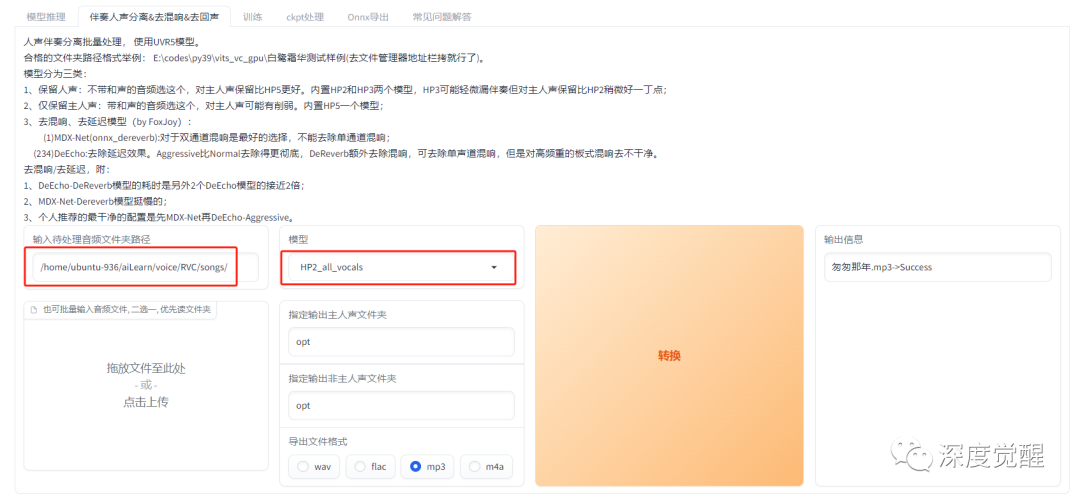
顺利的话,在 opt 目录下,就能找到分割好的人声和旋律。
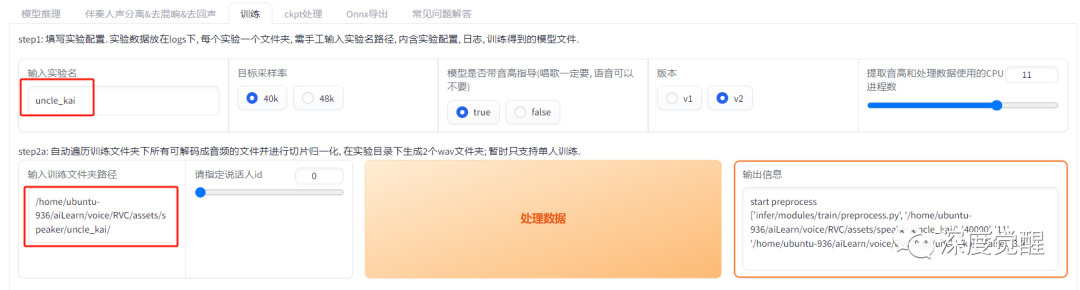
预处理目标语音
配置输入实验名,将凯叔的语音放入 ./assets/speaker/uncle_kai 目录下
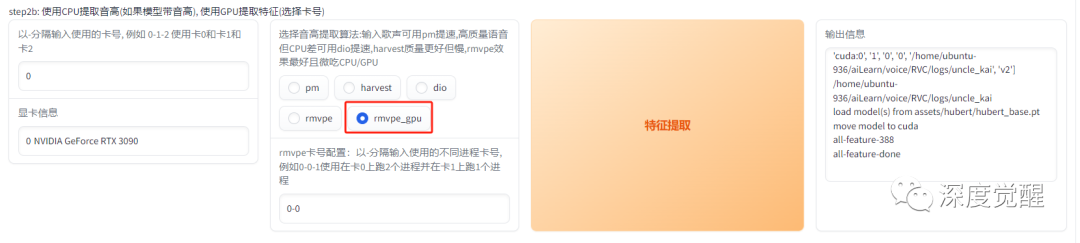
提取特征
使用 rmvpe_gpu 提取特征
训练模型
设置超参数,训练 200 个 epoch,batch_size 为 40(RTX3090),显存小的可以相应改小些。
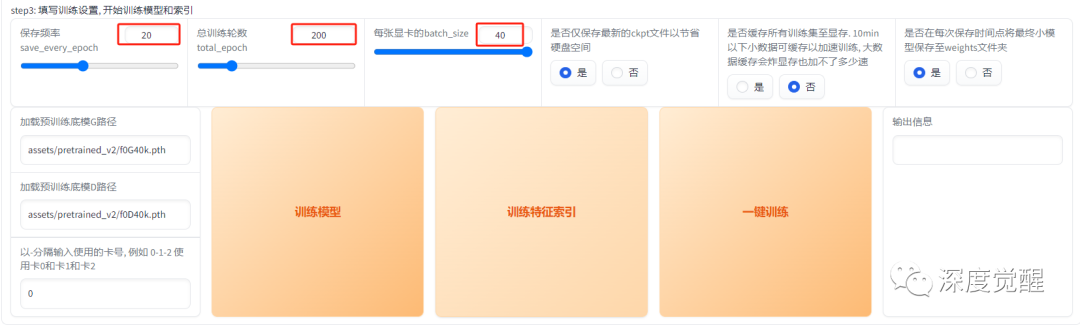
耐心等待一会儿,就能在 tensorboard 中看到整个训练过程
tensorboard --logdir=./logs/uncle_kai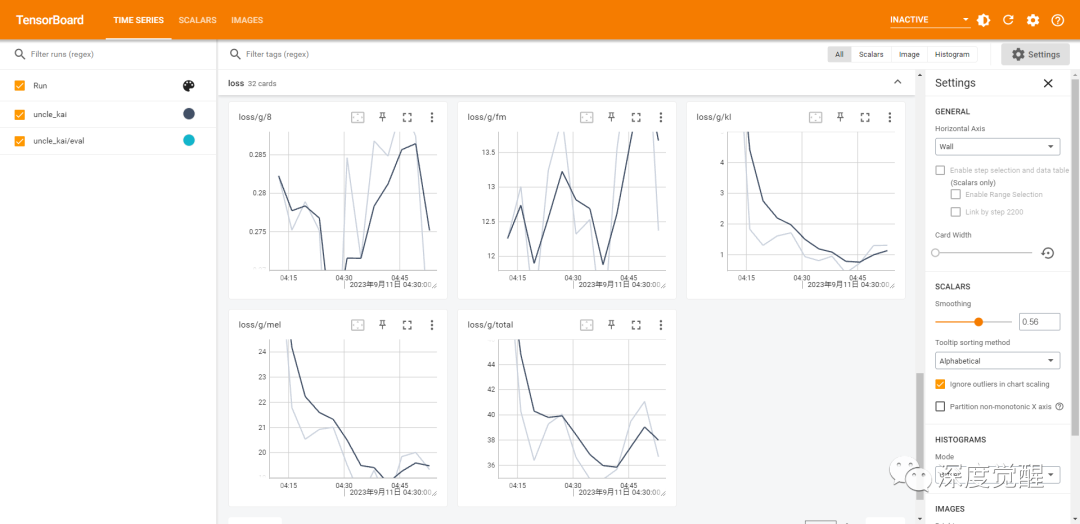
训练完的权重文件 ./assets/weights/uncle_kai.pth
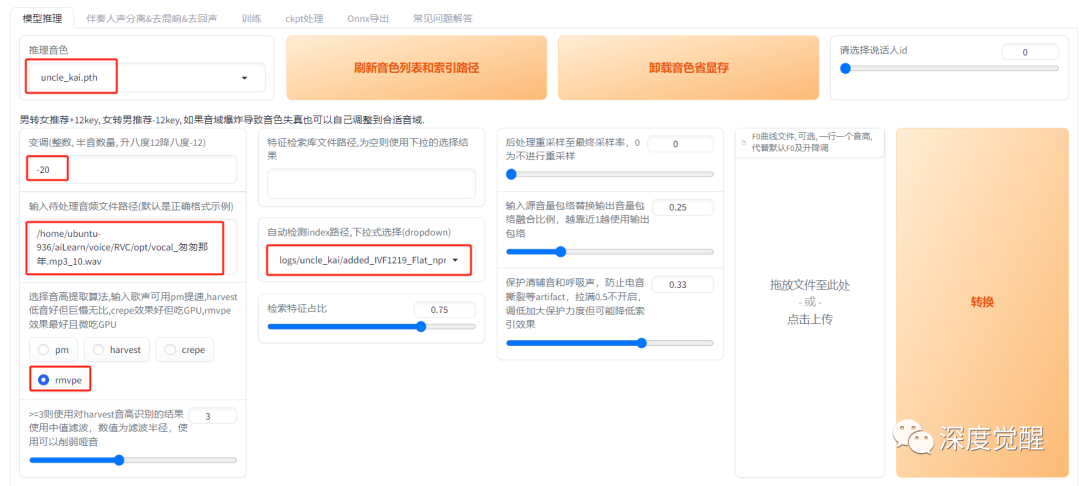
合成歌曲
切换到模型推理页,我们选择刚刚训练好的 uncle_kai.pth 模型;
由于凯叔的声音比较低沉,而王菲的女声比较高,这里设置变调 -20;
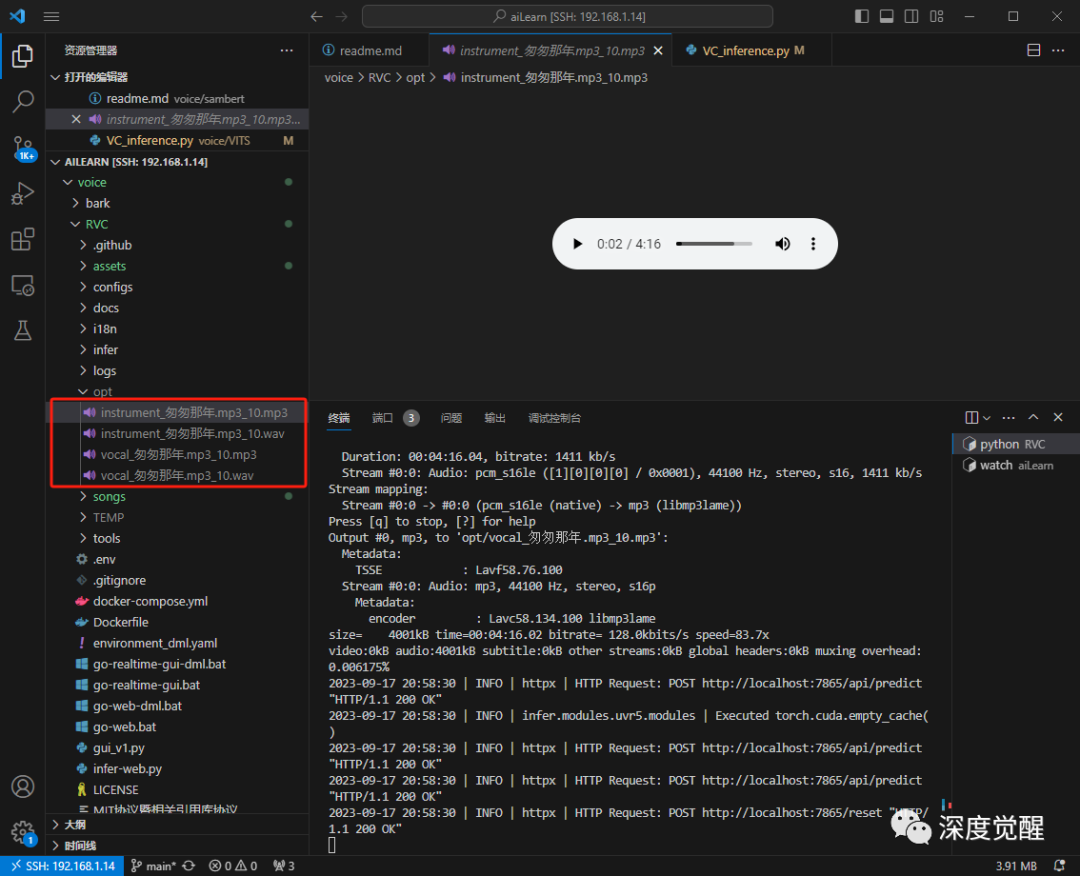
待处理的音频,选择刚刚分离的纯人声文件,./opt/vocal_匆匆那年.mp3_10.wav;
index 路径在 logs 目录下,点击转换合成歌曲。
下载合成好的人声(凯叔版本),最后我们可以使用 Audacity 来合成人声和旋律(instrument_匆匆那年.mp3)
https://www.audacityteam.org/download/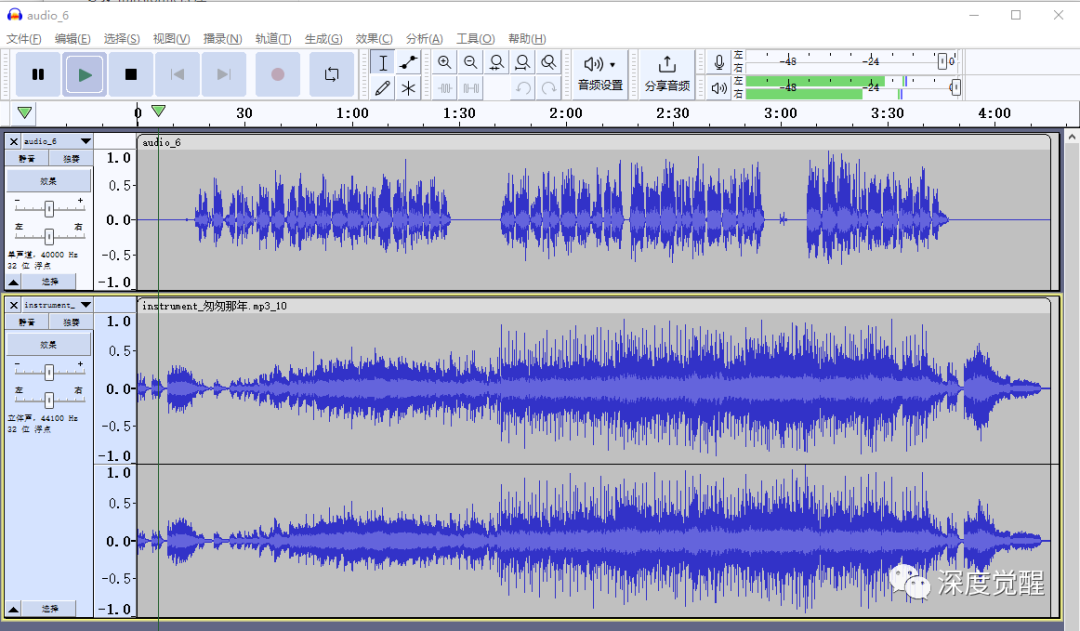
好了,男低音版本的凯叔匆匆那年有那味儿了,五音不全的朋友们也能自信地高歌起来啦。
番外篇 UVR
RVC 内置的人声分离模型比较简单,遇到有和声的歌曲则没法处理。要取得更好的效果,可以专门采用 UVR 来进一步优化。
git clone https://github.com/Anjok07/ultimatevocalremovergui.git UVR下载模型,解压到 models 目录下
https://github.com/Anjok07/ultimatevocalremovergui/releases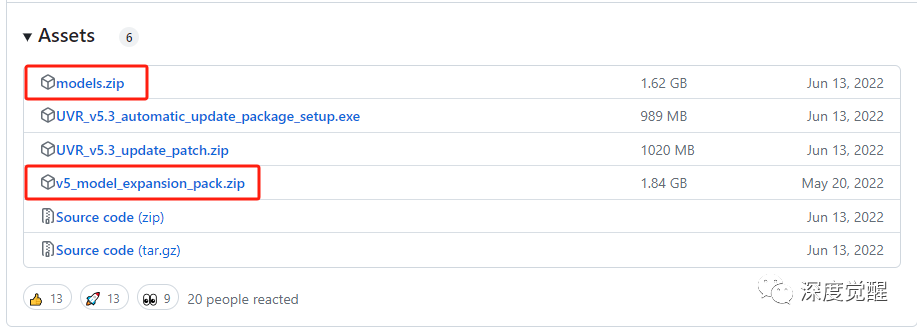
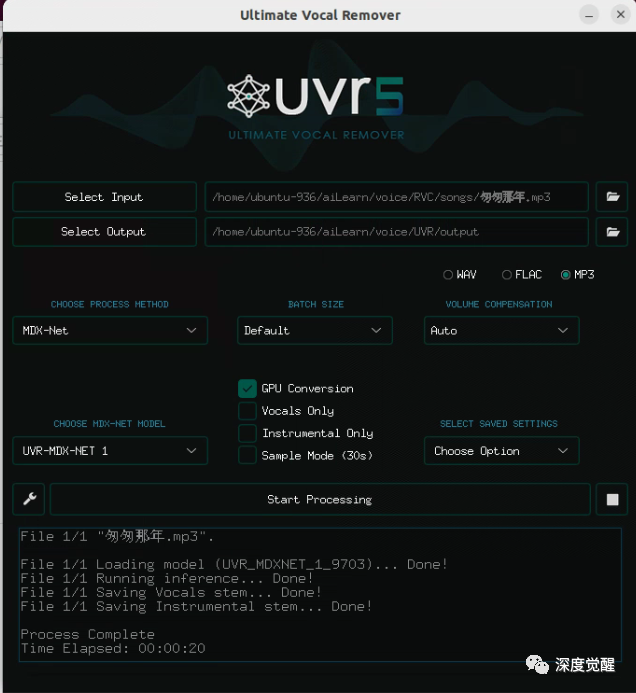
匆匆那年_(Instrumental).mp3 为纯伴奏,匆匆那年_(Vocals) 为人声, 至此以后再也不用辛苦的找寻伴奏带了,这简直是卡拉OK爱好者的福音啊。
另外,懒得部署模型,也可以试试免费在线应用
https://vocalremover.org/总结
本篇介绍了 Bark,Sambert,VITS 三种不同语音克隆的技术实现,并在 RVC(基于 VITS) 上克隆了歌曲。
整理一下整体思路,先将原始音频去噪,然后做人声分离,再将长音频进行标注,顺便分割为多段短音频,准备好原始训练素材;然后接入神经网络提取音频特征训练模型;最后将训练好的模型通过文本或语音(歌曲)渲染成特定的音色。
一直纠结是否要出一篇完整教程来介绍一下声音克隆项目,反复斟酌了好久。如果别有用心之人盗用了自己的声音,那不就间接做了电信诈骗的帮凶么?和朋友们深入地讨论后,仔细想来,恐怖分子都曾是技术专家,还是应该让更多人知道当前技术能实现的与应对策略,才会相对更安全。
一个有效的措施是,提前与家中老人孩子约定“密钥”,在电话中诉说重大事情的时候,对一下暗语,用以确定传递信息的真实性。
克隆声音对于社恐来说是一种福利,有效的解决了视频配音和直播的场景,加上翻译功能的加持,同声传译50种语言也不再是梦,而在动画人物和名人的模仿中,普通人更是可以轻松成为一个优秀的声优,会有很多的乐趣,科技点亮生活。
不多说了,批量导入喜爱的流行歌曲去除人声,进入K歌模式了!
源码下载

本期相关文件资料,可在公众号“深度觉醒”,后台回复:“voice01”,获取下载链接。涉及5个项目,推理的权重文件比较大,一共30个G左右,可以进入相应的目录按需下载。


 6168
6168

 被折叠的 条评论
为什么被折叠?
被折叠的 条评论
为什么被折叠?
 到【灌水乐园】发言


