


 本文详细描述了如何使用ESP32-S3通过ESP-IDF工具扫描并获取WiFi热点的详细信息,包括SSID、信号强度等,以及相应的C代码实现,适用于嵌入式设备的开发者进行项目开发需求。
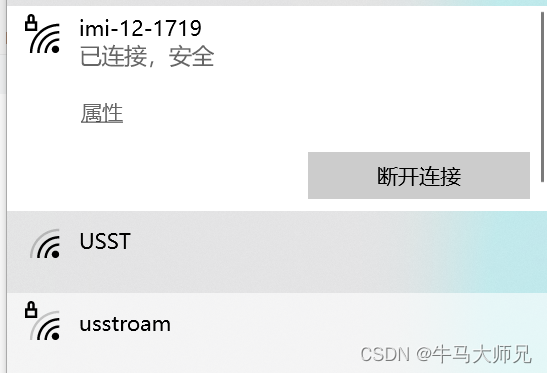
无论是我们日常使用的手机,还是电脑,当我们通过设备的无线WiFi网络连接路由器AP时,我们总是可以看到如下所示的一些WiFi AP的热点信息,从中可以清晰的看到,WiFi的状态信息,例如:WiFi热点名称,信号强度,是否加密等。
对于一个开发者而言,我们不禁会去思考,这到底是怎么实现的呢?
在工程项目开发过程中,由于设计或者优化产品的需求,也可能需要将设备采集的WiFi热点数据信息详细的记录下来,甚至是在嵌入式设备的GUI界面中通过图形、图标或文本的方式详细的呈现给使用者。本文中具体描述了使用ESP32-S3通过乐鑫的ESP-IDF工具获取详细的WiFi数据。
需要扫描的WiFi信号的结构体
/** @brief Parameters for an SSID scan. */
typedef struct {
    uint8_t *ssid;               /**< SSID of AP */
    uint8_t *bssid;              /**< MAC address of AP */
    uint8_t channel;             /**< channel, scan the specific channel */
    bool show_hidden;            /**< enable to scan AP whose SSID is hidden */
    wifi_scan_type_t scan_type;  /**< scan type, active or passive */
    wifi_scan_time_t scan_time;  /**< scan time per channel */
    uint8_t home_chan_dwell_time;/**< time spent at home channel between scanning consecutive channels.*/
} wifi_scan_config_t;
获取到的WiFi信号结构体
/** @brief Description of a WiFi AP */
typedef struct {
    uint8_t bssid[6];                     /**< MAC address of AP */
    uint8_t ssid[33];                     /**< SSID of AP */
    uint8_t primary;                      /**< channel of AP */
    wifi_second_chan_t second;            /**< secondary channel of AP */
    int8_t  rssi;                         /**< signal strength of AP */
    wifi_auth_mode_t authmode;            /**< authmode of AP */
    wifi_cipher_type_t pairwise_cipher;   /**< pairwise cipher of AP */
    wifi_cipher_type_t group_cipher;      /**< group cipher of AP */
    wifi_ant_t ant;                       /**< antenna used to receive beacon from AP */
    uint32_t phy_11b:1;                   /**< bit: 0 flag to identify if 11b mode is enabled or not */
    uint32_t phy_11g:1;                   /**< bit: 1 flag to identify if 11g mode is enabled or not */
    uint32_t phy_11n:1;                   /**< bit: 2 flag to identify if 11n mode is enabled or not */
    uint32_t phy_lr:1;                    /**< bit: 3 flag to identify if low rate is enabled or not */
    uint32_t phy_11ax:1;                  /**< bit: 4 flag to identify if 11ax mode is enabled or not */
    uint32_t wps:1;                       /**< bit: 5 flag to identify if WPS is supported or not */
    uint32_t ftm_responder:1;             /**< bit: 6 flag to identify if FTM is supported in responder mode */
    uint32_t ftm_initiator:1;             /**< bit: 7 flag to identify if FTM is supported in initiator mode */
    uint32_t reserved:24;                 /**< bit: 8..31 reserved */
    wifi_country_t country;               /**< country information of AP */
    wifi_he_ap_info_t he_ap;              /**< HE AP info */
} wifi_ap_record_t;获取的信号强度信息则是被存储于结构体成员的rssi中
ESP32扫描WiFi信号,输出SSID和RSSI等信息程序源代码
//ESP32扫描WiFi信号,输出SSID和RSSI等信息
//B站、CSDN:牛马大师兄
#include <stdio.h>
#include "esp_wifi.h"
#include "esp_log.h"
#include "nvs_flash.h"
#include "freertos/FreeRTOS.h"
#include "freertos/task.h"

/**
  * @brief  扫描WiFi信号任务
  * @param  param:线程任务传参
  * @retval None
  */
void wifi_scan_task(void *param)
{
    nvs_flash_init();
    wifi_init_config_t cfg = WIFI_INIT_CONFIG_DEFAULT();
    esp_wifi_init(&cfg);
    esp_wifi_set_storage(WIFI_STORAGE_RAM);
    esp_wifi_set_mode(WIFI_MODE_STA);
    esp_wifi_start();

    wifi_scan_config_t scan_config = {
        .ssid = 0,
        .bssid = 0,
        .channel = 0,
        .show_hidden = true
    };
    //通常认为-70dbm以上为理想的信号强度,-70 dbm~-80 dbm为中等信号强度,
    //小于-80dbm为弱信号,多数企业级AP可以接收到-95dbm左右的信号。
    while (1)
    {
        esp_wifi_scan_start(&scan_config, true);
        uint16_t ap_num = 0;
        esp_wifi_scan_get_ap_num(&ap_num);
        wifi_ap_record_t *ap_list = (wifi_ap_record_t *)malloc(sizeof(wifi_ap_record_t) * ap_num);
        esp_wifi_scan_get_ap_records(&ap_num, ap_list);
        printf("ap_num:%d\n", ap_num);
        if(ap_num == 0)
        {
            printf("扫描失败!\n");
            vTaskDelay(1000 / portTICK_PERIOD_MS);
            continue;
        }

        printf("扫描成功:\n");
        for (int i = 0; i < ap_num; i++)
        {
            printf("WiFi ID: %s\t信号强度: %d\n", (char *)ap_list[i].ssid, ap_list[i].rssi);
        }

        free(ap_list);
        vTaskDelay(10000 / portTICK_PERIOD_MS);
    }

    esp_wifi_stop();
    esp_wifi_deinit();
}

int app_main()
{
    printf("Program starting...\n");
    xTaskCreate(wifi_scan_task, "wifi_scan_task", 10240, NULL, 5, NULL);

    while (1)
    {
        vTaskDelay(1000);
    }

    return 0;
}
程序代码烧录到ESP32S3设备后,运行效果如下图所示:
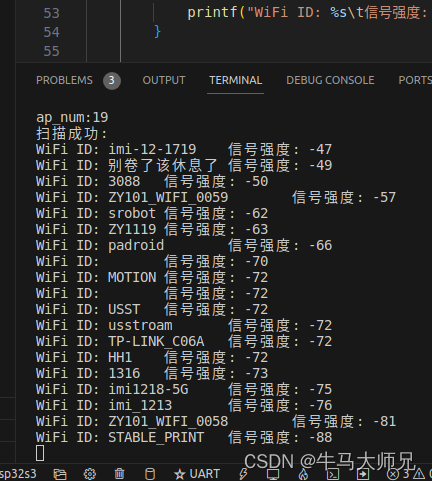
通常认为-70dbm以上为理想的信号强度,-70 dbm~-80 dbm为中等信号强度,小于-80dbm为弱信号,多数企业级AP可以接收到-95dbm左右的信号。


 1782
1782

 被折叠的 条评论
为什么被折叠?
被折叠的 条评论
为什么被折叠?
 到【灌水乐园】发言


