Unity OpenCVForUnity 安装和第二个案例详解 <二>

目录

一、前言

二、场景介绍

1.WebCamTextureToMatExample脚本

2.FpsMonitor脚本

三、 结构体Scaler

四、找到相机并使用

1.相机的启用

2.格式转换

a.把webCamTexture转换成Mat

b.把Mat转换成Texture2D

五、脚本组合

六、作者的碎碎念


一、前言

第二个案例(如图1所示),讲的内容是使用相机和把相机的图片转换成Mat再去使用。
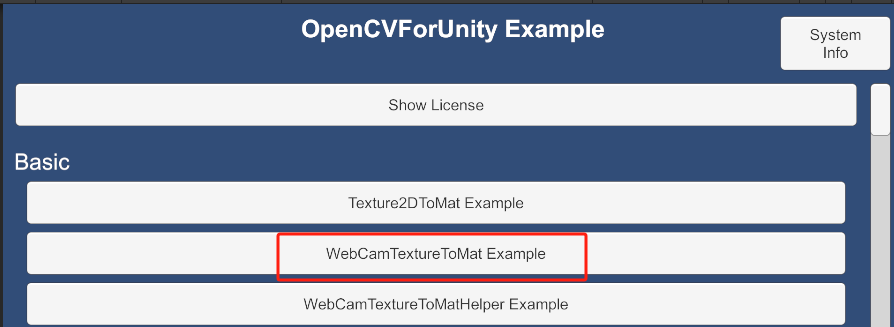
图1 案例2

二、场景介绍

这个案例,如果你点击运行了,就是把相机的内容显示在界面里,同时你可以控制相机的切换,是否启动。

整个场景中,重要的脚本有两个。(如图2所示)
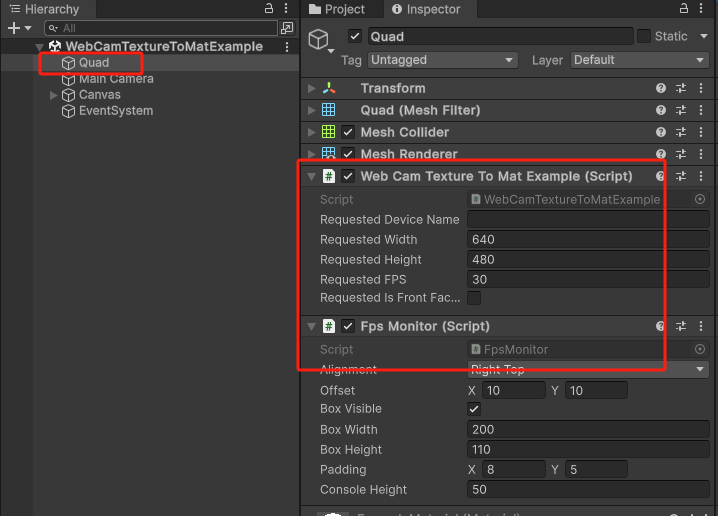
图2 两个重要的脚本
1.WebCamTextureToMatExample脚本

 这个脚本主要是控制相机的启停,输出图片,把图片显示在界面上。

2.FpsMonitor脚本

这个脚本是帧率监视器,把图片的长宽,和输出图片的帧率显示在界面上。(如图3所示)

这些数字和方框都是在脚本里画的,所以在界面里看不见这个游戏物体。
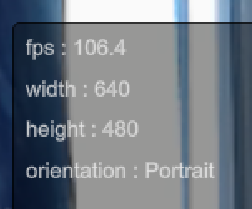
图3 面板

本篇文章不讲脚本2,因为不是主要脚本,只讲脚本1.

三、 结构体Scaler

图片计算一般是四个数据。比如,Color是(255,255,255,255)。

但是我们每次设置就要new Color(255,255,255,255),再进行修改或者计算是比较麻烦的。

为了不那么麻烦,OpenCV中设置了一个结构体Scaler,专门用来存放四个数,可以复制,可以相乘等,写了一些帮助计算的代码。本质就是存放四个数的结构体

大家后面看见了不要太陌生。

四、找到相机并使用

我把WebCamTextureToMatExample脚本中最核心的部分拿了出来,单独写了一个脚本。

1.相机的启用
//相机驱动
WebCamDevice webCamDevice;
//相机拍摄的图片
WebCamTexture webCamTexture;

//你希望输出的分辨率宽
public int requestedWidth = 1920;
//你希望输出的分辨率高
public int requestedHight = 1080;
//相机按什么帧率输出图片
public int requestFPS = 30;


void Start()
{
    //初始化
   Initialize();
}

//相机的初始化用携程比较好,就再创建个携程调用
private void Initialize()
{ 
 StartCoroutine(_Initialize());
}

//携程
IEnumerator _Initialize()
{
    //获取所有可以传输图片的相机
     WebCamDevice[] webCamDevices = WebCamTexture.devices;
    //如果这个数量是大于1的
     if (webCamDevices.Length >= 0)
      { 
            //默认取第一个相机,这里你也可以选别的,不要紧
            webCamDevice = webCamDevices[0];

            //初始化一下图片,提供驱动名称,图片的宽高,输出图片的帧率
            webCamTexture = new WebCamTexture(
            webCamDevice.name,    
            requestedWidth,
            requestedHight,
            requestFPS);
       }

        //如果没初始化,说明没找到相机
        if (webCamTexture == null)
        {
            Debug.Log("没有找到相机");
            //跳出方法
            yield break;
        }
        //如果找到了,就开始接收图片
        webCamTexture.Play();
        
        //相机照到以后
        OnInited();   
    }

这部分代码就可以把相机打开,并且把图片拿到WebCamTexture中了。

2.格式转换

还是老规矩,万物都要转换成OpenCV的通用格式Mat,所以分两步:

a.把webCamTexture转换成Mat

b.把mat转换成Texture2D。

a.把webCamTexture转换成Mat

需要的参数有三个:

public static void webCamTextureToMat(
WebCamTexture webCamTexture, 
Mat mat, 
Color32[] pixels32Buffer, 
bool flipAfter = true, 
int flipCode = 0)

webCamTexture有了

新建Mat:

Mat rgbaMat;

rgbaMat = new Mat(
webCamTexture.height, 
webCamTexture.width, 
CvType.CV_8UC4, 
new Scalar(0, 0, 0, 255));    //初始化一个黑色

新建Color32[]:

它的大小必须装得下你想要的相机图片大小。

Color32[] colors;

colors = new Color32[webCamTexture.width * webCamTexture.height];

webCamTexture转换成Mat:

上一集说过,转换的方法都放在Utils类里面,所以,转换方法为:

Utils.webCamTextureToMat(webCamTexture, rgbaMat, colors);
b.把Mat转换成Texture2D

上节课的内容,这里略过。

五、脚本组合

WebCamDevice webCamDevice;
    WebCamTexture webCamTexture;

    public int requestedWidth = 1920;
    public int requestedHight = 1080;
    public int requestFPS = 30;

    Mat rgbaMat;
    Color32[] colors;
    Texture2D texture;


    void Start()
    {
        Initialize();
    }

    private void Initialize()
    { 
    StartCoroutine(_Initialize());
    }

    IEnumerator _Initialize()
    {
        WebCamDevice[] webCamDevices = WebCamTexture.devices;
        if (webCamDevices.Length >= 0)
        { 
            webCamDevice = webCamDevices[0];
            webCamTexture = new WebCamTexture(webCamDevice.name,requestedWidth,requestedHight,requestFPS);
        }

        if (webCamTexture == null)
        {
            Debug.Log("没有找到相机");
            yield break;
        }

        webCamTexture.Play();

        OnInited();
    
    }

    private void OnInited()
    {
        //初始化Colors
        colors = new Color32[webCamTexture.width * webCamTexture.height];
        //初始化texture
        texture = new Texture2D(webCamTexture.width, webCamTexture.height, TextureFormat.RGBA32, false);
        //初始化mat并赋值黑色
        rgbaMat = new Mat(webCamTexture.height, webCamTexture.width, CvType.CV_8UC4, new Scalar(0, 0, 0, 255));
        //转换
        Utils.matToTexture2D(rgbaMat, texture, colors);

        //我是把脚本挂在RawImage上的,所以可以直接赋值
        gameObject.GetComponent<RawImage>().texture = texture;
    }

    void Update()
    {
        if (webCamTexture.isPlaying && webCamTexture.didUpdateThisFrame)
        {
            Utils.webCamTextureToMat(webCamTexture, rgbaMat, colors);
            Utils.matToTexture2D(rgbaMat, texture, colors);

            //我是把脚本挂在RawImage上的,所以可以直接赋值
            gameObject.GetComponent<RawImage>().texture = webCamTexture;
        }
    }

六、作者的碎碎念

发现数据还挺好,所以....继续更了。

Works with Unity Cloud Build iOS & Android support Windows10 UWP support WebGL support Win & Mac & Linux Standalone support Preview support in the Editor OpenCV for Unity is an Assets Plugin for using OpenCV 3.4.2 from within Unity. Official Site | ExampleCode | Android Demo WebGL Demo | Tutorial & Demo Video | Forum | API Reference | Support Modules Features: - Since this package is a clone of OpenCV Java, you are able to use the same API as OpenCV Java 3.4.2 (link). - You can image processing in real-time by using the WebCamTexture capabilities of Unity. (real-time face detection works smoothly on iPhone 5) - Provides a method to interconversion of Unity's Texture2D and OpenCV's Mat. - IDisposable is implemented in many classes.You can manage the resources with the “using” statement. - Examples of integration with other publisher assets are available.(e.g. PlayMaker, NatCam, NatCorder) ExampleCode using OpenCV for Unity is available. MarkerBased AR Example MarkerLess AR Example FaceTracker Example FaceSwapper Example FaceMask Example RealTime FaceRecognition Example GoogleVR with OpenCV for Unity Example Kinect with OpenCV for Unity Example AVPro with OpenCV for Unity Example HoloLens with OpenCV for Unity Example PlayMakerActions for OpenCVforUnity NatCam with OpenCVForUnity Example NatCorder with OpenCVForUnity Example OpenCV for Unity uses OpenCV under 3-clause BSD License; see Third-Party Notices.txt file in package for details. System Requirements Build Win Standalone & Preview Editor : Windows 7 or later Build Mac Standalone & Preview Editor : OSX 10.9 or later
评论
添加红包

请填写红包祝福语或标题

红包个数最小为10个

红包金额最低5元

当前余额3.43前往充值 >
需支付:10.00
成就一亿技术人!
领取后你会自动成为博主和红包主的粉丝 规则
hope_wisdom
发出的红包

打赏作者

菌菌巧乐兹

希望能给大家写更多有用的文章~

¥1 ¥2 ¥4 ¥6 ¥10 ¥20
扫码支付:¥1
获取中
扫码支付

您的余额不足,请更换扫码支付或充值

打赏作者

实付
使用余额支付
点击重新获取
扫码支付
钱包余额 0

抵扣说明:

1.余额是钱包充值的虚拟货币,按照1:1的比例进行支付金额的抵扣。
2.余额无法直接购买下载,可以购买VIP、付费专栏及课程。

余额充值