


1.使用PyTorch训练MobileNetV2模型进行图像分类
在本文中,我们将介绍如何使用PyTorch框架训练一个MobileNetV2模型进行图像分类。MobileNetV2是一种轻量级的卷积神经网络(CNN),它在保持较高准确率的同时具有较低的计算复杂度,非常适合在移动设备和嵌入式系统上进行实时图像识别任务。
1.自己准备数据集
以下的代码可以用于爬一些图片:
import os
import time
import requests
import urllib3
urllib3.disable_warnings()
from tqdm import tqdm # 进度条库
import os
def craw_single_class(keyword, DOWNLOAD_NUM=50):
"""
参数说明:
keyword: 爬取对象
DOWNLOAD_NUM:爬取的数量
"""
########################HTTP请求参数###############################
cookies = {
'BDqhfp': '%E7%8B%97%E7%8B%97%26%26NaN-1undefined%26%2618880%26%2621',
'BIDUPSID': '06338E0BE23C6ADB52165ACEB972355B',
'PSTM': '1646905430',
'BAIDUID': '104BD58A7C408DABABCAC9E0A1B184B4:FG=1',
'BDORZ': 'B490B5EBF6F3CD402E515D22BCDA1598',
'H_PS_PSSID': '35836_35105_31254_36024_36005_34584_36142_36120_36032_35993_35984_35319_26350_35723_22160_36061',
'BDSFRCVID': '8--OJexroG0xMovDbuOS5T78igKKHJQTDYLtOwXPsp3LGJLVgaSTEG0PtjcEHMA-2ZlgogKK02OTH6KF_2uxOjjg8UtVJeC6EG0Ptf8g0M5',
'H_BDCLCKID_SF': 'tJPqoKtbtDI3fP36qR3KhPt8Kpby2D62aKDs2nopBhcqEIL4QTQM5p5yQ2c7LUvtynT2KJnz3Po8MUbSj4QoDjFjXJ7RJRJbK6vwKJ5s5h5nhMJSb67JDMP0-4F8exry523ioIovQpn0MhQ3DRoWXPIqbN7P-p5Z5mAqKl0MLPbtbb0xXj_0D6bBjHujtT_s2TTKLPK8fCnBDP59MDTjhPrMypomWMT-0bFH_-5L-l5js56SbU5hW5LSQxQ3QhLDQNn7_JjOX-0bVIj6Wl_-etP3yarQhxQxtNRdXInjtpvhHR38MpbobUPUDa59LUvEJgcdot5yBbc8eIna5hjkbfJBQttjQn3hfIkj0DKLtD8bMC-RDjt35n-Wqxobbtof-KOhLTrJaDkWsx7Oy4oTj6DD5lrG0P6RHmb8ht59JROPSU7mhqb_3MvB-fnEbf7r-2TP_R6GBPQtqMbIQft20-DIeMtjBMJaJRCqWR7jWhk2hl72ybCMQlRX5q79atTMfNTJ-qcH0KQpsIJM5-DWbT8EjHCet5DJJn4j_Dv5b-0aKRcY-tT5M-Lf5eT22-usy6Qd2hcH0KLKDh6gb4PhQKuZ5qutLTb4QTbqWKJcKfb1MRjvMPnF-tKZDb-JXtr92nuDal5TtUthSDnTDMRhXfIL04nyKMnitnr9-pnLJpQrh459XP68bTkA5bjZKxtq3mkjbPbDfn02eCKuj6tWj6j0DNRabK6aKC5bL6rJabC3b5CzXU6q2bDeQN3OW4Rq3Irt2M8aQI0WjJ3oyU7k0q0vWtvJWbbvLT7johRTWqR4enjb3MonDh83Mxb4BUrCHRrzWn3O5hvvhKoO3MA-yUKmDloOW-TB5bbPLUQF5l8-sq0x0bOte-bQXH_E5bj2qRCqVIKa3f',
'BDSFRCVID_BFESS': '8--OJexroG0xMovDbuOS5T78igKKHJQTDYLtOwXPsp3LGJLVgaSTEG0PtjcEHMA-2ZlgogKK02OTH6KF_2uxOjjg8UtVJeC6EG0Ptf8g0M5',
'H_BDCLCKID_SF_BFESS': 'tJPqoKtbtDI3fP36qR3KhPt8Kpby2D62aKDs2nopBhcqEIL4QTQM5p5yQ2c7LUvtynT2KJnz3Po8MUbSj4QoDjFjXJ7RJRJbK6vwKJ5s5h5nhMJSb67JDMP0-4F8exry523ioIovQpn0MhQ3DRoWXPIqbN7P-p5Z5mAqKl0MLPbtbb0xXj_0D6bBjHujtT_s2TTKLPK8fCnBDP59MDTjhPrMypomWMT-0bFH_-5L-l5js56SbU5hW5LSQxQ3QhLDQNn7_JjOX-0bVIj6Wl_-etP3yarQhxQxtNRdXInjtpvhHR38MpbobUPUDa59LUvEJgcdot5yBbc8eIna5hjkbfJBQttjQn3hfIkj0DKLtD8bMC-RDjt35n-Wqxobbtof-KOhLTrJaDkWsx7Oy4oTj6DD5lrG0P6RHmb8ht59JROPSU7mhqb_3MvB-fnEbf7r-2TP_R6GBPQtqMbIQft20-DIeMtjBMJaJRCqWR7jWhk2hl72ybCMQlRX5q79atTMfNTJ-qcH0KQpsIJM5-DWbT8EjHCet5DJJn4j_Dv5b-0aKRcY-tT5M-Lf5eT22-usy6Qd2hcH0KLKDh6gb4PhQKuZ5qutLTb4QTbqWKJcKfb1MRjvMPnF-tKZDb-JXtr92nuDal5TtUthSDnTDMRhXfIL04nyKMnitnr9-pnLJpQrh459XP68bTkA5bjZKxtq3mkjbPbDfn02eCKuj6tWj6j0DNRabK6aKC5bL6rJabC3b5CzXU6q2bDeQN3OW4Rq3Irt2M8aQI0WjJ3oyU7k0q0vWtvJWbbvLT7johRTWqR4enjb3MonDh83Mxb4BUrCHRrzWn3O5hvvhKoO3MA-yUKmDloOW-TB5bbPLUQF5l8-sq0x0bOte-bQXH_E5bj2qRCqVIKa3f',
'indexPageSugList': '%5B%22%E7%8B%97%E7%8B%97%22%5D',
'cleanHistoryStatus': '0',
'BAIDUID_BFESS': '104BD58A7C408DABABCAC9E0A1B184B4:FG=1',
'BDRCVFR[dG2JNJb_ajR]': 'mk3SLVN4HKm',
'BDRCVFR[-pGxjrCMryR]': 'mk3SLVN4HKm',
'ab_sr': '1.0.1_Y2YxZDkwMWZkMmY2MzA4MGU0OTNhMzVlNTcwMmM2MWE4YWU4OTc1ZjZmZDM2N2RjYmVkMzFiY2NjNWM4Nzk4NzBlZTliYWU0ZTAyODkzNDA3YzNiMTVjMTllMzQ0MGJlZjAwYzk5MDdjNWM0MzJmMDdhOWNhYTZhMjIwODc5MDMxN2QyMmE1YTFmN2QyY2M1M2VmZDkzMjMyOThiYmNhZA==',
'delPer': '0',
'PSINO': '2',
'BA_HECTOR': '8h24a024042g05alup1h3g0aq0q',
}
headers = {
'Connection': 'keep-alive',
'sec-ch-ua': '" Not;A Brand";v="99", "Google Chrome";v="97", "Chromium";v="97"',
'Accept': 'text/plain, */*; q=0.01',
'X-Requested-With': 'XMLHttpRequest',
'sec-ch-ua-mobile': '?0',
'User-Agent': 'Mozilla/5.0 (Macintosh; Intel Mac OS X 10_15_7) AppleWebKit/537.36 (KHTML, like Gecko) Chrome/97.0.4692.99 Safari/537.36',
'sec-ch-ua-platform': '"macOS"',
'Sec-Fetch-Site': 'same-origin',
'Sec-Fetch-Mode': 'cors',
'Sec-Fetch-Dest': 'empty',
'Referer': 'https://image.baidu.com/search/index?tn=baiduimage&ipn=r&ct=201326592&cl=2&lm=-1&st=-1&fm=result&fr=&sf=1&fmq=1647837998851_R&pv=&ic=&nc=1&z=&hd=&latest=©right=&se=1&showtab=0&fb=0&width=&height=&face=0&istype=2&dyTabStr=MCwzLDIsNiwxLDUsNCw4LDcsOQ%3D%3D&ie=utf-8&sid=&word=%E7%8B%97%E7%8B%97',
'Accept-Language': 'zh-CN,zh;q=0.9',
}
############################创建文件夹################################
if os.path.exists('dataset/' + keyword):
print('文件夹 dataset/{} 已存在,之后直接将爬取到的图片保存至该文件夹中'.format(keyword))
else:
os.makedirs('dataset/{}'.format(keyword))
print('新建文件夹:dataset/{}'.format(keyword))
#####################爬取并保存图像文件至本地#########################
count = 1
with tqdm(total=DOWNLOAD_NUM, position=0, leave=True) as pbar:
num = 0 # 爬取第几张
FLAG = True # 是否继续爬取
while FLAG:
page = 30 * count
params = (
('tn', 'resultjson_com'),
('logid', '12508239107856075440'),
('ipn', 'rj'),
('ct', '201326592'),
('is', ''),
('fp', 'result'),
('fr', ''),
('word', f'{keyword}'),
('queryWord', f'{keyword}'),
('cl', '2'),
('lm', '-1'),
('ie', 'utf-8'),
('oe', 'utf-8'),
('adpicid', ''),
('st', '-1'),
('z', ''),
('ic', ''),
('hd', ''),
('latest', ''),
('copyright', ''),
('s', ''),
('se', ''),
('tab', ''),
('width', ''),
('height', ''),
('face', '0'),
('istype', '2'),
('qc', ''),
('nc', '1'),
('expermode', ''),
('nojc', ''),
('isAsync', ''),
('pn', f'{page}'),
('rn', '30'),
('gsm', '1e'),
('1647838001666', ''),
)
response = requests.get('https://image.baidu.com/search/acjson', headers=headers, params=params,
cookies=cookies)
if response.status_code == 200:
try:
json_data = response.json().get("data")
if json_data:
for x in json_data:
type = x.get("type")
if type not in ["gif"]: # 剔除gif格式的图片
img = x.get("thumbURL")
fromPageTitleEnc = x.get("fromPageTitleEnc")
try:
resp = requests.get(url=img, verify=False)
time.sleep(1)
# print(f"链接 {img}")
# 保存文件名
# file_save_path = f'dataset/{keyword}/{num}-{fromPageTitleEnc}.{type}'
file_save_path = f'dataset/{keyword}/{num}.{type}'
with open(file_save_path, 'wb') as f:
f.write(resp.content)
f.flush()
# print('第 {} 张图像 {} 爬取完成'.format(num, fromPageTitleEnc))
num += 1
pbar.update(1) # 进度条更新
# 爬取数量达到要求
if num > DOWNLOAD_NUM:
FLAG = False
print('{} 张图像爬取完毕'.format(num))
break
except Exception:
pass
except:
pass
else:
break
count += 1
# 鸟
craw_single_class('dog', DOWNLOAD_NUM=500)
craw_single_class('dog', DOWNLOAD_NUM=500)
这里输入什么,就可以下载相应的照片如代码中的dog。
1.2数据集划分
路径修改为自己的路径即可:
# import numpy as np
import os
import random
import shutil

path = r'D:\网络讯飞2202_datacap\深度学习图片\dataset\dog'  # 原始数据集的路径
path1 = r'D:\网络讯飞2202_datacap\深度学习图片\dataset\动物\train\dog'  # 训练集
path2 = r'D:\网络讯飞2202_datacap\深度学习图片\dataset\动物\test\dog'  # 测试集


def datasetImage(path, path1, path2):
    for filename in os.listdir(path):
        if not os.path.exists(path1):
            os.makedirs(path1)
        if not os.path.exists(path2):
            os.makedirs(path2)

        pathfile = os.path.join(path, filename)
        if os.path.isdir(pathfile):  # 如果是文件夹就递归
            datasetImage(pathfile, path1, path2)
    # 如果是文件就处理
    if os.path.isfile(pathfile):
        data = os.listdir(path)
        t = int(len(data) * 0.8)
        for i in range(len(data)):
            random.shuffle(data)  # 打乱数据
        for z in range(len(data)):  # 将数据按8:2分到train和test中
            print('z:', z, '\n')
            pic_path = path + '\\' + data[z]
            print('pic_path:', pic_path)
            if z < t:
                obj_path = path1 + '\\' + data[z]
                shutil.copyfile(pic_path, obj_path)
                print('train:', obj_path)
            else:
                obj_path = path2 + '\\' + data[z]
                print('test:', obj_path)  # 显示分类情况
                shutil.copyfile(pic_path, obj_path)  # 往train、val中复制图片

            if (os.path.exists(pic_path)):
                shutil.copyfile(pic_path, obj_path)


if __name__ == '__main__':
    datasetImage(path, path1, path2)
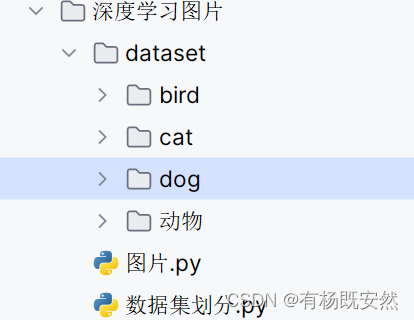
文件夹结构:
2.环境准备
首先,我们需要安装PyTorch库。可以通过以下命令安装:
pip install torch torchvision
接下来,我们需要准备训练数据。这里我们使用CIFAR-10数据集,它包含了10个类别的60,000张32x32彩色图片。我们可以使用torchvision库来下载并加载数据集:
import torchvision
import torchvision.transforms as transforms

transform = transforms.Compose([
    transforms.Resize((224, 224)),
    transforms.ToTensor(),
    transforms.Normalize(mean=[0.485, 0.456, 0.406], std=[0.229, 0.224, 0.225])
])

train_dataset = torchvision.datasets.CIFAR10(root='./data', train=True, download=True, transform=transform)
test_dataset = torchvision.datasets.CIFAR10(root='./data', train=False, download=True, transform=transform)

train_loader = torch.utils.data.DataLoader(dataset=train_dataset, batch_size=128, shuffle=True)
test_loader = torch.utils.data.DataLoader(dataset=test_dataset, batch_size=128, shuffle=False)
3.模型定义
接下来,我们定义一个MobileNetV2模型。这里我们使用PyTorch提供的预定义模型:
import torch
import torch.nn as nn
import torchvision.models as models

model = models.mobilenet_v2(pretrained=False)
为了将模型输出映射到10个类别,我们需要修改模型的最后一层:
num_classes = 10
model.classifier[1] = nn.Linear(model.last_channel, num_classes)
4.训练与测试
现在我们可以开始训练模型了。首先,我们需要定义损失函数和优化器:
device = torch.device("cuda:0" if torch.cuda.is_available() else "cpu")
model.to(device)
criterion = nn.CrossEntropyLoss()
optimizer = torch.optim.SGD(model.parameters(), lr=0.01, momentum=0.5)
接下来,我们定义训练和测试函数:
def train(epoch):
    total = 0.0
    correct = 0.0
    running_loss = 0.0
    for batch_id, data in enumerate(train_loader, 0):
        inputs, target = data
        inputs, target = inputs.to(device), target.to(device)
        # Send the inputs and targets at every step to the GPU
        optimizer.zero_grad()

        # forward + backward + update

        outputs = model(inputs)
        loss = criterion(outputs, target)
        loss.backward()
        optimizer.step()
        running_loss += loss.item()
        # print('[%d,%5d] loss: %.3f' % (epoch + 1, batch_id, running_loss ))
        # running_loss = 0.0

        predicted = torch.argmax(outputs.data, dim=1)
        total += target.size(0)
        correct += (predicted == target).sum().item()
        accuracy = 100 * correct / total

        if (batch_id) % 100 == 99:
            print('[%d,%5d] loss: %.3f' % (epoch + 1, batch_id, running_loss / 100))
            running_loss = 0.0
            print('Accuracy on train set : %d %% [%d/%d]' % (100 * correct / total, correct, total))
    accuracy = test()
    accuracies.append(accuracy)
    writer.add_scalar('train accuracy', accuracy, epoch)
    writer.add_scalar('train loss', running_loss, epoch)

    writer.add_graph(model, (inputs,))
    writer.flush()

def test():
   def test():
    correct = 0
    total = 0
    with torch.no_grad():
        for batch_id, data in enumerate(test_loader, 0):
            inputs, target = data
            inputs, target = inputs.to(device), target.to(device)
            # Send the inputs and targets at every step to the GPU
            outputs = model(inputs)
            predicted = torch.argmax(outputs.data, dim=1)
            total += target.size(0)
            correct += (predicted == target).sum().item()
        print('Accuracy on test set : %d %% [%d/%d]' % (100 * correct / total, correct, total))

        accuracy = 100 * correct / total

    writer.add_scalar('test accuracy', 100 * correct / total, epoch)
    writer.flush()
    return accuracy
最后,我们可以开始训练模型:
if __name__ == '__main__':
    num_epochs = 100
    for epoch in range(num_epochs):
        train(epoch)
        accuracy = test()
        print(f'Epoch {epoch + 1}/{num_epochs}, Test Accuracy: {accuracy:.2f}%')
5.结果展示
在训练过程中,我们可以使用TensorBoard记录训练过程中的损失值和准确率。训练完成后,我们可以绘制准确率随epoch变化的曲线:
import matplotlib.pyplot as plt

plt.figure()
plt.plot(range(1, num_epochs + 1), accuracies)
plt.title('Accuracy over Epochs')
plt.xlabel('Epoch')
plt.ylabel('Accuracy')
plt.show()
完整代码:
import torch
import torch.nn as nn
import matplotlib.pyplot as plt
from torch.utils.data import DataLoader  # For constructing DataLoader
from torchvision import transforms  # For constructing DataLoader
from torchvision import datasets  # For constructing DataLoader
import torch.nn.functional as F  # For using function relu()
from torch.utils.tensorboard import SummaryWriter
from torchvision.models._utils import _make_divisible

# torch.cuda.current_device()
# torch.cuda.empty_cache()
# torch.cuda._initialized = True 图片分类

batch_size = 5
epochs = 100
transform = transforms.Compose([transforms.Resize((224, 224)),
                                transforms.ToTensor(),  # Convert the PIL Image to Tensor.
                                transforms.Normalize((0.1307,),
                                                     (0.3081,))])  # The parameters are mean and std respectively.

train_dataset = datasets.ImageFolder('D:\\深度学习\\pytorch_project\\my_model_train\dataset\\train',
                                     transform=transform)  # 获取路径,返回的是所有图的data、label
test_dataset = datasets.ImageFolder('D:\\深度学习\\pytorch_project\\my_model_train\\dataset\\test', transform=transform)
train_loader = DataLoader(dataset=train_dataset, batch_size=batch_size, shuffle=True)
test_loader = DataLoader(dataset=test_dataset, batch_size=batch_size, shuffle=False)

writer = SummaryWriter('./dev/log', comment='Net')


class Net(torch.nn.Module):
    def __init__(self):
        super(Net, self).__init__()
        self.relu = nn.ReLU()
        self.sigmoid = nn.Sigmoid()
        self.conv1 = nn.Sequential(
            nn.Conv2d(
                in_channels=3,
                out_channels=16,
                kernel_size=3,
                stride=2,
            ),
            nn.BatchNorm2d(16),
            nn.ReLU(),
            nn.MaxPool2d(kernel_size=2),
        )
        #
        self.conv2 = nn.Sequential(
            nn.Conv2d(
                in_channels=16,
                out_channels=32,
                kernel_size=3,
                stride=2,
            ),
            nn.BatchNorm2d(32),
            nn.ReLU(),
            nn.MaxPool2d(kernel_size=2),
        )
        #
        self.conv3 = nn.Sequential(
            nn.Conv2d(
                in_channels=32,
                out_channels=64,
                kernel_size=3,
                stride=2,
            ),
            nn.BatchNorm2d(64),
            nn.ReLU(),
            nn.MaxPool2d(kernel_size=2),
        )
        self.fc1 = nn.Linear(3 * 3 * 64, 64)
        self.fc2 = nn.Linear(64, 10)
        self.out = nn.Linear(10, 2)

    def forward(self, x):
        x = self.conv1(x)
        x = self.conv2(x)
        x = self.conv3(x)
        # print(x.size())
        x = x.view(x.shape[0], -1)
        x = self.relu(self.fc1(x))
        x = self.relu(self.fc2(x))
        x = self.out(x)
        # x = F.log_softmax(x, dim=1)
        return x


#######################MobileNetV2模型######################################
class ConvBNReLU(nn.Sequential):
    def __init__(self, in_channel, out_channel, kernel_size=3, stride=1, groups=1):
        padding = (kernel_size - 1) // 2
        super(ConvBNReLU, self).__init__(
            nn.Conv2d(in_channel, out_channel, kernel_size, stride, padding, groups=groups, bias=False),
            nn.BatchNorm2d(out_channel),
            nn.ReLU6(inplace=True)
        )


class InvertedResidual(nn.Module):
    def __init__(self, in_channel, out_channel, stride, expand_ratio):
        super(InvertedResidual, self).__init__()
        hidden_channel = in_channel * expand_ratio
        self.use_shortcut = stride == 1 and in_channel == out_channel

        layers = []  # 定义层列表
        if expand_ratio != 1:
            # 1x1 pointwise conv
            layers.append(ConvBNReLU(in_channel, hidden_channel, kernel_size=1))
        layers.extend([
            # 3x3 depthwise conv
            ConvBNReLU(hidden_channel, hidden_channel, stride=stride, groups=hidden_channel),
            # 1x1 pointwise conv(linear)
            nn.Conv2d(hidden_channel, out_channel, kernel_size=1, bias=False),
            nn.BatchNorm2d(out_channel),
        ])

        self.conv = nn.Sequential(*layers)

    def forward(self, x):
        if self.use_shortcut:
            return x + self.conv(x)
        else:
            return self.conv(x)


class MobileNetV2(nn.Module):
    def __init__(self, num_classes=1000, alpha=1, round_nearest=8):
        super(MobileNetV2, self).__init__()
        block = InvertedResidual
        input_channel = _make_divisible(32 * alpha, round_nearest)  # 将卷积核个数调整到最接近8的整数倍数
        last_channel = _make_divisible(1280 * alpha, round_nearest)

        inverted_residual_setting = [
            # t, c, n, s
            [1, 16, 1, 1],
            [6, 24, 2, 2],
            [6, 32, 3, 2],
            [6, 64, 4, 2],
            [6, 96, 3, 1],
            [6, 160, 3, 2],
            [6, 320, 1, 1],
        ]

        features = []
        # conv1 layer
        features.append(ConvBNReLU(3, input_channel, stride=2))
        # building inverted residual residual blockes
        for t, c, n, s in inverted_residual_setting:
            output_channel = _make_divisible(c * alpha, round_nearest)
            for i in range(n):
                stride = s if i == 0 else 1
                features.append(block(input_channel, output_channel, stride, expand_ratio=t))
                input_channel = output_channel
        # building last several layers
        features.append(ConvBNReLU(input_channel, last_channel, 1))
        # combine feature layers
        self.features = nn.Sequential(*features)

        # building classifier
        self.avgpool = nn.AdaptiveAvgPool2d((1, 1))
        self.classifier = nn.Sequential(
            nn.Dropout(0.2),
            nn.Linear(last_channel, num_classes)
        )

        # weight initialization
        for m in self.modules():
            if isinstance(m, nn.Conv2d):
                nn.init.kaiming_normal_(m.weight, mode='fan_out')
                if m.bias is not None:
                    nn.init.zeros_(m.bias)
            elif isinstance(m, nn.BatchNorm2d):
                nn.init.ones_(m.weight)  # 初始化均值为0
                nn.init.zeros_(m.bias)  # 初始化方差为1
            elif isinstance(m, nn.Linear):
                nn.init.normal_(m.weight, 0, 0.01)
                nn.init.zeros_(m.bias)

    def forward(self, x):
        x = self.features(x)
        x = self.avgpool(x)
        x = torch.flatten(x, 1)
        x = self.classifier(x)
        return x


###########################################################################

model = MobileNetV2()

device = torch.device("cuda:0" if torch.cuda.is_available() else "cpu")
# Define device as the first visible cuda device if we have CUDA available.

model.to(device)
# Convert parameters and buffers of all modules to CUDA Tensor.

criterion = torch.nn.CrossEntropyLoss()
optimizer = torch.optim.SGD(model.parameters(), lr=0.01, momentum=0.5)

accuracies = []


def train(epoch):
    total = 0.0
    correct = 0.0
    running_loss = 0.0
    for batch_id, data in enumerate(train_loader, 0):
        inputs, target = data
        inputs, target = inputs.to(device), target.to(device)
        # Send the inputs and targets at every step to the GPU
        optimizer.zero_grad()

        # forward + backward + update

        outputs = model(inputs)
        loss = criterion(outputs, target)
        loss.backward()
        optimizer.step()
        running_loss += loss.item()
        # print('[%d,%5d] loss: %.3f' % (epoch + 1, batch_id, running_loss ))
        # running_loss = 0.0

        predicted = torch.argmax(outputs.data, dim=1)
        total += target.size(0)
        correct += (predicted == target).sum().item()
        accuracy = 100 * correct / total

        if (batch_id) % 100 == 99:
            print('[%d,%5d] loss: %.3f' % (epoch + 1, batch_id, running_loss / 100))
            running_loss = 0.0
            print('Accuracy on train set : %d %% [%d/%d]' % (100 * correct / total, correct, total))
    accuracy = test()
    accuracies.append(accuracy)
    writer.add_scalar('train accuracy', accuracy, epoch)
    writer.add_scalar('train loss', running_loss, epoch)

    writer.add_graph(model, (inputs,))
    writer.flush()


def test():
    correct = 0
    total = 0
    with torch.no_grad():
        for batch_id, data in enumerate(test_loader, 0):
            inputs, target = data
            inputs, target = inputs.to(device), target.to(device)
            # Send the inputs and targets at every step to the GPU
            outputs = model(inputs)
            predicted = torch.argmax(outputs.data, dim=1)
            total += target.size(0)
            correct += (predicted == target).sum().item()
        print('Accuracy on test set : %d %% [%d/%d]' % (100 * correct / total, correct, total))

        accuracy = 100 * correct / total

    writer.add_scalar('test accuracy', 100 * correct / total, epoch)
    writer.flush()
    return accuracy


if __name__ == '__main__':
    for epoch in range(epochs):
        train(epoch)
        # test()
    torch.save(model.state_dict(), './result/try.pyt')
    writer.flush()
    writer.close()
    plt.figure()
    plt.plot(range(1, 101), accuracies)
    plt.title('Accuracy over Epochs')
    plt.xlabel('Epoch')
    plt.ylabel('Accuracy')
    plt.show()

# print(train_dataset[0][0].size())
# 展示图像,乘标准差加均值,再转回PIL Image(上述过程的逆过程)
# show=transforms.ToPILImage()
# show(train_dataset[0][0]*0.5+0.5)

# print(train_dataset.class_to_idx) #查看类别名,及对应的标签。
# print(train_dataset.imgs)  #查看路径里所有的图片,及对应的标签
# print(train_dataset[0][1]) #第1张图的label
# print(train_dataset[0][0])#第1张图的data
通过本文的介绍,我们学会了如何使用PyTorch训练一个MobileNetV2模型进行图像分类。希望对您有所帮助!


 1147
1147


 被折叠的 条评论
为什么被折叠?
被折叠的 条评论
为什么被折叠?
 到【灌水乐园】发言


