


利用pytorch实现lenet5网络模型
写在前面:
利用框架搭建模型相对比较简单,但是也会遇到很多问题,网上资料很多,搭建模型的方法大同小异,但是在我尝试了用两种方法搭建出来模型,无论是训练还是检测都会遇到很多的问题,像这种自己遇到的问题,请教别人也没有用。大多数资料上面都是用torch自带的mnist下载数据集,这样自己就跳过了数据整理这个阶段,虽然能训练,并且出来很好的结果,但总归不是自己整理的数据,对于新手朋友来说,就很难图形化的查看自己手写的图片的预测结果。
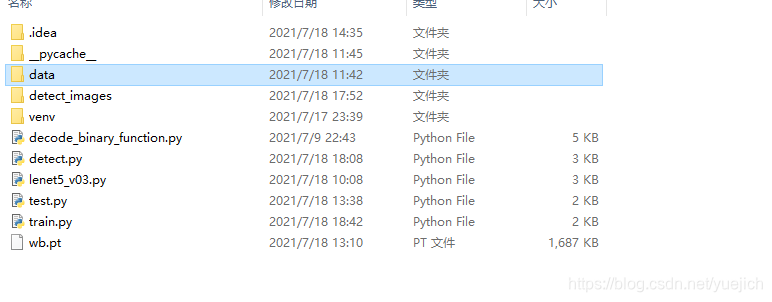
这个是我的项目文件夹结构
第一步:用pytorch框架搭建lenet5模型
首先需要熟悉lenet5的结构,它是检测手写数字,手写数字图像是28*28大小的一个单通道图片,
第一层为卷积层+池化层:conv2d+maxpool
利用卷积,卷积核大小为5*5,padding为0,stride为1,卷积核数量为20
in_channel=1
out_channel=20
kernel_size=5
stride=1
self.conv1=nn.Conv2d(in_channels=1,out_channels=20,kernel_size=5,stride=1)
池化为最大池化
self.pool1=nn.MaxPool2d(2)
第二层为卷积层+池化层:conv2d+maxpool
和第一层一样,第二层的输入就是第一层的输出
in_channel=20
out_channel=50
kerne_size=5
stride=1
self.conv2=nn.Conv2d(in_channels=20,out_channels=50,kernel_size=5,stride=1)
第二层池化
self.pool2=nn.MaxPool2d(2)
第三层和第四层为全连接层Linear
in_features=800
为什么是800
第一层卷积后得到特征图的大小为(W-F+2P)/S+1=2424,数量20个
第一层池化后得到特征图大小为1212,数量20
第二层卷积后得到特征图的大小为(W-F+2P)/S+1=88,数量50
第二层池化后得到的特征图大小为44,数量50
把50个44的特征图reshape成一个1维数组,就是44*50=800
第三层全连接层输出维500,
最后一层输出为10
        self.fc1=nn.Linear(in_features=800,out_features=500,bias=True)
        self.relu1=nn.ReLU()

        self.fc2=nn.Linear(in_features=500,out_features=10,bias=True)
        self.relu2=nn.ReLU()
下面我贴出用pytorch搭建的lenet5网络模型
'''
首先介绍一下这个py文件,文件名为lenet5_v03,版本为v03,因为之前我已经用被的方法复现过两次lenet5算法,这次是第三次,就给这个文件命名为v03。
这个文件是定义一个类class,这个类定义一下LeNet5网络模型,这个网络模型是基于pytorch框架的。
这里面定义了两个模型,我认为是同样的模型的两种书写方式,
'''
import torch
from torch import nn
from torch.nn import functional as F

class LeNet5(nn.Module):
    def __init__(self):
        super().__init__()
        self.cnn_layers=nn.Sequential(
             #定义卷积层,1个输入通道,6个输出通道,5*5的卷积filter
            nn.Conv2d(in_channels=1,out_channels=20,kernel_size=5,stride=1),
            nn.MaxPool2d(2),
            #the second cnn_layer,input 20 feature map,output 50 feature map,kernel_size=5,stride=1
            nn.Conv2d(in_channels=20,out_channels=50,kernel_size=5,stride=1),
            nn.MaxPool2d(2)
         )
        self.fc_layers=nn.Sequential(
            # 3 full connect layers
            nn.Linear(800,500),
            nn.ReLU(),
            nn.Linear(500,10),
            nn.LogSoftmax(dim=1)
        )
    def forward(self,x):
        #the forward function
        out=self.cnn_layers(x)
        out=out.view(-1,800)
        out=self.fc_layers(out)
        return out

class LeNet5_01(nn.Module):
    def __init__(self):
        super().__init__()
        self.conv1=nn.Conv2d(in_channels=1,out_channels=20,kernel_size=5,stride=1)
        self.pool1=nn.MaxPool2d(2)
        #the second conv input 20,output 50 kernel_size=5,stride=1
        self.conv2=nn.Conv2d(in_channels=20,out_channels=50,kernel_size=5,stride=1)
        self.pool2=nn.MaxPool2d(2)
        # the full connect
        self.fc1=nn.Linear(in_features=800,out_features=500,bias=True)
        self.relu1=nn.ReLU()

        self.fc2=nn.Linear(in_features=500,out_features=10,bias=True)
        self.relu2=nn.ReLU()

    def forward(self,x):
        x=self.conv1(x)
        x=self.pool1(x)
        x=self.conv2(x)
        x=self.pool2(x)
        x=x.view(-1,800)
        x=self.fc1(x)
        x=self.relu1(x)
        x=self.fc2(x)
        x=self.relu2(x)
        x=F.log_softmax(input=x,dim=1)
        return x
上面的代码用了两种方式搭建了模型,分别是LeNet5和LeNet5_01
第二步:数据集整理
这里我不用pytorch自己下载数据集,这里我从网上下载mnist数据集
首先介绍一下mnist数据集

这里是我下载的mnist数据集的二进制文件,总共是4个文件,分别是训练集,训练集标签,测试集,测试集标签,其中训练集为60000张图片,测试集为10000张图片,同时对应的标签为60000个和10000个
图片信息是以二进制的格式保存在这四个文件中的,下面我们需要创建方法读取二进制文件中的内容
'''
解码二进制文件的函数
用来解码MNIST数据集里面的二进制文件

'''
import struct#struct模块
import numpy as np #numpy包

def decode_idx3_ubyte(idx3_ubyte_file):
    """
    解析idx3文件的通用函数
    :param idx3_ubyte_file: idx3文件路径
    :return: 数据集
    """
    # 读取二进制数据
    with open(idx3_ubyte_file, 'rb') as bin_data1:
        bin_data=bin_data1.read()
        # 解析文件头信息,依次为魔数、图片数量、每张图片高、每张图片宽
        offset = 0
        fmt_header = '>4i'
        '''使用大端法'''
        #mnist使用的大端方法存储的数据
        # 因为数据结构中前4行的数据类型都是32位整型,所以采用i格式,但我们需要读取前4行数据,所以需要4个i。我们后面会看到标签集中,只使用2个ii。
        magic_number, num_images, num_rows, num_cols = struct.unpack_from(fmt_header, bin_data, offset)
        print('魔数:%d, 图片数量: %d张, 图片大小: %d*%d' % (magic_number, num_images, num_rows, num_cols))

        # 解析数据集
        image_size = num_rows * num_cols
        # 获得数据在缓存中的指针位置,从前面介绍的数据结构可以看出,读取了前4行之后,指针位置(即偏移位置offset)指向0016。
        print(struct.calcsize(">4i"))
        offset =offset+ struct.calcsize(fmt_header)
        print(offset)
        # 图像数据像素值的类型为unsigned char型,对应的format格式为B。这里还有加上图像大小784,是为了读取784个B格式数据,如果没有则只会读取一个值(即一副图像中的一个像素值)
        #B是一个字节8为,I是4个字节32位
        fmt_image = '>' + str(image_size) + 'B'
        print(fmt_image,offset,struct.calcsize(fmt_image))
        #1万张图片
        images = np.empty((num_images, num_rows, num_cols))
        #plt.figure()
        #j=0
        for i in range(num_images):
            if (i + 1) % 10000 == 0:
                print('已解析 %d' % (i + 1) + '张')
                print(offset)
            #读取数据放入第i行,并reshape(28,28)
            images[i] = np.array(struct.unpack_from(fmt_image, bin_data, offset)).reshape((num_rows, num_cols))
            #print("输出",images[i])
            offset += struct.calcsize(fmt_image)
            #plt.imshow(images[i],'gray')
            #不明白是什么意思

            #plt.pause(0.001)
            #plt.show()
        #plt.show()

        return images

def decode_idx1_ubyte(idx1_ubyte_file):
    """
    解析idx1文件的通用函数
    :param idx1_ubyte_file: idx1文件路径
    :return: 数据集
    """
    # 读取二进制数据
    with open(idx1_ubyte_file, 'rb') as bin_data1:
        bin_data=bin_data1.read()
        # 解析文件头信息,依次为魔数、图片数量、每张图片高、每张图片宽
        offset = 0
        fmt_header = '>2i'
        '''使用大端法'''
        #mnist使用的大端方法存储的数据
        # 因为数据结构中前4行的数据类型都是32位整型,所以采用i格式,但我们需要读取前4行数据,所以需要4个i。我们后面会看到标签集中,只使用2个ii。
        magic_number, num_labels = struct.unpack_from(fmt_header, bin_data, offset)
        print('魔数:%d, 图片标签数量: %d个' % (magic_number, num_labels))

        # 解析数据集
        label_size = 1
        # 获得数据在缓存中的指针位置,从前面介绍的数据结构可以看出,读取了前4行之后,指针位置(即偏移位置offset)指向0016。
        print(struct.calcsize(">2i"))
        offset =offset+ struct.calcsize(fmt_header)
        print(offset)
        # 图像数据像素值的类型为unsigned char型,对应的format格式为B。这里还有加上图像大小784,是为了读取784个B格式数据,如果没有则只会读取一个值(即一副图像中的一个像素值)
        #B是一个字节8为,I是4个字节32位
        fmt_label = '>' + str(label_size) + 'B'
        print(fmt_label,offset,struct.calcsize(fmt_label))
        #1万张图片
        labels = np.empty((num_labels, 1))
        #plt.figure()
        j=0
        for i in range(num_labels):
            labels[i] = np.array(struct.unpack_from(fmt_label, bin_data, offset)).reshape(1)
            #print("输出",images[i])
            offset += struct.calcsize(fmt_label)
            #plt.imshow(images[i],'gray')
            #不明白是什么意思

            #plt.pause(0.001)
            #plt.show()
        #plt.show()

        return labels
上面的代码就是两个方法,一个是读取图片,并转换成ndarray数组,一个是读取labels,转换成ndarray数组,并返回数据
第三步:训练方法train(),训练数据
下面是文件train.py的代码
#author:chenchen
import torch as t
import numpy as np
from lenet5_v03 import LeNet5_01,LeNet5
from torch.utils.data import DataLoader,TensorDataset
from decode_binary_function import decode_idx3_ubyte,decode_idx1_ubyte
#定义一个train方法,训练模型
def train(EPOCH,model,train_dl):
    model.train()
    print('_'*10,"训练开始",'_'*10)
    print("model's state_dict:")
    for param_tensor in model.state_dict():
        print(param_tensor,"\t",model.state_dict()[param_tensor].size())
    loss=t.nn.CrossEntropyLoss()
    opt=t.optim.Adam(model.parameters(),lr=1e-3)
    for e in range(EPOCH):
        print("run in EPOCH:%d"%e)
        for i,(x_train,y_train) in enumerate(train_dl):
            x_train=x_train.cuda()
            y_train=y_train.cuda()
            y_pred=model.forward(x_train)
            train_loss=loss(y_pred,y_train)
            if (i+1)%100==0:
                print('batch:',i+1,train_loss.item())
                opt.zero_grad()
                train_loss.backward()
                opt.step()
    t.save(model.state_dict(),'wb.pt')
    print('*'*10,'训练完毕','*'*10)

#主程序
if __name__=="__main__":

    print('*' * 10,'程序开始执行......','*'*10)
    EPOCH = 50
    batch_size=32
    train_images_path=r"data/train-images-idx3-ubyte"
    train_labels_path=r"data/train-labels-idx1-ubyte"
    train_images=decode_idx3_ubyte(train_images_path)
    train_labels=decode_idx1_ubyte(train_labels_path)
    train_images=train_images.reshape(60000,1,28,28).astype(np.float32)/255-0.5/0.5
    train_labels=train_labels.reshape(60000).astype(np.long)
    train_images=t.from_numpy(train_images)
    train_labels=t.from_numpy(train_labels).type(t.long)
    #print(train_images[0])

    train_ds=TensorDataset(train_images,train_labels)
    model = LeNet5().cuda()
    train_dl=DataLoader(dataset=train_ds,batch_size=batch_size,shuffle=True,drop_last=False)
    train(EPOCH, model,train_dl)
这里的代码主要定义了一个train方法,主程序就是加载数据,把数据转换成tensor,合并train和label为dataset,然后加载数据,
整个过程中用到的torch自带的数据集处理工具
重要应该理解的就是TensorDataset,DataLoader,这两个方法,代码我都是一步一步写的,可以很清晰的了解这两个方法的使用。
最后保存训练好的权重文件为wb.pt
第四步 test(),计算准确率
下面的就是test.py 这个文件的内容
#author=chenchen
import numpy as np
import torch as t
from torch.utils.data import TensorDataset,DataLoader
from lenet5_v03 import LeNet5,LeNet5_01
from decode_binary_function import decode_idx1_ubyte,decode_idx3_ubyte
#定义一个测试方法
def test(model,test_dl,wt):
    print("测试开始:")
    total=0
    correct_count=0
    model.eval()
    model.load_state_dict(t.load(wt))
    for i,(x_test,y_test) in enumerate(test_dl):
        pred_labels=model(x_test.cuda())
        predicted=t.max(pred_labels,1)[1]
        correct_count=correct_count+(predicted==y_test.cuda()).sum()
        total=total+len(y_test)
    print('total acc:%.2f\n'%(correct_count/total))

if __name__=="__main__":
    model = LeNet5().cuda()
    test_images_path = r"data/t10k-images-idx3-ubyte"
    test_labels_path = r"data/t10k-labels-idx1-ubyte"
    test_images = decode_idx3_ubyte(test_images_path)
    test_labels = decode_idx1_ubyte(test_labels_path)
    test_images = test_images.reshape(10000, 1, 28, 28).astype(np.float32) / 255 - 0.5 / 0.5
    test_labels = test_labels.reshape(10000).astype(np.long)
    test_images = t.from_numpy(test_images)
    test_labels = t.from_numpy(test_labels).type(t.long)
    test_ds = TensorDataset(test_images, test_labels)
    test_dl = DataLoader(dataset=test_ds, batch_size=62, shuffle=True)

    wt = "wb.pt"

    test(model=model, test_dl=test_dl, wt=wt)
这个和训练类似,也是需要加载数据,构造加载器,加载模型,加载好训练好的权重文件,然后输入test的数据集,计算预测值
这里用的一个方法就是加载训练好的权重文件
第五步:detect(),可视化测试模型
这个文件名为detect.py
#author=chenchen
import matplotlib.pyplot as plt
from PIL import Image
import numpy as np
from lenet5_v03 import LeNet5
import torch as t
import cv2
def detect(model,image):
    print("预测开始:")
    model.eval()
    wt='wb.pt'
    model.load_state_dict(t.load(wt))
    image=t.from_numpy(image)
    pred_labels=model(image.cuda())
    predicted=t.max(pred_labels,1)[1].cpu()
    print(type(predicted))
    print(predicted.shape)
    num=predicted.numpy()
    print("num:",num[0])
def load_image(image_path):
    image=Image.open(image_path)
    plt.imshow(image)
    plt.show()
    image = np.array(image)
    image=image[:,:,0]
    a=image[0][0]-22
    print(a)
    print(image)
    image=Image.fromarray(image)
    #image=image.convert('L')
    plt.imshow(image)
    plt.show()
    #image.show()
    threshold=a
    table=[]
    for i in range(256):
        if i<threshold:
            table.append(1)
        else:
            table.append(0)
    image=image.point(table,"1")
    plt.imshow(image)
    plt.show()
    image=image.convert('L')
    image = image.resize((28, 28), Image.ANTIALIAS)
    plt.imshow(image)
    plt.show()
    image=np.array(image).reshape(1,1,28,28).astype('float32')
    image=image/255-0.5/0.5
    print(image)
    return image
def load_image1(file):
    img=cv2.imread(file)
    cv2.imshow("加载完成",img)
    cv2.waitKey(0)
    b,g,r=cv2.split(img)
    cv2.imshow("r",r)
    cv2.waitKey(0)
    threshold =100
    table = []
    for i in range(256):
        if i < threshold:
            table.append(1)
        else:
            table.append(0)

    # 图片二值化
    img=Image.fromarray(r)
    img = img.point(table, '1')
    plt.imshow(img)
    plt.show()
    print(type(img))
    img = img.convert('L')

    # 预处理
    # 调整图像大小
    plt.imshow(img)
    plt.show()

    img = img.resize((28,28),Image.ANTIALIAS)


    plt.imshow(img)
    plt.show()
    img = np.array(img).reshape(1,1,28,28).astype('float32')
    # 归一化处理
    img = img / 255-0.5/0.5
    return img

if __name__=="__main__":
    model=LeNet5().cuda()
    image_path = r"./detect_images/555.png"
    image=load_image(image_path)
    detect(model=model,image=image)
这一个也是和train和test类似,主要是读取图片,处理图片,把图片转为tensor,归一化处理

这是我手写的数字,用手机拍的照片,在detect_images文件夹下面,由于拍摄环境的影响,我在前处理这些图片的时候需要把背景全部转换成黑色,数字转成白色,因为拍摄图片光照的原因,在0-256之间这些图片对应的一个阈值不一样,有差别,我就在每次读取图片的时候,读取一个大概的背景值对阈值

这里我读取的图片的第一个数值减去22为背景阈值,
下面我贴出几张图片
原始图像

单通道图像

背景黑色,数字白色处理

resize并归一化处理

预测结果

还有需要注意的是下面这个截图,这里又执行了一遍image.convert(‘L’)具体没有搞明白,转为8位像素


 1万+
1万+

 被折叠的 条评论
为什么被折叠?
被折叠的 条评论
为什么被折叠?
 到【灌水乐园】发言


