


基于three-mesh-bvh实现第一人称及第三人称的漫游
简介
这篇文章主要介绍在3d场景中实现第一人称与第三人称切换以及碰撞监测的漫游方案。
人称视角的场景漫游主要需要解决两个问题,人物在场景中的移动和碰撞检测。移动与碰撞功能是所有三维场景首先需要解决的基本问题,今天我们就通过最基本的threejs来完成第一人称视角的场景漫游功能。
利用git clone 地址为
git clone https://github.com/shanchangshuiyuan/threejs-examples-recurrent.git
预览地址:
https://three-mesh-bvh-recurrent.vercel.app/
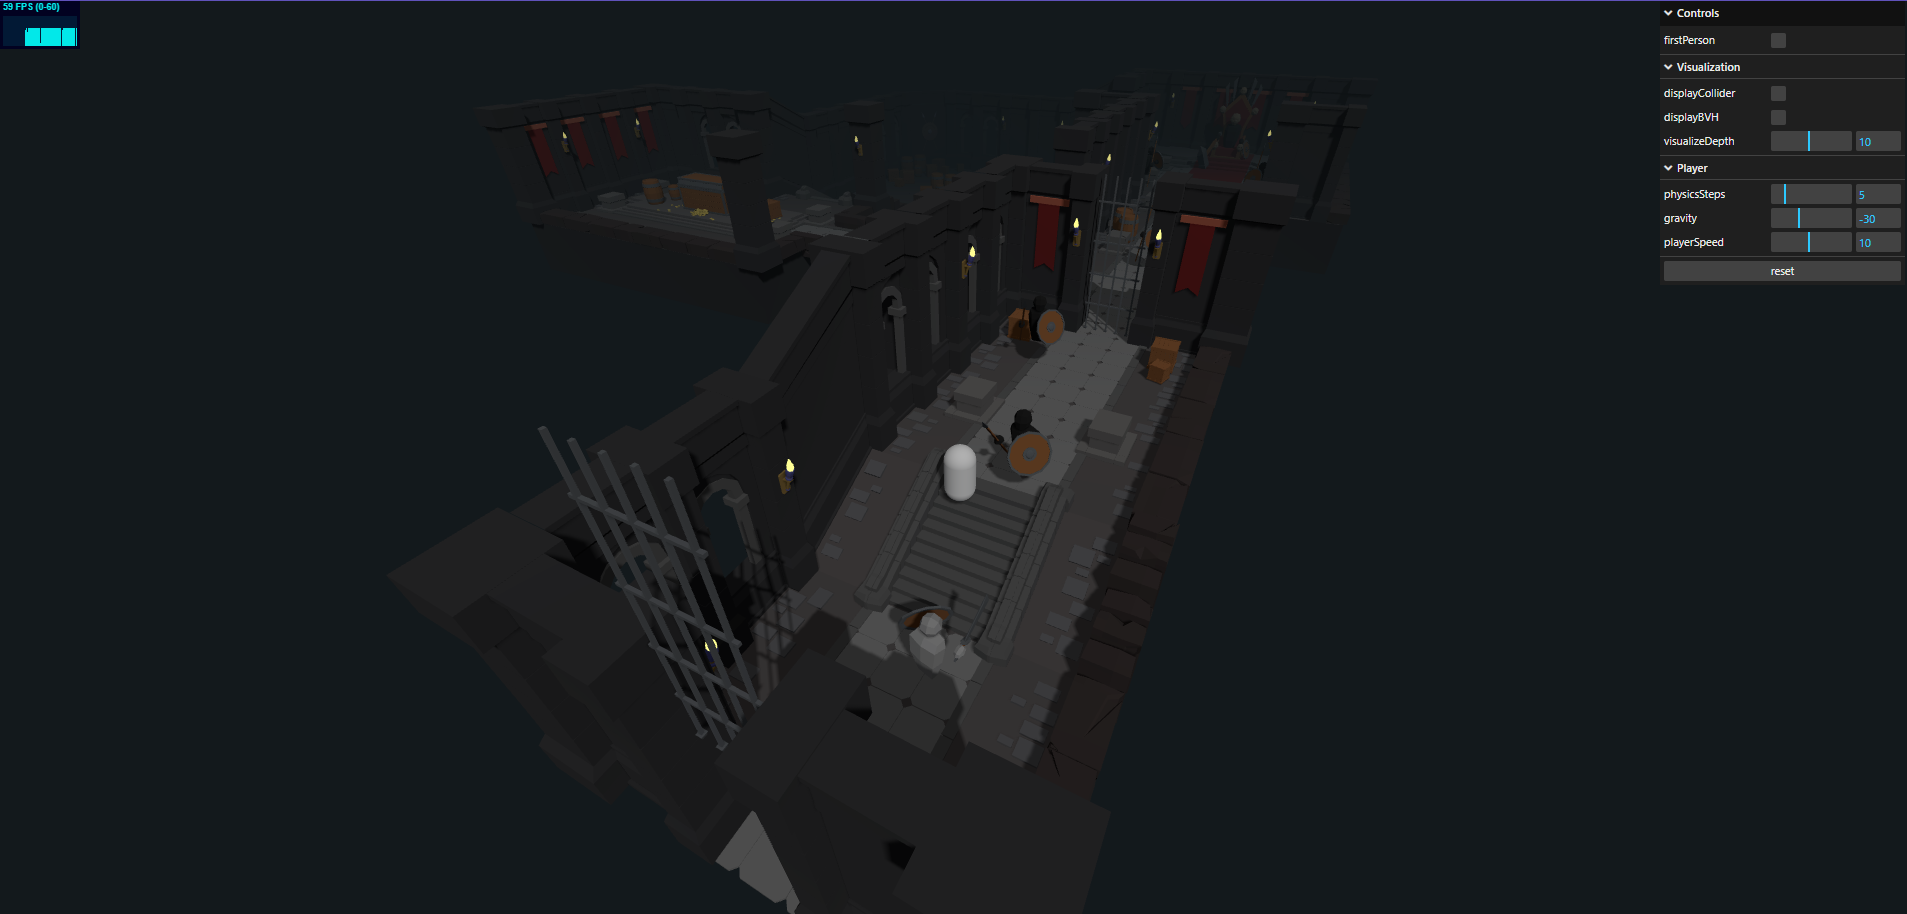
效果如下:
创建碰撞面
依赖 three-glow-mesh 插件 原理通过模型拆解计算生成碰撞面,个人理解是通过拆解模型,每个几何体的顶点去生成一个正方体碰撞面模型,用来计算 碰撞面。市面上也有其他方案计算碰撞面,有通过直接计算模型生成碰撞面,但是如果模型一旦太大,计算会导致内存崩溃。 可以参考开源项目 gkjohnson.github.io/three-mesh-…
通过深度遍历拆解模型计算生成碰撞面,想深入了解可以看作者的源码,这块代码我做了一点修改,也是一知半解。大概理解就是通过遍历拾取geometry生成面片,具体可以查看MeshBVH的源码
function loadColliderEnvironment() {

    const dracoLoader = new DRACOLoader();
    dracoLoader.setDecoderPath('js/libs/draco/gltf/');
    const gltfLoader = new GLTFLoader();
    gltfLoader.setDRACOLoader(dracoLoader);

    gltfLoader.load('models/dungeon_low_poly_game_level_challenge/scene.gltf', res => {
        // .load('models/dungeon_low_poly_game_level_challenge/scene.gltf', res => {

        const gltfScene = res.scene;
        gltfScene.scale.setScalar(.01);

        // 这几行代码创建了一个Box3对象用于计算场景的包围盒,
        // 并将场景的中心点设置为原点(0,0,0)。updateMatrixWorld(true)用于更新场景中所有对象的世界变换矩阵。
        const box = new THREE.Box3();
        box.setFromObject(gltfScene);
        box.getCenter(gltfScene.position).negate();
        gltfScene.updateMatrixWorld(true);

        // visual geometry setup
        // 这段代码遍历场景中的每个物体,如果该物体是一个Mesh并且材质颜色的红色通道为1.0,
        // 则忽略该物体。否则,将该物体按材质颜色分组存储到toMerge对象中。
        const toMerge = {};
        gltfScene.traverse(c => {

            if (
                // 	/Boss/.test( c.name ) ||
                // /Enemie/.test( c.name ) ||
                // /Shield/.test( c.name ) ||
                // /Sword/.test( c.name ) ||
                // /Character/.test( c.name ) ||
                // /Gate/.test( c.name ) ||

                // // spears
                // /Cube/.test( c.name ) ||

                // pink brick
                c.material && c.material.color.r === 1.0
            ) {

                return;

            }

            if (c.isMesh) {

                const hex = c.material.color.getHex();
                toMerge[hex] = toMerge[hex] || [];
                toMerge[hex].push(c);

            }

        });

        // 这段代码遍历了存储在toMerge对象中的各个颜色分组,对每个颜色分组中的物体进行合并处理,
        // 并将合并后的物体添加到环境对象中。
        environment = new THREE.Group();
        for (const hex in toMerge) {

            const arr = toMerge[hex];
            const visualGeometries = [];
            arr.forEach(mesh => {

                if (mesh.material.emissive.r !== 0) {

                    environment.attach(mesh);

                } else {

                    const geom = mesh.geometry.clone();
                    geom.applyMatrix4(mesh.matrixWorld);
                    visualGeometries.push(geom);

                }

            });

            if (visualGeometries.length) {

                const newGeom = BufferGeometryUtils.mergeGeometries(visualGeometries);
                const newMesh = new THREE.Mesh(newGeom, new THREE.MeshStandardMaterial({ color: parseInt(hex), shadowSide: 2 }));
                newMesh.castShadow = true;
                newMesh.receiveShadow = true;
                newMesh.material.shadowSide = 2;

                environment.add(newMesh);

            }

        }

        // 这几行代码使用静态几何体生成器StaticGeometryGenerator从环境对象中生成合并后的几何体,
        // 并为生成的几何体创建了边界体层次结构(BVH)。
        const staticGenerator = new StaticGeometryGenerator(environment);
        staticGenerator.attributes = ['position'];

        const mergedGeometry = staticGenerator.generate();
        mergedGeometry.boundsTree = new MeshBVH(mergedGeometry);

        // 这几行代码创建了一个网格对象作为碰撞器,并设置了碰撞器的材质为半透明的线框材质。
        collider = new THREE.Mesh(mergedGeometry);
        collider.material.wireframe = true;
        collider.material.opacity = 0.5;
        collider.material.transparent = true;

        // 这几行代码创建了一个用于可视化碰撞器边界体层次结构的辅助对象,并将其添加到场景中。
        // 然后,将碰撞器、环境对象以及辅助对象都添加到了场景中
        visualizer = new MeshBVHHelper(collider, params.visualizeDepth);
        scene.add(visualizer);
        scene.add(collider);
        scene.add(environment);

    });

}
初始化及操作漫游事件
这边包括整个场景的初始化及WASD移动以及跳跃和人称切换。通过事件绑定的形式,操作标识开关,操作对应方向的坐标系移动。
function init() {

    const bgColor = 0x263238 / 2;

    // renderer setup
    renderer = new THREE.WebGLRenderer({ antialias: true });
    renderer.setPixelRatio(window.devicePixelRatio);
    renderer.setSize(window.innerWidth, window.innerHeight);
    renderer.setClearColor(bgColor, 1);
    renderer.shadowMap.enabled = true;
    renderer.shadowMap.type = THREE.PCFSoftShadowMap;
    renderer.outputEncoding = THREE.sRGBEncoding;
    document.body.appendChild(renderer.domElement);

    // scene setup
    scene = new THREE.Scene();
    scene.fog = new THREE.Fog(bgColor, 20, 70);

    // lights
    const light = new THREE.DirectionalLight(0xffffff, 1);
    light.position.set(1, 1.5, 1).multiplyScalar(50);
    light.shadow.mapSize.setScalar(2048);
    light.shadow.bias = - 1e-4;
    light.shadow.normalBias = 0.05;
    light.castShadow = true;

    const shadowCam = light.shadow.camera;
    shadowCam.bottom = shadowCam.left = - 30;
    shadowCam.top = 30;
    shadowCam.right = 45;

    scene.add(light);
    scene.add(new THREE.HemisphereLight(0xffffff, 0x223344, 0.4));

    // camera setup
    camera = new THREE.PerspectiveCamera(75, window.innerWidth / window.innerHeight, 0.1, 50);
    camera.position.set(10, 10, - 10);
    camera.far = 100;
    camera.updateProjectionMatrix();
    window.camera = camera;

    clock = new THREE.Clock();

    controls = new OrbitControls(camera, renderer.domElement);

    // stats setup
    stats = new Stats();
    document.body.appendChild(stats.dom);

    loadColliderEnvironment();

    // character
    player = new THREE.Mesh(
        new RoundedBoxGeometry(1.0, 2.0, 1.0, 10, 0.5),
        new THREE.MeshStandardMaterial()
    );
    // 几何体沿着Y轴负方向平移了0.5个单位,使得玩家模型的底部与网格的原点对齐。
    player.geometry.translate(0, - 0.5, 0);

    // 包含了玩家的胶囊碰撞器的信息,其中radius表示碰撞器的半径,segment表示碰撞器的线段,用于进行碰撞检测。
    player.capsuleInfo = {
        radius: 0.5,
        segment: new THREE.Line3(new THREE.Vector3(), new THREE.Vector3(0, - 1.0, 0.0))
    };

    player.castShadow = true;
    player.receiveShadow = true;
    player.material.shadowSide = 2;
    scene.add(player);
    reset();

    // dat.gui
    gui = new GUI();
    gui.add(params, 'firstPerson').onChange(v => {

        if (!v) {

            // 如果firstPerson的值为false,则调整相机的位置,使其处于一种远距离的观察模式,相机位置会根据控制器的目标进行调整。
            camera
                .position
                .sub(controls.target)
                .normalize()
                .multiplyScalar(10)
                .add(controls.target);

        }

    });

    // 这段代码向Visualization文件夹中添加了三个控件,分别是控制是否显示碰撞器、是否显示 BVH、
    // 以及可视化深度的控件。当visualizeDepth控件的值发生变化时,会调用回调函数,更新可视化的深度。
    const visFolder = gui.addFolder('Visualization');
    visFolder.add(params, 'displayCollider');
    visFolder.add(params, 'displayBVH');
    visFolder.add(params, 'visualizeDepth', 1, 20, 1).onChange(v => {

        visualizer.depth = v;
        visualizer.update();

    });
    visFolder.open();

    const physicsFolder = gui.addFolder('Player');
    physicsFolder.add(params, 'physicsSteps', 0, 30, 1);
    physicsFolder.add(params, 'gravity', - 100, 100, 0.01).onChange(v => {

        params.gravity = parseFloat(v);

    });
    physicsFolder.add(params, 'playerSpeed', 1, 20);
    physicsFolder.open();

    gui.add(params, 'reset');
    gui.open();

    window.addEventListener('resize', function () {

        camera.aspect = window.innerWidth / window.innerHeight;
        camera.updateProjectionMatrix();

        renderer.setSize(window.innerWidth, window.innerHeight);

    }, false);

    window.addEventListener('keydown', function (e) {

        switch (e.code) {

            case 'KeyW': fwdPressed = true; break;
            case 'KeyS': bkdPressed = true; break;
            case 'KeyD': rgtPressed = true; break;
            case 'KeyA': lftPressed = true; break;
            case 'Space':
                if (playerIsOnGround) {

                    playerVelocity.y = 10.0;
                    playerIsOnGround = false;

                }

                break;

        }

    });

    window.addEventListener('keyup', function (e) {

        switch (e.code) {

            case 'KeyW': fwdPressed = false; break;
            case 'KeyS': bkdPressed = false; break;
            case 'KeyD': rgtPressed = false; break;
            case 'KeyA': lftPressed = false; break;

        }

    });

}
模型相机位置更新
除了碰撞监测,所谓漫游最重要的就是移动和相机跟随 这里要理解一点,除了物体自身的坐标系还存在一个世界坐标系,我们修改物体的同时需要更新其在世界坐标系中的顶点坐标位置。 通过WASD开关来控制模型移动,通过向量的计算以及模型碰撞的监测,调整模型的位置以及相机的位置。 reset主要是从高处掉落后是否碰撞到地面,用于不知道地面的高度下,监测地面碰撞面是否形成与是否需要重新下落~
function updatePlayer(delta) {

    // 根据玩家是否在地面上,调整玩家的垂直速度。
    // 根据物理规则,玩家在地面上时,垂直速度受重力影响;不在地面上时,垂直速度会逐渐增加。
    if (playerIsOnGround) {

        playerVelocity.y = delta * params.gravity;

    } else {

        playerVelocity.y += delta * params.gravity;

    }

    // 根据玩家的速度和时间间隔,更新玩家的位置。
    player.position.addScaledVector(playerVelocity, delta);

    // move the player
    // 获取相机控制器的方位角,用于确定玩家的移动方向。
    const angle = controls.getAzimuthalAngle();

    // 如果向前按键被按下,则根据相机的方向计算出玩家的移动方向,并根据移动速度和时间间隔更新玩家的位置。
    if (fwdPressed) {

        tempVector.set(0, 0, - 1).applyAxisAngle(upVector, angle);
        player.position.addScaledVector(tempVector, params.playerSpeed * delta);

    }

    if (bkdPressed) {

        tempVector.set(0, 0, 1).applyAxisAngle(upVector, angle);
        player.position.addScaledVector(tempVector, params.playerSpeed * delta);

    }

    if (lftPressed) {

        tempVector.set(- 1, 0, 0).applyAxisAngle(upVector, angle);
        player.position.addScaledVector(tempVector, params.playerSpeed * delta);

    }

    if (rgtPressed) {

        tempVector.set(1, 0, 0).applyAxisAngle(upVector, angle);
        player.position.addScaledVector(tempVector, params.playerSpeed * delta);

    }

    player.updateMatrixWorld();

    // adjust player position based on collisions
    const capsuleInfo = player.capsuleInfo;
    // 轴对齐的包围盒,用于碰撞检测或其他几何计算
    tempBox.makeEmpty();
    tempMat.copy(collider.matrixWorld).invert();
    tempSegment.copy(capsuleInfo.segment);

    // get the position of the capsule in the local space of the collider
    tempSegment.start.applyMatrix4(player.matrixWorld).applyMatrix4(tempMat);
    tempSegment.end.applyMatrix4(player.matrixWorld).applyMatrix4(tempMat);

    // 调整边界盒以确保其包含整个胶囊碰撞体,以便后续的碰撞检测计算可以正确地进行。
    // get the axis aligned bounding box of the capsule
    tempBox.expandByPoint(tempSegment.start);
    tempBox.expandByPoint(tempSegment.end);

    tempBox.min.addScalar(- capsuleInfo.radius);
    tempBox.max.addScalar(capsuleInfo.radius);

    // 使用碰撞体的边界树(boundsTree)进行碰撞检测。
    // shapecast()函数用于在边界树中进行形状投射碰撞检测,返回所有与指定形状相交的物体。
    collider.geometry.boundsTree.shapecast({

        // 用于判断碰撞体的边界盒是否与指定的边界盒 tempBox 相交。
        // 如果碰撞体的边界盒与 tempBox 相交,那么该函数会返回 true,表示碰撞体可能与待检测物体相交。
        intersectsBounds: box => box.intersectsBox(tempBox),


        // 用于在与碰撞体边界盒相交的情况下,进一步检测碰撞体是否与三角形相交。
        // 如果碰撞体与三角形相交,将会执行一系列操作,用于调整胶囊碰撞体的位置以避免穿透。
        intersectsTriangle: tri => {

            // check if the triangle is intersecting the capsule and adjust the
            // capsule position if it is.
            const triPoint = tempVector;
            const capsulePoint = tempVector2;

            // 计算了三角形与胶囊碰撞体段(segment)之间的最近点距离。
            const distance = tri.closestPointToSegment(tempSegment, triPoint, capsulePoint);

            // 如果距离小于半径,表示碰撞发生,需要对碰撞体位置进行调整
            if (distance < capsuleInfo.radius) {

                const depth = capsuleInfo.radius - distance;
                const direction = capsulePoint.sub(triPoint).normalize();

                tempSegment.start.addScaledVector(direction, depth);
                tempSegment.end.addScaledVector(direction, depth);

            }

        }

    });

    // get the adjusted position of the capsule collider in world space after checking
    // triangle collisions and moving it. capsuleInfo.segment.start is assumed to be
    // the origin of the player model.
    const newPosition = tempVector;
    newPosition.copy(tempSegment.start).applyMatrix4(collider.matrixWorld);

    // check how much the collider was moved
    const deltaVector = tempVector2;
    deltaVector.subVectors(newPosition, player.position);

    // if the player was primarily adjusted vertically we assume it's on something we should consider ground
    playerIsOnGround = deltaVector.y > Math.abs(delta * playerVelocity.y * 0.25);

    const offset = Math.max(0.0, deltaVector.length() - 1e-5);
    deltaVector.normalize().multiplyScalar(offset);

    // adjust the player model
    player.position.add(deltaVector);

    if (!playerIsOnGround) {

        deltaVector.normalize();
        playerVelocity.addScaledVector(deltaVector, - deltaVector.dot(playerVelocity));

    } else {

        playerVelocity.set(0, 0, 0);

    }

    // adjust the camera
    camera.position.sub(controls.target);
    controls.target.copy(player.position);
    camera.position.add(player.position);

    // if the player has fallen too far below the level reset their position to the start
    if (player.position.y < - 15) {

        reset();

    }

}
render
render函数主要更新场景中的一些动画位置 通过WASD控制模型移动,动画过渡效果以及碰撞监测、相机位置调整、向量计算、相机初始化等~
主要思路:通过WASD以及跳跃开关,开启模型动画,计算移动后的朝向以及位置同步到模型和相机上
function render() {

    stats.update();
    requestAnimationFrame(render);

    const delta = Math.min(clock.getDelta(), 0.1);
    if (params.firstPerson) {

        controls.maxPolarAngle = Math.PI;
        controls.minDistance = 1e-4;
        controls.maxDistance = 1e-4;

    } else {

        controls.maxPolarAngle = Math.PI / 2;
        controls.minDistance = 1;
        controls.maxDistance = 20;

    }

    if (collider) {

        collider.visible = params.displayCollider;
        visualizer.visible = params.displayBVH;

        const physicsSteps = params.physicsSteps;

        for (let i = 0; i < physicsSteps; i++) {

            updatePlayer(delta / physicsSteps);

        }

    }

    // TODO: limit the camera movement based on the collider
    // raycast in direction of camera and move it if it's further than the closest point

    controls.update();

    renderer.render(scene, camera);

}
完整代码链接如下:请自行领取。https://github.com/shanchangshuiyuan/threejs-examples-recurrent 其中的three-mesh-bvh文件夹中。


 2157
2157

 被折叠的 条评论
为什么被折叠?
被折叠的 条评论
为什么被折叠?
 到【灌水乐园】发言


