


1.单个资源文件分别打包、合并打包
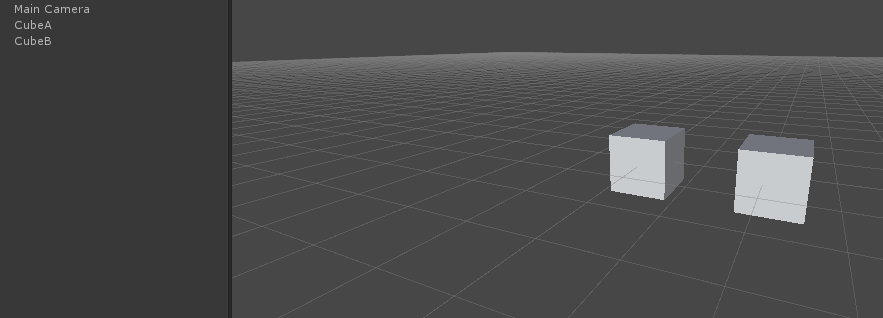
- 首先创建两个Cube并制作成perfab,删掉场景中的刚刚创建的Cube
- 创建脚本AssetBundleBuilt.cs编写代码如下
using UnityEngine;
using System.Collections;
using UnityEditor;

public class AssetBundleBuilt : MonoBehaviour {
    [MenuItem("AssetBundle Editor/Create AssetBundleMain")]

    static void CreateAssetBundlesMain() {
        //获取在Project视图中选取的所有游戏物体对象
        Object[] SelectedAsset = Selection.GetFiltered(typeof(Object), SelectionMode.DeepAssets);

        //遍历所有游戏对象
        foreach (Object obj in SelectedAsset) {
            //string sourcePath = AssetDatabase.GetAssetPath(obj);
            //本地测试:建议最后将Assetbundle放在StreamingAssets文件夹下,如果没有就创建一个,因为移动平台下只能读取这个路径
            //StreamingAssets是只读路径,不能写入
            //服务器下载:就不需要放在这里,服务器上客户端用www类进行下载。
            string targetPath = Application.dataPath + "/StreamingAssets/" + obj.name + ".assetbundle";
            if (BuildPipeline.BuildAssetBundle(obj, null, targetPath, BuildAssetBundleOptions.CollectDependencies)) {
                Debug.Log(obj.name + "资源打包成功");
            }
            else {
                Debug.Log(obj.name + "资源打包失败");
            }
        }
        //刷新编辑器,刷新工程文件目录
        AssetDatabase.Refresh();
    }

    [MenuItem("AssetBundle Editor/Create AssetBundleAll")]
    static void CreatAssetBundleAll() {
         //清除资源包缓存
        Caching.CleanCache();
        string Path = Application.dataPath + "/StreamingAssets/All.assetbundle";
        Object[] SelectedAsset = Selection.GetFiltered(typeof(Object), SelectionMode.DeepAssets);
        foreach (Object obj in SelectedAsset) {
            Debug.Log("Create AssetBundles name:" + obj.name);
        }

        //注意第二个参数,传入一个资源数组
        if (BuildPipeline.BuildAssetBundle(null, SelectedAsset, Path, BuildAssetBundleOptions.CollectDependencies)) {
            Debug.Log("资源组打包成功");
            AssetDatabase.Refresh();
        }
        else {
            Debug.Log("资源组打包失败");
        }
    }
}
注意:StreamingAssets目录必须存在否则会报错,不要问我是怎么知道的
保存后回到Unity,在工具栏就挂在了我们写好的打包函数,选择做好的两个Cube的prefab分别打包,不出意外在StreamingAsset目录下就生成了我们打包的perfab
- 创建脚本AssetBundleLoad.cs来加载我们刚刚打包好的assetbundle场景中
using UnityEngine;
using System.Collections;
public class AssetBundleLoad : MonoBehaviour {
//不同平台下StreamingAssets的路径是不同的,需要注意
public static readonly string PathURL =
#if UNITY_ANDROID
"jar:file://" + Application.dataPath + "!/assets/";
#elif UNITY_IPHONE
Application.dataPath + "/Raw/";
#elif UNITY_STANDALONE_WIN || UNITY_EDITOR
"file://" + Application.dataPath + "/StreamingAssets/";
#else
string.Empty;
#endif
void OnGUI() {
if (GUILayout.Button("Main Assetbundle")) {
StartCoroutine(LoadMainGameObject(PathURL + "CubeA.assetbundle"));
StartCoroutine(LoadMainGameObject(PathURL + "CubeB.assetbundle"));
}
if (GUILayout.Button("ALL Assetbundle")) {
StartCoroutine(LoadALLGameObject(PathURL + "ALL.assetbundle"));
}
}
//读取一个资源
private IEnumerator LoadMainGameObject(string path) {
WWW bundle = new WWW(path);
yield return bundle;
//加载到游戏中
yield return Instantiate(bundle.assetBundle.mainAsset);
bundle.assetBundle.Unload(false);
}
//读取全部资源
private IEnumerator LoadALLGameObject(string path) {
WWW bundle = new WWW(path);
yield return bundle;
//通过Prefab的名称把他们都读取出来
Object obj0 = bundle.assetBundle.Load("CubeA");
Object obj1 = bundle.assetBundle.Load("CubeB");
//加载到游戏中
yield return Instantiate(obj0);
yield return Instantiate(obj1);
//When unloadAllLoadedObjects is false, compressed file data for assets inside the bundle will be unloaded
bundle.assetBundle.Unload(false);
}
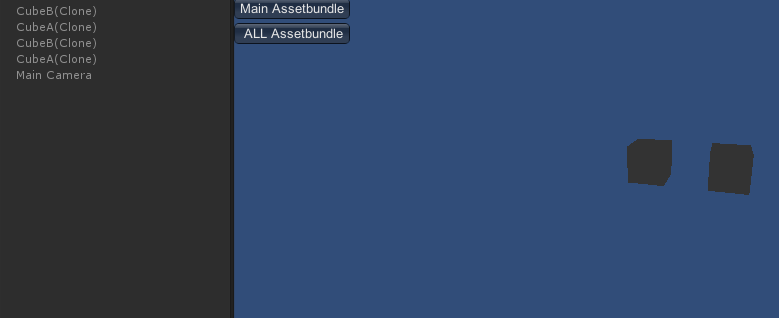
}如下图所示,点击下图中的button 按钮,两种打包方法都可以吧资源正确的加载到场景中来
2.包含依赖关系的资源打包
- 依赖关系概念的说明
回到上面的问题,打包结果如下图所示

显而易见两个物体一起打包的大小,和单个物体单独打包的大小一样,为什么?
答:前面说了开启BuildAssetBundleOptions.CollectDependencies时,会收集资源的依赖关系,CubeA和CubeB都是Cube用的都是同一套基础资源,只打包了一套基础资源。
扩展:如果没有使用BuildPipeline.PopAssetDependencies()来进行依赖打包,那么 打包物体 会把其引用的资源都打包到自己的assetbundle 中。如果引用的资源是图片、sprite或自定义的shader(内置的shader不会打包,这里的自定义shader被unity看作是一种资源,打包处理的时候也是如同资源来处理的),那么会打包到assetbundle 中。但如果引用的是代码,那么会打包一个对工程中代码的引用,也就是说引用的代码必须存在于工程中,这样当资源被加载到本地的时候才可以和本地的代码进行关联,如果本地没有这个代码,则会丢失对这个脚本的引用。
那么问题又来了,开启了BuildAssetBundleOptions.CollectDependencies一起打包,就会只打包一套公用的基础资源,直接把所有资源一起打包不就OK了?
答:答案显然是否定的,很明显AssetBundle就是实现资源的动态加载,方便更新,这样做的话,一但某个包含的资源更改,就需要重新打包,替换整个AssetBundle资源包这个肯定是不合理的。
因此问题的关系就在与,分析资源之间的依赖关系,人为的分级打包,这样既避免了一起打包的尴尬,又不至于重复打包的坑爹。
这就是下面要说的具有依赖关系的资源的打包流程
- 依赖打包的策略
依赖关系打包的实质就是将那些被依赖的资源先打包 ( 这里我把这类资源用”底层资源”代替 )。对于那些引用了底层资源的资源 ( 这里我把这类资源用”顶层资源”代替 )在打包的时候就不用再将底层资源打包到自己的包里面,而是添加对底层资源的引用,这样就避免了重复打包底层资源了。而且不同资源可以根据项目的分类分别打包到不同的AssetBundle包里面,也方便了后期的更新和维护。
- 依赖打包案例分析
还是用上面的例子,我给上面的两个Cube添加同一个蓝色的材质球blueMaterial,那么他们的依赖关系就是 CubeA–>blueMaterial,CubeB–>blueMaterial,那么他们的打包顺序就可以按照下列方式进行 blueMaterial–>CubeA–>CubeB,CubeA与CubeB是同一级所以可以任意交换CubeA,CubeB的顺序,当然也可以CubeA,CubeB一同打包,这个也取决于实际的应用场景
- 按照依赖关系分级打包
借助以下两个函数实现 BuildPipeline.PushAssetDependencies: 资源入栈,BuildPipeline.PopAssetDependencies: 资源出栈。
这里提供一个使用技巧:
1.先把所有材料编号:A-blueMaterial,B-CubeA,C-CubeB。 2.然后将每个编号两边加上括号,表示每个材料都在一个独立的栈:(A),(B),(C) 3.如果X依赖Y,那么X的栈加入Y的栈里:(A(B)),(A(C))。 4.然后合并:(A(B)(C)),就可以得到最终的关系栈
按照这个策略,创建脚本RelyAssetBundleBuilt.cs打包
using UnityEngine;
using System.Collections;
using UnityEditor;

public class RelyAssetBundleBuilt : MonoBehaviour {

    //按照分析的依赖关系进行打包
    [MenuItem("AssetBundle Editor/Create RelyAssetBundleMain")]
    public static void RelyAssetBundleMain() {
        string path = Application.dataPath + "/StreamingAssets";
        BuildTarget target = BuildTarget.StandaloneWindows64;
        BuildAssetBundleOptions option = BuildAssetBundleOptions.CollectDependencies | BuildAssetBundleOptions.CompleteAssets | BuildAssetBundleOptions.DeterministicAssetBundle;
        // (
        BuildPipeline.PushAssetDependencies();
        // A
        BuildPipeline.BuildAssetBundle(AssetDatabase.LoadMainAssetAtPath("Assets/Materials/blueMaterial.mat"), null, path + "/blueMaterial.assetbundle", option, target);
        // (
        BuildPipeline.PushAssetDependencies();
        // B
        BuildPipeline.BuildAssetBundle(AssetDatabase.LoadMainAssetAtPath("Assets/Prefabs/CubeA.prefab"), null, path + "/CubeA.assetbundle", option, target);
        // )
        BuildPipeline.PopAssetDependencies();
        // (
        BuildPipeline.PushAssetDependencies();
        // C
        BuildPipeline.BuildAssetBundle(AssetDatabase.LoadMainAssetAtPath("Assets/Prefabs/CubeB.prefab"), null, path + "/CubeB.assetbundle", option, target);
        // )
        BuildPipeline.PopAssetDependencies();
        // )
        BuildPipeline.PopAssetDependencies();
        AssetDatabase.Refresh();
    }
}这样就在上面创建的工具栏上又多了一个Create RelyAssetBundleMain选项,直接点击即可完成打包。
- 加载依赖打包的模型
修改脚本AssetBundleLoad如下
using UnityEngine;
using System.Collections;
public class AssetBundleLoad : MonoBehaviour {
//不同平台下StreamingAssets的路径是不同的,需要注意
public static readonly string PathURL =
#if UNITY_ANDROID
"jar:file://" + Application.dataPath + "!/assets/";
#elif UNITY_IPHONE
Application.dataPath + "/Raw/";
#elif UNITY_STANDALONE_WIN || UNITY_EDITOR
"file://" + Application.dataPath + "/StreamingAssets/";
#else
string.Empty;
#endif
void OnGUI() {
if (GUILayout.Button("Main Assetbundle")) {
StartCoroutine(LoadMainGameObject(PathURL + "CubeA.assetbundle"));
StartCoroutine(LoadMainGameObject(PathURL + "CubeB.assetbundle"));
}
if (GUILayout.Button("ALL Assetbundle")) {
StartCoroutine(LoadALLGameObject(PathURL + "ALL.assetbundle"));
}
if (GUILayout.Button("CubeA Assetbundle")) {
StartCoroutine(LoadMainGameObject(PathURL + "CubeA.assetbundle"));
}
if (GUILayout.Button("CubeB Assetbundle")) {
StartCoroutine(LoadMainGameObject(PathURL + "CubeB.assetbundle"));
}
if (GUILayout.Button("Materials Assetbundle")) {
StartCoroutine(LoadMaterial(PathURL + "blueMaterial.assetbundle"));
}
}
//读取一个资源
private IEnumerator LoadMainGameObject(string path) {
WWW bundle = new WWW(path);
yield return bundle;
//加载到游戏中
yield return Instantiate(bundle.assetBundle.mainAsset);
bundle.assetBundle.Unload(false);
}
//读取全部资源
private IEnumerator LoadALLGameObject(string path) {
WWW bundle = new WWW(path);
yield return bundle;
//通过Prefab的名称把他们都读取出来
Object obj0 = bundle.assetBundle.Load("CubeA");
Object obj1 = bundle.assetBundle.Load("CubeB");
//加载到游戏中
yield return Instantiate(obj0);
yield return Instantiate(obj1);
//When unloadAllLoadedObjects is false, compressed file data for assets inside the bundle will be unloaded
bundle.assetBundle.Unload(false);
}
//读取材质
public IEnumerator LoadMaterial(string path) {
WWW bundle = new WWW(path);
yield return bundle.assetBundle.mainAsset;
//不能将材质释放
//bundle.assetBundle.Unload(false);
}
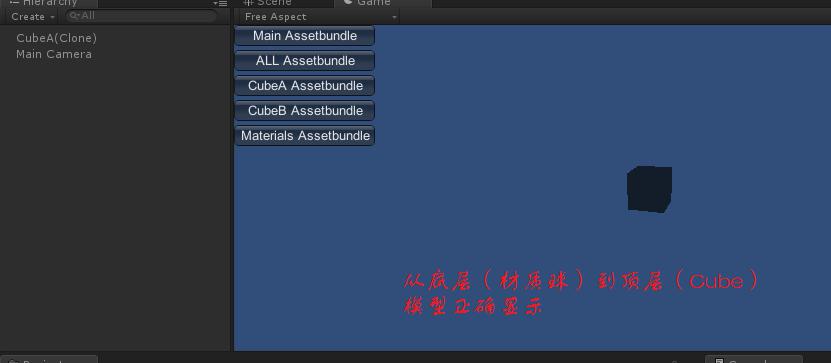
}运行场景,按钮如下
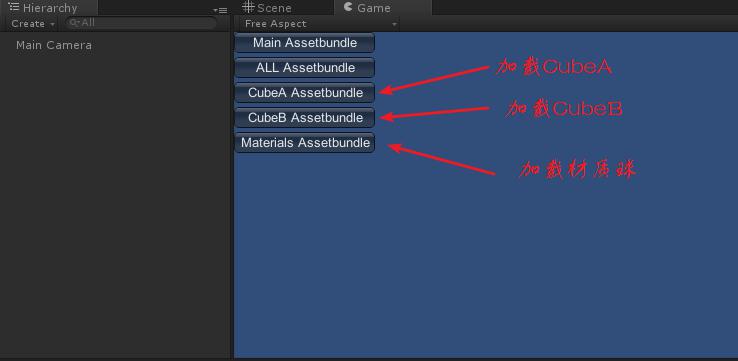
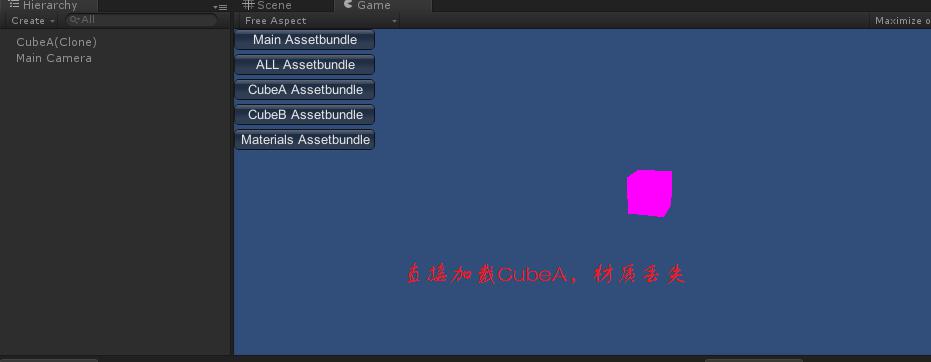
当我们,在加载材质之前直接加载CubeA或者CubeB,会发先如下图所示的情况,出现了材质丢失,如果先加载材质,在加载CubeA,CubeB就不会出先任何问题,所以在分析了依赖关系打包后,加载资源是先要先加载底层资源,然后一级一级往上,否者就会出错。
以上就是我对于AssetBundle旧版系统的一些学习应用,有什么问题可以留言交流,后续博客会讲到AssetBundle的新版系统的用法,欢迎围观~~~
最后来一发实验Demo的git地址 传送门(Click Here!)


 237
237

 被折叠的 条评论
为什么被折叠?
被折叠的 条评论
为什么被折叠?
 到【灌水乐园】发言


