


桥接模式:将虚拟机的网卡桥接到物理机的网卡上,从而可以通过物理机的网卡访问外网。
NAT 模式:让 VM 虚拟机的网络服务发挥路由器的作用,使得通过虚拟机软件模拟的主机可以通过物理主机访问外网,在真机中NAT 虚拟机网卡对应的物理网卡是 VMnet8。
仅主机模式:仅让虚拟机与物理主机通信,不能访问外网,在真机中仅主机模式模拟网卡对应的物理网卡是VMnet1。
这里写自定义目录标题

python的库/安装包 ,安装在这个里面
E:\Anaconda3\Lib\site-packages
报错
ERROR: Could not find a version that satisfies the requirement matplotlib>=3.2.2 (from versions: non
解决办法:关掉VPN就好
运行MyWzryTrain
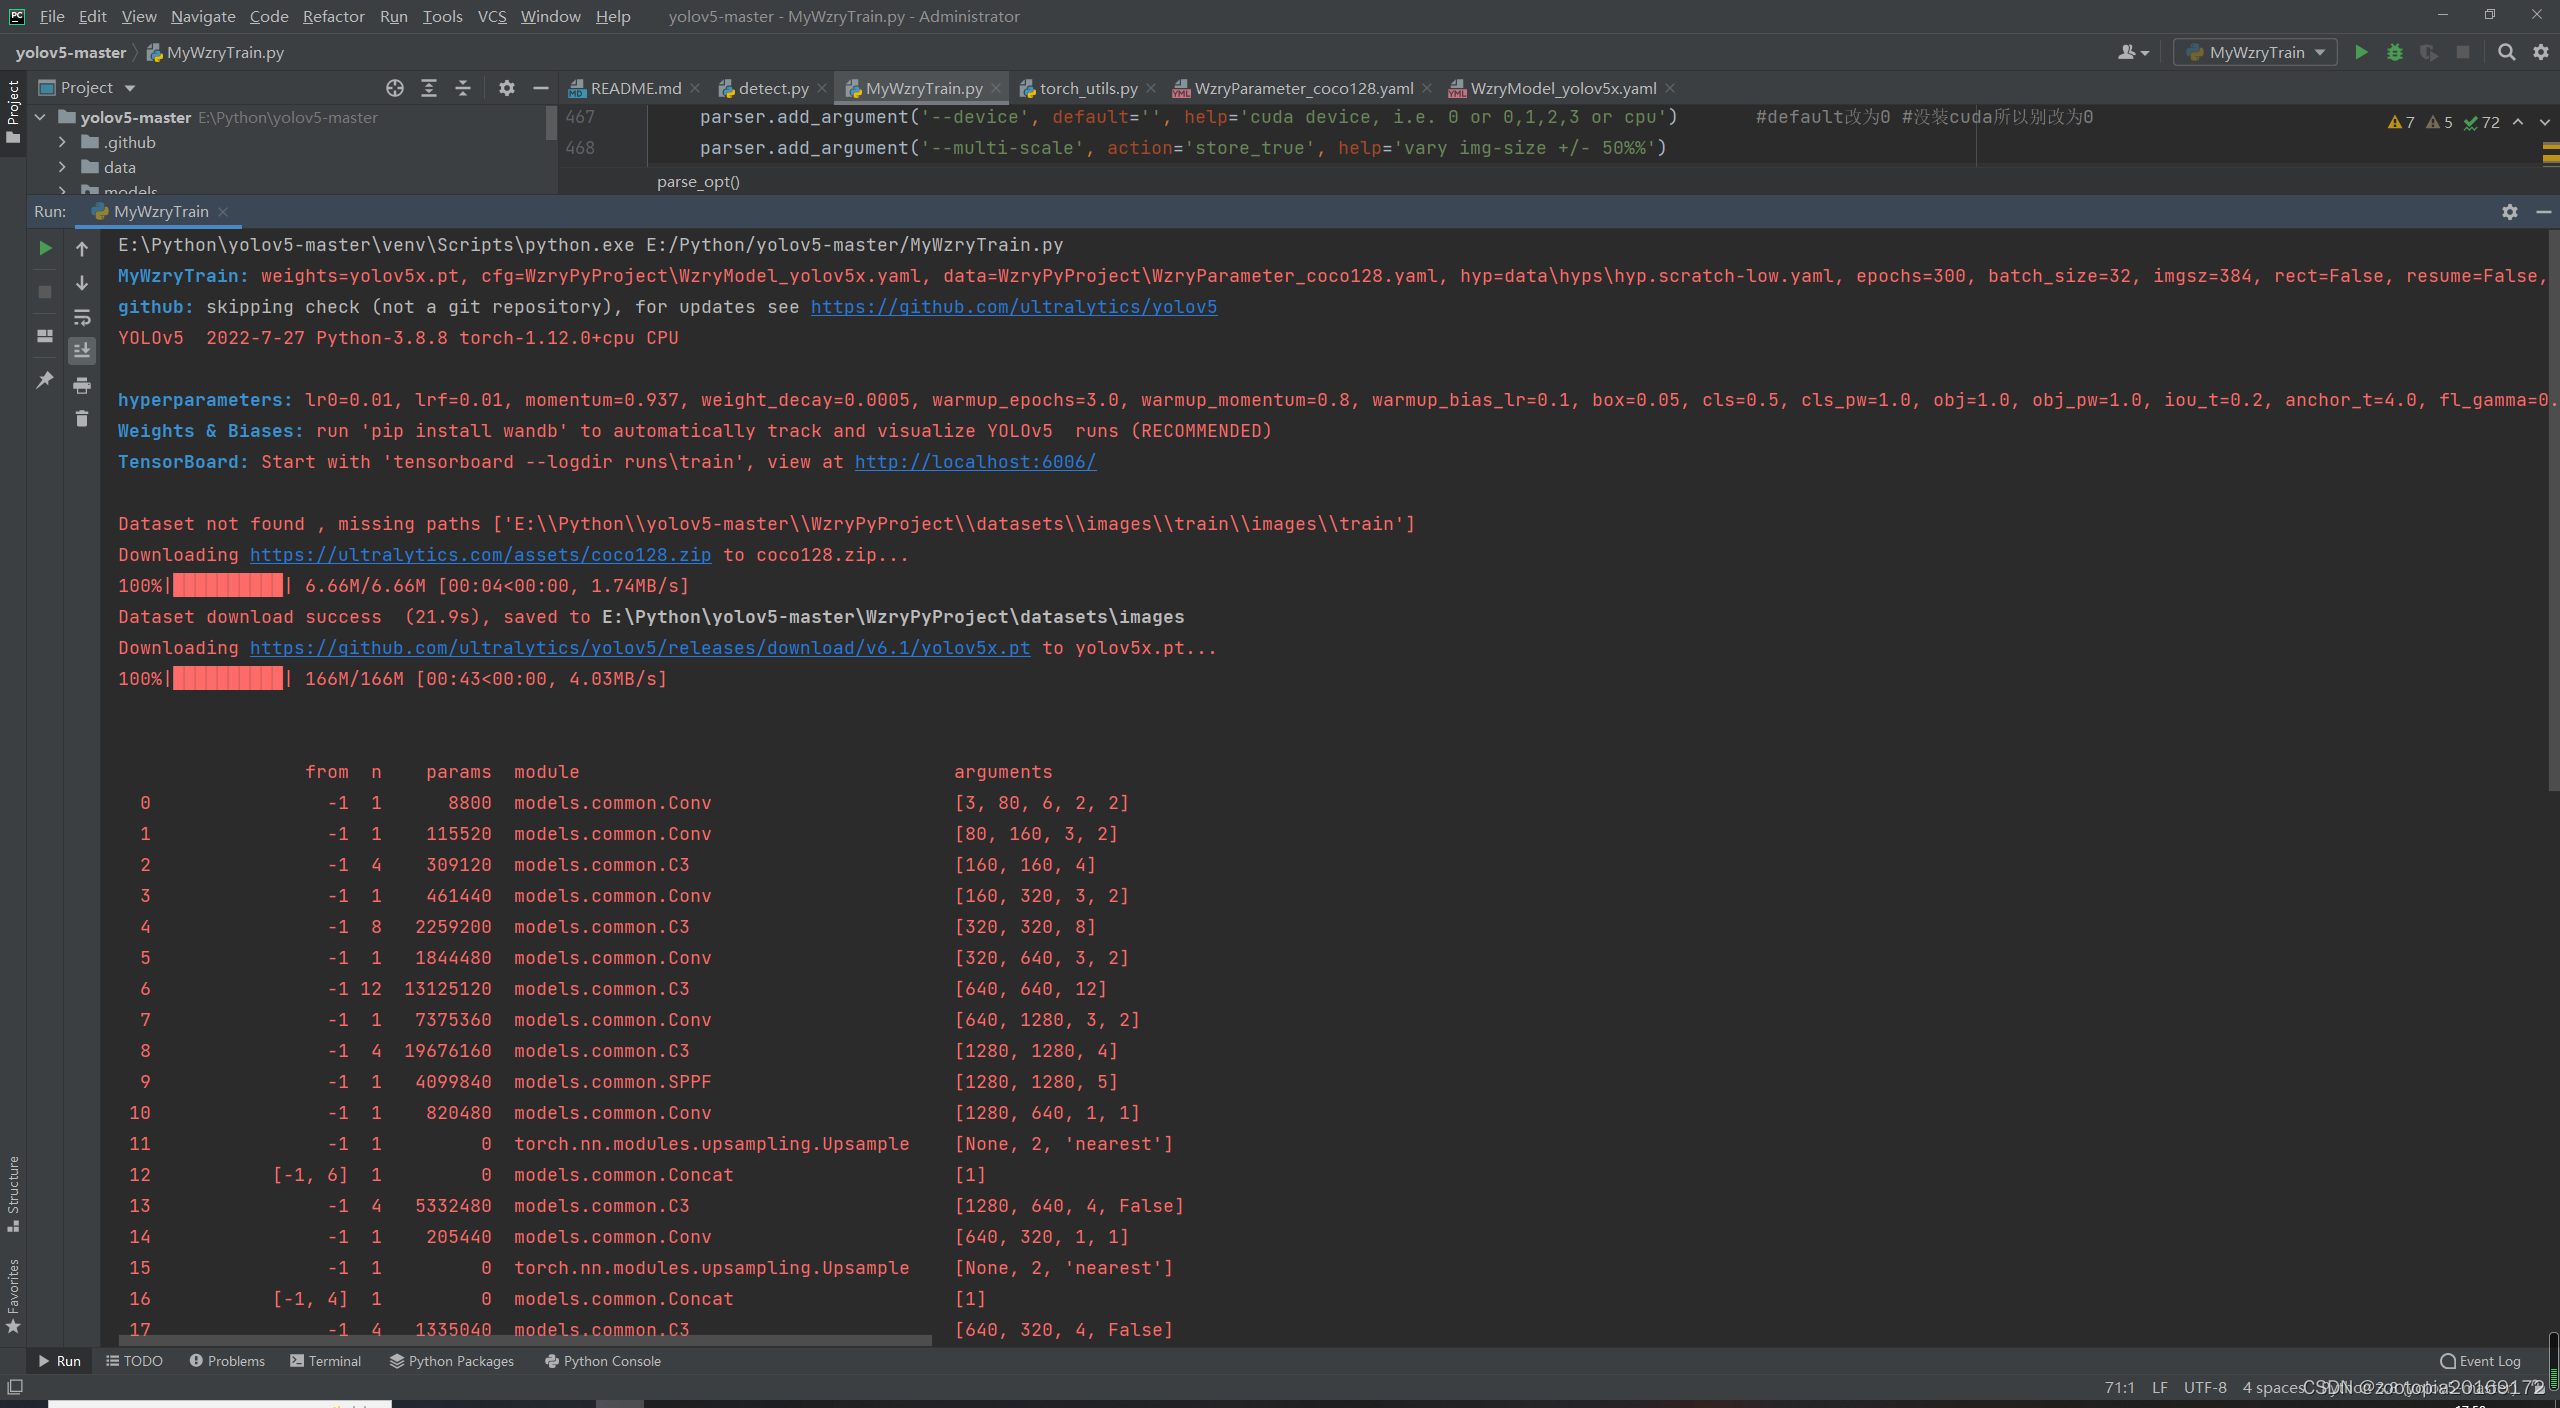


yolov5的王者荣耀代码,显示文件太小无法运行
错误:“OSError: [WinError 1455] 页面文件太小,无法完成操作。”
解决方法:
修改train中的workers,把default从10改为0。
0好像对应Windows版本,10对应是linux(不太确定)

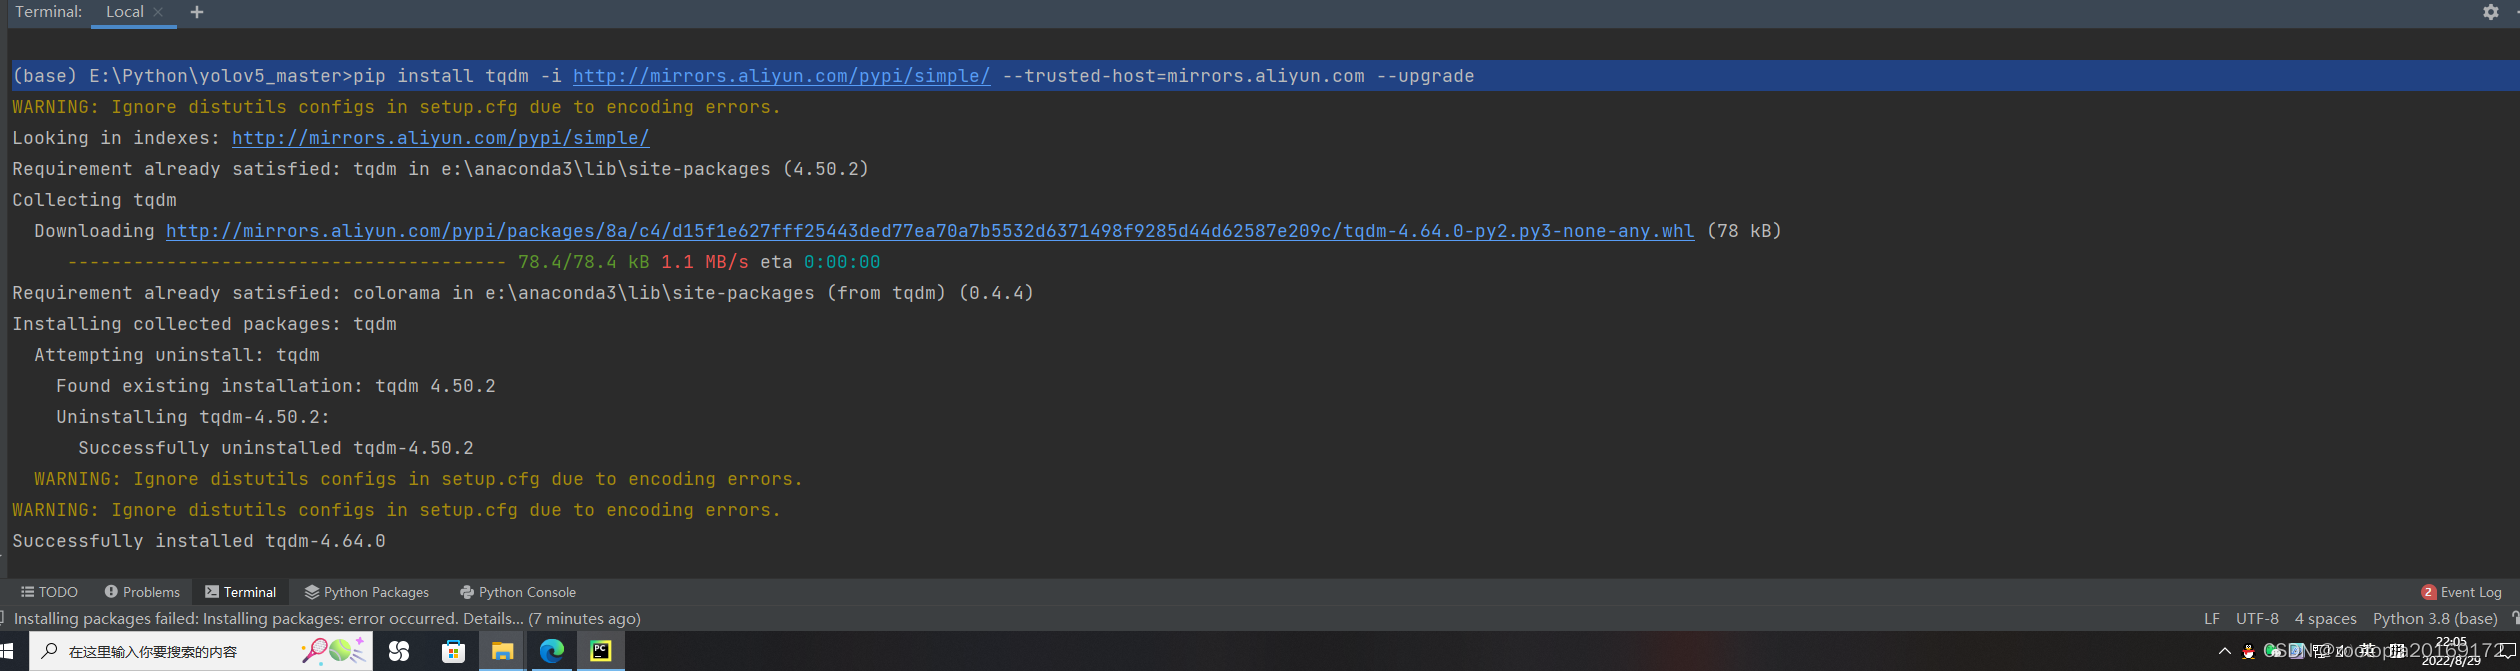
安装tqdm
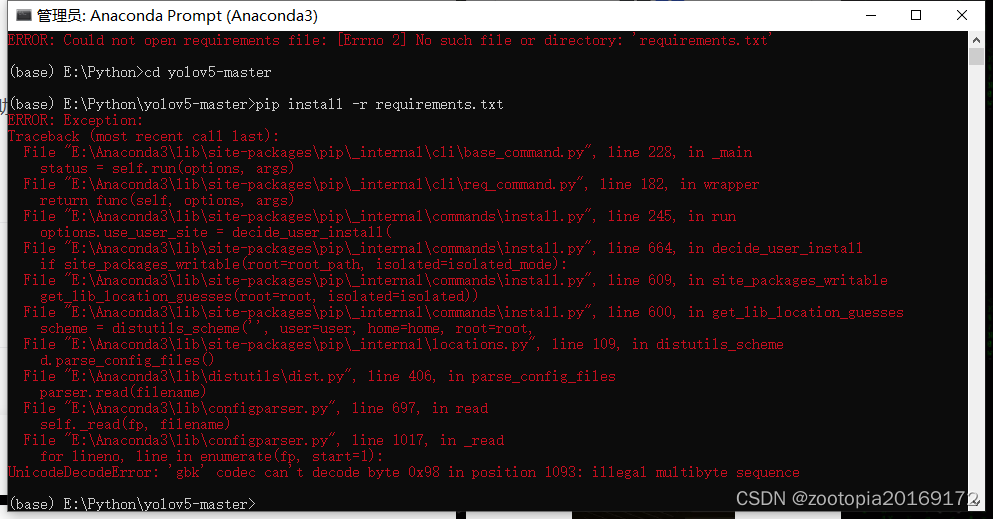
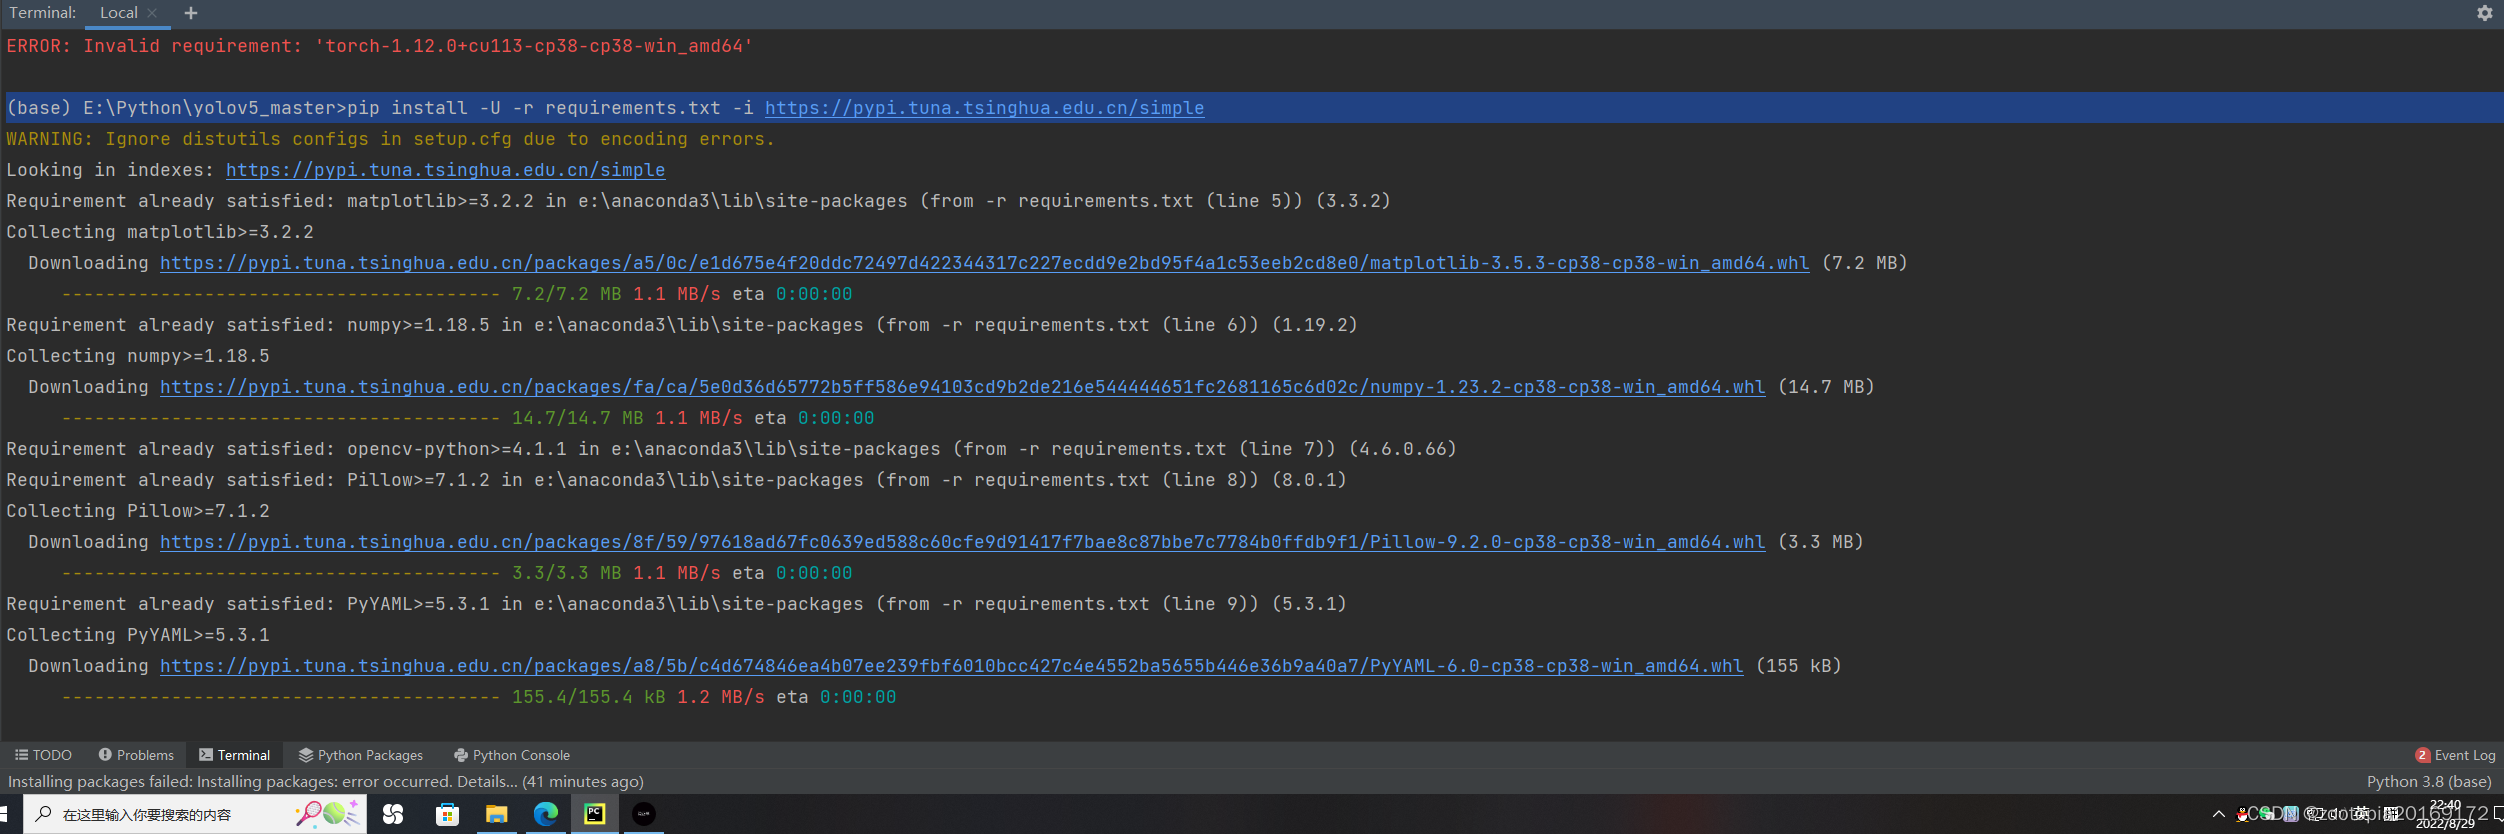
安装requirements的语句
pip install -U -r requirements.txt -i https://pypi.tuna.tsinghua.edu.cn/simple
或者:pip install -r requirements.txt
YOLOv5运行成功的画面如下所示:
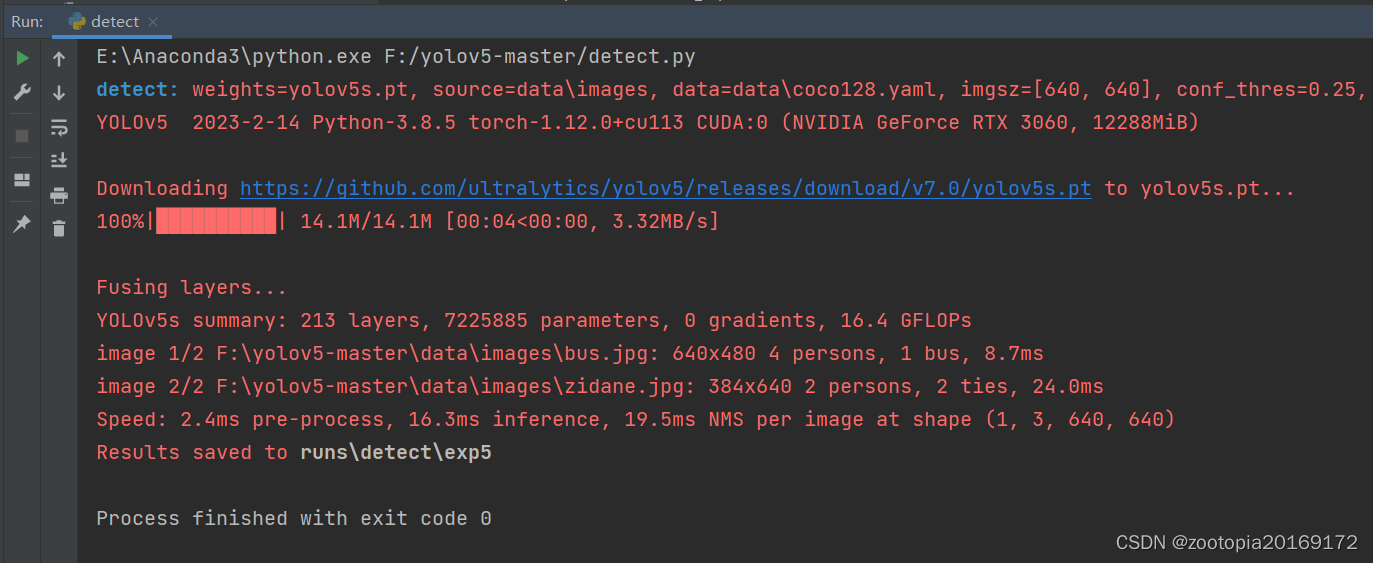
E:\Anaconda3\python.exe F:/yolov5-master/detect.py
detect: weights=yolov5s.pt, source=data\images, data=data\coco128.yaml, imgsz=[640, 640], conf_thres=0.25, iou_thres=0.45, max_det=1000, device=, view_img=False, save_txt=False, save_conf=False, save_crop=False, nosave=False, classes=None, agnostic_nms=False, augment=False, visualize=False, update=False, project=runs\detect, name=exp, exist_ok=False, line_thickness=3, hide_labels=False, hide_conf=False, half=False, dnn=False, vid_stride=1
YOLOv5 2023-2-14 Python-3.8.5 torch-1.12.0+cu113 CUDA:0 (NVIDIA GeForce RTX 3060, 12288MiB)
Downloading https://github.com/ultralytics/yolov5/releases/download/v7.0/yolov5s.pt to yolov5s.pt…
100%|██████████| 14.1M/14.1M [00:04<00:00, 3.32MB/s]
Fusing layers…
YOLOv5s summary: 213 layers, 7225885 parameters, 0 gradients, 16.4 GFLOPs
image 1/2 F:\yolov5-master\data\images\bus.jpg: 640x480 4 persons, 1 bus, 8.7ms
image 2/2 F:\yolov5-master\data\images\zidane.jpg: 384x640 2 persons, 2 ties, 24.0ms
Speed: 2.4ms pre-process, 16.3ms inference, 19.5ms NMS per image at shape (1, 3, 640, 640)
Results saved to runs\detect\exp5
Process finished with exit code 0
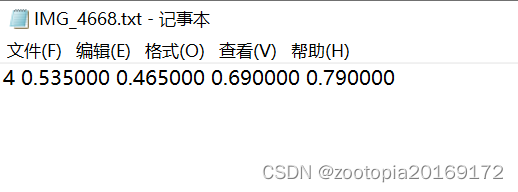
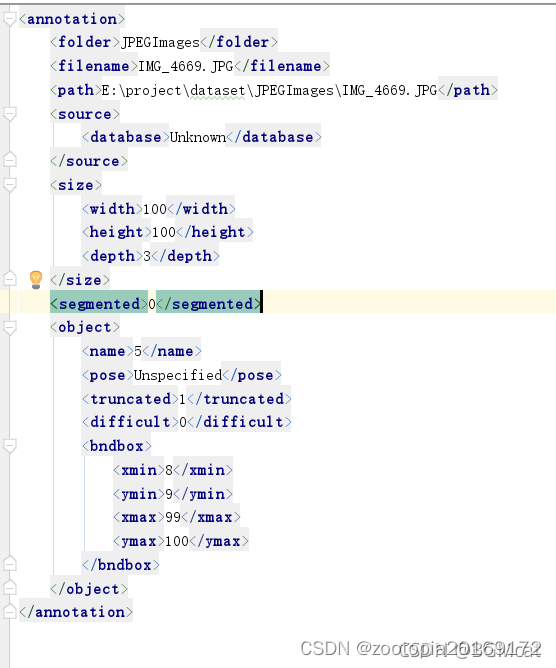
简述:YOLO为txt格式,voc为xml格式,具体结构如下图:
在这里插入图片描述


 705
705


 被折叠的 条评论
为什么被折叠?
被折叠的 条评论
为什么被折叠?
 到【灌水乐园】发言


