


一、前言
本篇续接前一篇 yolo v2 之车牌检测 ,前一篇使用yolo v2已经可以很准确地框出车牌图片了,这里完成后续的车牌字符号码的识别,从车牌框框中要识别出车牌字符,笔者能想到3种思路,1种是同样yolo、SSD等深度学习目标检测的方法直接对车牌内的字符识别;第2种是传统方法从框里切分字符,再训练深度学习的模型对各个字符做识别;第3种方法就是端到端的车牌图片识别。在车牌图像的分辨率比较高,而且清晰的情况下,第1种方法的成功率理论上会比较高的,而且能够针对多种车牌,第2种方法则车牌字符倾斜的情况下效果不好,故这里尝试第3种方法,这种做法实际上也与验证码识别类似,缺点就是只能识别固定位数的车牌图片,用基于循环神经网络的方法可能可以解决这个问题。
二、修改caffe源码使适合多标签分类
由于caffe源码只对hdf5支持多标签,对lmdb格式文件只支持单标签,为此先参考这篇文章http://blog.csdn.net/sinat_14916279/article/details/56489601?locationNum=10&fps=1 修改caffe的源码,该博文针对的是5位数的验证码图片,而我这里需要修改为支持7个标签输入
三、训练集和验证集制作
首先需要采集数据,端到端的识别需要用到大量样本,上一篇中,修改yolo v2的源码src/detector.c中的draw_detections函数,将训练集和测试集的所检测的仅包含车牌的图片保存下来。为了能够得到更多的样本,爬虫更多网上的图片来检测,我这里共保存了3922张仅含车牌图片
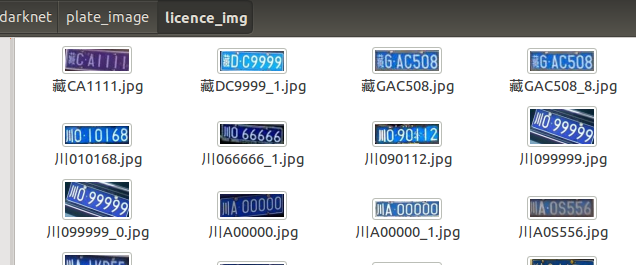
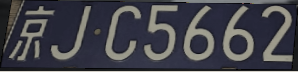
其次上述采集到的图片远远不够,发现用户 szad670401在 Github 上开源的一个车牌生成器,当然也提供了相应的端到端识别模型。但是还是感觉生成的图片和真实的图片有所差距,故借鉴其代码中的添加高斯噪声、旋转、仿射变换、调整HSV、添加背景图像等操作对3922张图片做样本增强,先将图片resize至272*72,这个分辨率大小是为了之后符合模型的输入,再做样本增强,以下为一张图片的变换示例:


附上数据增强的python代码
#!/usr/bin/env python
#coding=utf-8

import os
import cv2
import numpy as np
from math import *
import random

index = {"京": 0, "沪": 1, "津": 2, "渝": 3, "冀": 4, "晋": 5, "蒙": 6, "辽": 7, "吉": 8, "黑": 9, "苏": 10, "浙": 11, "皖": 12,
         "闽": 13, "赣": 14, "鲁": 15, "豫": 16, "鄂": 17, "湘": 18, "粤": 19, "桂": 20, "琼": 21, "川": 22, "贵": 23, "云": 24,
         "藏": 25, "陕": 26, "甘": 27, "青": 28, "宁": 29, "新": 30, "0": 31, "1": 32, "2": 33, "3": 34, "4": 35, "5": 36,
         "6": 37, "7": 38, "8": 39, "9": 40, "A": 41, "B": 42, "C": 43, "D": 44, "E": 45, "F": 46, "G": 47, "H": 48,
         "J": 49, "K": 50, "L": 51, "M": 52, "N": 53, "P": 54, "Q": 55, "R": 56, "S": 57, "T": 58, "U": 59, "V": 60,
         "W": 61, "X": 62, "Y": 63, "Z": 64};


def GetFileList(dir, fileList):
    if os.path.isfile(dir):
        fileList.append(dir)
    elif os.path.isdir(dir):
        for s in os.listdir(dir):
            #如果需要忽略某些文件夹,使用以下代码
            #if s == "xxx":
                #continue
            newDir=os.path.join(dir,s)
            GetFileList(newDir, fileList)
    return fileList

# create random value between 0 and val-1
def r(val):
    return int(np.random.random() * val)

def AddGauss(img, level):
    return cv2.blur(img, (level * 2 + 1, level * 2 + 1));

def rot(img,angel,shape,max_angel):
    """ 使图像轻微的畸变

        img 输入图像
        factor 畸变的参数
        size 为图片的目标尺寸

    """
    size_o = [shape[1],shape[0]]

    size = (shape[1]+ int(shape[0]*cos((float(max_angel )/180) * 3.14)),shape[0])


    interval = abs( int( sin((float(angel) /180) * 3.14)* shape[0]));

    pts1 = np.float32([[0,0]         ,[0,size_o[1]],[size_o[0],0],[size_o[0],size_o[1]]])
    if(angel>0):

        pts2 = np.float32([[interval,0],[0,size[1]  ],[size[0],0  ],[size[0]-interval,size_o[1]]])
    else:
        pts2 = np.float32([[0,0],[interval,size[1]  ],[size[0]-interval,0  ],[size[0],size_o[1]]])

    M  = cv2.getPerspectiveTransform(pts1,pts2);
    dst = cv2.warpPerspective(img,M,size);

    return dst;

def rotRandrom(img, factor, size):
    shape = size;
    pts1 = np.float32([[0, 0], [0, shape[0]], [shape[1], 0], [shape[1], shape[0]]])
    pts2 = np.float32([[r(factor), r(factor)], [ r(factor), shape[0] - r(factor)], [shape[1] - r(factor),  r(factor)],
                       [shape[1] - r(factor), shape[0] - r(factor)]])
    M = cv2.getPerspectiveTransform(pts1, pts2);
    dst = cv2.warpPerspective(img, M, size);
    return dst;

def cropFill(img , bot):
    leftIdx = 0
    rightIdx = 0
    for col in range(img.shape[1]):
        if sum( sum( img[0: , col ] ) ) !=0:
            leftIdx = col
            break
    for col in range( img.shape[1] ):
        if sum( sum( img[0: ,img.shape[1]-col-1 ] ) ) !=0:
            rightIdx = img.shape[1] - col
            break
    imgRoi = img[0: , leftIdx: rightIdx]

    envPath = './env/'+str(r(28))+'.png'    #env文件夹下保存了28张背景图片,从0.png到27.png
    env = cv2.imread(envPath)
    env = cv2.resize( env , ( imgRoi.shape[1] , imgRoi.shape[0]))

    img2gray = cv2.cvtColor(imgRoi, cv2.COLOR_BGR2GRAY)
    ret,mask = cv2.threshold(img2gray,10,255,cv2.THRESH_BINARY)
    mask_inv = cv2.bitwise_not(mask)

    bak = (imgRoi==0);
    bak = bak.astype(np.uint8)*255;
    inv = cv2.bitwise_and(bak,env)
    img_temp = cv2.bitwise_or(inv,imgRoi, mask = mask_inv)
    imgRoi = cv2.bitwise_or(imgRoi , img_temp)

    return imgRoi

def tfactor(img):
    hsv = cv2.cvtColor(img,cv2.COLOR_BGR2HSV);
    hsv[:,:,1] = hsv[:,:,1]*(0.7+ np.random.random()*0.3);
    hsv[:,:,1] = hsv[:,:,1]*(0.4+ np.random.random()*0.6);
    hsv[:,:,2] = hsv[:,:,2]*(0.4+ np.random.random()*0.6);

    img = cv2.cvtColor(hsv,cv2.COLOR_HSV2BGR);
    return img

if __name__ == '__main__':
    lists = GetFileList( './licence_img'  ,[])
    for imgPath in lists:            #遍历所有图片
        img = cv2.imread(imgPath)
        img = cv2.resize(img , (272,72) )
        cv2.imshow('src', img)
        cv2.waitKey(0)

        for times in range(20):           #20次变换可得到20张增强的图片
            src = img
            dst = AddGauss( src, r(3 ) )
            dst = rot(dst,r(60)-30,dst.shape,20);
            dst = rotRandrom(dst,5,(dst.shape[1],dst.shape[0]));
            dst = cropFill(  dst, 3 )
            dst = tfactor( dst )
            cv2.imshow('dst' , dst)
            cv2.waitKey(0)
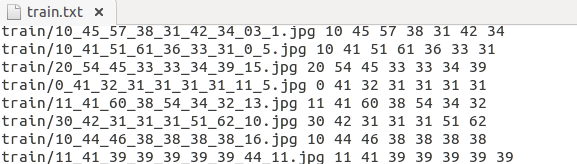
在caffe下新建文件夹 LPR,在当中新建文件夹train和val,用于保存训练集和验证集图片,3922张图片每张图片均做20次上述图像处理,共80000多张图片,将71547张图片保存于train,10815张保存于val,每张图片的名字已经被修改为诸如0_41_31_31_31_31_31_6_4.jpg的名字,前7位数字即为该车牌号的对应label,在LPR下新建python文件genText.py,输入以下内容
#!/usr/bin/env python
#-*- coding:utf-8 -*-

import os,sys

trainFile = 'train/'
valFile = 'val/'

if __name__ == '__main__':

    tf = open('train.txt' , 'w')
    vf = open('val.txt' , 'w' )

    for filename in os.listdir( trainFile ):
        lists = filename.split('_')
        imgPath = trainFile +filename
        tf.write(imgPath)

        for k in range(7):
            tf.write(' '+lists[k])
        tf.write('\n')
    tf.close()

    for filename in os.listdir( valFile ):
        lists = filename.split('_')
        imgPath = valFile +filename
        vf.write(imgPath)

        for k in range(7):
            vf.write(' '+lists[k])
        vf.write('\n')
    vf.close()
四、生成lmdb
这里生成lmdb,还是用到了create_imagenet.sh,其内部还是调用了convert_imageset,将 examples/imagenet/create_imagenet.sh 复制一份到LPR文件夹下,修改如下:
#!/usr/bin/env sh
# Create the imagenet lmdb inputs
# N.B. set the path to the imagenet train + val data dirs
set -e

EXAMPLE=LPR/Build_lmdb  #Build_lmdb保存生成的lmdb文件,需要先创建好
DATA=LPR/           #train.txt和val.txt所在位置
TOOLS=build/tools   #caffe自带工具,不用管
LABEL_NUM='7'    #label标签数量
TRAIN_DATA_ROOT=/home/jyang/caffe/LPR/ #训练图片所在路径,和标签文件的路径拼起来为完整路径
VAL_DATA_ROOT=/home/jyang/caffe/LPR/   #测试图片所在路径,同上

# Set RESIZE=true to resize the images to 256x256. Leave as false if images have
# already been resized using another tool.
RESIZE=false         #已经做过resize了,所以这里不做了
if $RESIZE; then
  RESIZE_HEIGHT=256
  RESIZE_WIDTH=256
else
  RESIZE_HEIGHT=0
  RESIZE_WIDTH=0
fi

if [ ! -d "$TRAIN_DATA_ROOT" ]; then
  echo "Error: TRAIN_DATA_ROOT is not a path to a directory: $TRAIN_DATA_ROOT"
  echo "Set the TRAIN_DATA_ROOT variable in create_imagenet.sh to the path" \
       "where the ImageNet training data is stored."
  exit 1
fi

if [ ! -d "$VAL_DATA_ROOT" ]; then
  echo "Error: VAL_DATA_ROOT is not a path to a directory: $VAL_DATA_ROOT"
  echo "Set the VAL_DATA_ROOT variable in create_imagenet.sh to the path" \
       "where the ImageNet validation data is stored."
  exit 1
fi

echo "Creating train lmdb..."

GLOG_logtostderr=1 $TOOLS/convert_imageset \
    --resize_height=$RESIZE_HEIGHT \
    --resize_width=$RESIZE_WIDTH \
    --shuffle \
    $TRAIN_DATA_ROOT \
    $DATA/train.txt \
    $EXAMPLE/train_lmdb        #lmdb格式训练集保存的路径

echo "Creating val lmdb..."

GLOG_logtostderr=1 $TOOLS/convert_imageset \
    --resize_height=$RESIZE_HEIGHT \
    --resize_width=$RESIZE_WIDTH \
    --shuffle \
    $VAL_DATA_ROOT \
    $DATA/val.txt \
    $EXAMPLE/val_lmdb         #lmdb格式验证集保存的路径

echo "Done."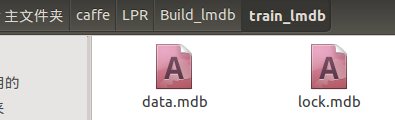
五、生成均值文件
caffe路径下执行build/tools/compute_image_mean LPR/Build_lmdb/train_lmdb LPR/Mean/mean.binaryproto,在新建的Mean文件夹下保存均值文件
结语
这样已经得到lmdb格式的数据集和均值文件,以下提供3922张仅含车牌的图片下载,配置文件、模型文件生成及模型训练、测试参看下一篇。
链接


 344
344

 被折叠的 条评论
为什么被折叠?
被折叠的 条评论
为什么被折叠?
 到【灌水乐园】发言


