


UV动画
UV动画,顾名思义,就是针对UV做的动画。在游戏中,一些动态水面,飞流直下的瀑布,流动的岩浆,跳动的火焰等等,很多都是通过操作UV做的动画。在unity中我可以实用挂载脚本或者直接针对UV key动画帧做动画操作,而在本文中将通过shader编写实现三个比较常见的UV动画方式:
1.UV位移动画
2.UV序列帧动画
3.UV旋转动画
先从UV位移动画开始
我们将做一个流动岩浆的效果,在开始前,我们需要介绍下Unity内置变量_Time
float4 _Time : Time (t/20, t, t*2, t*3)
这是个随时间变化的增量,从函数的定义我们可以知道这个变量的4个分量速率比 _Time=20*_Time.x=_Time.y=_Time.z/2=_Time.w/3.
为了方便控制位移动画的速率和方向我们定义一个变量
_ScrollingSpeed("Scrolling speed", Vector) = (0,0,0,0)在顶点函数中 将uv坐标乘以 _Time 变量和_ScrollingSpeed,下面为关键代码
o.uvScroll = TRANSFORM_TEX((v.texcoord.xy+_Time.x*_ScrollingSpeed.xy), _Tex);// 这里只使用了xy上的两个分量对应uvVF版本代码01:
Shader "PengLu/Self-Illumin/IlluminDiffuseScrollVF"
{
    Properties
    {
       	_Color ("Main Color", Color) = (1,1,1,1)
        _MainTex ("Base (RGB)", 2D) = "white" {}
		_Illum ("Illumin (A)", 2D) = "white" {}
		_Tex("Scroll Tex (RGB)", 2D)= "white" {}
		_ScrollingSpeed("Scrolling speed", Vector) = (0,0,0,0)
    }

    SubShader
    {

        Tags { "RenderType"="Opaque" }
		LOD 200

        pass
        {
            CGPROGRAM
            #pragma vertex vert
            #pragma fragment frag
            #include "UnityCG.cginc"
            sampler2D _MainTex,_Illum,_Tex;
            float4 _MainTex_ST,_Illum_ST,_Tex_ST,_Color,_ScrollingSpeed;

            struct appdata {
                float4 vertex : POSITION;
                float2 texcoord : TEXCOORD0;
                float2 texcoord1 : TEXCOORD1;
            };

            struct v2f  {
                float4 pos : POSITION;
                float2 uv_MainTex : TEXCOORD0;
				float2 uv_Illum : TEXCOORD1;
				float2 uvLM : TEXCOORD2;
				float2 uvScroll : TEXCOORD3;
            };

            v2f vert (appdata v)
            {
                v2f o;
                o.pos = mul(UNITY_MATRIX_MVP,v.vertex)*_Color;
                o.uv_MainTex = TRANSFORM_TEX(v.texcoord, _MainTex);
                o.uv_Illum = TRANSFORM_TEX(v.texcoord, _Illum);
                o.uvScroll = TRANSFORM_TEX((v.texcoord.xy+_Time.x*_ScrollingSpeed.xy), _Tex);
                o.uvLM = v.texcoord1.xy * unity_LightmapST.xy + unity_LightmapST.zw;
                return o;
            }

            float4 frag (v2f i) : COLOR
            {
                float4 texCol = tex2D(_MainTex, i.uv_MainTex);
                float4 IllumTex = tex2D(_Illum,i.uv_Illum);
                float3 lm = DecodeLightmap (UNITY_SAMPLE_TEX2D(unity_Lightmap, i.uvLM.xy));
                IllumTex.rgb+=tex2D(_Tex,i.uvScroll).rgb;
                IllumTex*=IllumTex.a;
                texCol+=IllumTex;
                texCol.rgb*=lm;
                return texCol;
            }
            ENDCG
        }
    }
    FallBack "Diffuse"
}

UV序列帧动画
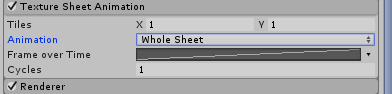
序列帧动画是游戏比较常用的一种动画形式,在unity自带的粒子系统中就可以设置序列帧动画(下图),但是这个只能用于粒子系统的粒子效果,如果是自己做的模型就要使用序列帧动画就得自己写脚本或shader,下面我们将用shader实现序列帧动画效果。
首先得准备一张序列帧的贴图,如下图这样的:

然后我们需要声明三个变量:
_SizeX ("SizeX", Float) = 4//列数
_SizeY ("SizeY", Float) = 4//行数
_Speed ("Speed", Float) = 200//动画的播放速度
在frag函数里面处理动画
int indexX=fmod (_Time.x*_Speed,_SizeX);//获得列数的循环
int indexY=fmod ((_Time.x*_Speed)/_SizeX,_SizeY);//获得行数的循环
fmod函数是取余函数,int用来强制取整,当然也可以用floor函数来取整
| _Time.x*_Speed | 0 | 1 | 2 | 3 | 4 | 5 | 6 | 7 | 8 | 9 | 10 | 11 | 12 | 13 | 14 | 15 |
| indexX | 0 | 1 | 2 | 3 | 0 | 1 | 2 | 3 | 0 | 1 | 2 | 3 | 0 | 1 | 2 | 3 |
| indexY | 0 | 0 | 0 | 0 | 1 | 1 | 1 | 1 | 2 | 2 | 2 | 2 | 3 | 3 | 3 | 3 |
| _Time.x*_Speed | 16 | 17 | 18 | 19 | 20 | 21 | 22 | 23 | 24 | 25 | 26 | 27 | 28 | 29 | 30 | 31 |
| indexX | 0 | 1 | 2 | 3 | 0 | 1 | 2 | 3 | 0 | 1 | 2 | 3 | 0 | 1 | 2 | 3 |
| indexY | 0 | 0 | 0 | 0 | 1 | 1 | 1 | 1 | 2 | 2 | 2 | 2 | 3 | 3 | 3 | 3 |
参考网络上的例子我还有写了另外一种获得循环动画的代码(我是孔乙己啦),和上面两句功能是一样的,貌似消耗稍微少一点
int index = floor(_Time .x * _Speed);
int indexY = index/_SizeX;
int indexX = index - indexY*_SizeX;| index | 0 | 1 | 2 | 3 | 4 | 5 | 6 | 7 | 8 | 9 | 10 | 11 | 12 | 13 | 14 | 15 |
| indexX | 0 | 1 | 2 | 3 | 0 | 1 | 2 | 3 | 0 | 1 | 2 | 3 | 0 | 1 | 2 | 3 |
| indexY | 0 | 0 | 0 | 0 | 1 | 1 | 1 | 1 | 2 | 2 | 2 | 2 | 3 | 3 | 3 | 3 |
| index | 16 | 17 | 18 | 19 | 20 | 21 | 22 | 23 | 24 | 25 | 25 | 27 | 28 | 29 | 30 | 31 |
| indexX | 0 | 1 | 2 | 3 | 0 | 1 | 2 | 3 | 0 | 1 | 2 | 3 | 0 | 1 | 2 | 3 |
| indexY | 4 | 4 | 4 | 4 | 5 | 5 | 5 | 5 | 6 | 6 | 6 | 6 | 7 | 7 | 7 | 7 |
接下来将获得的循环数与uv贴图的UV进行操作
fixed2 seqUV = float2((i.texcoord.x) /_SizeX, (i.texcoord.y)/_SizeY);//将uv切分
seqUV.x += indexX/_SizeX;//U方向上循环
seqUV.y -= indexY/_SizeY;//V方向上循环
VF版本代码02:
Shader "PengLu/Particle/SequenceAdd" {
Properties {
	_TintColor ("Tint Color", Color) = (0.5,0.5,0.5,0.5)
	_MainTex ("Particle Texture", 2D) = "white" {}
	_InvFade ("Soft Particles Factor", Range(0.01,3.0)) = 1.0
	_SizeX ("SizeX", Float) = 4
    _SizeY ("SizeY", Float) = 4
    _Speed ("Speed", Float) = 200
}

Category {
	Tags { "Queue"="Transparent" "IgnoreProjector"="True" "RenderType"="Transparent" }
	Blend SrcAlpha One
	AlphaTest Greater .01
	ColorMask RGB
	Cull Off Lighting Off ZWrite Off Fog { Color (0,0,0,0) }

	SubShader {
		Pass {

			CGPROGRAM
			#pragma vertex vert
			#pragma fragment frag
			#pragma multi_compile_particles

			#include "UnityCG.cginc"

			sampler2D _MainTex;
			fixed4 _TintColor;
			fixed _SizeX;
			fixed _SizeY;
			fixed _Speed;

			struct appdata_t {
				float4 vertex : POSITION;
				fixed4 color : COLOR;
				float2 texcoord : TEXCOORD0;
			};

			struct v2f {
				float4 vertex : POSITION;
				fixed4 color : COLOR;
				float2 texcoord : TEXCOORD0;
				#ifdef SOFTPARTICLES_ON
				float4 projPos : TEXCOORD1;
				#endif
			};

			float4 _MainTex_ST;

			v2f vert (appdata_t v)
			{
				v2f o;
				o.vertex = mul(UNITY_MATRIX_MVP, v.vertex);
				#ifdef SOFTPARTICLES_ON
				o.projPos = ComputeScreenPos (o.vertex);
				COMPUTE_EYEDEPTH(o.projPos.z);
				#endif
				o.color = v.color;
				o.texcoord = TRANSFORM_TEX(v.texcoord,_MainTex);
				return o;
			}

			sampler2D _CameraDepthTexture;
			float _InvFade;

			fixed4 frag (v2f i) : COLOR
			{
				#ifdef SOFTPARTICLES_ON
				float sceneZ = LinearEyeDepth (UNITY_SAMPLE_DEPTH(tex2Dproj(_CameraDepthTexture, UNITY_PROJ_COORD(i.projPos))));
				float partZ = i.projPos.z;
				float fade = saturate (_InvFade * (sceneZ-partZ));
				i.color.a *= fade;
				#endif
				int indexX=fmod (_Time.x*_Speed,_SizeX);
		 		int indexY=fmod ((_Time.x*_Speed)/_SizeX,_SizeY);

//				以下三行代码和之前两行代码功能一样
//				int index = floor(_Time .x * _Speed);
//    			int indexY = index/_SizeX;
//				int indexX = index-indexY*_SizeX;

				fixed2 seqUV = float2((i.texcoord.x) /_SizeX, (i.texcoord.y)/_SizeY);
					seqUV.x += indexX/_SizeX;
					seqUV.y -= indexY/_SizeY;
				return 2.0f * i.color * _TintColor * tex2D(_MainTex, seqUV);
			}
			ENDCG
		}
	}
}
}
VF版本代码02效果:

UV旋转动画
UV旋转动画在游戏开发中用得相对比较少,特效师一般会采用其他方式代替,这里将用shader实现一个UV旋转的动画。
UV旋转实际上一个2D旋转,有关2D旋转的理论在
这里
。这边文章里讲得比较透彻,在这里我只需要拿到最终结果公式:
x' = r*cosα*cosθ - r*sinα*sinθ = x * cos θ – y * sin θ
y' = r*sinα*cosθ +r*cosα*sinθ = y * cos θ + x * sin θ
那么开始,同意需要声明一个变量来控制旋转方向和速度;
_Speed ("Speed", Float) = 200接下来就要在frag函数里面操作UV,关键代码如下:
//将uv偏移0.5,使旋转中心到贴图中心
float2 uv=i.texcoord-0.5;
//定义一个二元变量,存储时间变量的正弦和余弦值
float2 rotate = float2(cos(_Speed*_Time.x),sin(_Speed*_Time.x));
//获得旋转后的uv坐标值
uv=float2((uv.x*rotate.x-uv.y*rotate.y),(uv.x*rotate.y+uv.y*rotate.x));
//将偏移的uv偏移回来
uv+=0.5;
Shader "PengLu/Particle/RotationAdd" {
Properties {
	_TintColor ("Tint Color", Color) = (0.5,0.5,0.5,0.5)
	_MainTex ("Particle Texture", 2D) = "white" {}
	_InvFade ("Soft Particles Factor", Range(0.01,3.0)) = 1.0
    _Speed ("Speed", Float) = 200
}

Category {
	Tags { "Queue"="Transparent" "IgnoreProjector"="True" "RenderType"="Transparent" }
	Blend SrcAlpha One
	AlphaTest Greater .01
	ColorMask RGB
	Cull Off Lighting Off ZWrite Off Fog { Color (0,0,0,0) }

	SubShader {
		Pass {

			CGPROGRAM
			#pragma vertex vert
			#pragma fragment frag
			#pragma multi_compile_particles

			#include "UnityCG.cginc"

			sampler2D _MainTex;
			fixed4 _TintColor;
			fixed _Speed;

			struct appdata_t {
				float4 vertex : POSITION;
				fixed4 color : COLOR;
				float2 texcoord : TEXCOORD0;
			};

			struct v2f {
				float4 vertex : POSITION;
				fixed4 color : COLOR;
				float2 texcoord : TEXCOORD0;
				#ifdef SOFTPARTICLES_ON
				float4 projPos : TEXCOORD1;
				#endif
			};

			float4 _MainTex_ST;

			v2f vert (appdata_t v)
			{
				v2f o;
				o.vertex = mul(UNITY_MATRIX_MVP, v.vertex);
				#ifdef SOFTPARTICLES_ON
				o.projPos = ComputeScreenPos (o.vertex);
				COMPUTE_EYEDEPTH(o.projPos.z);
				#endif
				o.color = v.color;
				o.texcoord = TRANSFORM_TEX(v.texcoord,_MainTex);
				return o;
			}

			sampler2D _CameraDepthTexture;
			float _InvFade;

			fixed4 frag (v2f i) : COLOR
			{
				#ifdef SOFTPARTICLES_ON
				float sceneZ = LinearEyeDepth (UNITY_SAMPLE_DEPTH(tex2Dproj(_CameraDepthTexture, UNITY_PROJ_COORD(i.projPos))));
				float partZ = i.projPos.z;
				float fade = saturate (_InvFade * (sceneZ-partZ));
				i.color.a *= fade;
				#endif
				float2 uv=i.texcoord-0.5;
				float2 rotate = float2(cos(_Speed*_Time.x),sin(_Speed*_Time.x));
				uv=float2((uv.x*rotate.x-uv.y*rotate.y),(uv.x*rotate.y+uv.y*rotate.x));
				uv+=0.5;
				return 2.0f * i.color * _TintColor * tex2D(_MainTex, uv);
			}
			ENDCG
		}
	}
}
}
VF版本代码03效果:

PS:贴图的Wrap Mode要设置成Clamp,原因你懂的 ^_^


 8083
8083

 被折叠的 条评论
为什么被折叠?
被折叠的 条评论
为什么被折叠?
 到【灌水乐园】发言


