from PIL import Image
import torchvision
import cv2
import numpy as np
from collections import OrderedDict
import torch
import torch.nn as nn

class MDNet(nn.Module):
    def \_\_init\_\_(self, model_path=None, K=1):
        super(MDNet, self).__init__()
        self.avgpool=nn.AdaptiveAvgPool2d(1)
        self.layers=nn.Sequential(OrderedDict([
                ('conv1', nn.Sequential(nn.Conv2d(3, 96, kernel_size=7, stride=2),
                                        nn.ReLU(inplace=True),
                                        nn.LocalResponseNorm(2),
                                        nn.MaxPool2d(kernel_size=3, stride=2))),
                ('conv2', nn.Sequential(nn.Conv2d(96, 256, kernel_size=5, stride=2),
                            nn.ReLU(inplace=True),
                            nn.LocalResponseNorm(2),
                            nn.MaxPool2d(kernel_size=3, stride=2))),
                ('features', nn.Sequential(nn.Conv2d(3, 512, kernel_size=3, stride=1),
                                  nn.ReLU(inplace=True))),
                ('fc4', nn.Sequential(nn.Linear(500, 512),
                                  nn.ReLU(inplace=True))),
                ('fc5', nn.Sequential(nn.Dropout(0.5),
                                  nn.Linear(500, 512),
                                  nn.ReLU(inplace=True)))
        ]))

    def forward(self, x):
        avg_result = self.avgpool(x)
        output = self.layers(x)
        return output
if __name__ == '\_\_main\_\_':
    net = MDNet()
其次将该模型保存下来,即在代码中添加:
def save\_model(model):
    torch.save(obj=model, f='B.pth')
具体代码如下:
from PIL import Image
import torchvision
import cv2
import numpy as np
from collections import OrderedDict
import torch
import torch.nn as nn


class MDNet(nn.Module):
    def \_\_init\_\_(self, model_path=None, K=1):
        super(MDNet, self).__init__()
        self.avgpool=nn.AdaptiveAvgPool2d(1)
        self.layers=nn.Sequential(OrderedDict([
                ('conv1', nn.Sequential(nn.Conv2d(3, 96, kernel_size=7, stride=2),
                                        nn.ReLU(inplace=True),
                                        nn.LocalResponseNorm(2),
                                        nn.MaxPool2d(kernel_size=3, stride=2))),
                ('conv2', nn.Sequential(nn.Conv2d(96, 256, kernel_size=5, stride=2),
                            nn.ReLU(inplace=True),
                            nn.LocalResponseNorm(2),
                            nn.MaxPool2d(kernel_size=3, stride=2))),
                ('features', nn.Sequential(nn.Conv2d(3, 512, kernel_size=3, stride=1),
                                  nn.ReLU(inplace=True))),
                ('fc4', nn.Sequential(nn.Linear(500, 512),
                                  nn.ReLU(inplace=True))),
                ('fc5', nn.Sequential(nn.Dropout(0.5),
                                  nn.Linear(500, 512),
                                  nn.ReLU(inplace=True)))
        ]))

    def forward(self, x):
        avg_result = self.avgpool(x)
        output = self.layers(x)
        return output

def save\_model(model):
    torch.save(obj=model, f='B.pth')

if __name__ == '\_\_main\_\_':
    net = MDNet()
    save_model(net)
    # model = torch.load(f="A.pth")
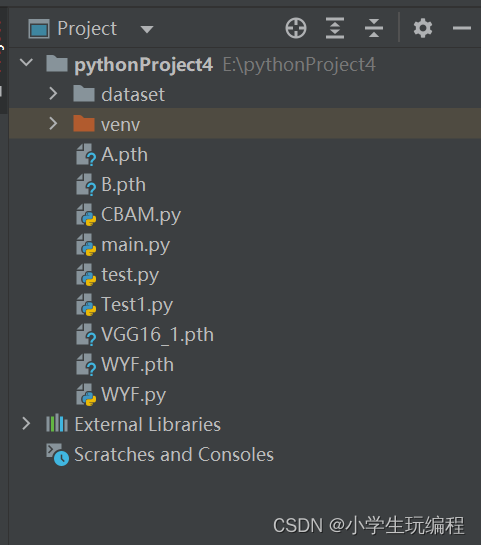
运行Python后可以看见生成了一个B.pth文件

2.使用热红外图生成图片:
#图片路径
img_path = r'C:/Users/HP/Desktop/w/1.jpg'

#给图片进行标准化操作
img = Image.open(img_path).convert('RGB')
transforms = torchvision.transforms.Compose([
    torchvision.transforms.ToTensor(),
    torchvision.transforms.Normalize([0.5, ], [0.5, ])])
data = transforms(img).unsqueeze(0)

#用于加载Pycharm中封装好的网络框架
# model = torchvision.models.vgg11\_bn(pretrained=True)
#用于加载1中生成的.pth文件
model = torch.load(f="B.pth")
#打印一下刚刚生成的.pth文件看看他的网络结构
print(model)
model.eval()

#读取他fc4层图片特征
features = net.layers.Conv1(data)
features.retain_grad()
# t = model.avgpool(features)
# t = t.reshape(1, -1)
# output = model.classifier(t)[0]


# pred = torch.argmax(output).item()
# pred\_class = output[pred]
#
# pred\_class.backward()
grads = features.grad


features = features[0]
# avg\_grads = torch.mean(grads[0], dim=(1, 2))
# avg\_grads = avg\_grads.expand(features.shape[1], features.shape[2], features.shape[0]).permute(2, 0, 1)
# features \*= avg\_grads

heatmap = features.detach().cpu().numpy()
heatmap = np.mean(heatmap, axis=0)

heatmap = np.maximum(heatmap, 0)
heatmap /= (np.max(heatmap) + 1e-8)


img = cv2.imread(img_path)
heatmap = cv2.resize(heatmap, (img.shape[1], img.shape[0]))
heatmap = np.uint8(255 \* heatmap)
heatmap = cv2.applyColorMap(heatmap, cv2.COLORMAP_JET)
superimposed_img = np.uint8(heatmap \* 0.5 + img \* 0.5)
cv2.imshow('1', superimposed_img)
cv2.waitKey(0)
3.总代码:
from PIL import Image
import torchvision
import cv2
import numpy as np
from collections import OrderedDict
import torch
import torch.nn as nn
class MDNet(nn.Module):
def \_\_init\_\_(self, model_path=None, K=1):
super(MDNet, self).__init__()
### 最后的话
最近很多小伙伴找我要Linux学习资料,于是我翻箱倒柜,整理了一些优质资源,涵盖视频、电子书、PPT等共享给大家!
### 资料预览
给大家整理的视频资料:

给大家整理的电子书资料:

**如果本文对你有帮助,欢迎点赞、收藏、转发给朋友,让我有持续创作的动力!**
涵盖视频、电子书、PPT等共享给大家!
### 资料预览
给大家整理的视频资料:
[外链图片转存中...(img-8LkTEyHP-1726128979588)]
给大家整理的电子书资料:
[外链图片转存中...(img-r1709Nb5-1726128979589)]
**如果本文对你有帮助,欢迎点赞、收藏、转发给朋友,让我有持续创作的动力!**


 9万+
9万+

 被折叠的 条评论
为什么被折叠?


