


目录
- 目录
- 预先浏览
- QA
- Q1 error utilsbboxc No such file or directory
- Q2 error nmscpu_nmsc No such file or directory
- Q3 error nmsgpu_nmsc No such file or directory
- Q4 Makefileconfig not found
- Q5 undefined symbol _nms
- Q6 Check failed registrycounttype 1 0 vs 1 Unknown layer type
- Q7 ImportError No module named _caffe
- Q8 tkinterTclError no display name and no DISPLAY environment variable
- Q9 invalid conversion from const int to int
- Q10Check failed error cudaSuccess 8 vs 0 invalid device function
- Q11Check failed error cudaSuccess 8 vs 0 invalid device function
- Q12Check failed error cudaSuccess 8 vs 0 invalid device function
预先浏览
- Faster R-CNN原文
- 源码(python)
推荐阅读CSDN Blog- 说明
- 文中仅描述了我所遇到的问题,所以可能会不全。
- 文中粘贴Error track,除了说明错误的原因外,更是为了便于检索和搜索。
- 希望对大家有帮助,若有错误,还望指出。
Q&A
Q1: error: utils/bbox.c: No such file or directory
错误描述:
x86_64-linux-gnu-gcc: error: utils/bbox.c: No such file or directory
x86_64-linux-gnu-gcc: fatal error: no input files
compilation terminated.
error: command ‘x86_64-linux-gnu-gcc’ failed with exit status 4
make: * [all] Error 1解决方案: 手动用python生成bbox.c
cd $FRCN_ROOT/lib/utils
cython bbox.pyx
Q2: error: nms/cpu_nms.c: No such file or directory**
错误描述:
x86_64-linux-gnu-gcc: error: nms/cpu_nms.c: No such file or directory
x86_64-linux-gnu-gcc: fatal error: no input files
compilation terminated.
error: command ‘x86_64-linux-gnu-gcc’ failed with exit status 4
make: * [all] Error 1解决方案: 手动用python生成cpu_nms.c
cd $FRCN_ROOT/lib/nms
cython cpu_nms.pyx
Q3: error: nms/gpu_nms.c: No such file or directory**
错误描述:
x86_64-linux-gnu-gcc: error: nms/gpu_nms.c: No such file or directory
x86_64-linux-gnu-gcc: fatal error: no input files
compilation terminated.
error: command ‘x86_64-linux-gnu-gcc’ failed with exit status 4
make: * [all] Error 1解决方案: 手动用cython生成gpu_nms.c
cd $FRCN_ROOT/lib/nms
cython gpu_nms.pyx
Q4: Makefile.config not found**
错误描述:
Makefile:6: * Makefile.config not found. See Makefile.config.example.. Stop.
解决方案: $FRCN_ROOT/caffe-fast-rcnn目录下,作者提供了Makefile.config.example
cd $FRCN_ROOT/caffe-fast-rcnn
cp Makefile.config.example Makefile.config
Q5: undefined symbol: _nms**
错误描述: 当在$FRCN_ROOT/lib下make时出现
Traceback (most recent call last):
File “./demo.py”, line 18, in module
from fast_rcnn.test import im_detect
File “/home/lijiajun/py-faster-rcnn-blog/tools/../lib/fast_rcnn/test.py”, line 17, in module
from fast_rcnn.nms_wrapper import nms
File “/home/lijiajun/py-faster-rcnn-blog/tools/../lib/fast_rcnn/nms_wrapper.py”, line 9, in module
from nms.gpu_nms import gpu_nms
ImportError: /home/lijiajun/py-faster-rcnn-blog/tools/../lib/nms/gpu_nms.so: undefined symbol: _nms**解决方案: **gpu_nms.so编译时有误,分3步
编辑setup.py
cd $FRCN_ROOT/lib
vim setup.py
将gpu_nms.pyx改为gpu_nms.cpp
#before

Extension('nms.gpu_nms',
    ['nms/nms_kernel.cu', 'nms/gpu_nms.pyx'],
    ...

#after

Extension('nms.gpu_nms',
    ['nms/nms_kernel.cu', 'nms/gpu_nms.cpp'],
    ...
修改gpu_nms.c文件后缀为.cpp
cd $FRCN_ROOT/lib/nms
mv gpu_nms.c gpu_nms.cpp
rm gpu_nms.so
Q6: Check failed: registry.count(type) == 1 (0 vs. 1) Unknown layer type**
错误描述:
I1221 19:43:06.790405 12895 layer_factory.hpp:76] Creating layer proposal
F1221 19:43:06.790431 12895 layer_factory.hpp:80] Check failed: registry.count(type) == 1 (0 vs. 1) Unknown layer type: Python (known types: AbsVal, Accuracy, ArgMax, BNLL, Concat, ContrastiveLoss, Convolution, Data, Deconvolution, Dropout, DummyData, Eltwise, Embed, EuclideanLoss, Exp, Filter, Flatten, HDF5Data, HDF5Output, HingeLoss, Im2col, ImageData, InfogainLoss, InnerProduct, LRN, Log, MVN, MemoryData, MultinomialLogisticLoss, PReLU, Pooling, Power, ROIPooling, ReLU, Reduction, Reshape, SPP, Sigmoid, SigmoidCrossEntropyLoss, Silence, Slice, SmoothL1Loss, Softmax, SoftmaxWithLoss, Split, TanH, Threshold, Tile, WindowData)
*** Check failure stack trace: ***
Aborted (core dumped)解决方案: 将caffe的Makefile.config配置正确
Caffe must be built with support for Python layers!
# In your Makefile.config, make sure to have this line uncommented

WITH_PYTHON_LAYER := 1
修改完成后重新编译
cd $FRCN_ROOT/caffe-fast-rcnn
make clean
make -j
make pycaffe
Q7: ImportError: No module named _caffe**
错误描述:
Traceback (most recent call last):
File “./demo.py”, line 18, in < module>
from fast_rcnn.test import im_detect
File “/home/lijiajun/py-faster-rcnn-blog/tools/../lib/fast_rcnn/test.py”, line 16, in < module>
import caffe
File “/home/lijiajun/py-faster-rcnn-blog/tools/../caffe-fast-rcnn/python/caffe/init.py”, line 1, in < module>
from .pycaffe import Net, SGDSolver
File “/home/lijiajun/py-faster-rcnn-blog/tools/../caffe-fast-rcnn/python/caffe/pycaffe.py”, line 13, in < module>
from ._caffe import Net, SGDSolver
ImportError: No module named _caffe解决方案: 编译pycaffe
cd $FRCN_ROOT/caffe-fast-rcnn
make pycaffe
Q8: tkinter.TclError: no display name and no $DISPLAY environment variable**
错误描述:
Traceback (most recent call last):
File “./demo.py”, line 149, in < module>
demo(net, im_name)
File “./demo.py”, line 98, in demo
vis_detections(im, cls, dets, thresh=CONF_THRESH)
File “./demo.py”, line 47, in vis_detections
fig, ax = plt.subplots(figsize=(12, 12))
File “/usr/lib/pymodules/python2.7/matplotlib/pyplot.py”, line 1046, in subplots
fig = figure(**fig_kw)
File “/usr/lib/pymodules/python2.7/matplotlib/pyplot.py”, line 423, in figure**kwargs)
File “/usr/lib/pymodules/python2.7/matplotlib/backends/backend_tkagg.py”, line 79, in new_figure_manager
return new_figure_manager_given_figure(num, figure)
File “/usr/lib/pymodules/python2.7/matplotlib/backends/backend_tkagg.py”, line 87, in new_figure_manager_given_figure
window = Tk.Tk()
File “/usr/lib/python2.7/lib-tk/Tkinter.py”, line 1767, in __init__
self.tk = _tkinter.create(screenName, baseName, className, interactive, wantobjects, useTk, sync, use)
_tkinter.TclError: no display name and no $DISPLAY environment variable解决方案: 注释需要图形界面的代码
切换到图形界面后在执行脚本。
或者,修改demo.py,将调用函数vis_detections()的代码注释。
Q9: invalid conversion from ‘const int*’ to ‘int*’**
错误描述:
nms/gpu_nms.cpp: In function ‘PyObject* __pyx_pf_3nms_7gpu_nms_gpu_nms(PyObject*, PyArrayObject*, PyObject*, __pyx_t_5numpy_int32_t)’:
nms/gpu_nms.cpp:1593:469: error: invalid conversion from ‘const int*’ to ‘int*’ [-fpermissive]
_nms((&(__Pyx_BufPtrStrided1d(const int , __pyx_pybuffernd_keep.rcbuffer->pybuffer.buf, __pyx_t_10, __pyx_pybuffernd_keep.diminfo[0].strides))), (&__pyx_v_num_out), (&(__Pyx_BufPtrStrided2d(__pyx_t_5numpy_float32_t , __pyx_pybuffernd_sorted_dets.rcbuffer->pybuffer.buf, __pyx_t_12, __pyx_pybuffernd_sorted_dets.diminfo[0].strides, __pyx_t_13, __pyx_pybuffernd_sorted_dets.diminfo[1].strides))), __pyx_v_boxes_num, __pyx_v_boxes_dim, __pyx_t_14, __pyx_v_device_id);
^
In file included from nms/gpu_nms.cpp:253:0:
nms/gpu_nms.hpp:1:6: error: initializing argument 1 of ‘void _nms(int*, int*, const float*, int, int, float, int)’ [-fpermissive]
void _nms(int* keep_out, int* num_out, const float* boxes_host, int boxes_num,int boxes_dim, float nms_overlap_thresh, int device_id);
^
error: command ‘arm-linux-gnueabihf-gcc’ failed with exit status 1
make: * [all] Error 1问题分析:
原因就是C语言编译器允许隐含性的将一个通用指针转换为任意类型的指针,包括const *而C++不允许将const 转换为非const*,所以出错。解决方案:
将出错的函数变量__pyx_t_5numpy_int32_t*,改成int*(见红色字体)。接着,为了保证gpu_nms.cpp不再由gpu_nms.pyx自动生成,需要将setup.py中ext_modules数组下的nms/gpu_nms.pyx改为nms/gpu_nms.cpp。error:
_nms((&(__Pyx_BufPtrStrided1d(__pyx_t_5numpy_int32_t *, __pyx_pybuffernd_keep.rcbuffer->pybuffer.buf, __pyx_t_10, __pyx_pybuffernd_keep.diminfo[0].strides))), (&__pyx_v_num_out), (&(*__Pyx_BufPtrStrided2d(__pyx_t_5numpy_float32_t , __pyx_pybuffernd_sorted_dets.rcbuffer->pybuffer.buf, __pyx_t_12, __pyx_pybuffernd_sorted_dets.diminfo[0].strides, __pyx_t_13, __pyx_pybuffernd_sorted_dets.diminfo[1].strides))), __pyx_v_boxes_num, __pyx_v_boxes_dim, __pyx_t_14, __pyx_v_device_id);
correct:
_nms((&(__Pyx_BufPtrStrided1d(int*, __pyx_pybuffernd_keep.rcbuffer->pybuffer.buf, __pyx_t_10, __pyx_pybuffernd_keep.diminfo[0].strides))), (&__pyx_v_num_out), (&(*__Pyx_BufPtrStrided2d(__pyx_t_5numpy_float32_t , __pyx_pybuffernd_sorted_dets.rcbuffer->pybuffer.buf, __pyx_t_12, __pyx_pybuffernd_sorted_dets.diminfo[0].strides, __pyx_t_13, __pyx_pybuffernd_sorted_dets.diminfo[1].strides))), __pyx_v_boxes_num, __pyx_v_boxes_dim, __pyx_t_14, __pyx_v_device_id);
Q10:Check failed: error == cudaSuccess (8 vs. 0) invalid device function**
错误分析:
GPU too old or Cuda too old. Faster R-CNN的Issue讨论得还比较清楚。
Whenever the CUDA runtime API returns “Invalid Device Function”, it means you are using code which wasn’t built for the architecture you are trying to run it on (and doesn’t have a JIT path).解决方案请参考:
Q11:Check failed: error == cudaSuccess (8 vs. 0) invalid device function**
错误描述:
Error using textread (line 165)
File not found.
Error in VOCevaldet (line 30)
[ids,confidence,b1,b2,b3,b4]=textread(sprintf(VOCopts.detrespath,id,cls),’%s %f %f %f %f %f’);
Error in voc_eval>voc_eval_cls (line 36)
[recall, prec, ap] = VOCevaldet(VOCopts, comp_id, cls, true);
Error in voc_eval (line 8)
res(i) = voc_eval_cls(cls, VOCopts, comp_id, output_dir, rm_res);
165 error(message(‘MATLAB:textread:FileNotFound’));解决方案:
- In VOCCode, inside the VOCdevkit folder, there will be a file called VOCinit.m
- In that, on around line 31, change the VOC.testset to ‘test’ instead of ‘val’.
2016年2月26日更新
2016年11月22日更新
Q12:Check failed: error == cudaSuccess (8 vs. 0) invalid device function**
错误描述:
python setup.py build_ext –inplace
Traceback (most recent call last):
File “setup.py”, line 57, in
CUDA = locate_cuda()
File “setup.py”, line 54, in locate_cuda
raise EnvironmentError(‘The CUDA %s path could not be located in %s’ % (k, v))
EnvironmentError: The CUDA lib64 path could not be located in /usr/local/cuda/lib64
make: * [all] Error 1解决方案:
- 1 修改lib/setup.py中cudaconfig元组中lib64的值, ‘lib64’->’lib’。因为设备不支持64位运算,所以cuda缺少lib64文件。
- 2 显存不够大,适当增大存储(sunyiyou9提供)。
reference:
1. Github issues1
2. Github issues2
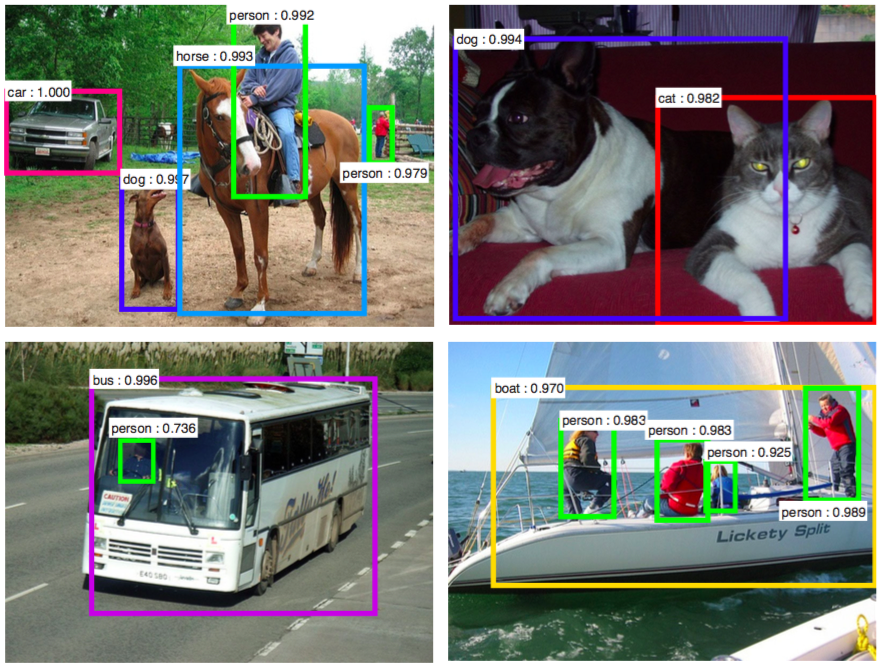
最终效果图


 252
252

 被折叠的 条评论
为什么被折叠?
被折叠的 条评论
为什么被折叠?
 到【灌水乐园】发言


