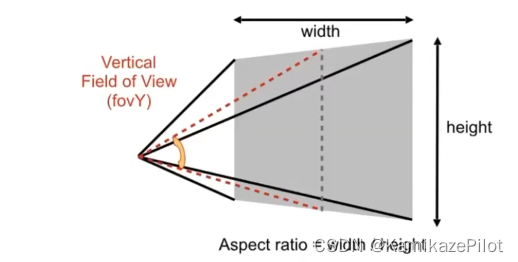
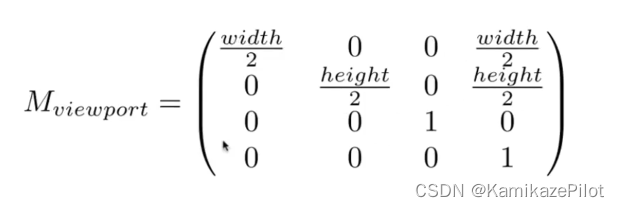
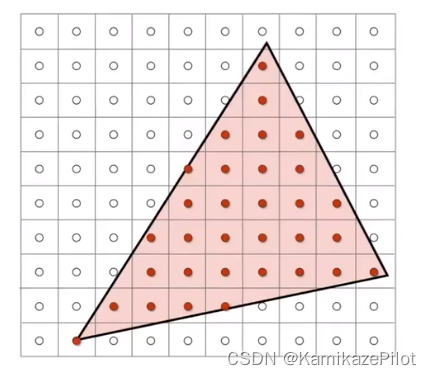
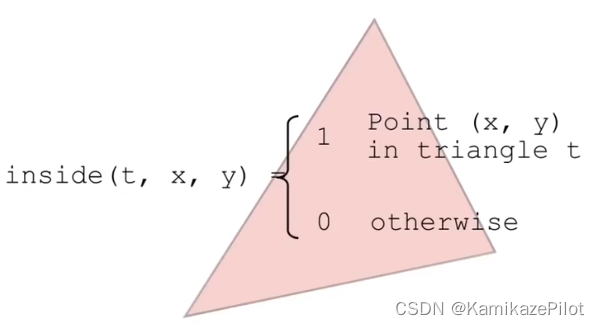
光栅化渲染器是一种基于图形学的渲染方式,它通过将三维模型转换为二维图像进行渲染。下面是一个简单的光栅化渲染器的C++实现示例:
```cpp
#include <iostream>
#include <fstream>
#include <cstring>
#include <cmath>
using namespace std;
// 定义三维向量结构体
struct Vec3f {
float x, y, z;
// 向量加法
Vec3f operator+(const Vec3f& v) const {
return Vec3f(x + v.x, y + v.y, z + v.z);
}
// 向量减法
Vec3f operator-(const Vec3f& v) const {
return Vec3f(x - v.x, y - v.y, z - v.z);
}
// 向量点乘
float operator*(const Vec3f& v) const {
return x * v.x + y * v.y + z * v.z;
}
// 向量叉乘
Vec3f operator^(const Vec3f& v) const {
return Vec3f(y * v.z - z * v.y, z * v.x - x * v.z, x * v.y - y * v.x);
}
// 向量数乘
Vec3f operator*(const float& f) const {
return Vec3f(x * f, y * f, z * f);
}
// 向量模长
float length() const {
return sqrtf(x * x + y * y + z * z);
}
// 向量归一化
void normalize() {
float len = length();
x /= len;
y /= len;
z /= len;
}
};
// 定义三角形结构体
struct Triangle {
Vec3f v1, v2, v3;
};
// 定义光线结构体
struct Ray {
Vec3f origin; // 光线起点
Vec3f direction; // 光线方向
};
// 定义颜色结构体
struct Color {
float r, g, b;
// 颜色加法
Color operator+(const Color& c) const {
return Color(r + c.r, g + c.g, b + c.b);
}
// 颜色数乘
Color operator*(const float& f) const {
return Color(r * f, g * f, b * f);
}
// 颜色乘法
Color operator*(const Color& c) const {
return Color(r * c.r, g * c.g, b * c.b);
}
};
// 定义相机结构体
struct Camera {
Vec3f position; // 相机位置
Vec3f direction; // 相机方向
float fov; // 视场角
};
// 定义画布结构体
struct Canvas {
int width, height; // 画布宽度和高度
Color* pixels; // 像素数组
// 获取指定位置的像素颜色
Color& getPixel(int x, int y) const {
return pixels[y * width + x];
}
};
// 定义场景结构体
struct Scene {
Triangle* triangles; // 三角形数组
int numTriangles; // 三角形数量
Color ambientLight; // 环境光颜色
Vec3f lightPosition; // 光源位置
Color lightColor; // 光源颜色
};
// 计算光线和三角形的交点
bool intersect(const Ray& ray, const Triangle& triangle, Vec3f& intersection) {
Vec3f edge1 = triangle.v2 - triangle.v1;
Vec3f edge2 = triangle.v3 - triangle.v1;
Vec3f h = ray.direction ^ edge2;
float a = edge1 * h;
if (a > -0.00001f && a < 0.00001f) {
return false;
}
float f = 1.0f / a;
Vec3f s = ray.origin - triangle.v1;
float u = f * (s * h);
if (u < 0.0f || u > 1.0f) {
return false;
}
Vec3f q = s ^ edge1;
float v = f * (ray.direction * q);
if (v < 0.0f || u + v > 1.0f) {
return false;
}
float t = f * (edge2 * q);
if (t > 0.00001f) {
intersection = ray.origin + ray.direction * t;
return true;
}
return false;
}
// 计算光线和场景的交点
bool intersect(const Ray& ray, const Scene& scene, Vec3f& intersection) {
bool intersected = false;
float nearestDistance = INFINITY;
for (int i = 0; i < scene.numTriangles; i++) {
Vec3f intsec;
if (intersect(ray, scene.triangles[i], intsec)) {
float distance = (intsec - ray.origin).length();
if (distance < nearestDistance) {
nearestDistance = distance;
intersection = intsec;
intersected = true;
}
}
}
return intersected;
}
// 计算点在三角形上的投影颜色
Color shade(const Vec3f& point, const Triangle& triangle, const Scene& scene) {
Vec3f normal = (triangle.v3 - triangle.v1) ^ (triangle.v2 - triangle.v1);
normal.normalize();
Vec3f toLight = scene.lightPosition - point;
toLight.normalize();
float diffuse = normal * toLight;
diffuse = max(diffuse, 0.0f);
Color color = scene.lightColor * diffuse;
color = color + scene.ambientLight;
return color;
}
// 渲染场景
void render(const Scene& scene, const Camera& camera, const Canvas& canvas) {
float fovScale = tanf(camera.fov / 2.0f * M_PI / 180.0f);
for (int y = 0; y < canvas.height; y++) {
for (int x = 0; x < canvas.width; x++) {
float px = (2.0f * ((x + 0.5f) / canvas.width) - 1.0f) * fovScale;
float py = (1.0f - 2.0f * ((y + 0.5f) / canvas.height)) * fovScale;
Vec3f direction = camera.direction + Vec3f(px, py, 1.0f);
direction.normalize();
Ray ray = { camera.position, direction };
Vec3f intersection;
if (intersect(ray, scene, intersection)) {
Color color = shade(intersection, scene.triangles[0], scene);
canvas.getPixel(x, y) = color;
}
}
}
}
// 保存渲染结果到文件
void saveCanvas(const Canvas& canvas, const char* filename) {
ofstream file(filename);
file << "P3\n" << canvas.width << ' ' << canvas.height << "\n255\n";
for (int y = 0; y < canvas.height; y++) {
for (int x = 0; x < canvas.width; x++) {
Color color = canvas.getPixel(x, y);
file << (int)(color.r * 255.0f) << ' '
<< (int)(color.g * 255.0f) << ' '
<< (int)(color.b * 255.0f) << '\n';
}
}
file.close();
}
int main() {
// 定义场景
Scene scene;
scene.numTriangles = 1;
scene.triangles = new Triangle[scene.numTriangles];
scene.triangles[0] = { { -1.0f, -1.0f, 0.0f }, { 1.0f, -1.0f, 0.0f }, { 0.0f, 1.0f, 0.0f } };
scene.ambientLight = { 0.1f, 0.1f, 0.1f };
scene.lightPosition = { 0.0f, 0.0f, -10.0f };
scene.lightColor = { 1.0f, 1.0f, 1.0f };
// 定义相机
Camera camera;
camera.position = { 0.0f, 0.0f, -5.0f };
camera.direction = { 0.0f, 0.0f, 1.0f };
camera.fov = 60.0f;
// 定义画布
Canvas canvas;
canvas.width = 640;
canvas.height = 480;
canvas.pixels = new Color[canvas.width * canvas.height];
// 渲染场景
render(scene, camera, canvas);
// 保存渲染结果到文件
saveCanvas(canvas, "output.ppm");
// 释放内存
delete[] scene.triangles;
delete[] canvas.pixels;
return 0;
}
```
这个渲染器实现了一个简单的场景渲染,包含一个三角形和一个白色光源。它使用了光线追踪算法进行渲染,可以在输出文件中看到渲染结果。不过,这个渲染器还有很多可以优化的地方,比如增加阴影、反射、抗锯齿等功能。


 1293
1293


 被折叠的 条评论
为什么被折叠?


