


图像像素、属性获取:
OpenCV读取图像后,可以通过图像的像素坐标来对图像像素值进行访问。我们知道OpenCV读取彩色图像的通道顺序为BGR排序:
获取图像坐标(100, 100)的像素值:
import cv2

img = cv2.imread('./data/messi5.jpg')

# get the value from coordinate
pixel_value = img[100, 100]
print('---------print the pixel_value---------')
print(pixel_value)
只获取图像坐标(100, 100) b b b通道的像素值:
# accessing only the blue pixel
pixel_blue = img[100, 100, 0]

print('---------print the pixel_blue---------')
print(pixel_blue)
g g g、 r r r通道获取类似,分别为 i m g [ 100 , 100 , 1 ] img[100, 100, 1] img[100,100,1]和 i m g [ 100 , 100 , 2 ] img[100, 100, 2] img[100,100,2]。
当然,可以修改图像的像素值:
# modify the pixel values
img[100, 100] = [255, 255, 255]
print('---------modify the pixel_blue---------')
print(img[100, 100])
读取单独像素时,采用OpenCV函数坐标形式获取较慢,推荐使用Numpy中的item()与itemset()函数来对图像像素进行相关的操作比较快速。
pixel_blue = img.item(100, 100, 2)

print('---------print the pixel_blue---------')
print(pixel_blue)

img.itemset((100, 100, 2), 250)
print('---------modify the pixel_blue---------')
print(img.item(100, 100, 2))
获取图像的宽、高、深度、像素值类型属性:
i m g . s h a p e → ( h e i g h t 、 w i d t h 、 d e p t h ) img.shape\rightarrow(height、width、depth) img.shape→(height、width、depth)
print(img.shape) # img.shape --> (height, width, depth)
如果是灰度图像,img.shape只返回图像的宽、高,因此可以用此方法来鉴别加载的图像是灰度图像还是彩色图像。
i m g . d t y p e → ( 像 素 值 类 型 ) img.dtype\rightarrow(像素值类型) img.dtype→(像素值类型)
i m g . s i z e → ( h e i g h t ∗ w i d t h ∗ c h a n n e l s ) 获 取 图 像 所 有 的 个 数 img.size\rightarrow(height * width * channels)获取图像所有的个数 img.size→(height∗width∗channels)获取图像所有的个数
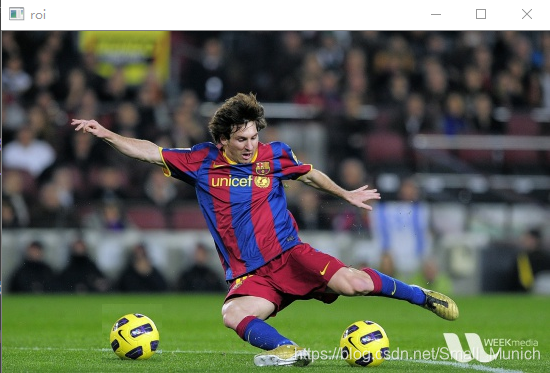
图像ROI区域操作:
ROI区域是你需要处理特定区域的图像,例如图像中检测眼睛,可以采取的策略是先进行行人检测,在行人检测的基础上进行人脸检测,在人脸检测的区域的搜索眼睛。通过缩小感兴趣区域从而提高准确性。ROI区域的获取在OpenCV-Python中通过Numpy数组赋予坐标即可获取:
import cv2

img = cv2.imread('./data/messi5.jpg')

ball = img[280:340, 330:390]
img[273:333, 100:160] = ball

cv2.imshow('roi', img)
cv2.waitKey(0)
cv2.destroyAllWindows()
看一下对特定ROI区域增加一个足球覆盖:
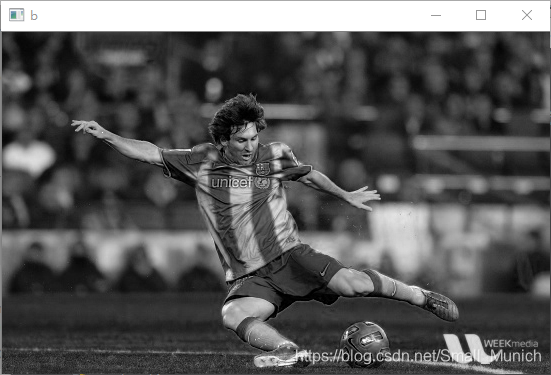
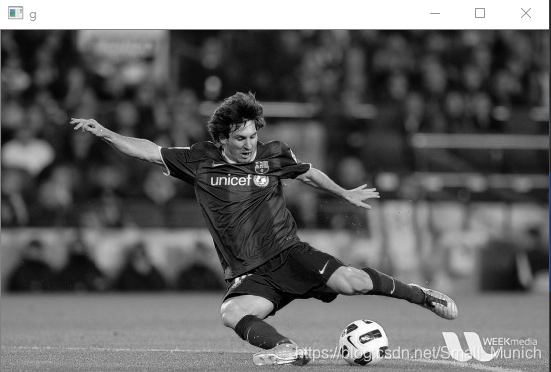
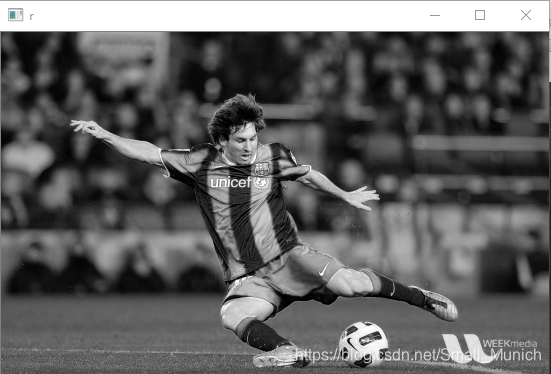
图像通道分离、合并操作:
彩色图像通常是3通道,cv2.split()函数就是将彩色图像的通道进行分开,cv2.merge()就是将分离后的通道合并在一起。
# image channels split
b, g, r = cv2.split(img)
# image merge
img_m = cv2.merge((b,g,r))
当然,此处多啰嗦一下:OpenCV中cv2.split()函数耗时较大,建议对图像像素值操作、或者对通道分离后处理尽量使用Numpy来进行处理。例如获取img的各个通道:
b = img[:, :, 0]
g = img[:, :, 1]
r = img[:, :, 2]
OpenCV的cv2.split()函数与Numpy耗时分别为:
'''
OpenCV cv2.split() time:  0.000354
Numpy array time:  4.7e-05
'''
彩色图像b、g、r通道图:
图像Padding方法(数据增广函数):
cv2.copyMakeBorder()函数功能强大,刚刚接触到此函数是由于深度学习里面针对数据增广操作,该函数主要功能是能够对图像周围进行扩充。
def copyMakeBorder(src, top, bottom, left, right, borderType, dst=None, value=None):
参数解析:
src:  #输入图像;
top, bottom, left, right:  #边界框宽度,以对应方向像素数为单位;
borderType: #边界填充方式,目前支持如下几种;
     cv2.BORDER_CONSTANT # 添加一个固定的彩色边框,该值应该作为下一个参数给出。
     cv2.BORDER_REFLECT  # 边框将边界像素镜像反射,就像这个示例: fedcba | abcdefgh | hgfedcbaabcdef
     cv2.BORDER_REFLECT_101 & cv2.BORDER_DEFAULT :
     # OpenCV默认的边界处理方式,同上,只是轻微的改变,填充示例如下:gfedcb| abcdefgh | gfedcba
     cv2.BORDER_REPLICATE  # 最后一个元素值被复制,就像如下示例:aaaaaa | abcdefgh | hhhhhhh
     cv2.BORDER_WARP # 无法解释,填充方式如下: cdefgh | abcdefgh | abcdefg
value: #当borderType类型为cv2.BORDER_CONSTANT时候,填充的像素值参数;
参数top & bottom & left & right 位置图像显示:
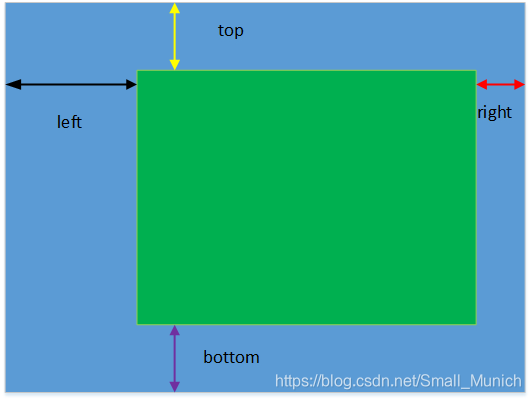
如上图所示:蓝色区域为函数cv2.copyMakeBorder()填充的结果,绿色为原始图像,那么参数top & bottom & left & right 对应的大小位置如上图所示。
示例代码:
import cv2
from matplotlib import pyplot as plt

BLUE = [0, 0, 255]

img1 = cv2.imread('./data/opencv_logo.png')

replicate  = cv2.copyMakeBorder(img1, 20, 10, 10, 10, cv2.BORDER_REPLICATE)
reflect    = cv2.copyMakeBorder(img1, 10, 10, 50, 10, cv2.BORDER_REFLECT)
reflect101 = cv2.copyMakeBorder(img1, 10, 5, 10, 10, cv2.BORDER_REFLECT_101)
wrap       = cv2.copyMakeBorder(img1, 10, 10, 10, 40, cv2.BORDER_WRAP)
constant   = cv2.copyMakeBorder(img1, 30, 20, 50, 60, cv2.BORDER_CONSTANT, value=BLUE)

plt.subplot(231),plt.imshow(img1,'gray'), plt.title('ORIGINAL')
plt.subplot(232),plt.imshow(replicate,'gray'), plt.title('REPLICATE')
plt.subplot(233),plt.imshow(reflect,'gray'), plt.title('REFLECT')
plt.subplot(234),plt.imshow(reflect101,'gray'), plt.title('REFLECT_101')
plt.subplot(235),plt.imshow(wrap,'gray'), plt.title('WRAP')
plt.subplot(236),plt.imshow(constant,'gray'), plt.title('CONSTANT')

plt.show()
实验图像边界填充结果:


 22万+
22万+

 被折叠的 条评论
为什么被折叠?
被折叠的 条评论
为什么被折叠?
 到【灌水乐园】发言


