


原理图

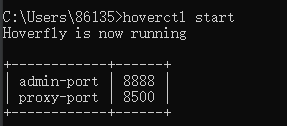
安装 hoverfly
Spring Initializr

新建真实服务
package com.example.hoverflydemo;

import java.util.Date;
import java.util.UUID;
import org.springframework.boot.SpringApplication;
import org.springframework.boot.autoconfigure.SpringBootApplication;
import org.springframework.web.bind.annotation.RequestMapping;
import org.springframework.web.bind.annotation.RestController;

@SpringBootApplication
public class HoverflyActualServiceApplication {

    public static void main(String[] args) {
        SpringApplication.run(HoverflyActualServiceApplication.class, args);
    }
}

@RestController
class MyRestController {

    @RequestMapping(value = "/service/hoverfly")
    public HoverflyServiceResponse getSampleResponse() {
        System.out.println("Inside HoverflyActualServiceApplication::getSampleResponse()");
        return new HoverflyServiceResponse("returned value from HoverflyActualServiceApplication", new Date().toString(), UUID.randomUUID().toString());
    }
}

class HoverflyServiceResponse {
    private String message;
    private String responseTime;
    private String transactionid;

    public HoverflyServiceResponse(String message, String responseTime, String transactionid) {
        super();
        this.message = message;
        this.responseTime = responseTime;
        this.transactionid = transactionid;
    }

    public String getMessage() {
        return message;
    }

    public void setMessage(String message) {
        this.message = message;
    }

    public String getResponseTime() {
        return responseTime;
    }

    public void setResponseTime(String responseTime) {
        this.responseTime = responseTime;
    }

    public String getTransactionid() {
        return transactionid;
    }

    public void setTransactionid(String transactionid) {
        this.transactionid = transactionid;
    }
}
更改运行端口:
server.port=9080
浏览器访问:

创建 Proxy 服务
1.和创建真实服务一样的步骤,创建一个 proxy 服务。
2.新建 `HoverflyActualServiceClientApplication 类文件:
package com.example.hoverflyactualserviceclient;

import java.net.InetSocketAddress;
import java.net.Proxy;
import java.net.Proxy.Type;

import org.springframework.beans.factory.annotation.Autowired;
import org.springframework.boot.SpringApplication;
import org.springframework.boot.autoconfigure.SpringBootApplication;
import org.springframework.context.annotation.Bean;
import org.springframework.core.ParameterizedTypeReference;
import org.springframework.http.HttpMethod;
import org.springframework.http.client.SimpleClientHttpRequestFactory;
import org.springframework.web.bind.annotation.RequestMapping;
import org.springframework.web.bind.annotation.RestController;
import org.springframework.web.client.RestTemplate;

@SpringBootApplication
public class HoverflyActualServiceClientApplication {

    public static void main(String[] args) {
        SpringApplication.run(HoverflyActualServiceClientApplication.class, args);
    }
}

@RestController
class TestController {

    private static final int HOVERFLY_PORT = 8500;
    private static final String HOVERFLY_HOST = "localhost";
    private static final String PROXY = "proxy";

    @RequestMapping("/invoke")
    public String invoke() {
        System.out.println("inside TestController::invoke()");
        String url = "http://localhost:9080/service/hoverfly";
        String response = restTemplate.exchange(url, HttpMethod.GET, null,
                new ParameterizedTypeReference<String>() {
                }).getBody();
        System.out.println("Actual Response : " + response);
        return response;
    }

    @Bean
    public RestTemplate restTemplate() {
        String mode = System.getProperty("mode");
        if (!PROXY.equals(mode)){
            return new RestTemplate();
        }

        SimpleClientHttpRequestFactory requestFactory = new SimpleClientHttpRequestFactory();
        Proxy proxy = new Proxy(Type.HTTP, new InetSocketAddress(HOVERFLY_HOST, HOVERFLY_PORT));
        requestFactory.setProxy(proxy);

        return new RestTemplate(requestFactory);
    }

    @Autowired
    RestTemplate restTemplate;
}
设置运行端口:
server.port=8080
运行参数增加 mode:

启动 Hoverfly
设置:

访问 http://localhost:8080/invoke 多次,然后浏览器访问:


 1131
1131


 被折叠的 条评论
为什么被折叠?
被折叠的 条评论
为什么被折叠?
 到【灌水乐园】发言


