


Install the ZED Python API | Stereolabs
1、下载对应的ZED SDK
官方 ZED SDK 4.0 - Download | Stereolabs

2、ZED SDK安装
chmod +x ZED_SDK_Ubuntu18_cuda11.0_v3.2.2.run
./ZED_SDK_Ubuntu18_cuda11.0_v3.2.2.run
# ZED2环境配置
(tensorflow) zxh@zxh-Precision-3640-Tower:~/Downloads$ chmod +x ZED_SDK_Ubuntu18_cuda11.0_v3.5.6.run
(tensorflow) zxh@zxh-Precision-3640-Tower:~/Downloads$ ./ZED_SDK_Ubuntu18_cuda11.0_v3.5.6.run
Verifying archive integrity... 100% All good.
Uncompressing 'ZED camera SDK by Stereolabs' 100%
Ubuntu version 18.04 detected. OK
To continue you have to accept the EULA. Accept [Y/n] ?y
Installing...
Installation path: /usr/local/zed
[sudo] password for zxh:
Checking CUDA version...
OK: Found CUDA 11.0
Detected nvidia driver 495.46, capable of running CUDA 11.5 (need 11.0)
Do you want to install the static version of the ZED SDK (AI module will still requires libsl_ai.so) [Y/n] ?y
Do you want to install the Object Detection module (recommended), cuDNN 8.0 and TensorRT 7.1 will be installed [Y/n] ?n
Install samples (recommended) [Y/n] ?y
Installation path: /usr/local/zed/samples/
Do you want to auto-install dependencies (recommended) ? following packet will be installed via the package manager : libjpeg-turbo8 libturbojpeg libusb-1.0 libopenblas-dev libarchive-dev libv4l-0 curl unzip libpng16-16 libpng-dev libturbojpeg0-dev python3-dev python3-pip python3-setuptools libglew-dev freeglut3-dev qt5-default libqt5opengl5 libqt5svg5 [Y/n] ?y
Do you want to install the Python API (recommended) [Y/n] ?y安装后可能出现如下错误: 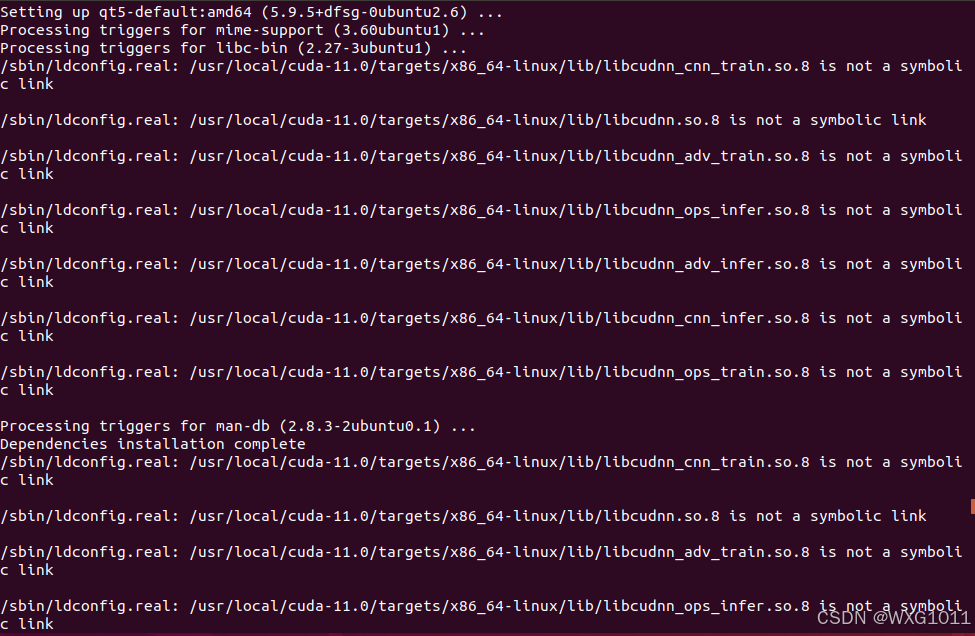
解决方法:
这个问题是符号链接导致的,对报错的链接重新定位即可。
cd /usr/local/cuda-11.0/targets/x86_64-linux/lib/
ls
sudo ln -sf /usr/local/cuda-11.0/targets/x86_64-linux/lib/libcudnn_cnn_train.so.8.0.5 /usr/local/cuda-11.0/targets/x86_64-linux/lib/libcudnn_cnn_train.so.8
sudo ln -sf /usr/local/cuda-11.0/targets/x86_64-linux/lib/libcudnn.so.8.0.5 /usr/local/cuda-11.0/targets/x86_64-linux/lib/libcudnn.so.8
sudo ln -sf /usr/local/cuda-11.0/targets/x86_64-linux/lib/libcudnn_adv_train.so.8.0.5 /usr/local/cuda-11.0/targets/x86_64-linux/lib/libcudnn_adv_train.so.8
sudo ln -sf /usr/local/cuda-11.0/targets/x86_64-linux/lib/libcudnn_ops_infer.so.8.0.5 /usr/local/cuda-11.0/targets/x86_64-linux/lib/libcudnn_ops_infer.so.8
sudo ln -sf /usr/local/cuda-11.0/targets/x86_64-linux/lib/libcudnn_adv_infer.so.8.0.5 /usr/local/cuda-11.0/targets/x86_64-linux/lib/libcudnn_adv_infer.so.8
sudo ln -sf /usr/local/cuda-11.0/targets/x86_64-linux/lib/libcudnn_cnn_infer.so.8.0.5 /usr/local/cuda-11.0/targets/x86_64-linux/lib/libcudnn_cnn_infer.so.8
sudo ln -sf /usr/local/cuda-11.0/targets/x86_64-linux/lib/libcudnn_ops_train.so.8.0.5 /usr/local/cuda-11.0/targets/x86_64-linux/lib/libcudnn_ops_train.so.8
全部修改后,执行
sudo ldconfig若无输出,则链接都重新定位。
3、检查是否安装成功
# ZED2环境测试
(tensorflow) zxh@zxh-Precision-3640-Tower:~/Chengdu$ cd /usr/local/zed/tools/
(tensorflow) zxh@zxh-Precision-3640-Tower:/usr/local/zed/tools$ ls
ZED_Calibration   ZED_Diagnostic  ZEDfu              ZED_SVO_Editor
ZED_Depth_Viewer  ZED_Explorer    ZED_Sensor_Viewer
(tensorflow) zxh@zxh-Precision-3640-Tower:/usr/local/zed/tools$ ./ZED_Depth_Viewer
测试图:

但import pyzed时,提示No module named 'pyzed',可能是因为未成功安装ZED python API,重新安装ZED python API即可。
python
import pyzed.sl as sl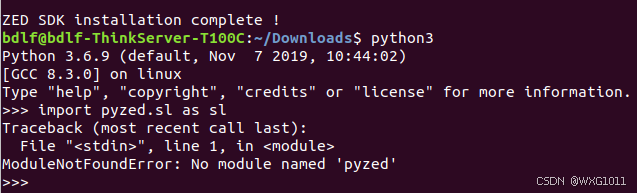
踩坑记录:
1、先安装了ZED SDK 3.5.6,import pyzed成功,但import pyzed.sl失败,显示illegal instructions,故打算卸载ZED SDK 3.5.6,重新安装3.2.2。
若安装过不同版本的ZED SDK,则可能会导致模块导入失败,需要全部卸载。
#/usr/local/zed 这个目录全部删掉
sudo rm -rf zed
pip3 uninstall pyzed
pip uninstall pyzed
可以通过sudo find -name zed(zed sdk pyzed)等关键词查询把以前安装过的全部删除干净
2、ZED python API安装失败
在安装ZED SDK的过程中,可能因为网络问题,ZED python API安装失败。
解决方法:
cd /usr/local/zed/
python get_python_api.py
但还是报错:

可以先点击链接下载,然后再pip安装
pip install pyzed-3.5-cp36-cp36m-linux_×86_64.whl3、有时在安装过程中出现依赖包安装失败的问题,建议更换源。
# 备份源文件
sudo cp /etc/apt/sources.list /etc/apt/sources.list.bak
# 增加以下源文件
deb http://mirrors.aliyun.com/ubuntu/ bionic main restricted universe multiverse
deb http://mirrors.aliyun.com/ubuntu/ bionic-security main restricted universe multiverse
deb http://mirrors.aliyun.com/ubuntu/bionic-updates main restricted universe multiverse
deb http://mirrors.aliyun.com/ubuntu/ bionic-proposed main restricted universe multiverse
deb http://mirrors.aliyun.com/ubuntu/bionic-backports main restricted universe multiverse
deb-src http://mirrors.aliyun.com/ubuntu/ bionic main restricted universe multiverse
deb-src http://mirrors.aliyun.com/ubuntu/ bionic-security main restricted universe multiverse
deb-src http://mirrors.aliyun.com/ubuntu/ bionic-updates main restricted universe multiverse
deb-src http://mirrors.aliyun.com/ubuntu/bionic-proposed main restricted universe multiverse
deb-src http://mirrors.aliyun.com/ubuntu/ bionic-backports main restricted universe multiverse
# 更新源
sudo apt-get update
# 慎用!慎用!慎用!
# 升级软件,有的博文推荐使用此命令,但此命令慎用,会导致内核升级,无法开机,
sudo apt-get upgrade参考链接 <ZED相机开发> jetsonnano linux ubuntu 安装ZED SDK3.6.2_SHU_RYE的博客-CSDN博客


 1787
1787

 被折叠的 条评论
为什么被折叠?
被折叠的 条评论
为什么被折叠?
 到【灌水乐园】发言


