


目录
前言
在学习了一个学期的unity3D游戏设计课程后,已初步掌握了unity3D游戏设计的设计流程、具体游戏实现以及相关的游戏建模。在学习的过程中,我们已经掌握了MVC模型以及带有Action的模型,它们都是进行游戏设计与实现过程中常见的游戏设计模型。其中,利用该模型,我也完成了相应的游戏实例,比如魔鬼与牧师游戏的MVC版本以及动作分离版本,还有打飞碟和射击游戏的实现。在这一个过程中,加深了我对游戏模型的认识。
而在3D游戏设计课程的结课大作业中,我将会尝试着使用一个新的游戏设计模型——感知、思考、行为模型,来编写一个人机坦克对战的小游戏。
我们首先来看一些游戏的视频效果吧:人机坦克对战演示视频
游戏的仓库地址为:github仓库地址
人机坦克对战建模——感知、思考、行为模型
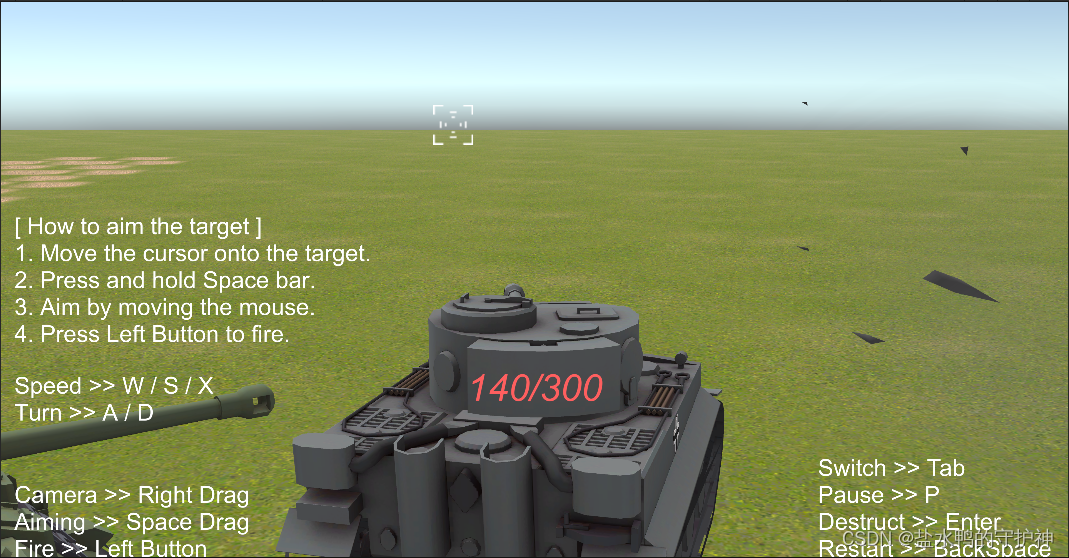
感知
在人机坦克大战游戏中,AI坦克通过视觉感知来获取导航信息。然而,由于存在障碍物的阻挡,这限制了AI坦克的行动,使其不会盲目地朝向玩家涌去。这种限制增加了游戏的挑战和可玩性。此外,AI坦克无法实时瞄准玩家坦克,从而要求玩家坦克在游戏中采取更加策略性的行动。
当AI坦克感知到游戏世界时,它会依靠视觉感知来获取导航信息。通过扫描视野范围内的环境,AI坦克能够识别出地形、障碍物以及玩家的位置。然而,这并不意味着AI坦克能够直接冲向玩家。相反,由于有障碍物的存在,AI坦克需要进行路径规划和导航,以避免碰撞或受阻。
AI坦克会分析感知到的导航信息,并根据预先定义的策略和算法来做出决策。它会考虑到障碍物的位置和形状,以及玩家的相对位置。基于这些信息,AI坦克会选择最佳的路径来接近玩家,同时尽量避开障碍物。
此外,AI坦克并不能实时瞄准玩家。这意味着它不能准确地跟踪玩家的位置和移动,增加了游戏的不确定性和挑战性。玩家需要巧妙地运用战术和策略,以躲避AI坦克的攻击并寻找机会反击。
通过这种感知过程,AI坦克在游戏中表现出更加智能和有策略的行为。玩家需要面对AI坦克的导航限制和瞄准能力的不足,从而提高游戏的可玩性和挑战性。
思考
AI坦克会分析感知到的导航信息,包括地形、障碍物和玩家的位置。它会评估障碍物对路径的影响,考虑到避免碰撞和受阻的因素。AI坦克会计算最佳路径以接近玩家,同时尽可能避开障碍物。它可能会使用路径规划算法(如A*算法)来找到最短和最安全的路径。而在这里主要使用了Unity自带的寻路组件"Navigation"进行“思考”寻路。
行为
AI坦克会根据思考的结果决定移动方向和速度,以沿着最佳路径前进。当遇到障碍物时,它会调整移动方向,选择绕过障碍物的路径。AI坦克的行动可能会受到策略和算法的约束,以避免陷入困境或采取不理想的行为。如果玩家位置发生变化,AI坦克可能会重新评估导航信息并调整行为。
在游戏中,每个AI坦克都具备发射子弹的能力。然而,为了保持游戏的平衡和可玩性,AI坦克不能连续不断地发射子弹,否则游戏将失去挑战。因此,为了限制子弹的发射频率,每个AI坦克会在一段时间后准备好下一次射击。
同时,游戏中的地形具有凹凸不平的特点,这会影响子弹的轨迹。当子弹被发射出去时,它可能会受到地形的影响而产生一定的偏差。这意味着玩家和AI坦克需要在考虑地形因素的基础上,调整瞄准和防御策略。
因此,在游戏中,AI坦克通过控制子弹发射的间隔时间来限制其射击频率,以保持游戏的平衡和玩法的多样性。同时,地形的凹凸不平性也增加了战斗的复杂性,使得子弹的轨迹不完全可控,需要玩家和AI坦克在战斗中做出更加精准的判断和决策。这样的设计考虑了游戏的挑战性和可玩性,使得玩家能够享受到策略性和战术性的对战体验。
资源包导入
Kawaii Tank模型导入
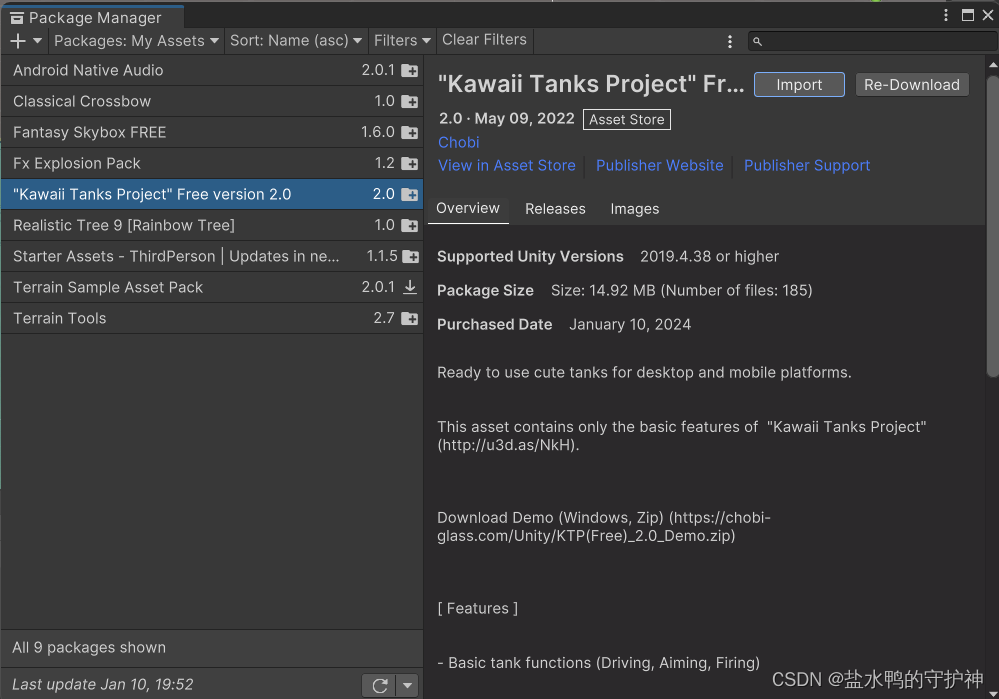
在本次游戏的设计实现中,我们主要利用了unity资源商店的kawaii Tank模型。
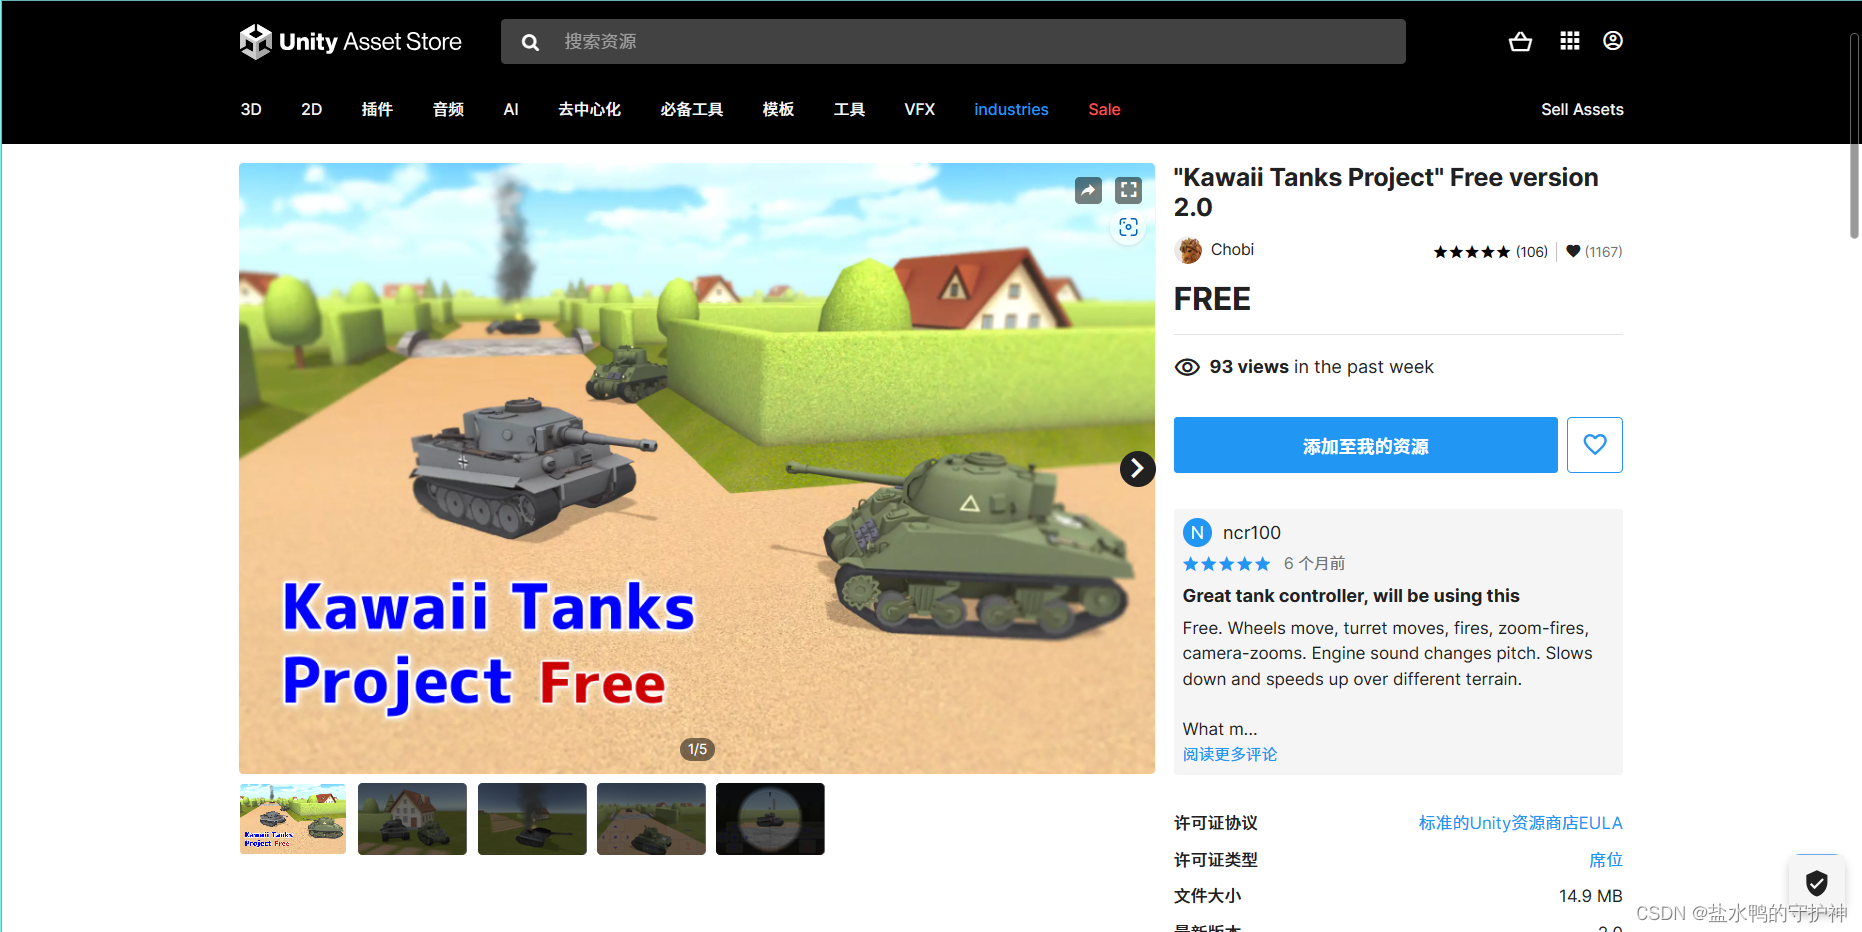
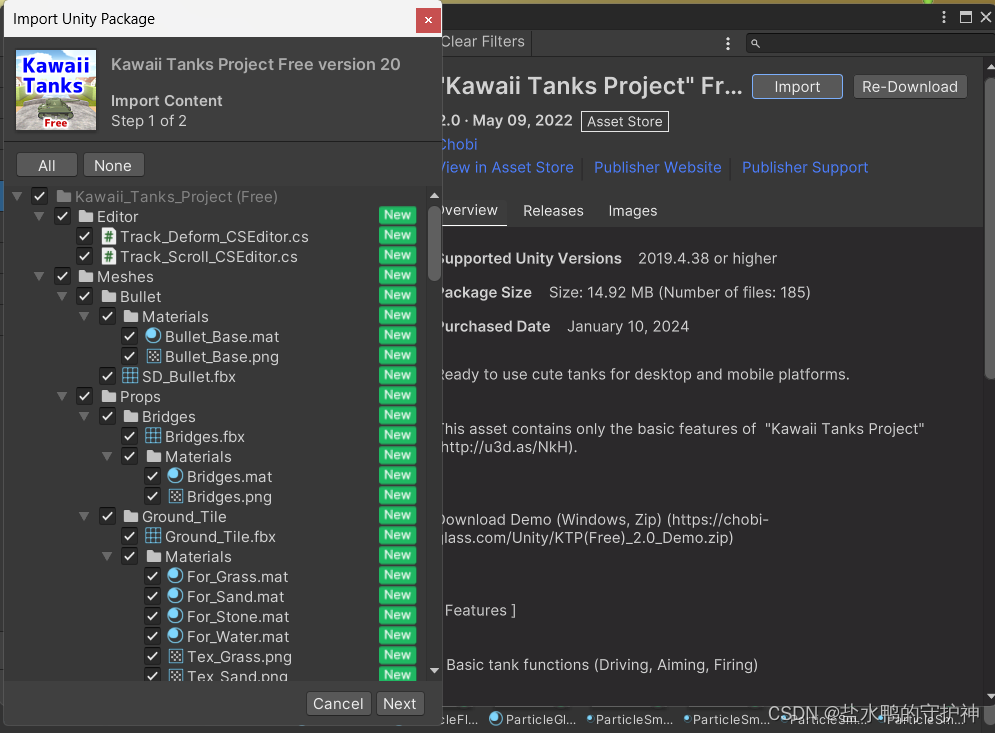
因此,我们首先需要在我们的游戏项目中导入这一个资源包。我们首先需要在资源商店中搜索kawaii Tank,然后选取这一个Free的资源,然后点击添加至我的资源中,随后选择在unity中打开,并且选择download将资源下载,随后点击导入即可。

标准资源包Assets
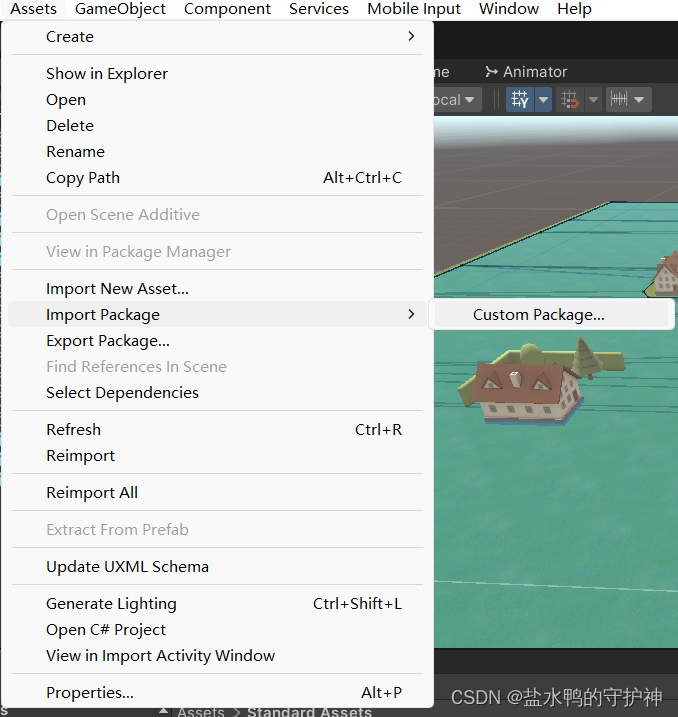
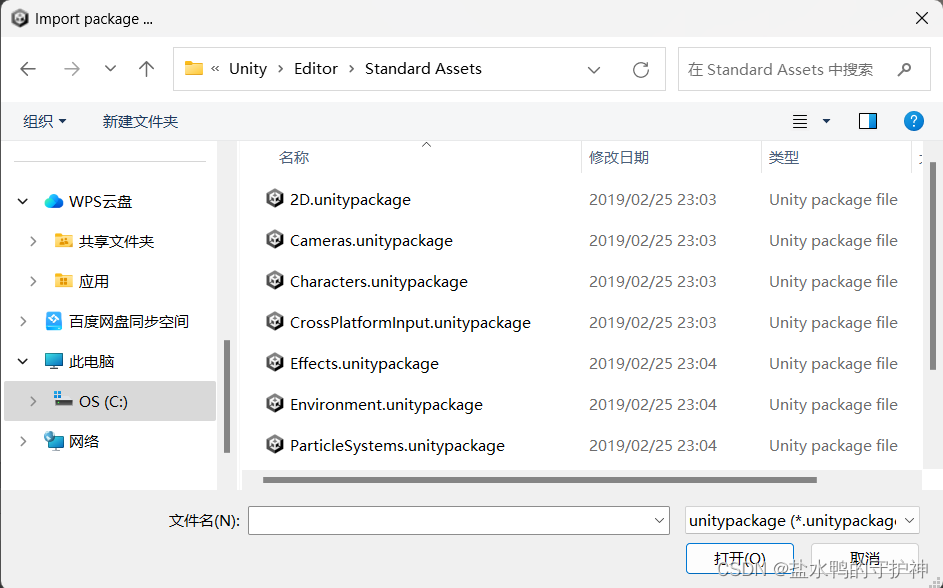
随后,我们需要导入Unity的标准Assets,我们首先在unity官方网站中下载standard Assets,然后通过Assets—import Package—Custom Package将标准资源包Assets导入。
游戏场景布置
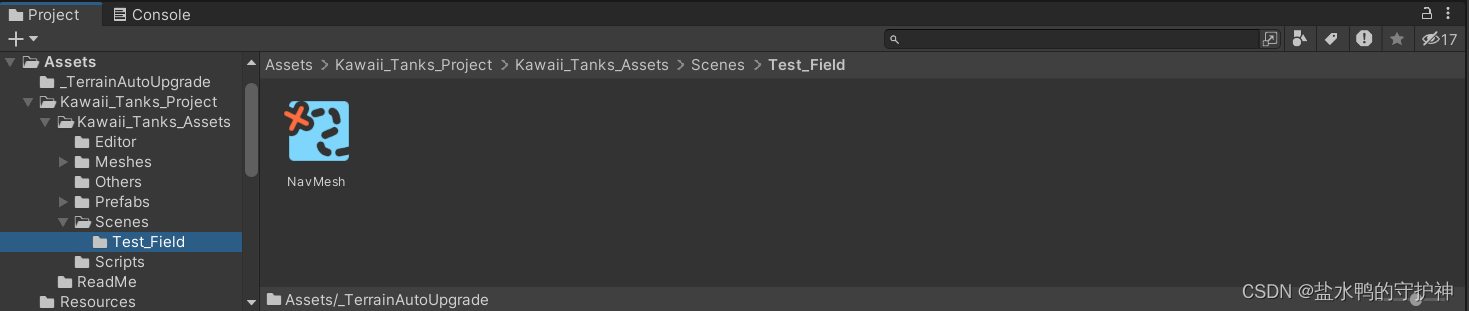
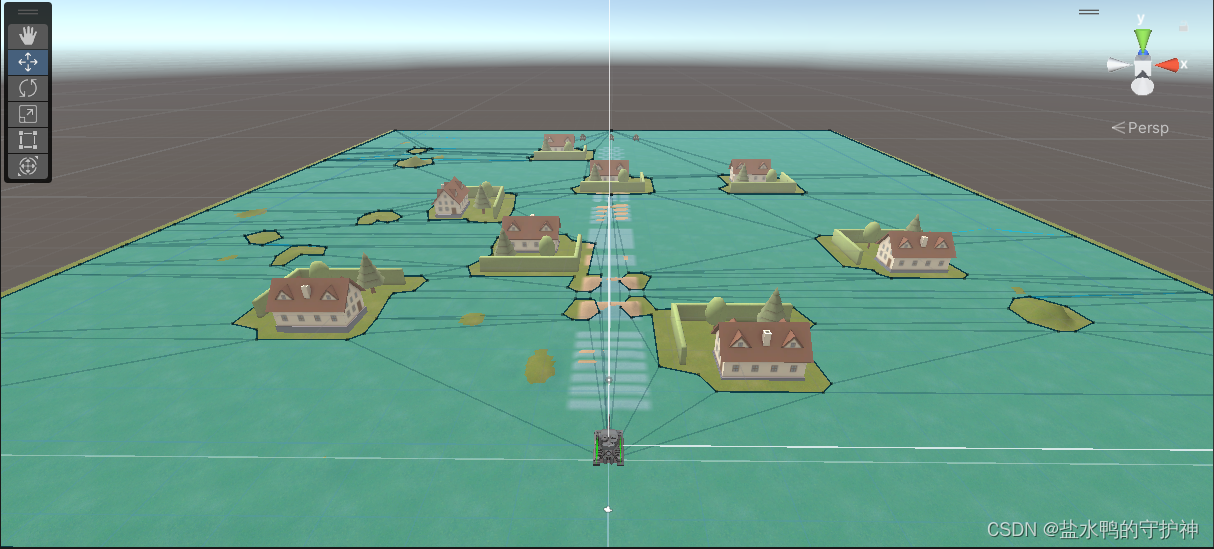
首先选择我们导入的资源商店的模型kawaii Tank的Kawaii_Tanks_Project中的Scenes中的Test_Field,我们需要将其另存为场景Tank_battle,如图所示。

随后我们打开新的场景Tank_battle,我们需要对原有的场景布局进行修改,增加地面凹凸不平物以及房子、树、篱笆等遮挡物。同时一共需要三个AI坦克作为攻击方,将其初始位置置于玩家坦克的对面,拉开距离。

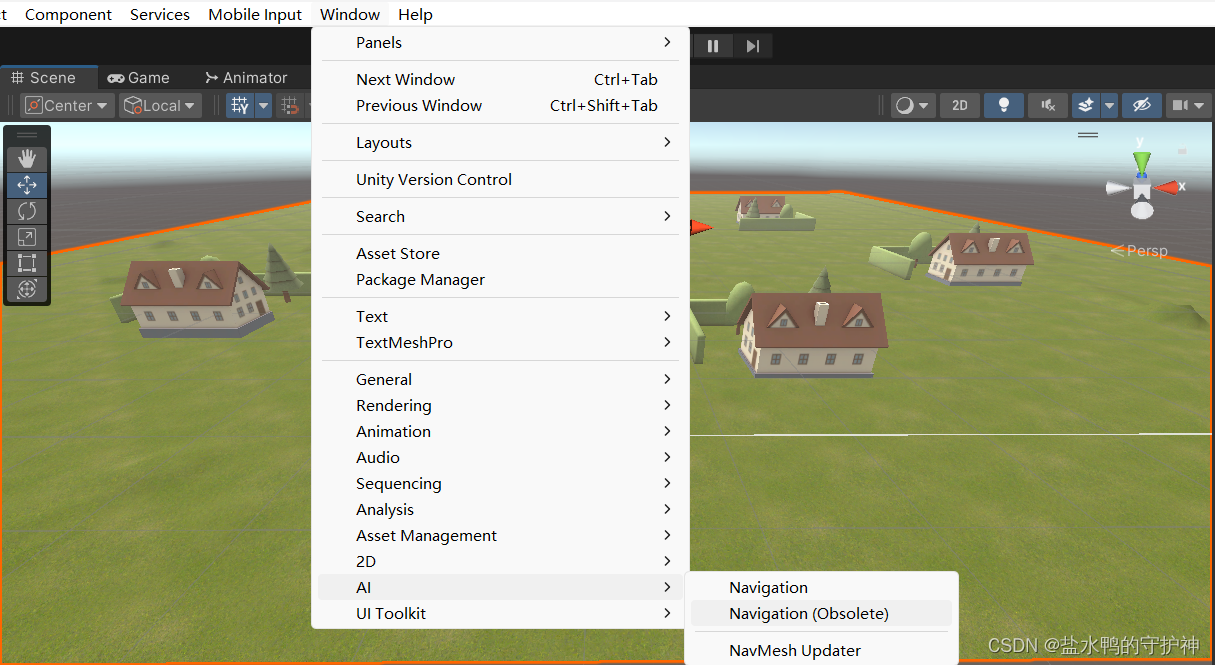
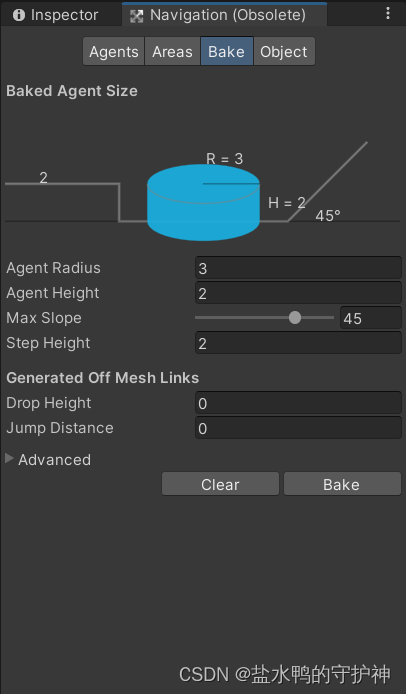
然后我们需要添加Navigation窗口,通过Window—AI—Navigation(Obsolete)添加Navigation窗口,然后打开Bake界面,点击按钮Bake生成导航网格图。
控制脚本实现
相机的选择控制
1. Awake(): 当脚本实例被加载时调用的函数。它初始化变量,例如thisTransform是用于存储组件信息的Transform类型变量,angY和angZ是绕Y轴和Z轴的旋转角度,targetAng_Y是绕Y轴的目标旋转角度。
2. Update(): 每帧调用的函数。根据玩家是否在控制状态来更新变量。
3. Mobile_Input(): 处理移动平台上相机的输入。通过检测按钮按下、按住和松开的状态,获取手指的位置信息,计算相机的旋转角度,并将相机的旋转应用到thisTransform.rotation上。
4. Desktop_Input(): 处理桌面平台上相机的输入。调用Mouse_Input_Drag()函数来处理鼠标的拖拽输入。
5. Mouse_Input_Drag(bool isFreeAiming): 处理鼠标的拖拽输入。根据鼠标的移动量计算相机的旋转角度,并将相机的旋转应用到thisTransform.rotation上。
6. Get_ID_Script(ID_Control_CS tempScript): 获取ID_Control_CS脚本的引用。
7. Pause(bool isPaused): 用于暂停相机的旋转效果。
using UnityEngine;
using System.Collections;

#if UNITY_ANDROID || UNITY_IPHONE
using UnityStandardAssets.CrossPlatformInput;
#endif

//实现了相机的旋转控制
// This script must be attached to "Camera_Pivot".
namespace ChobiAssets.KTP
{

	public class Camera_Rotate_CS : MonoBehaviour
	{

		//用于存储组件信息
		Transform thisTransform;
		//存储鼠标位置
		Vector2 previousMousePos;
		float angY;   //绕Y轴的旋转角度
		float angZ;   //绕Z轴的旋转角度
		float targetAng_Y ;   //绕Y轴的目标旋转角度

		#if UNITY_ANDROID || UNITY_IPHONE
		bool isButtonDown = false;    //标记是否按下了相机控制的按钮
		int fingerID;                 //用于存储手指的ID
		#endif

		ID_Control_CS idScript;       //存储脚本的引用

		void Awake ()
		{
			//变量绑定
			thisTransform = transform;
			angY = thisTransform.eulerAngles.y;
			targetAng_Y = angY;
			angZ = thisTransform.eulerAngles.z;
		}

		void Update ()
		{
			//变量更新
			if (idScript.isPlayer) {
				#if UNITY_ANDROID || UNITY_IPHONE
				Mobile_Input () ;
				#else
				Desktop_Input ();
				#endif
			}
		}

		#if UNITY_ANDROID || UNITY_IPHONE
		//处理移动平台的相机输入
		void Mobile_Input ()
		{
			if (CrossPlatformInputManager.GetButtonDown ("Camera_Press")) {
				isButtonDown = true ;
				#if UNITY_EDITOR
				previousMousePos = Input.mousePosition;
				#else
				fingerID = Input.touches.Length - 1;
				previousMousePos = Input.touches [fingerID].position;
				#endif
				return;
			}
			if (isButtonDown && CrossPlatformInputManager.GetButton ("Camera_Press")) {
				#if UNITY_EDITOR
				Vector3 currentMousePos = Input.mousePosition;
				#else
				Vector3 currentMousePos = Input.touches [fingerID].position;
				#endif
				float horizontal = (currentMousePos.x - previousMousePos.x);
				//float vertical = (currentMousePos.y - previousMousePos.y);
				targetAng_Y += horizontal * 0.5f;
				angY = targetAng_Y;
				//angZ -= vertical * 0.2f;
				previousMousePos = currentMousePos ;
			} else if (CrossPlatformInputManager.GetButtonUp ("Camera_Press")) {
				isButtonDown = false;
			}
			angY = Mathf.MoveTowardsAngle (angY, targetAng_Y, 180.0f * Time.deltaTime);
			thisTransform.rotation = Quaternion.Euler (0.0f, angY, angZ);
		}
		#else

		//处理平台上的相机输入
		void Desktop_Input ()
		{
			Mouse_Input_Drag (true);
		}

		//处理鼠标的拖拽输入
		void Mouse_Input_Drag (bool isFreeAiming)
		{
			if (idScript.aimButton == false) {
				if (idScript.dragButtonDown) {
					previousMousePos = Input.mousePosition;
				}
				if (idScript.dragButton) {
					float horizontal = (Input.mousePosition.x - previousMousePos.x) * 0.1f;
					targetAng_Y += horizontal * 3.0f;
					angY = targetAng_Y;
					//float vertical = (Input.mousePosition.y - previousMousePos.y) * 0.1f;
					//angZ -= vertical * 2.0f;
					previousMousePos = Input.mousePosition;
				}
			}
			angY = Mathf.MoveTowardsAngle (angY, targetAng_Y, 180.0f * Time.deltaTime);
			thisTransform.rotation = Quaternion.Euler (0.0f, angY, angZ);
		}
		#endif

		//获取脚本的引用
		void Get_ID_Script (ID_Control_CS tempScript)
		{
			idScript = tempScript;
		}

		//用于暂停相机的旋转效果
		void Pause (bool isPaused)
		{ // Called from "Game_Controller_CS".
			this.enabled = !isPaused;
		}

	}

}
相机的缩放控制
1. Awake(): 在脚本实例被加载时调用的函数。它初始化了一些变量和组件,包括获取摄像机组件和音频监听器组件,并设置初始位置。
2. Update(): 在每一帧更新时调用的函数。它检测玩家输入,并根据输入控制摄像机的缩放。同时调用Cast_Ray()函数来检测摄像机是否需要自动缩放。
3. Cast_Ray(): 发射射线,检测摄像机与场景中的物体之间是否有碰撞。如果有碰撞,根据碰撞距离调整摄像机的缩放位置。如果没有碰撞,恢复摄像机的初始位置。
4. Get_ID_Script(ID_Control_CS tempScript): 从ID_Control_CS脚本中获取对应的组件引用。根据获取的组件引用决定是否启用摄像机和音频监听器。
5. Pause(bool isPaused): 从"Game_Controller_CS"脚本调用。根据传入的参数决定是否暂停摄像机的更新。
6. Switch_Player(bool isPlayer): 根据传入的参数决定是否启用摄像机和音频监听器。
using UnityEngine;
using System.Collections;

#if UNITY_ANDROID || UNITY_IPHONE
using UnityStandardAssets.CrossPlatformInput;
#endif

// This script must be attached to "Main Camera".
// (Note.) Main Camera must be placed on X Aixs of "Camera_Pivot".
//用于控制摄像机的缩放
namespace ChobiAssets.KTP
{

	public class Camera_Zoom_CS : MonoBehaviour
	{

		Transform thisTransform;
		Transform parentTransform;
		Transform rootTransform;
		Camera thisCamera;
		AudioListener thisAudioListener;
		float posX;
		float targetPosX;
		int layerMask = ~((1 << 10) + (1 << 2)); // Layer 2 = Ignore Ray, Layer 10 = Ignore All.
		float storedPosX;
		bool autoZoomFlag;
		float hitCount;

		#if UNITY_ANDROID || UNITY_IPHONE
		bool isButtonDown = false;
		Vector2 previousMousePos;
		int fingerID;
		#endif

		public float speed = 30.0f;

		ID_Control_CS idScript;

		//初始化一些变量和组件,包括获取摄像机组件和音频监听器组件,设置初始位置
		void Awake ()
		{
			this.tag = "MainCamera";
			thisCamera = GetComponent < Camera > ();
			thisCamera.enabled = false;
			thisAudioListener = GetComponent < AudioListener > ();
			thisAudioListener.enabled = false;
			thisTransform = transform;
			parentTransform = thisTransform.parent;
			rootTransform = thisTransform.root;
			posX = transform.localPosition.x;
			targetPosX = posX;
		}

		//在每一帧更新时调用
        //检测玩家输入并根据输入控制摄像机的缩放
		//调用Cast_Ray()函数检测摄像机是否需要自动缩放
		void Update ()
		{
			if (idScript.isPlayer) {
				#if UNITY_ANDROID || UNITY_IPHONE
				if (CrossPlatformInputManager.GetButtonDown ("Zoom_Press")) {
					isButtonDown = true ;
				#if UNITY_EDITOR
					previousMousePos = Input.mousePosition;
				#else
					fingerID = Input.touches.Length - 1;
					previousMousePos = Input.touches [fingerID].position;
				#endif
					return;
				}
				if (isButtonDown && CrossPlatformInputManager.GetButton ("Zoom_Press")) {
				#if UNITY_EDITOR
					Vector3 currentMousePos = Input.mousePosition;
				#else
					Vector3 currentMousePos = Input.touches [fingerID].position;
				#endif
					float vertical = (currentMousePos.y - previousMousePos.y);
					targetPosX += vertical * 0.1f;
					targetPosX = Mathf.Clamp (targetPosX, 3.0f, 20.0f);
					previousMousePos = currentMousePos ;
				} else if (CrossPlatformInputManager.GetButtonUp ("Zoom_Press")) {
					isButtonDown = false;
				}
				#else
				float axis = Input.GetAxis ("Mouse ScrollWheel");
				if (axis != 0) {
					#if UNITY_WEBGL
					targetPosX -= axis * 10.0f;
					#else
					targetPosX -= axis * 30.0f;
					#endif
					targetPosX = Mathf.Clamp (targetPosX, 3.0f, 20.0f);
				}
				#endif
				if (posX != targetPosX) {
					posX = Mathf.MoveTowards (posX, targetPosX, speed * Time.deltaTime);
					thisTransform.localPosition = new Vector3 (posX, thisTransform.localPosition.y, thisTransform.localPosition.z);
				} else {
					Cast_Ray ();
				}
			}
		}

		//发射射线,检测摄像机与场景中的物体之间是否有碰撞
		//如果有碰撞,根据碰撞距离调整摄像机的缩放位置
		//如果没有碰撞,恢复摄像机的初始位置
		void Cast_Ray () {
			Ray ray = new Ray (parentTransform.position, thisTransform.position - parentTransform.position);
			RaycastHit[] raycastHits;
			raycastHits = Physics.SphereCastAll (ray, 0.5f, thisTransform.localPosition.x + 1.0f, layerMask);
			foreach (RaycastHit raycastHit in raycastHits) {
				if (raycastHit.transform.root != rootTransform) { // not itself.
					hitCount += Time.deltaTime;
					if (hitCount > 0.5f) {
						hitCount = 0.0f;
						if (autoZoomFlag == false) {
							autoZoomFlag = true;
							storedPosX = posX;
							targetPosX = raycastHit.distance;
							targetPosX = Mathf.Clamp (targetPosX, 3.0f, 20.0f);
						} else {
							if (targetPosX > raycastHit.distance) {
								targetPosX = raycastHit.distance;
								targetPosX = Mathf.Clamp (targetPosX, 3.0f, 20.0f);
							}
						}
					}
					return;
				}
			}
			hitCount = 0.0f;
			if (autoZoomFlag) {
				autoZoomFlag = false;
				targetPosX = storedPosX;
			}
		}

		//从ID_Control_CS脚本中获取对应的组件引用
		//根据获取的组件引用决定是否启用摄像机和音频监听器
		void Get_ID_Script (ID_Control_CS tempScript)
		{
			idScript = tempScript;
			if (idScript.isPlayer) {
				thisAudioListener.enabled = true;
				thisCamera.enabled = true;
			}
			idScript.mainCamScript = this;
		}

		//从"Game_Controller_CS"脚本调用
		//根据传入的参数决定是否暂停摄像机的更新
		void Pause (bool isPaused)
		{ // Called from "Game_Controller_CS".
			this.enabled = !isPaused;
		}

		//根据传入的参数决定是否启用摄像机和音频监听器
		public void Switch_Player (bool isPlayer)
		{
			thisAudioListener.enabled = isPlayer;
			thisCamera.enabled = isPlayer;
		}

	}

}
坦克的碰撞器属性控制
1. Awake(): 在脚本实例被加载时调用的函数。它用于设置装甲碰撞器的属性。首先,通过GetComponent<Collider>()获取当前脚本附加的游戏对象上的碰撞器组件,然后将其设置为一个触发器(trigger)。接着,通过GetComponent<MeshRenderer>()获取当前脚本附加的游戏对象上的网格渲染器组件,并将其设置为在游戏中不可见,即禁用渲染器。
2. damageMultiplier: 装甲的伤害倍数。这个变量用于设置装甲的伤害倍数,可以根据需要进行调整。
using UnityEngine;
using System.Collections;

//用于管理装甲的碰撞器的属性
namespace ChobiAssets.KTP
{

	public class Armor_Collider_CS : MonoBehaviour
	{
		[ Header ("Armor settings")]
		//用于设置装甲的伤害倍数
		[ Tooltip ("Multiplier for the damage.")] public float damageMultiplier = 1.0f;

		void Awake ()
		{
			// Make it a trigger and invisible.
			//获取当前脚本附加的游戏对象上的碰撞器组件,然后设置其为一个触发器
			GetComponent < Collider > ().isTrigger = true;
			//获取当前脚本附加的游戏对象上的网格渲染器组件,并将其设置为在游戏中不可见
			GetComponent < MeshRenderer > ().enabled = false;
		}

	}

}
炮管的后坐力效果
1. Awake(): 在脚本实例被加载时调用的函数。它用于绑定和初始化组件。通过this.transform获取脚本所附加的游戏对象的Transform组件,然后将其赋值给thisTransform变量。同时,将炮管的初始本地位置存储在initialPos变量中。
2. IEnumerator Recoil_Brake(): 这是一个协程方法,用于控制炮管的后坐力效果。协程是一种特殊的函数,可以在一段时间内暂停执行,并在稍后继续执行。在这个协程中,首先通过正弦函数计算炮管的位置偏移量,并将其应用到炮管的本地坐标上,实现后坐力的前冲效果。然后,再通过正弦函数计算炮管的位置偏移量,将其应用到炮管的本地坐标上,实现炮管回位的效果。最后,表示后坐力效果已经完成。
3. recoilTime: 后坐力前冲的持续时间,以秒为单位。可以根据需要进行调整。
4. returnTime: 炮管回位的持续时间,以秒为单位。可以根据需要进行调整。
5. length: 炮管移动的长度,以米为单位。可以根据需要进行调整。
6. thisTransform: Transform组件的引用,用于存储脚本所附加的游戏对象的Transform组件。
7. isReady: 表示坐后力效果是否准备就绪的布尔值。当炮管坐后力效果正在进行时,设置为false,以防止重复触发后坐力。
8. initialPos: 用于存储炮管的初始本地位置的Vector3变量。
9. Fire(): 用于触发后坐力效果的公共方法。当Fire()方法被调用时,首先检查坐后力效果是否准备就绪。如果准备就绪,将isReady设置为false,然后启动协程Recoil_Brake()来实现后坐力效果。
using UnityEngine;
using System.Collections;

// This script must be attached to "Barrel_Base".
//用于控制炮管的坐后力效果
namespace ChobiAssets.KTP
{

	public class Barrel_Control_CS : MonoBehaviour
	{
		//设置了浮点型变量,用于设置了坐后力制动器地参数
		[ Header ("Recoil Brake settings")]
		[ Tooltip ("Time it takes to push back the barrel. (Sec)")] public float recoilTime = 0.05f;    //炮管坐后力时间
		[ Tooltip ("Time it takes to to return the barrel. (Sec)")] public float returnTime = 0.05f;    //炮管回位的持续时间
		[ Tooltip ("Movable length for the recoil brake. (Meter)")] public float length = 0.3f;         //炮管移动的长度

		Transform thisTransform;           //组件变量
		bool isReady = true;               //表示坐后力效果是否准备就绪
		Vector3 initialPos;                //用于存储炮管的初始本地位置
		const float HALF_PI = Mathf.PI * 0.5f;   //用于后续的计算

		void Awake ()
		{
			//绑定和初始化组件
			thisTransform = this.transform;
			initialPos = thisTransform.localPosition;
		}

		//一个协程方法,用于控制炮管的后坐力效果
		IEnumerator Recoil_Brake ()
		{
			//用于后坐力前冲
			// Move backward.
			//在一定的时间recoilTime内,通过计算当前时间与总时间的比例
			//使用正弦函数计算炮管的位置偏移量,并将其应用到炮管的本地坐标上
			float count = 0.0f;
			while (count < recoilTime) {
				float rate = Mathf.Sin (HALF_PI * (count / recoilTime));
				thisTransform.localPosition = new Vector3 (initialPos.x, initialPos.y, initialPos.z - (rate * length));
				count += Time.deltaTime;
				yield return null;
			}
			// Return to the initial position.
			//用于炮管回位
			//在一定的时间returnTime内,通过计算当前时间与总时间的比例
			//使用正弦函数计算炮管的位置偏移量,并将其应用到炮管的本地坐标上
			count = 0.0f;
			while (count < returnTime) {
				float rate = Mathf.Sin (HALF_PI * (count / returnTime) + HALF_PI);
				thisTransform.localPosition = new Vector3 (initialPos.x, initialPos.y, initialPos.z - (rate * length));
				count += Time.deltaTime;
				yield return null;
			}
			//表示后坐力效果已经完成
			isReady = true;
		}

		//用于触发后坐力效果
		public void Fire ()
		{ // Called from "Fire_Control_CS".
			//首先检查是否已经准备就绪
			if (isReady) {
				isReady = false;
				//启动协程
				StartCoroutine ("Recoil_Brake");
			}
		}
	}

}
游戏对象破碎效果的实现
1. Awake(): 在脚本实例被加载时调用的函数。它用于绑定组件对象。通过transform获取脚本所附加的游戏对象的Transform组件,然后将其赋值给thisTransform变量。
2. OnJointBreak(): 当与当前对象连接的关节断开时调用的方法。该方法使用协程Broken()来触发对象的破碎效果。
3. OnTriggerEnter(Collider collider): 当与当前对象发生碰撞的触发器对象进入时调用的方法。如果进入的碰撞体不是一个触发器(isTrigger属性为false),则使用协程Broken()来触发对象的破碎效果。
4. brokenPrefab: 破碎对象的预制体。这是一个公共变量,可以在Inspector面板中指定破碎对象的预制体。
5. lagTime: 破碎对象的延迟时间,以秒为单位。在破碎效果触发之前,等待一段时间。
6. thisTransform: Transform组件的引用,用于存储脚本所附加的游戏对象的Transform组件。
7. IEnumerator Broken(): 这是一个协程方法,用于实现对象的破碎效果。在协程中,首先等待一段时间(由lagTime指定),然后在当前对象的位置和旋转处实例化破碎对象的预制体。最后,销毁当前对象。
using UnityEngine;
using System.Collections;

//用于实现游戏中游戏对象破碎的效果
namespace ChobiAssets.KTP
{

	public class Break_Object_CS : MonoBehaviour
	{
		//用于设置游戏对象破碎的参数
		[ Header ("Broken object settings")]
		[ Tooltip ("Prefab of the broken object.")] public GameObject brokenPrefab;    //破碎对象的预制体
		[ Tooltip ("Lag time for breaking. (Sec)")] public float lagTime = 1.0f;       //破碎对象的延迟时间

		Transform thisTransform;     //组件对象

		void Awake ()
		{
			thisTransform = transform;   //绑定组件对象
		}

		void OnJointBreak ()
		{
			//它使用协程来调用名为Broken的方法
			//在游戏中,当与当前对象连接的关节断开时,该方法会触发对象的破碎效果
			StartCoroutine ("Broken");
		}

		void OnTriggerEnter (Collider collider)
		{
			if (collider.isTrigger == false) {
				StartCoroutine ("Broken");
			}
		}

		//用于实现对象的破碎效果
		IEnumerator Broken ()
		{
			//首先等待一段时间lagTime
			yield return new WaitForSeconds (lagTime);
			if (brokenPrefab) {
				//然后在当前对象的位置和旋转处实例化破碎对象的预制体
				Instantiate (brokenPrefab, thisTransform.position, thisTransform.rotation);
			}
			//销毁当前对象
			Destroy (gameObject);
		}

	}

}
坦克受损和销毁的逻辑
1. Start(): 在脚本启动时调用的函数。它用于记录初始耐久度(initialDurability)。
2. Set_DamageText(): 根据设置的参数实例化伤害文本(Damage Text)的预制体,并将其设置到Canvas中进行显示。它获取Damage_Display_CS脚本的引用,用于更新伤害文本的显示。根据设置的Canvas名称(canvasName),找到对应的Canvas对象,并将伤害文本设置为其子对象。如果找不到对应的Canvas对象,则打印警告信息。
3. Update(): 在每一帧更新时调用的函数。如果是玩家控制的坦克,根据玩家的输入决定是否启动销毁逻辑。如果是玩家控制的坦克,调用displayScript.Get_Damage()更新伤害文本的显示。
4. Get_Damage(float damageValue): 从子弹脚本(Bullet_Nav_CS)调用的函数。根据传入的伤害值(damageValue)减少坦克的耐久度(durability)。如果坦克的耐久度仍然大于零,则调用displayScript.Get_Damage()更新伤害文本的显示。如果坦克的耐久度小于等于零,则开始销毁坦克。
5. Start_Destroying(): 开始销毁坦克的逻辑。向坦克的所有部件发送销毁消息("Destroy")。如果设置了destroyedPrefab,则在坦克位置实例化destroyedPrefab。移除伤害文本(displayScript)。销毁当前脚本。
6. Get_ID_Script(ID_Control_CS tempScript): 从ID_Control_CS脚本中获取对应的组件引用。根据获取的组件引用设置坦克的伤害文本。
7. Pause(bool isPaused): 从"Game_Controller_CS"脚本调用的函数。根据传入的参数决定是否暂停当前脚本的更新。
using UnityEngine;
using System.Collections;
using UnityEngine.UI;

#if UNITY_ANDROID || UNITY_IPHONE
using UnityStandardAssets.CrossPlatformInput;
#endif


//用于控制坦克的受伤和销毁的逻辑
namespace ChobiAssets.KTP
{

	public class Damage_Control_CS : MonoBehaviour
	{
		[Header ("Damage settings")]
		[Tooltip ("Durability of this tank.")] public float durability = 300.0f;
		[Tooltip ("Prefab used for destroyed effects.")] public GameObject destroyedPrefab;
		[Tooltip ("Prefab of Damage Text.")] public GameObject textPrefab;
		[Tooltip ("Name of the Canvas used for Damage Text.")] public string canvasName = "Canvas_Texts";

		Transform bodyTransform;
		Damage_Display_CS displayScript;
		float initialDurability;

		ID_Control_CS idScript;

		//在启动脚本时调用
		//记录初始耐久度(initialDurability)
		void Start ()
		{ // Do not change to "Awake()".
			initialDurability = durability;
		}

		//根据设置的参数实例化伤害文本(Damage Text)的预制体,并将其设置到Canvas中进行显示
		//获取Damage_Display_CS脚本的引用,用于更新伤害文本的显示
		//根据设置的Canvas名称(canvasName)找到对应的Canvas对象,并将伤害文本设置为其子对象
		//如果找不到对应的Canvas对象,则打印警告信息
		void Set_DamageText ()
		{
			if (textPrefab == null || string.IsNullOrEmpty (canvasName) || durability == Mathf.Infinity) {
				return;
			}
			// Instantiate Damage Text, and set it to the Canvas.
			GameObject textObject = Instantiate (textPrefab, Vector3.zero, Quaternion.identity) as GameObject;
			displayScript = textObject.GetComponent <Damage_Display_CS> ();
			displayScript.targetTransform = bodyTransform;
			GameObject canvasObject = GameObject.Find (canvasName);
			if (canvasObject) {
				displayScript.transform.SetParent (canvasObject.transform);
				displayScript.transform.localScale = Vector3.one;
			} else {
				Debug.LogWarning ("Canvas for Damage Text cannot be found.");
			}
		}

		//在每一帧更新时调用
		//如果是玩家控制的坦克,根据玩家的输入决定是否启动销毁逻辑
		//如果是玩家控制的坦克,调用displayScript.Get_Damage()更新伤害文本的显示
		void Update ()
		{
            // 游戏玩家一直显示血条,AI坦克受到攻击后显示血条
            if(idScript.isPlayer)
            {
                displayScript.Get_Damage(durability, initialDurability);
            }
            // Destruct
            if (idScript.isPlayer) {
				#if UNITY_ANDROID || UNITY_IPHONE
				if (CrossPlatformInputManager.GetButtonDown ("Destruct")) {
				#else
				if (Input.GetKeyDown (KeyCode.Return)) {
				#endif
					Start_Destroying ();
				}
			}
		}

		//从子弹脚本(Bullet_Nav_CS)调用
		//根据传入的伤害值(damageValue)减少坦克的耐久度(durability)
		//如果坦克的耐久度仍然大于零,则调用displayScript.Get_Damage()更新伤害文本的显示
		//如果坦克的耐久度小于等于零,则开始销毁坦克
		public void Get_Damage (float damageValue)
		{ // Called from "Bullet_Nav_CS".
			durability -= damageValue;
			if (durability > 0.0f) { // Still alive.
				// Display Text
				if (displayScript) {
					displayScript.Get_Damage (durability, initialDurability);
				}
			} else { // Dead
				Start_Destroying ();
			}
		}

		//开始销毁坦克的逻辑
		//向坦克的所有部件发送销毁消息("Destroy")
		//如果设置了destroyedPrefab,则在坦克位置实例化destroyedPrefab
		//移除伤害文本(displayScript)
		//销毁当前脚本
		void Start_Destroying ()
		{
            if(idScript.isPlayer == false)
            {
                this.gameObject.SetActive(false);
            }
			// Send message to all the parts.
			BroadcastMessage ("Destroy", SendMessageOptions.DontRequireReceiver);
			// Create destroyedPrefab.
			if (destroyedPrefab) {
				GameObject tempObject = Instantiate (destroyedPrefab, bodyTransform.position, Quaternion.identity) as GameObject;
				tempObject.transform.parent = bodyTransform;
			}
			// Remove the Damage text.
			if (displayScript) {
				Destroy (displayScript.gameObject);
			}
			// Destroy this script.
			Destroy (this);
		}

		//从ID_Control_CS脚本中获取对应的组件引用
        //根据获取的组件引用设置坦克的伤害文本
		void Get_ID_Script (ID_Control_CS tempScript)
		{
			idScript = tempScript;
			bodyTransform = idScript.storedTankProp.bodyTransform;
			Set_DamageText ();
		}

		//从"Game_Controller_CS"脚本调用
        //根据传入的参数决定是否暂停当前脚本的更新
		void Pause (bool isPaused)
		{ // Called from "Game_Controller_CS".
			this.enabled = !isPaused;
		}

	}

}
用于控制开火的行为
1. Awake(): 在脚本启动时调用的函数。它获取当前游戏对象的Transform组件的引用,并获取该游戏对象下的所有Barrel_Control_CS和Fire_Spawn_CS脚本的引用。
2. Update(): 在每一帧更新时调用的函数。如果该游戏对象是玩家操控的坦克(由idScript.isPlayer属性判断),则根据平台类型调用Mobile_Input()或Desktop_Input()来接收输入。如果该游戏对象不是玩家操控的坦克,则根据一定时间间隔调用Fire()来进行自动开火。
3. Mobile_Input(): 在移动平台上接收输入的函数。如果按下了名为"GunCam_Press"的按钮,并且当前可以开火(isReady为true),则调用Fire()来进行开火。
4. Desktop_Input(): 在桌面平台上接收输入的函数。如果设置了fireButton,并且当前可以开火(isReady为true),则调用Fire()来进行开火。
5. Fire(): 开火函数。调用barrelScripts和fireScripts的Fire()方法来执行开火操作。如果该游戏对象是玩家操控的坦克(由idScript.isPlayer属性判断),则执行后坐力效果,并进入重新装填状态。启动Reload协程来控制重新装填时间。
6. Reload(): 重新装填协程。在一定时间(reloadTime)后将isReady设置为true,表示可以进行下一次开火。
7. Destroy(): 被Damage_Control_CS调用的函数。销毁当前脚本组件。
8. Get_ID_Script(ID_Control_CS tempScript): 由ID_Control_CS调用的函数。获取ID_Control_CS脚本的引用,并缓存其属性值。获取关联的刚体组件的引用。
9. Pause(bool isPaused): 由Game_Controller_CS调用的函数。根据传入的isPaused参数,启用或禁用当前脚本组件,实现暂停或恢复行为控制。
using UnityEngine;
using System.Collections;
using UnityEngine.UI;

#if UNITY_ANDROID || UNITY_IPHONE
using UnityStandardAssets.CrossPlatformInput;
#endif

// This script must be attached to "Cannon_Base".
//用于控制开火行为
namespace ChobiAssets.KTP
{
	public class Fire_Control_CS : MonoBehaviour
	{

		[Header ("Fire control settings")]
		[Tooltip ("Loading time. (Sec)")] public float reloadTime = 0.1f;
		[Tooltip ("Recoil force with firing.")] public float recoilForce = 100.0f;

		bool isReady = true;
		Transform thisTransform;
		Rigidbody bodyRigidbody;

		ID_Control_CS idScript;
		Barrel_Control_CS[] barrelScripts;
		Fire_Spawn_CS[] fireScripts;

        private float count = 0;


		//在脚本启动时调用
		//获取当前游戏对象的Transform组件
		//获取当前游戏对象下的所有Barrel_Control_CS和Fire_Spawn_CS脚本的引用
		void Awake ()
		{
			thisTransform = this.transform;
			barrelScripts = GetComponentsInChildren <Barrel_Control_CS> ();
			fireScripts = GetComponentsInChildren <Fire_Spawn_CS> ();
		}

		//在每一帧更新时调用
		//如果该游戏对象是玩家操控的坦克(由idScript.isPlayer属性判断),则根据平台类型调用Mobile_Input()或Desktop_Input()来接收输入
		//如果该游戏对象不是玩家操控的坦克,则根据一定时间间隔调用Fire()来进行自动开火
		void Update ()
		{
			if (idScript.isPlayer) {
				#if UNITY_ANDROID || UNITY_IPHONE
				Mobile_Input ();
				#else
				Desktop_Input ();
				#endif
			} else
            {
                count = count + Time.deltaTime;
                if(count > 3.0f)
                {
                    Fire();
                    count = 0;
                }
            }
		}

		//用于在移动平台上接收输入
		//如果按下了名为"GunCam_Press"的按钮,并且当前可以开火(isReady为true),则调用Fire()来进行开火
		#if UNITY_ANDROID || UNITY_IPHONE
		void Mobile_Input ()
		{
			if (CrossPlatformInputManager.GetButtonUp ("GunCam_Press") && isReady) {
				Fire ();
			}
		}
		#else

		//用于在桌面平台上接收输入
		//如果设置了fireButton,并且当前可以开火(isReady为true),则调用Fire()来进行开火
		void Desktop_Input ()
		{
			if (idScript.fireButton && isReady) {
				Fire ();
			}
		}
		#endif

		//开火函数
		//调用barrelScripts和fireScripts的Fire()方法来执行开火操作
		//如果该游戏对象是玩家操控的坦克(由idScript.isPlayer属性判断),则执行后坐力效果,并进入重新装填状态
		//启动Reload协程来控制重新装填时间
		void Fire ()
		{
			// Call barrelScripts and fireScripts to fire.
			for (int i = 0; i < barrelScripts.Length; i++) {
				barrelScripts [i].Fire ();
			}
			for (int i = 0; i < fireScripts.Length; i++) {
				fireScripts [i].StartCoroutine ("Fire");
			}
            if(idScript.isPlayer)
            {
                // Add recoil shock.
                bodyRigidbody.AddForceAtPosition(-thisTransform.forward * recoilForce, thisTransform.position, ForceMode.Impulse);
                isReady = false;
                StartCoroutine("Reload");
            }

		}

		//重新装填协程
		//在一定时间(reloadTime)后将isReady设置为true,表示可以进行下一次开火
		IEnumerator Reload ()
		{
			yield return new WaitForSeconds (reloadTime);
			isReady = true;
		}

		//被"Damage_Control_CS"调用
		//销毁当前脚本组件
		void Destroy ()
		{ // Called from "Damage_Control_CS".
			Destroy (this);
		}

		//由"ID_Control_CS"调用
		//获取ID_Control_CS脚本的引用,并缓存其属性值
		//获取关联的刚体组件的引用
		void Get_ID_Script (ID_Control_CS tempScript)
		{
			idScript = tempScript;
			bodyRigidbody = idScript.storedTankProp.bodyRigidbody;
		}

		//由"Game_Controller_CS"调用
		//根据传入的isPaused参数,启用或禁用当前脚本组件,实现暂停或恢复行为控制
		void Pause (bool isPaused)
		{ // Called from "Game_Controller_CS".
			this.enabled = !isPaused;
		}

	}

}
生成子弹和火焰的效果
1. Awake(): 在脚本启动时调用的函数。它获取当前游戏对象的Transform组件的引用。
2. firePrefab: 火焰效果的预制体,用于生成火焰特效。
3. bulletPrefab: 子弹的预制体,用于生成子弹。
4. attackForce: 子弹的攻击力。
5. bulletVelocity: 子弹的速度,以米每秒为单位。
6. spawnOffset: 生成子弹时的偏移距离,以米为单位。
7. thisTransform: 当前游戏对象的Transform组件的引用。
8. Fire(): 开火协程。在协程中,首先实例化火焰效果(如果有定义firePrefab),并将其放置在当前游戏对象的位置和旋转下。然后实例化子弹(如果有定义bulletPrefab)并将其放置在当前游戏对象的前方一定偏移距离的位置。接着获取子弹对象上的Bullet_Nav_CS脚本引用,并设置其attackForce属性。计算子弹的初始速度tempVelocity,以当前游戏对象的前方方向和设定的子弹速度(bulletVelocity)为基础。在下一个FixedUpdate周期中,将子弹刚体的速度设置为tempVelocity,实现子弹的发射。
using UnityEngine;
using System.Collections;

// This script must be attached to "Fire_Point".
//用于生成子弹和火焰效果
namespace ChobiAssets.KTP
{

	public class Fire_Spawn_CS : MonoBehaviour
	{

		[ Header ("Firing settings")]
		[ Tooltip ("Prefab of muzzle fire.")] public GameObject firePrefab;
		[ Tooltip ("Prefab of bullet.")] public GameObject bulletPrefab;
		[ Tooltip ("Attack force of the bullet.")] public float attackForce = 100.0f;
		[ Tooltip ("Speed of the bullet. (Meter per Second)")] public float bulletVelocity = 250.0f;
		[ Tooltip ("Offset distance for spawning the bullet. (Meter)")] public float spawnOffset = 1.0f;

		Transform thisTransform;

		//在脚本启动时调用
		//获取当前游戏对象的Transform组件
		void Awake ()
		{
			thisTransform = this.transform;
		}

		//开火协程
		//实例化火焰效果(如果有firePrefab)并放置在当前游戏对象的位置和旋转下
		//实例化子弹(如果有bulletPrefab)并放置在当前游戏对象前方一定偏移距离的位置
		//获取子弹对象上的Bullet_Nav_CS脚本引用,并设置attackForce属性
		//计算子弹的初始速度tempVelocity,以当前游戏对象的前方方向和设定的子弹速度(bulletVelocity)为基础
		//在下一个FixedUpdate周期中设置子弹刚体的速度为tempVelocity,实现子弹的发射
		public IEnumerator Fire ()
		{
			// Muzzle Fire
			if (firePrefab) {
				GameObject fireObject = Instantiate (firePrefab, thisTransform.position, thisTransform.rotation) as GameObject;
				fireObject.transform.parent = thisTransform;
			}
			// Shot Bullet
			if (bulletPrefab) {
				GameObject bulletObject = Instantiate (bulletPrefab, thisTransform.position + thisTransform.forward * spawnOffset, thisTransform.rotation) as GameObject;
				bulletObject.GetComponent <Bullet_Nav_CS> ().attackForce = attackForce;
				Vector3 tempVelocity = thisTransform.forward * bulletVelocity;
				// Shoot
				yield return new WaitForFixedUpdate ();
				bulletObject.GetComponent <Rigidbody> ().velocity = tempVelocity;
			}
		}

	}

}
游戏控制器
1. fixedTimestep: 物理计算的固定时间步长。
2. maxResolution: 移动设备的最大分辨率。
3. touchControlsPrefab: 触摸控制器的预制体。
4. tankList: 坦克列表,存储所有的坦克。
5. currentID: 当前可操作的坦克的ID。
6. isPaused: 游戏是否暂停。
7. Awake(): 在脚本启动时调用的函数。设置物理计算的固定时间步长(fixedTimestep)。初始化坦克列表(tankList)。如果在移动设备上,实例化触摸控制器(touchControlsPrefab)。根据移动设备的最大分辨率(maxResolution)调整屏幕分辨率。设置游戏对象的标签为"GameController"。设置层之间的碰撞关系,包括重置和忽略碰撞。
8. Receive_ID(ID_Control_CS idScript): 接收ID_Control_CS脚本发送的ID。存储坦克的组件信息(bodyTransform和bodyRigidbody)。将坦克添加到坦克列表(tankList)中。如果ID为0,表示当前操作的是玩家坦克。
9. Update(): 在每一帧更新中调用。切换当前可操作的坦克。如果按下Tab键(或者在移动设备上按下Switch按钮),将当前ID加1,并确保不超过坦克列表的长度。处理退出游戏的逻辑。处理重新加载场景的逻辑。处理暂停游戏的逻辑。
10. Pause(): 暂停游戏。切换isPaused的值。根据isPaused设置时间缩放(timeScale)。向所有坦克发送暂停消息。
using UnityEngine;
using System.Collections;
using System.Collections.Generic;
using UnityEngine.SceneManagement;
using UnityEngine.UI;

#if UNITY_ANDROID || UNITY_IPHONE
using UnityStandardAssets.CrossPlatformInput;
#endif

//用于整体的游戏控制
namespace ChobiAssets.KTP
{
	[ System.Serializable]
	public class TankProp
	{
		public Transform bodyTransform;
		public Rigidbody bodyRigidbody;
	}

	public class Game_Controller_CS : MonoBehaviour {

		[Header ("Game settings")]
		[Tooltip ("Interval for physics calculations.")] public float fixedTimestep = 0.03f;
		#if UNITY_ANDROID || UNITY_IPHONE
		[Tooltip ("Maximum resolution for mobile device.")] public int maxResolution = 720;
		#endif

		[Header ("Stage settings")]
		[Tooltip ("Set the prefab of 'Touch_Controls'.")] public GameObject touchControlsPrefab;

		List <ID_Control_CS> tankList;
		int currentID = 0;
		bool isPaused;

		//在脚本启动时调用
		//设置物理计算的固定时间步长(fixedTimestep)
		//初始化坦克列表(tankList)
		//如果是在移动设备上(UNITY_ANDROID || UNITY_IPHONE),实例化触摸控制器(touchControlsPrefab)
		//根据移动设备的最大分辨率(maxResolution)调整屏幕分辨率
		//设置游戏对象的标签为"GameController"
		//设置层之间的碰撞关系,包括重置和忽略碰撞
		void Awake ()
		{
			Time.fixedDeltaTime = fixedTimestep;
			tankList = new List <ID_Control_CS> ();
			#if UNITY_ANDROID || UNITY_IPHONE
			if (touchControlsPrefab) {
				Instantiate (touchControlsPrefab);
			}
			float screenRate = (float)maxResolution / Screen.height;
			if (screenRate > 1.0f) {
				screenRate = 1.0f;
			}
			int width = (int)(Screen.width * screenRate);
			int height = (int)(Screen.height * screenRate);
			Screen.SetResolution(width, height, true);
			#endif
			this.tag = "GameController";
			/*
			Layer Collision Settings.
			Layer9 >> for wheels.
			Layer10 >> for Suspensions.
			Layer11 >> for MainBody.
			*/
			for (int i = 0; i <= 11; i++) {
				Physics.IgnoreLayerCollision (9, i, false); // Reset settings.
				Physics.IgnoreLayerCollision (11, i, false); // Reset settings.
			}
			Physics.IgnoreLayerCollision (9, 9, true); // Wheels do not collide with each other.
			Physics.IgnoreLayerCollision (9, 11, true); // Wheels do not collide with MainBody.
			for (int i = 0; i <= 11; i++) {
				Physics.IgnoreLayerCollision (10, i, true); // Suspensions do not collide with anything.
			}
		}

		//接收ID_Control_CS脚本发送的ID
		//存储坦克的组件信息(bodyTransform和bodyRigidbody)
		//将坦克添加到坦克列表(tankList)中
		//如果ID为0,表示当前操作的是玩家坦克
		public void Receive_ID (ID_Control_CS idScript)
		{
			// Store the components in the lists.
			TankProp tankProp = new TankProp ();
			tankProp.bodyRigidbody = idScript.GetComponentInChildren <Rigidbody> ();
			tankProp.bodyTransform = tankProp.bodyRigidbody.transform;
			idScript.storedTankProp = tankProp;
			// Add the tank to tankList.
			tankList.Add (idScript);
			// Send currentID (0).
			if (idScript.id == 0) {
				idScript.isPlayer = true;
			} else {
				idScript.isPlayer = false;
			}
		}

		//在每一帧更新中调用
		//切换当前可操作的坦克
		//如果按下Tab键(或者在移动设备上按下Switch按钮),将当前ID加1,并确保不超过坦克列表的长度
		//处理退出游戏的逻辑
		//处理重新加载场景的逻辑
		//处理暂停游戏的逻辑
		void Update ()
		{
			// Switch operable tank.
			#if UNITY_ANDROID || UNITY_IPHONE
			if (CrossPlatformInputManager.GetButtonDown ("Switch")) {
			#else
			if (Input.GetKeyDown (KeyCode.Tab)) {
			#endif
				currentID += 1;
				if (currentID > tankList.Count - 1) {
					currentID = 0;
				}
				for (int i = 0; i < tankList.Count; i++) {
					tankList [i].Get_Current_ID (currentID);
				}
			}
			// Quit
			if (Input.GetKeyDown (KeyCode.Escape)) {
				Application.Quit ();
			}
			// Reload the scene.
			#if UNITY_ANDROID || UNITY_IPHONE
			if (CrossPlatformInputManager.GetButtonDown ("Restart")) {
			#else
			if (Input.GetKeyDown (KeyCode.Backspace)) {
			#endif
				if (isPaused) {
					Pause ();
				}
				SceneManager.LoadScene (SceneManager.GetActiveScene ().name);
			}
			// Pause.
			#if UNITY_ANDROID || UNITY_IPHONE
			if (CrossPlatformInputManager.GetButtonDown ("Pause")) {
			#else
			if (Input.GetKeyDown ("p")) {
			#endif
				Pause ();
			}
		}

		//暂停游戏
		//切换isPaused的值
		//根据isPaused设置时间缩放(timeScale)
		//向所有坦克发送暂停消息
		void Pause ()
		{
			isPaused = !isPaused;
			// Set timeScale and text.
			if (isPaused) {
				Time.timeScale = 0.0f;
			} else {
				Time.timeScale = 1.0f;
			}
			// Send Message to all the tanks.
			ID_Control_CS[] idScripts = FindObjectsOfType <ID_Control_CS> ();
			foreach (ID_Control_CS idScript in idScripts) {
				idScript.BroadcastMessage ("Pause", isPaused, SendMessageOptions.DontRequireReceiver);
			}
		}

	}

}
目标的移动控制
1. target: 用于获取目标点的游戏对象,在Inspector面板中进行赋值。
2. mr: NavMesh代理组件的引用。
3. Start(): 在脚本启动时调用的函数。获取自身的NavMeshAgent组件,并将其赋值给变量mr。
4. Update(): 每帧调用一次的函数。使用NavMeshAgent的SetDestination()方法将目标点的位置传递给NavMeshAgent组件,以使游戏对象移动到目标点。在Update()函数中,通过mr.SetDestination(target.transform.position)将目标点的位置传递给NavMeshAgent组件,使游戏对象以最优路径移动到目标点。这样,当目标点发生变化时,游戏对象会自动调整路径并移动到新的目标点。
using System.Collections;
using System.Collections.Generic;
using UnityEngine;
using UnityEngine.AI;

//用于将游戏对象移动到目标点
public class PlaceTarget : MonoBehaviour
{
    //public GameObject target:用于获取目标点的游戏对象,在Inspector面板中进行赋值
    //NavMeshAgent mr:NavMesh代理组件的引用
    public GameObject target;  //获取目标点,注意在面板中赋值
    NavMeshAgent mr;   //声明变量

    // Use this for initialization
    //在脚本启动时调用
    //获取自身的NavMeshAgent组件,并将其赋值给mr变量
    void Start()
    {
        //获取到自身的NavMeshAgent组件
        mr = GetComponent<NavMeshAgent>();
    }

    // Update is called once per frame
    //每帧调用一次
    //使用NavMeshAgent的SetDestination()方法将目标点的位置传递给NavMeshAgent组件,以使游戏对象移动到目标点
    void Update()
    {
        //使用属性将目标点的坐标进行传递
        //mr.destination = target.transform.position;
        //使用方法获取目标点坐标,,和前一行代码作用相同
        mr.SetDestination(target.transform.position);
    }
}
坦克车轮的控制
1. Awake(): 在脚本被加载时调用的函数。在该函数中,设置了游戏对象的层级,获取了Rigidbody组件,并设置了刚体的迭代次数。
2. Update(): 在每一帧更新时调用的函数。根据不同平台(Android、iPhone或桌面)的输入方式,调用相应的输入处理函数。
3. Mobile_Input(): 用于处理移动平台上的输入(Android或iPhone)。根据玩家的操作,更新车辆的行驶方向。
4. Desktop_Input(): 用于处理桌面平台上的输入。根据玩家的操作,更新车辆的行驶方向。
5. FixedUpdate(): 在固定的时间间隔内调用的函数。用于更新车辆的物理属性,例如速度、角速度和停车制动。
6. Destroy(): 在游戏对象被销毁时调用的函数。禁用刚体的约束,并在一段时间后销毁游戏对象。
7. Disable_Constraints(): 协程方法,用于在一段时间后禁用刚体的约束,并最终销毁脚本所附加的游戏对象。
8. Get_ID_Script(): 用于获取与脚本交互的ID_Control_CS脚本的引用。
9. Pause(): 用于根据游戏是否暂停来启用或禁用脚本的更新。
using UnityEngine;
using System.Collections;

#if UNITY_ANDROID || UNITY_IPHONE
using UnityStandardAssets.CrossPlatformInput;
#endif

//用于车轮控制
// This script must be attached to "MainBody".
namespace ChobiAssets.KTP
{

	public class Wheel_Control_CS : MonoBehaviour
	{
		[ Header ("Driving settings")]
		[ Tooltip ("Torque added to each wheel.")] public float wheelTorque = 3000.0f; // Reference to "Wheel_Rotate".
		[ Tooltip ("Maximum Speed (Meter per Second)")] public float maxSpeed = 7.0f; // Reference to "Wheel_Rotate".
		[ Tooltip ("Rate for ease of turning."), Range (0.0f, 2.0f)] public float turnClamp = 0.8f;
		[ Tooltip ("'Solver Iteration Count' of all the rigidbodies in this tank.")] public int solverIterationCount = 7;

		// Reference to "Wheel_Rotate".
		[HideInInspector] public float leftRate;
		[HideInInspector] public float rightRate;

		Rigidbody thisRigidbody;
		bool isParkingBrake = false;
		float lagCount;
		float speedStep;
		float autoParkingBrakeVelocity = 0.5f;
		float autoParkingBrakeLag = 0.5f;

		ID_Control_CS idScript;

		/* for reducing Calls.
		Wheel_Rotate_CS[] rotateScripts;
		*/

		//这是 MonoBehaviour 类的一个生命周期方法,在游戏对象被加载时调用
		//Awake() 方法用于执行一些初始化操作
		//它设置了游戏对象的层级、获取 Rigidbody 组件,并设置刚体的迭代次数
		void Awake ()
		{
			this.gameObject.layer = 11; // Layer11 >> for MainBody.
			thisRigidbody = GetComponent < Rigidbody > ();
			thisRigidbody.solverIterations = solverIterationCount;
			/* for reducing Calls.
			rotateScripts = GetComponentsInChildren <Wheel_Rotate_CS> ();
			*/
		}

		//在每一帧更新时调用,Update() 方法用于根据输入更新车辆的行驶方向
		void Update ()
		{
			if (idScript.isPlayer) {
				#if UNITY_ANDROID || UNITY_IPHONE
				Mobile_Input ();
				#else
				Desktop_Input ();
				#endif
			}
		}

		//用于处理移动平台(Android 或 iPhone)上的输入。根据玩家的操作,它更新车辆的行驶方向
		#if UNITY_ANDROID || UNITY_IPHONE
		void Mobile_Input ()
		{
			if (CrossPlatformInputManager.GetButtonDown ("Up")) {
				speedStep += 0.5f;
				speedStep = Mathf.Clamp (speedStep, -1.0f, 1.0f);
			} else if (CrossPlatformInputManager.GetButtonDown ("Down")) {
				speedStep -= 0.5f;
				speedStep = Mathf.Clamp (speedStep, -1.0f, 1.0f);
			}
			float vertical = speedStep;
			float horizontal = 0.0f;
			if (CrossPlatformInputManager.GetButton ("Left")) {
				horizontal = Mathf.Lerp (-turnClamp, -1.0f, Mathf.Abs (vertical / 1.0f));
			} else if (CrossPlatformInputManager.GetButton ("Right")) {
				horizontal = Mathf.Lerp (turnClamp, 1.0f, Mathf.Abs (vertical / 1.0f));
			}
			if (vertical < 0.0f) {
				horizontal = -horizontal; // like a brake-turn.
			}
			leftRate = Mathf.Clamp (-vertical - horizontal, -1.0f, 1.0f);
			rightRate = Mathf.Clamp (vertical - horizontal, -1.0f, 1.0f);
		}
		#else

		//用于处理桌面平台上的输入。根据玩家的操作,它更新车辆的行驶方向
		void Desktop_Input ()
		{
			if (Input.GetKeyDown (KeyCode.UpArrow) || Input.GetKeyDown (KeyCode.W)) {
				speedStep += 0.5f;
				speedStep = Mathf.Clamp (speedStep, -1.0f, 1.0f);
			} else if (Input.GetKeyDown (KeyCode.DownArrow) || Input.GetKeyDown (KeyCode.S)) {
				speedStep -= 0.5f;
				speedStep = Mathf.Clamp (speedStep, -1.0f, 1.0f);
			} else if (Input.GetKeyDown (KeyCode.X)) {
				speedStep = 0.0f;
			}
			float vertical = speedStep;
			float horizontal = Input.GetAxis ("Horizontal");
			float clamp = Mathf.Lerp (turnClamp, 1.0f, Mathf.Abs (vertical / 1.0f));
			horizontal = Mathf.Clamp (horizontal, -clamp, clamp);
			if (vertical < 0.0f) {
				horizontal = -horizontal; // like a brake-turn.
			}
			leftRate = Mathf.Clamp (-vertical - horizontal, -1.0f, 1.0f);
			rightRate = Mathf.Clamp (vertical - horizontal, -1.0f, 1.0f);
		}
		#endif

		//在固定的时间间隔内调用,FixedUpdate() 方法用于更新车辆的物理属性,例如速度、角速度和停车制动
		void FixedUpdate ()
		{
			// Auto Parking Brake using 'RigidbodyConstraints'.
			if (leftRate == 0.0f && rightRate == 0.0f) {
				float velocityMag = thisRigidbody.velocity.magnitude;
				float angularVelocityMag = thisRigidbody.angularVelocity.magnitude;
				if (isParkingBrake == false) {
					if (velocityMag < autoParkingBrakeVelocity && angularVelocityMag < autoParkingBrakeVelocity) {
						lagCount += Time.fixedDeltaTime;
						if (lagCount > autoParkingBrakeLag) {
							isParkingBrake = true;
							thisRigidbody.constraints = RigidbodyConstraints.FreezePositionX | RigidbodyConstraints.FreezePositionZ | RigidbodyConstraints.FreezeRotationY;
						}
					}
				} else {
					if (velocityMag > autoParkingBrakeVelocity || angularVelocityMag > autoParkingBrakeVelocity) {
						isParkingBrake = false;
						thisRigidbody.constraints = RigidbodyConstraints.None;
						lagCount = 0.0f;
					}
				}
			} else {
				isParkingBrake = false;
				thisRigidbody.constraints = RigidbodyConstraints.None;
				lagCount = 0.0f;
			}
			/* for reducing Calls.
			for (int i = 0; i < rotateScripts.Length; i++) {
				rotateScripts [i].FixedUpdate_Me ();
			}
			*/
		}

		//在游戏对象被销毁时调用,Destroy() 方法用于处理游戏对象被破坏时的逻辑
		//它会禁用刚体的约束,并在一段时间后销毁游戏对象
		void Destroy ()
		{ // Called from "Damage_Control_CS".
			StartCoroutine ("Disable_Constraints");
		}

		//这个协程方法用于在一段时间后禁用刚体的约束,并最终销毁脚本所附加的游戏对象
		IEnumerator Disable_Constraints ()
		{
			// Disable constraints of MainBody's rigidbody.
			yield return new WaitForFixedUpdate (); // This wait is required for PhysX.
			thisRigidbody.constraints = RigidbodyConstraints.None;
			Destroy (this);
		}

		//这个函数用于获取与脚本交互的 ID_Control_CS 脚本的引用
		void Get_ID_Script (ID_Control_CS tempScript)
		{
			idScript = tempScript;
		}

		//这个函数用于根据游戏是否暂停来启用或禁用脚本的更新
		void Pause (bool isPaused)
		{ // Called from "Game_Controller_CS".
			this.enabled = !isPaused;
		}

	}

}
坦克车轮旋转的控制
1. Awake(): 在脚本被加载时调用的函数。在该函数中,设置了车轮的层级为第9层,获取了车轮的刚体组件,判断车轮是否在左侧,获取车轮的初始旋转角度,查找并获取父物体的Wheel_Control_CS脚本,根据车轮的半径计算最大角速度。
2. FixedUpdate(): 在固定的时间间隔内调用的函数。根据车轮是左侧还是右侧,获取对应的转速比率。根据转速比率和控制脚本中的轮胎扭矩,给车轮施加扭矩。设置车轮的最大角速度,根据转速比率和之前计算的最大角速度。通过稳定角度来保持车轮的角度。
3. Destroy(): 在游戏对象被销毁时调用的函数。设置车轮的角阻尼为无穷大,并销毁脚本自身。
4. Pause(): 当游戏暂停时调用的函数,根据传入的布尔值参数来启用或禁用脚本的更新。
using UnityEngine;
using System.Collections;

// This script must be attached to all the Driving Wheels.
//用于控制车轮的旋转
namespace ChobiAssets.KTP
{

	public class Wheel_Rotate_CS : MonoBehaviour
	{

		bool isLeft;                          //用于表示车轮是否位于左侧
		Rigidbody thisRigidbody;              //用于存储车轮的刚体组件
		float maxAngVelocity;                 //最大角速度,根据车辆的最大速度和车轮半径计算得出
		Wheel_Control_CS controlScript;       //用于存储 Wheel_Control_CS 脚本的引用,该脚本控制车辆的行驶
		Transform thisTransform;              //当前车轮的 Transform 组件
		Transform parentTransform;            //当前车轮的父物体的 Transform 组件
		Vector3 angles;                       //存储车轮的初始旋转角度


		//将车轮的层级设置为第9层,用于车轮
		//获取车轮的刚体组件
		//根据车轮在局部坐标系的位置判断车轮是否在左侧
		//获取车轮的初始旋转角度
		//查找并获取父物体的 Wheel_Control_CS 脚本
		//根据车轮的半径计算最大角速度
		void Awake ()
		{
			this.gameObject.layer = 9; // Layer9 >> for wheels.
			thisRigidbody = GetComponent <Rigidbody> ();
			// Set direction.
			if (transform.localPosition.y > 0.0f) {
				isLeft = true;
			} else {
				isLeft = false;
			}
			// Get initial rotation.
			thisTransform = transform;
			parentTransform = thisTransform.parent;
			angles = thisTransform.localEulerAngles;
			// Find controlScript.
			controlScript = parentTransform.parent.GetComponent <Wheel_Control_CS> ();
			// Set maxAngVelocity.
			float radius = GetComponent <SphereCollider> ().radius;
			maxAngVelocity = Mathf.Deg2Rad * ((controlScript.maxSpeed / (2.0f * Mathf.PI * radius)) * 360.0f);
		}

		/* for reducing Calls.
		public void FixedUpdate_Me ()
		*/
		//根据车轮是左侧还是右侧,获取对应的转速比率
		//根据转速比率和控制脚本中的轮胎扭矩,给车轮施加扭矩
		//设置车轮的最大角速度,根据转速比率和之前计算的最大角速度
		//通过稳定角度来保持车轮的角度
		void FixedUpdate ()
		{
			float rate;
			if (isLeft) {
				rate = controlScript.leftRate;
			} else {
				rate = controlScript.rightRate;
			}

			thisRigidbody.AddRelativeTorque (0.0f, Mathf.Sign (rate) * controlScript.wheelTorque, 0.0f);
			thisRigidbody.maxAngularVelocity = Mathf.Abs (maxAngVelocity * rate);
			// Stabilize angle.
			angles.y = thisTransform.localEulerAngles.y;
			thisRigidbody.rotation = parentTransform.rotation * Quaternion.Euler (angles);
		}

		//当游戏对象被破坏时调用,设置车轮的角阻尼为无穷大,并销毁脚本自身
		void Destroy ()
		{ // Called from "Damage_Control_CS".
			thisRigidbody.angularDrag = Mathf.Infinity;
			Destroy (this);
		}

		//当游戏暂停时调用,根据传入的布尔值参数来启用或禁用脚本的更新
		void Pause (bool isPaused)
		{ // Called from "Game_Controller_CS".
			this.enabled = !isPaused;
		}

	}

}
游戏效果展示
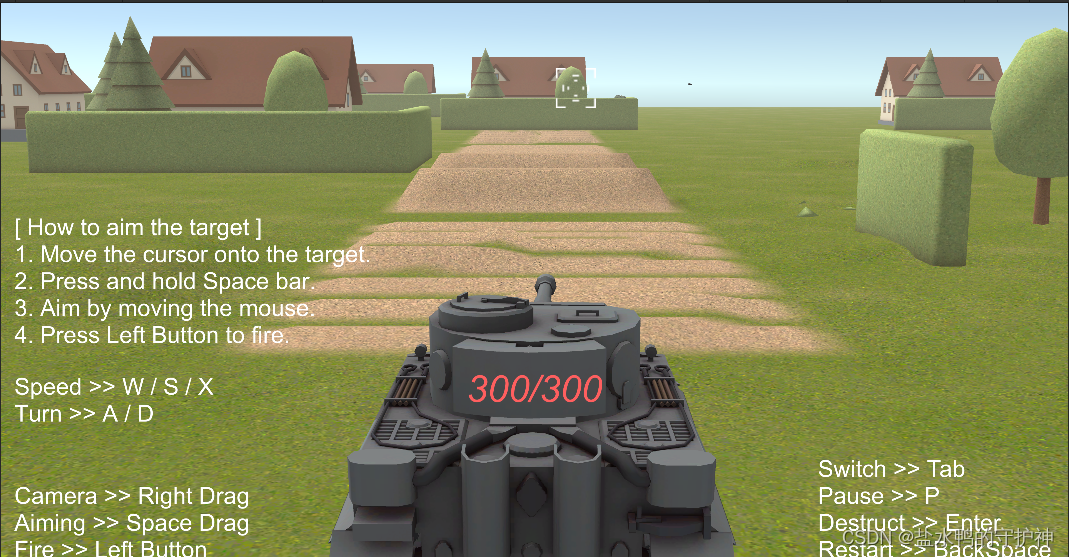
开始游戏
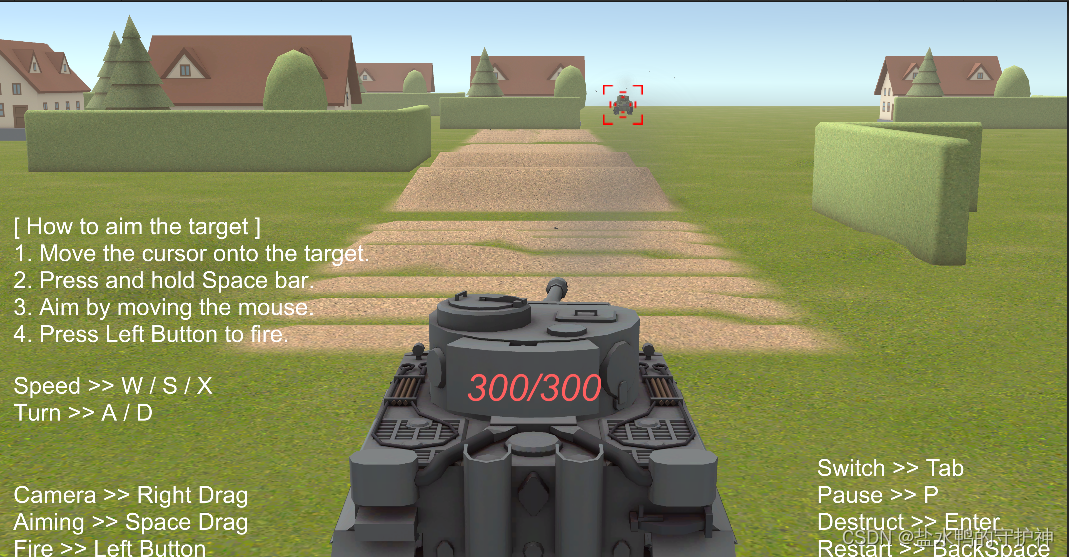
攻击敌方
击中敌方后血量显示
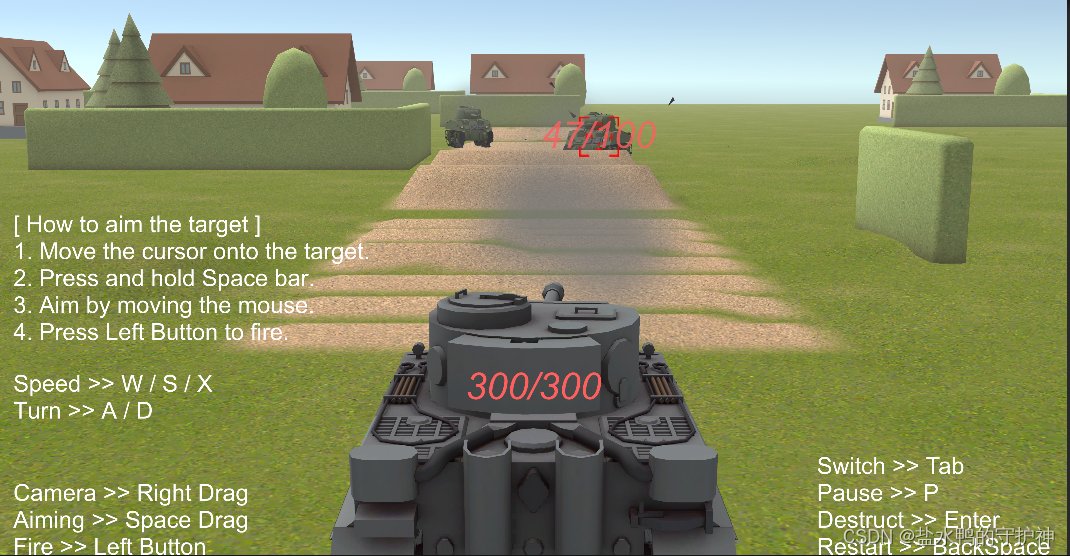
剩余血量
被击败(被摧毁)
结语
在这一个人机坦克对战游戏实现中,我们主要运用了感知—思考—行为的模型来对游戏进行建模,同时我们的游戏主要是建立在了kawaii Tank模型上的,我们主要在该模型上进行修改,以及添加各种检测和损坏的效果脚本等。
结束了这一个游戏项目的设计后,本学期的unity3D游戏设计就需要告一段落啦,在这一个学期里,我学习到了很多东西,学会了使用unity这一个主流的游戏设计软件来进行设计和编写游戏。主要学习了各种不同的模型来设计游戏、还学会了粒子效果、UI设计等技术知识,这一段时间的unity3D游戏设计的学习给我带来了极大的兴趣,相信不久的以后还会有使用到unity3D来设计游戏的时候。
特别感谢老师一整个学期的教学,一步一步地指导我们对unity3D进行设计和学习,同时还教会我们自己创建了不同的属于自己地游戏设计,在这个过程中,我们体会到了游戏设计的快乐,以及编程游戏的爱好。虽然这一个过程是艰苦的,但是好在真正地有体验到了游戏设计的编程之美,以及游戏设计的不简单。
我觉得本课程我应该得到优秀,因为我在本学期的学习过程中,善于游戏程序设计技术,熟练掌握了多种设计模式,比如MVC设计模式、带有action的MVC模式、还有感知—思考—行为的模式,充分利用相关的模式与技术来编写代码。同时,我还善于利用不同的UI设计技术来设计游戏以及展示游戏,在本学期的游戏内容中,我不仅可以编写游戏代码,还可以为游戏设计相对精彩的游戏内容以及闯关内容,真正达到锻炼自己的目的,在这个过程中,学习到了很多东西,使得自己的技术不断得到提升。
同时,我还非常擅长写技术普及博客,我写的每一篇博客均获得了比较大的浏览量,很多博客都获得了超过一千的阅读量,同时还获的不少的赞和收藏数。
总而言之,我觉得我本课程应该获得优秀,因为我不仅付出了比别人多的努力和时间,而且对老师布置的每一个作业都认真完成和积极改进,收获了比较大的成就感和真正的硬实力的提升。


 926
926

 被折叠的 条评论
为什么被折叠?
被折叠的 条评论
为什么被折叠?
 到【灌水乐园】发言


