


The content editor is a key part of WordPress. It allows users to create and manage their content, galleries and videos, in a Visual WYSIWYG (what you see is what you get) view.
内容编辑器是WordPress的关键部分。 它允许用户在Visual WYSIWYG(所见即所得)视图中创建和管理其内容,画廊和视频。
It also comes with a Text view, which allows users to insert or amend HTML within their content.
它还带有文本视图,该视图允许用户在其内容中插入或修改HTML。
The WordPress Visual Editor is powered by the TinyMCE editor control, which provides the WYSIWYG view, as well as the formatting buttons you see:
WordPress可视编辑器由TinyMCE编辑器控件提供动力,该控件提供WYSIWYG视图以及所看到的格式按钮:

Thanks to the TinyMCE API and WordPress’ filter hooks, we can add our own functionality to the WordPress Visual Editor. Specifically, we’ll look at how to create and register a custom TinyMCE Plugin which wraps selected text in a CSS class.
借助TinyMCE API和WordPress的过滤器挂钩,我们可以将自己的功能添加到WordPress可视编辑器中。 具体来说,我们将研究如何创建和注册自定义TinyMCE插件,该插件将选定的文本包装在CSS类中。
创建TinyMCE插件 (Creating the TinyMCE Plugin)
In your WordPress website, create the wp-content/plugins/tinymce-custom-class folder.
在您的WordPress网站中,创建wp-content/plugins/tinymce-custom-class文件夹。
We’ll store our plugin’s files here, so next create a file called tinymce-custom-class.php, using the following code:
我们将在此处存储插件的文件,因此接下来使用以下代码创建一个名为tinymce-custom-class.php的文件:
/**
 * Plugin Name: TinyMCE Custom Class
 * Plugin URI: https://www.sitepoint.com
 * Version: 1.0
 * Author: Tim Carr
 * Author URI: http://www.n7studios.co.uk
 * Description: TinyMCE Plugin to wrap selected text in a custom CSS class, within the Visual Editor
 * License: GPL2
 */

class TinyMCE_Custom_Class {

    /**
    * Constructor. Called when the plugin is initialised.
    */
    function __construct() {

    }

}

$tinymce_custom_class = new TinyMCE_Custom_Class;
This gives WordPress some information about our Plugin, and sets up our construct, where we’ll register our TinyMCE actions and filters.
这为WordPress提供了有关我们插件的一些信息,并设置了我们的构造,我们将在其中注册TinyMCE操作和过滤器。
WordPress TinyMCE过滤器 (WordPress TinyMCE Filters)
TinyMCE provides two key filters for registering an element on the Visual Editor toolbar:
TinyMCE提供了两个关键过滤器,用于在可视编辑器工具栏上注册元素:
mce_external_plugins: Used to load external TinyMCE plugins (https://codex.wordpress.org/Plugin_API/Filter_Reference/mce_external_plugins)mce_external_plugins:用于加载外部TinyMCE插件( https://codex.wordpress.org/Plugin_API/Filter_Reference/mce_external_plugins )mce_buttons: Used to add/remove buttons to the TinyMCE toolbar (https://codex.wordpress.org/Plugin_API/Filter_Reference/mce_buttons,mce_buttons_2,mce_buttons_3,_mce_buttons_4)mce_buttons:用于添加/删除按钮TinyMCE的工具栏( https://codex.wordpress.org/Plugin_API/Filter_Reference/mce_buttons,mce_buttons_2,mce_buttons_3,_mce_buttons_4 )
Before we call these filters, we want check we’re in the WordPress Administration screens. Add the following code to the __construct:
在调用这些过滤器之前,我们要检查是否在WordPress管理屏幕中。 将以下代码添加到__construct :
if ( is_admin() ) {
	add_action( 'init', array( &$this, 'setup_tinymce_plugin' ) );
}
Next, add the setup_tinymce_plugin function to perform some further checks:
接下来,添加setup_tinymce_plugin函数以执行一些进一步的检查:
/**
* Check if the current user can edit Posts or Pages, and is using the Visual Editor
* If so, add some filters so we can register our plugin
*/
function setup_tinymce_plugin() {

    // Check if the logged in WordPress User can edit Posts or Pages
    // If not, don't register our TinyMCE plugin
    if ( ! current_user_can( 'edit_posts' ) && ! current_user_can( 'edit_pages' ) ) {
        return;
    }

    // Check if the logged in WordPress User has the Visual Editor enabled
    // If not, don't register our TinyMCE plugin
    if ( get_user_option( 'rich_editing' ) !== 'true' ) {
        return;
    }

    // Setup some filters
    add_filter( 'mce_external_plugins', array( &$this, 'add_tinymce_plugin' ) );
    add_filter( 'mce_buttons', array( &$this, 'add_tinymce_toolbar_button' ) );

}
This checks if the current logged in WordPress user can edit Posts or Pages. If they can’t, there’s no point in registering our TinyMCE Plugin for that User, as they’ll never see the Visual Editor.
这将检查当前登录的WordPress用户是否可以编辑帖子或页面。 如果他们不能这样做,那么为该用户注册我们的TinyMCE插件是没有意义的,因为他们永远不会看到Visual Editor。
We then check if the user is using the Visual Editor, as some WordPress users turn this off via Users > Your Profile. Again, if the user is not using the Visual Editor, we return (exit) the function, as we don’t need to do anything else.
然后,我们检查用户是否正在使用可视编辑器,因为某些WordPress用户通过“ 用户”>“您的个人资料”将其关闭。 同样,如果用户没有使用Visual Editor,我们将返回(退出)该函数,因为我们无需执行其他任何操作。
If the above checks pass, the two TinyMCE WordPress Filters are registered – mce_external_plugins and mce_buttons.
如果上述检查通过,则将注册两个TinyMCE WordPress过滤器– mce_external_plugins和mce_buttons 。
The first filter – mce_external_plugins – allows us to register the TinyMCE JavaScript Plugin file that will interact with the Visual Editor. Let’s add a function call for this filter, inside our class:
第一个过滤器– mce_external_plugins –使我们能够注册将与Visual Editor交互的TinyMCE JavaScript插件文件。 让我们在类中为此过滤器添加一个函数调用:
/**
 * Adds a TinyMCE plugin compatible JS file to the TinyMCE / Visual Editor instance
 *
 * @param array $plugin_array Array of registered TinyMCE Plugins
 * @return array Modified array of registered TinyMCE Plugins
 */
function add_tinymce_plugin( $plugin_array ) {

    $plugin_array['custom_class'] = plugin_dir_url( __FILE__ ) . 'tinymce-custom-class.js';
    return $plugin_array;

}
Here, we register a JavaScript file within the $plugin_array, which contains all TinyMCE JavaScript plugins.
在这里,我们在$plugin_array注册一个JavaScript文件,其中包含所有TinyMCE JavaScript插件。
The second filter – mce_buttons – tells TinyMCE that we’d like to register a button in the Visual Editor. Again, let’s add a function call for this filter, inside our class:
第二个过滤器– mce_buttons –告诉TinyMCE我们想在可视编辑器中注册一个按钮。 再次,让我们在类中为该过滤器添加一个函数调用:
/**
 * Adds a button to the TinyMCE / Visual Editor which the user can click
 * to insert a custom CSS class.
 *
 * @param array $buttons Array of registered TinyMCE Buttons
 * @return array Modified array of registered TinyMCE Buttons
 */
function add_tinymce_toolbar_button( $buttons ) {

    array_push( $buttons, 'custom_class' );
    return $buttons;

}
This registers the programmatic name for our TinyMCE button (custom_class).
这将为我们的TinyMCE按钮注册程序名称( custom_class )。
创建JavaScript插件 (Creating the JavaScript Plugin)
When we called mce_external_plugins, we referenced a JavaScript file. We now need to create that file, and add some JavaScript code to it. This will tell TinyMCE how to output the button, and what to do when it’s clicked.
当我们调用mce_external_plugins ,我们引用了一个JavaScript文件。 现在,我们需要创建该文件,并向其中添加一些JavaScript代码。 这将告诉TinyMCE如何输出按钮,以及单击按钮时的操作。
Create a new file in the plugin folder called tinymce-custom-class.js, inserting the following code:
在名为tinymce-custom-class.js的插件文件夹中创建一个新文件,插入以下代码:
(function() {
    tinymce.PluginManager.add( 'custom_class', function( editor, url ) {
        // Add Button to Visual Editor Toolbar
        editor.addButton('custom_class', {
            title: 'Insert CSS Class',
            cmd: 'custom_class',
            image: url + '/icon.png',
        });

        // Add Command when Button Clicked
        editor.addCommand('custom_class', function() {
            alert('Button clicked!');
        });
    });
})();
This JavaScript function performs a few actions:
此JavaScript函数执行一些操作:
It calls the TinyMCE Plugin Manager class, which we can use to perform a number of TinyMCE plugin related actions. Specifically, we’re adding our plugin to TinyMCE using the
addfunction.它调用TinyMCE插件管理器类,我们可以使用该类执行许多与TinyMCE插件相关的操作。 具体来说,我们正在使用
add函数将插件添加到TinyMCE中。Within the
addroutine, we have access to the Visual Editor through theeditorinstance. We register our button using theaddButtonfunction, which comprises of a title, command and icon image.在
add例程中,我们可以通过editor实例访问Visual Editor。 我们使用addButton函数注册按钮,该函数包含标题,命令和图标图像。Finally, we register a command using the
addCommandfunction, which shows an alert telling us when our button was clicked.最后,我们使用
addCommand函数注册一个命令,该命令会显示一条警报,告诉我们何时单击按钮。
We’ll need to also include the icon.png image within our Plugin folder – this is the icon image that will be used for the button:
我们还需要在Plugin文件夹中包含icon.png图像-这是将用于按钮的图标图像:
Save your code, and activate your Plugin in WordPress Administration > Plugins.
保存您的代码,然后在WordPress管理>插件中激活您的插件。
Next, create or edit a Page or Post, and you’ll hopefully see your button with the icon:
接下来,创建或编辑页面或帖子,希望您会看到带有图标的按钮:
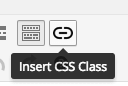
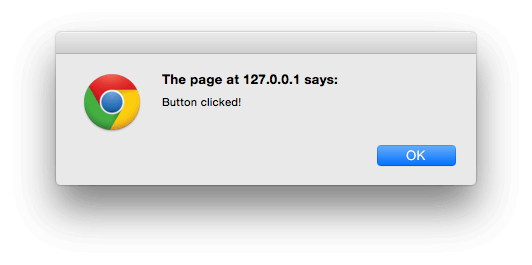
Click the button, and you’ll see the Button clicked! alert:
点击按钮,您将看到按钮被点击! 警报:
定义要运行的命令 (Defining a Command to Run)
Let’s replace the alert with a prompt, asking the user for the CSS class name they want to wrap around the selected text in the Visual Editor:
让我们用提示替换警报,询问用户要在Visual Editor中环绕所选文本CSS类名称:
(function() {
    tinymce.PluginManager.add( 'custom_class', function( editor, url ) {
        // Add Button to Visual Editor Toolbar
        editor.addButton('custom_class', {
            title: 'Insert CSS Class',
            cmd: 'custom_class',
            image: url + '/icon.png',
        });

        // Add Command when Button Clicked
        editor.addCommand('custom_class', function() {
            // Check we have selected some text selected
            var text = editor.selection.getContent({
                'format': 'html'
            });
            if ( text.length === 0 ) {
                alert( 'Please select some text.' );
                return;
            }

            // Ask the user to enter a CSS class
            var result = prompt('Enter the CSS class');
            if ( !result ) {
                // User cancelled - exit
                return;
            }
            if (result.length === 0) {
                // User didn't enter anything - exit
                return;
            }

            // Insert selected text back into editor, wrapping it in an anchor tag
            editor.execCommand('mceReplaceContent', false, '' + text + '');
        });
    });
})();
This command performs a few sanity checks, to make sure the user selected some text, entered a CSS class name and didn’t cancel the process.
该命令执行一些完整性检查,以确保用户选择了一些文本,输入了CSS类名并且没有取消该过程。
If those checks pass, we then run the editor’s execCommand function, to replace the selected text, with the selected text wrapped in a span tag which includes the inputted CSS class.
如果这些检查通过,则我们将运行编辑器的execCommand函数,以替换所选文本,并将所选文本包装在包含输入CSS类的span标记中。
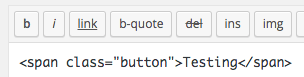
If everything worked, switch to the ‘Text’ view, and you’ll see your selected text is now wrapped in a span tag:
如果一切正常,请切换到“文本”视图,您会看到所选文本现在被包裹在span标记中:
结论 (Conclusion)
We’ve created a WordPress Plugin to add a button to the TinyMCE Visual Editor. In this process, we’ve explored the filters WordPress uses for integration with TinyMCE, as well as the JavaScript code needed to add a button and perform an action when clicked.
我们已经创建了一个WordPress插件来向TinyMCE Visual Editor添加一个按钮。 在此过程中,我们研究了WordPress用于与TinyMCE集成的筛选器,以及单击按钮时添加按钮并执行操作所需JavaScript代码。
To download the complete source code, visit the GitHub repository or the direct ZIP file download link.
要下载完整的源代码,请访问GitHub存储库或直接ZIP文件下载链接 。
In the next article, we’ll cover some more advanced steps that we can take to customize our TinyMCE plugin further.
在下一篇文章中,我们将介绍一些更高级的步骤,可用来进一步自定义TinyMCE插件。
翻译自: https://www.sitepoint.com/adding-custom-functionality-to-the-wordpress-visual-editor/


 950
950


 被折叠的 条评论
为什么被折叠?
被折叠的 条评论
为什么被折叠?
 到【灌水乐园】发言


