


probuilder
We recently introduced Snaps, asset packs designed to help bring your projects to life. Read on to learn how you can benefit from using Snaps to lay out your levels quickly and easily and how to modify the assets to use them in your game.
我们最近推出了Snaps,资产包旨在帮助使您的项目栩栩如生。 请继续阅读以了解如何使用Snap快速轻松地布置关卡,以及如何修改资产以在游戏中使用它们,从而从中受益。
什么是快照原型资产? (What are Snaps Prototype assets?)
Snaps Prototypes are modular prototyping assets created entirely with Unity’s ProBuilder 3D modeling package. They are designed to snap to a grid using the ProGrids system. Built to real-world scale, they make it easy for both novice and intermediate-level designers to lay out game environments. You can substitute the prototype assets with high-detail art assets later.
Snaps原型是完全由Unity的ProBuilder 3D建模包创建的模块化原型资产。 它们旨在使用ProGrids系统捕捉到网格。 它们按实际规模构建,使新手和中级设计师都可以轻松布置游戏环境。 您可以稍后将原型资产替换为高细节艺术品。
Several Snaps asset packs, with different themes, are currently available on the Asset Store. Check back for more soon. We want you to be able to prototype anything.
目前, Asset Store中提供了几个具有不同主题的Snaps资产包。 请稍后再回来查看。 我们希望您能够原型制作任何东西。
These low-polygon assets are designed to simplify level prototyping by making it modular. You have full control over how you use them. This can save you a lot of time as you no longer need to create your own 3D assets or use external digital content-creation tools to modify them.
这些低多边形资产旨在通过使其模块化来简化关卡原型制作。 您可以完全控制它们的使用方式。 由于您不再需要创建自己的3D资产或使用外部数字内容创建工具来修改它们,因此可以节省大量时间。
The assets are lightweight and do not contain any textures. Instead, parts of the meshes have different materials assigned to the topology. However, they are UV unwrapped, making it easy for you to texture them if you wish to do so. Alternatively, after getting your level layout in place, you can replace Snaps Prototype assets with highly detailed meshes of your own.
资源是轻量级的,不包含任何纹理。 相反,部分网格具有分配给拓扑的不同材质。 但是,它们是经过紫外线包裹的,如果您愿意,可以轻松地对其进行纹理处理。 或者,在放置关卡布局之后,可以使用自己的高度详细的网格替换Snaps Prototype资产。
卡扣包装结构 (Snaps package structure)
Before we begin working with our assets, let’s take a brief look at how everything is organized within a typical Snaps package.
在开始使用资产之前,让我们简要看一下如何在典型的Snaps软件包中组织一切。
Each Snaps asset pack comes with a script that will automatically download the ProBuilder and ProGrids packages if they are not already included in your project.
每个Snaps资产包都附带一个脚本,如果您的项目中尚未包含ProBuilder和ProGrids包,它们将自动下载。
All of the prototyping assets are within the AssetStoreOriginals folder, under _SNAPS_PrototypingAssets. Here, you will find an About folder containing some necessary information about Snaps, as well as all of your assets. Your assets are categorized according to their respective package names (e.g., ModernOfficeInterior or SciFi_Industrial).
所有原型资产都位于AssetStoreOriginals文件夹中的_SNAPS_PrototypingAssets下。 在这里,您将找到一个About文件夹,其中包含一些有关Snap以及所有资产的必要信息。 您的资产根据其各自的程序包名称(例如ModernOfficeInterior或SciFi_Industrial)进行分类。
Each Snaps Prototype package contains a Prefabs folder, which has all of the 3D meshes with their assigned materials ready for you to place around the scene. There is a Materials folder with material files assigned to different areas of each model, as well as a SampleScenes folder. The SampleScenes folder contains examples of how the assets can be laid out in an environment.
每个Snaps Prototype软件包都包含一个Prefabs文件夹,其中包含所有3D网格及其分配的材质,可随时放置在场景中。 有一个Material文件夹,其中有分配给每个模型不同区域的Material文件,还有一个SampleScenes文件夹。 SampleScenes文件夹包含如何在环境中布置资产的示例。
Without further ado, let’s see how we can quickly put something together from scratch.
事不宜迟,让我们看看如何快速地从头开始将某些内容组合在一起。
捕捉原型 (Prototyping with Snaps)
It’s time to create a new scene and see how we can arrange some Snaps assets into a level!
现在是时候创建一个新场景并了解如何将某些Snaps资产排列到一个关卡中了!
We’ll use two of the Snaps packs currently available on the Asset Store – the Sci-Fi/Industrial and Office packs – to prototype some futuristic living quarters. This will also serve as inspiration to develop our own prototyping props down the line.
我们将使用Asset Store当前提供的Snaps包中的两个(Sci-Fi / Industrial和Office包)来制作一些未来派居住区的原型。 这也将成为开发我们自己的原型道具的灵感。
Once you have imported Snaps into a project, along with ProGrids and ProBuilder, you will notice some new UI elements appear in the top left corner of your Scene view. This set of icons is part of the ProGrids package – it contains all the tools you need to start snapping your models together quickly. Using the Grid Visibility icon in the toolbar, you can turn on the grid display. Also, with the X, Y, Z, and 3D icons below, you’re able to choose the axis on which you want to render the grid. Just below it is the button that controls grid snapping. With it enabled, if you try to move objects in your scene, they will move within the specified snapping interval. You can optionally enable scale and angle snapping too. Check out the ProGrids documentation if you want to learn more.
将快照以及ProGrids和ProBuilder导入到项目后,您会注意到一些新的UI元素将出现在“场景”视图的左上角。 这组图标是ProGrids程序包的一部分–它包含开始将模型快速对齐在一起所需的所有工具。 使用工具栏中的“网格可见性”图标,可以打开网格显示。 同样,使用下面的X,Y,Z和3D图标,您可以选择要在其上渲染网格的轴。 在它的正下方是控制网格捕捉的按钮。 启用它后,如果您尝试在场景中移动对象,则它们将在指定的捕捉间隔内移动。 您也可以选择启用比例和角度捕捉。 如果您想了解更多信息,请查阅ProGrids 文档 。
Let’s put our grid to use. To do that, we can grab one of the floor tiles from the Sci-Fi/Industrial pack and drag it into the scene. Then use the Push to Grid button to match our new tile to our grid, with the corresponding snapping increment (1 by default). Make sure that Snapping is turned on. Now, if we attempt to move our tile around the scene, it will always snap in increments of one unit. You will also notice that the tile’s pivot is set to one of its corners, making sure it will always snap with other tiles. Let’s add some more tiles, laying out the base floor of our level.
让我们使用网格。 为此,我们可以从Sci-Fi / Industrial包中抓取其中一个地砖并将其拖到场景中。 然后使用“推到网格”按钮将我们的新图块与网格匹配,并具有相应的捕捉增量(默认为1)。 确保打开了“捕捉”功能。 现在,如果我们尝试在场景中移动图块,它将始终以一个单位递增。 您还将注意到,图块的枢轴设置为其角之一,请确保它始终与其他图块对齐。 让我们添加更多的瓷砖,布置我们关卡的底楼。
In much the same manner, we can place walls, doors, and stairs. Once we get to positioning our props, we might need to change the snapping increment from 1 to something smaller, to give us more freedom over their placement. Alternatively, we could go ahead and place the props by hand, using Unity’s default snapping tools to snap them to surfaces where needed.
以几乎相同的方式,我们可以放置墙壁,门和楼梯。 一旦定位好道具,我们可能需要将捕捉增量从1更改为更小的值,以使我们在放置它们时有更大的自由度。 或者,我们可以继续进行操作,并使用Unity的默认捕捉工具将道具手动放置到需要的地方。
And that’s how simple it is to start using Snaps. Have fun laying out your new game environments! Next, we’ll learn about editing Snaps assets and creating new ones using ProBuilder.
这就是开始使用Snap的过程非常简单。 布置新的游戏环境,玩得开心! 接下来,我们将学习有关编辑Snap资产以及使用ProBuilder创建新资产的知识。
Once you have your level layout in place, you might want to replace the low-poly meshes with some high-resolution ones, or vice versa, for faster iteration. You can do so very easily with this downloadable tool.
放置好关卡布局后,可能需要用一些高分辨率的网格替换低多边形网格,反之亦然,以加快迭代速度。 您可以使用此可下载工具轻松完成此操作 。
You can access the script under Snaps → Snaps Swap Tool.
您可以在捕捉→捕捉交换工具下访问脚本。
In the script options, you can pass in a Prefabs folder containing your Snaps Prototype assets. In the case of this script, the Prefab filenames need to match the filenames of the Snaps assets. Once you point the script to the Prefabs, you can simply replace the objects you selected, or all the objects in the scene, with a single click.
在脚本选项中,您可以传入一个包含Snaps Prototype资产的Prefabs文件夹。 对于此脚本,Prefab文件名需要与Snaps资产的文件名匹配。 将脚本指向Prefabs后,您只需单击一下,即可替换选定的对象或场景中的所有对象。
You can also create customized Nested Prefabs, using Snaps Prototype assets. The script can help you automatically generate high-resolution Prefabs that correspond to them.
您还可以使用Snaps Prototype资产创建定制的嵌套式预制件。 该脚本可以帮助您自动生成与其对应的高分辨率预制件。
使用ProBuilder编辑快照资产 (Editing Snaps assets with ProBuilder)
So, what happens if we want to alter one of the props inside the pack slightly? Perhaps give it a different material, or change the topology? Typically, you’d need experience with an external 3D modeling package to do that. However, since Snaps assets are made with ProBuilder, we can use it to edit any of our existing props – or create new ones – without leaving the Editor.
那么,如果我们想稍微改变背包中的道具之一怎么办? 也许给它不同的材料,或者改变拓扑? 通常,您需要具有外部3D建模包的经验才能做到这一点。 但是,由于Snaps资产是使用ProBuilder制作的,因此无需离开编辑器,我们就可以使用它来编辑任何现有的道具(或创建新的道具)。
什么是ProBuilder? (What is ProBuilder?)
ProBuilder is a completely free 3D modeling and level editing package, available directly within the Unity Editor. The installation steps for ProBuilder can be found at the beginning of this blog post. ProBuilder offers a vast array of 3D modeling tools and is especially useful for prototyping. It is also compatible with ProGrids, making it easy to create precisely positioned geometry.
ProBuilder是一个完全免费的3D建模和关卡编辑包,可直接在Unity Editor中使用。 ProBuilder的安装步骤可以在此博客文章的开头找到。 ProBuilder提供了广泛的3D建模工具,对于原型制作特别有用。 它也与ProGrids兼容,使创建精确定位的几何图形变得容易。
We won’t be covering the entirety of the ProBuilder toolkit here, but you can explore detailed documentation and many tutorial videos on the topic. If you want to get into 3D modeling or find an easier way to create level layouts in Unity, that’s the perfect place to start.
我们不会在这里介绍ProBuilder工具包的全部内容,但是您可以浏览有关该主题的详细文档和许多教程视频。 如果您想进入3D建模或找到在Unity中创建关卡布局的简便方法,那么这是一个理想的起点。
To edit any of our existing meshes, we will need to convert it back to the ProBuilder editable format first. To do so, we need to select our mesh in the scene while we are in Object mode.
要编辑现有的任何网格,我们需要先将其转换回ProBuilder可编辑格式。 为此,我们需要在处于“对象”模式下时在场景中选择网格。
Then, go to Tools → ProBuilder → Object → ProBuilderize. This will open a new ProBuilder toolbar at the top of the Scene view and will enable us to edit the mesh.
然后,转到工具→ProBuilder→对象→ProBuilderize。 这将在“场景”视图顶部打开一个新的ProBuilder工具栏,并使我们能够编辑网格。
We will also need to open the ProBuilder window to access the rest of the 3D modeling toolkit. To do so, go to Tools → ProBuilder → ProBuilder Window, and dock it somewhere handy.
我们还需要打开ProBuilder窗口以访问其余的3D建模工具包。 为此,请转到工具→ProBuilder→ProBuilder窗口,然后将其停靠在方便的地方。
分配新材料 (Assigning new materials)
One of the features of ProBuilder is the Material Editor. This is separate from the main ProBuilder toolkit; you can find it under Tools → ProBuilder → Editors → Open Material Editor. ProBuilder has many other useful editors, such as the UV and smoothing editors, which you would typically find in a 3D modeling package. For now, let’s focus on changing the materials for our object.
ProBuilder的功能之一是材质编辑器。 这与主要的ProBuilder工具包是分开的。 您可以在工具→ProBuilder→编辑器→打开材料编辑器下找到它。 ProBuilder还有许多其他有用的编辑器,例如UV和平滑编辑器,通常可以在3D建模包中找到它们。 现在,让我们集中精力更改对象的材质。
Since we’re going for a futuristic look, the color scheme of the assets from the office pack doesn’t fit very well. Let’s change it. First, ProBuilderize one of the props – I chose the desk. Now, let’s take a look at our Material Editor. Here, we can select an existing material and assign it to either the entire object or only the selected polygons. We can also assign some materials to hotkeys.
由于我们将采用未来派的外观,因此Office Pack中资产的配色方案不太适合。 让我们改变它。 首先,ProBuilderize道具之一–我选择了桌子。 现在,让我们看一下“材质编辑器”。 在这里,我们可以选择一个现有的材质并将其分配给整个对象或仅分配给选定的多边形。 我们还可以为热键分配一些材料。
Let’s quickly create a matte white material for the desk and a black metallic material for the legs. I can now assign both of these to different hotkeys. After this, let’s go into ProBuilder’s face mode by selecting the corresponding icon in the top toolbar of our Scene view.
让我们快速为办公桌创建哑光白色材料,为支腿创建黑色金属材料。 我现在可以将这两个都分配给不同的热键。 之后,通过选择“场景”视图顶部工具栏中的相应图标进入ProBuilder的面部模式。
Let’s select all faces of the desk by going around the desk and selecting with Shift. After that, press either Assign Material or your designated key combination. You can then do the same with your metallic material for all the faces of the desk’s feet.
让我们四处走动并使用Shift键选择办公桌的所有面。 之后,按分配材料或您指定的组合键。 然后,您可以对桌脚的所有面使用金属材料进行相同处理。
You can also add some emissive materials for the computer screens, or just change the materials initially assigned to the computer screens.
您还可以为计算机屏幕添加一些发光材料,或仅更改最初分配给计算机屏幕的材料。
So now we know it’s super easy to reassign materials for Snaps with ProBuilder. You can also learn from other Unity users; this video shows you how to use the existing UVs and the UV editor to map a texture to your mesh, walking you through the complete creation process for two simple game props – a crate and a barrel.
因此,现在我们知道使用ProBuilder为Snap重新分配材质非常容易。 您还可以向其他Unity用户学习; 该视频向您展示了如何使用现有的UV和UV编辑器将纹理映射到您的网格,并引导您完成两个简单游戏道具(板条箱和枪管)的完整创建过程。
编辑网格 (Editing the mesh)
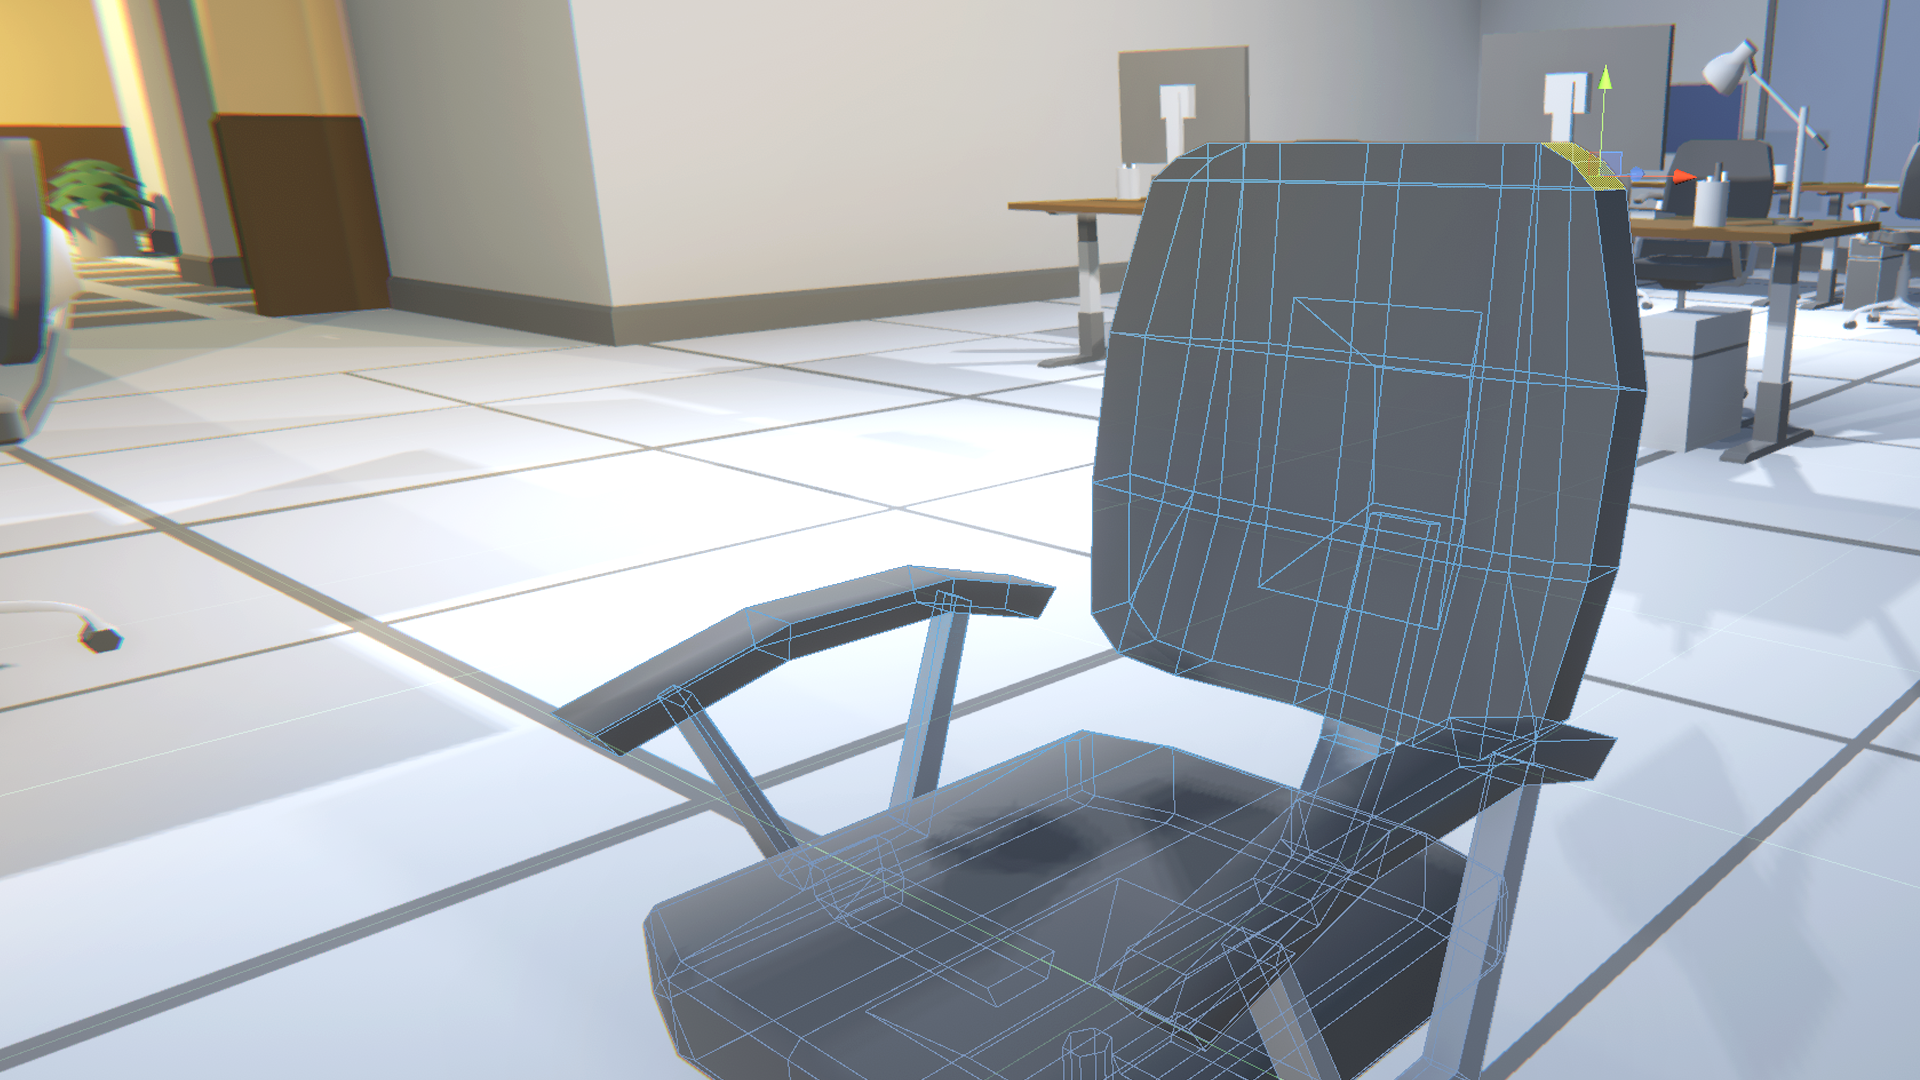
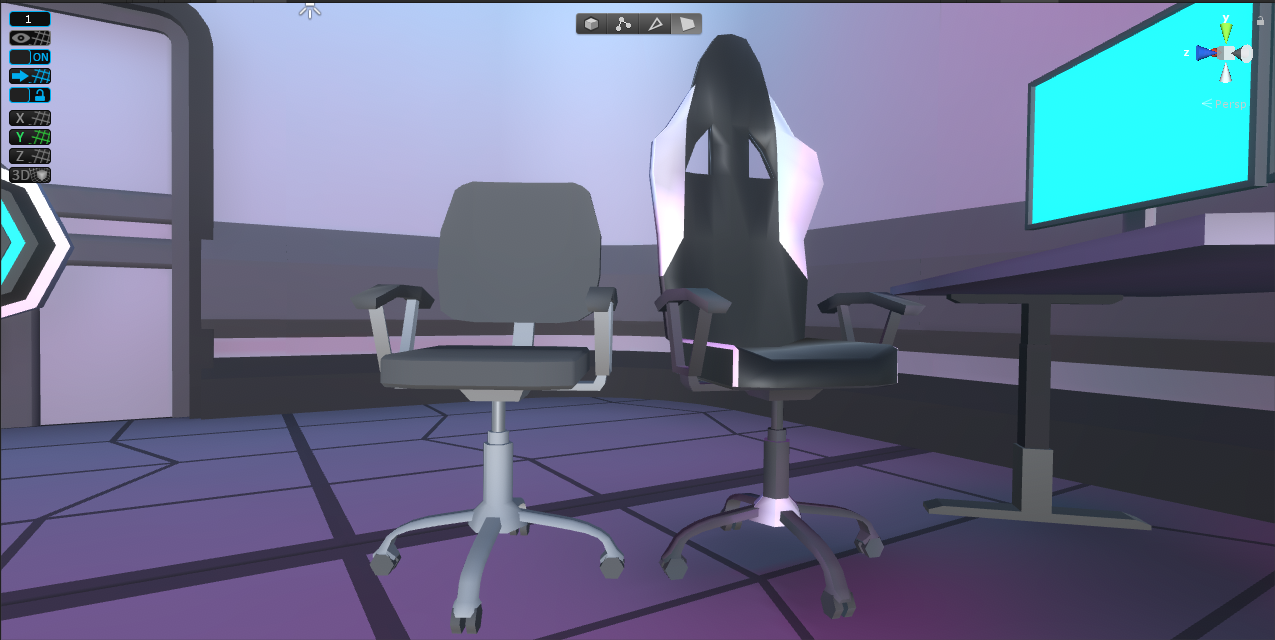
What if we want to change the geometry of one of the meshes in the level? There is currently an office chair in my level, but it’s not very futuristic. Let’s see how we can turn it into a glorious gaming chair instead.
如果我们想更改关卡中一个网格的几何形状怎么办? 我目前在办公室椅子上,但不是很未来。 让我们看看如何将其变成光彩的游戏椅。
After looking at some references of what those look like, we get an idea of the general shape of our object. Let’s start simple: the back of our chair needs to be a lot taller, as it will have a rounded headrest. There will also be two holes in the backrest, near where the headrest pillow would be. The sides of the backrest are wing-shaped, and the bottom of the back needs to go down all the way to the seat.
在查看了有关其外观的一些参考之后,我们对对象的总体形状有了一个了解。 让我们从简单开始:椅子的后背需要高很多,因为它将有一个圆形的头枕。 靠背上还将有两个Kong,靠近头枕的位置。 靠背的侧面呈翼形,靠背的底部需要一直向下到座椅。
Let’s start by working on bigger shapes by going into face mode and selecting the top and bottom polygons of the backrest. Then, we can switch to the scale tool and scale-up on the y-axis. This will pull our top and bottom polygons further apart from each other. After that, we can use the move tool to do some micro-adjustments on the faces individually.
首先,进入面部模式并选择靠背的顶部和底部多边形,开始处理更大的形状。 然后,我们可以切换到缩放工具并在y轴上放大。 这将使我们的顶部和底部多边形彼此分离。 之后,我们可以使用移动工具分别对面上进行一些微调整。
Tip: The axis in which your scale, move, and rotate tools operate in the context of ProBuilder depends on whether you are in Local or Global transform mode, and whether your handle is at the Center of your selection or the Pivot of the last selected element, like a face or an edge. Generally, it is best to stay in Local transform mode, so that the axes are local to the normals of your selected objects, and to use the Center of your selection as your tool handle placement, to ensure that all of your selected objects are affected by the tool symmetrically.
提示:在ProBuilder的上下文中,缩放,移动和旋转工具所处的轴取决于您是处于“本地”转换模式还是“全局”转换模式,以及手柄是否位于所选内容的中心或上一个所选内容的枢轴上元素,例如面部或边缘。 通常,最好保持在“局部”变换模式下,以使轴位于所选对象的法线的局部,并使用选择的“中心”作为工具的手柄放置位置,以确保所有所选对象均受到影响通过工具对称。
One thing that we can notice is that we don’t have enough detail on the top part of the chair to shape our headrest properly. To fix that, we can go into Edge mode, and use the Insert Edge Loop tool to add two new edge loops along the top of our chair. We can then grab the two new edges at the top of the back and move them up, which gives us a more rounded shape.
我们可以注意到的一件事是,我们在椅子的顶部没有足够的细节来正确地塑造我们的头枕。 要解决此问题,我们可以进入“边缘”模式,并使用“插入边缘循环”工具在椅子的顶部添加两个新的边缘循环。 然后,我们可以抓住背部顶部的两个新边缘并将其向上移动,这使我们的形状更加圆滑。
Let’s get to work on the sides of the chair. We can grab two of our outside edges and scale them apart; however, we will need to add some new edge loops to round off our chair. We should also pull the wings slightly forward.
让我们开始在椅子的侧面上工作。 我们可以抓住我们的两个外边缘并将其缩放; 但是,我们将需要添加一些新的边缘环以使椅子更圆滑。 我们还应稍微向前拉动翅膀。
Now it’s time to make the holes in the back. For this, we will need a few new tools. We can split some of our existing quad geometry into triangles, then delete those triangulated faces, and bridge the formed gap outline with new polygons.
现在是时候在背面打Kong了。 为此,我们将需要一些新工具。 我们可以将一些现有的四边形几何形状拆分为三角形,然后删除那些三角化的面,并将形成的间隙轮廓与新的多边形桥接。
To begin, we will need to pull some of the geometry in the middle of our backrest upwards. After that, select four diagonally placed faces on both the front and the back of the chair, and press Triangulate Faces in our ProBuilder panel to see the result.
首先,我们需要将靠背中间的某些几何形状向上拉。 然后,在椅子的正面和背面选择四个对角放置的面,然后在ProBuilder面板中按Triangulate Faces来查看结果。
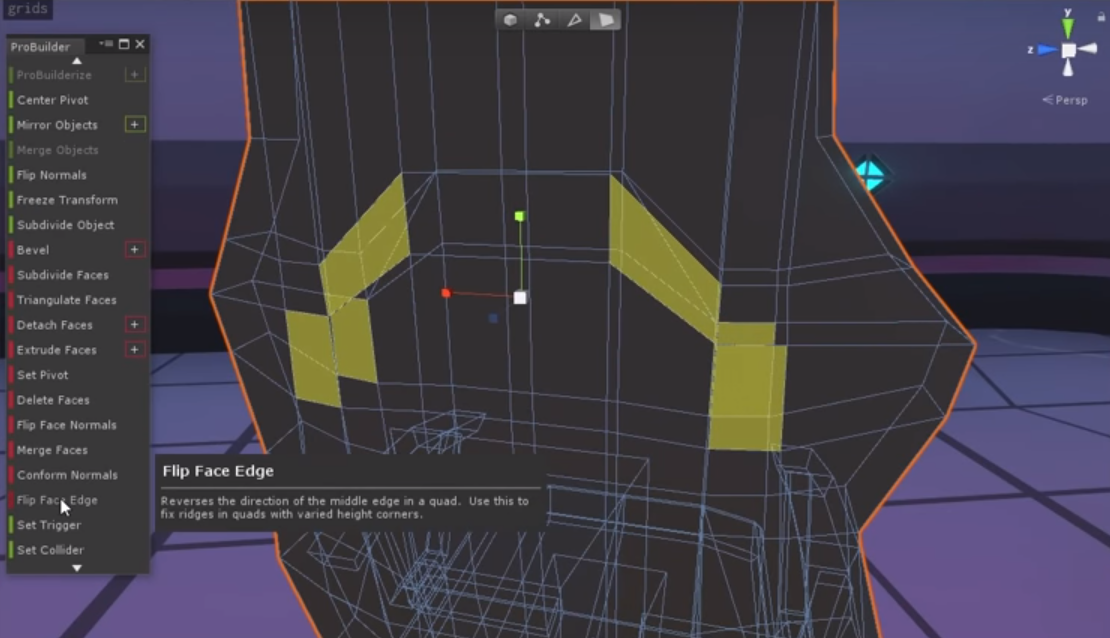
As you can see, some of our new triangles are facing the wrong way. We can fix this by undoing our division and deselecting the faces which end up forming improperly oriented triangles. Then we triangulate again, on only one side of the mesh. After that, we can use the Flip Face Edge tool on the other set of polygons, and if we triangulate those faces now, you will see the edge has been flipped correctly.
如您所见,我们的一些新三角形正面临错误的道路。 我们可以通过取消除法并取消选择最终形成不正确方向的三角形的面来解决此问题。 然后,我们仅在网格的一侧再次进行三角剖分。 之后,我们可以在另一组多边形上使用“翻转面边缘”工具,如果现在对这些面进行三角测量,您将看到边缘已正确翻转。
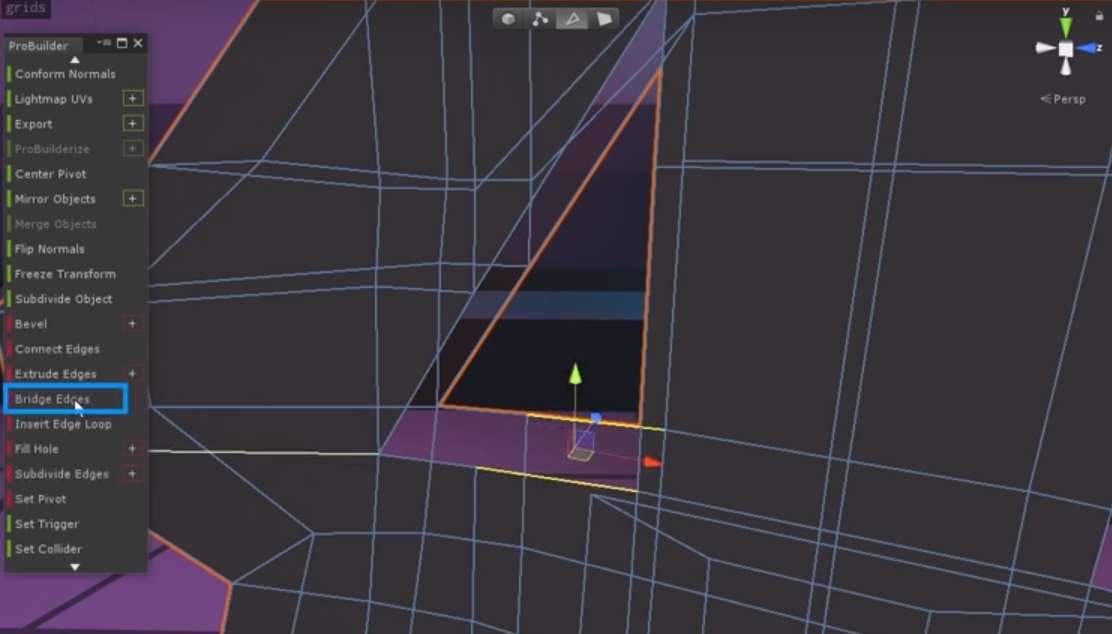
Now, select our new triangles and use Delete Faces to form a gap. Once complete, we can go around the newly formed mesh hole in edge mode, selecting pairs of faces from the front and the back and using the Bridge Edges tool.
现在,选择我们的新三角形,然后使用“删除面”形成一个间隙。 完成后,我们可以在“边缘”模式下绕过新形成的网格Kong,从“前”和“后”选择成对的面,并使用“桥边缘”工具。
使用平滑编辑器 (Using the Smoothing Editor)
Earlier, we talked about ProBuilder’s smoothing editor. We can use it to make the corner edges of our chair appear slightly more rounded. Let’s bring up the Smoothing Editor by going to Tools → ProBuilder → Editors → Open Smoothing Editor.
之前,我们讨论了ProBuilder的平滑编辑器。 我们可以使用它使椅子的拐角边缘显得更圆一些。 让我们通过转到工具→ProBuilder→编辑器→打开平滑编辑器来启动平滑编辑器。
We can get rid of any existing smoothing groups on our chair by dragging a selection box around the object in Face mode (make sure Select Hidden is set to On) and pressing the Clear Smoothing Groups button in the Smoothing Editor window.
通过在“脸部”模式下围绕对象拖动选择框(确保“选择隐藏”设置为“开”)并在“平滑编辑器”窗口中按“清除平滑组”按钮,可以摆脱椅子上任何现有的平滑组。
Let’s start smoothing the parts of our chair that we wish to round off. First, we can select all the faces of our backrest, and add it to the same smoothing group by pressing on any of the numbers in our editor. There are no hard edges on the back of our chair, so we can safely do this, but make sure not to select the metal part of the chair base at the back.
让我们开始平滑椅子上我们想要四舍五入的部分。 首先,我们可以选择靠背的所有面,然后通过在编辑器中按任意数字将其添加到同一平滑组中。 椅背上没有硬边,因此我们可以安全地进行此操作,但请确保不要选择椅背的金属部分在椅背上。
We can also do the same for the seat, and we can use the same smoothing group since the faces of the back and the seat are not adjacent.
我们还可以对座椅执行相同的操作,并且可以使用相同的平滑组,因为靠背和座椅的面不相邻。
It also makes sense to add smoothing groups to other parts of the model that should appear rounded, like the hydraulic cylinder and the feet. Be sure to not assign the same smoothing groups in places where you want to keep a hard edge while smoothing both sides.
将平滑组添加到应该显示为圆形的模型的其他部分(例如液压缸和支脚)也很有意义。 确保在要平滑两边的同时要保持坚硬边缘的地方不要分配相同的平滑组。
And there we have it. Here’s the office chair we started with, next to the glorious gaming chair that we have in the end.
我们终于得到它了。 这是我们开始使用的办公椅,最后是我们拥有的光彩游戏椅。
使用ProBuilder自定义资产 (Custom assets with ProBuilder)
You now have a good knowledge of using Snaps and editing them with ProBuilder. You might also want to explore how you can make your own props using these packages.
您现在对使用快照和通过ProBuilder进行编辑有很好的了解。 您可能还想探索如何使用这些软件包制作自己的道具。
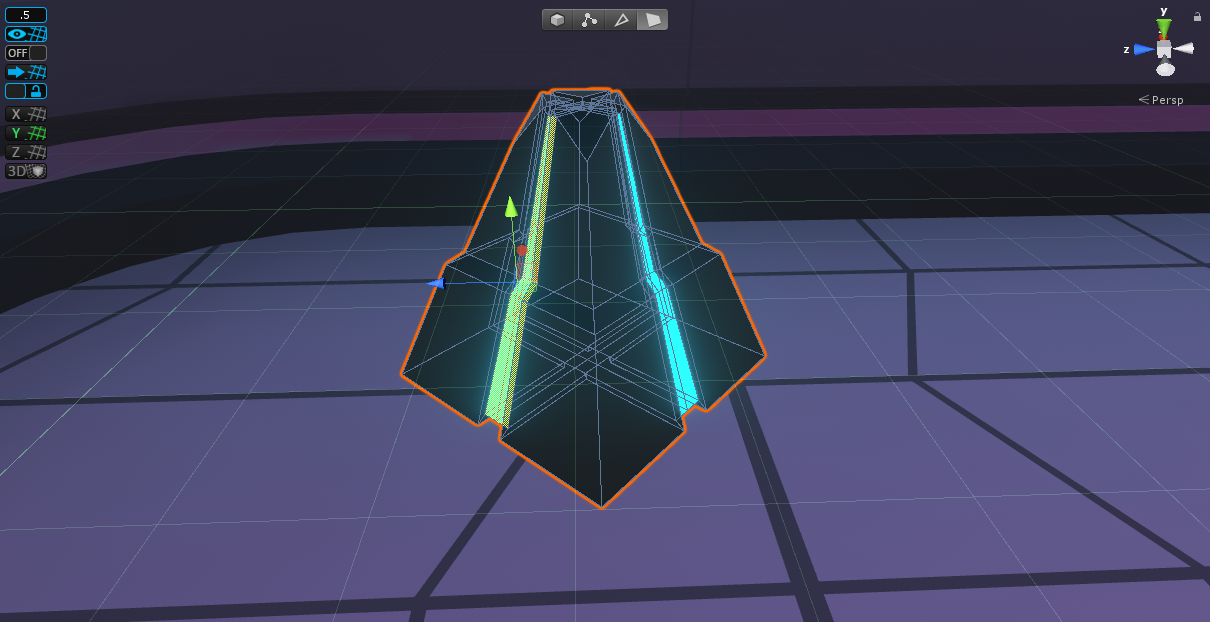
Let’s do so by making a small alien-looking prop, which would function as a sort of control panel for our doors.
让我们通过制作一个看起来像外星人的小型道具来做到这一点,它将用作我们门的控制面板。
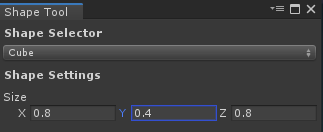
We can begin by making a primitive in ProBuilder. To do so, let’s select the New Shape tool and open its configuration window by pressing the plus icon next to the tool’s name. This will open a dialogue box that lets us set dimensions and specify the type of our new shape.
我们可以从在ProBuilder中创建基本体开始。 为此,我们选择“ New Shape”工具,然后通过按工具名称旁边的加号图标来打开其配置窗口。 这将打开一个对话框,可让我们设置尺寸并指定新形状的类型。
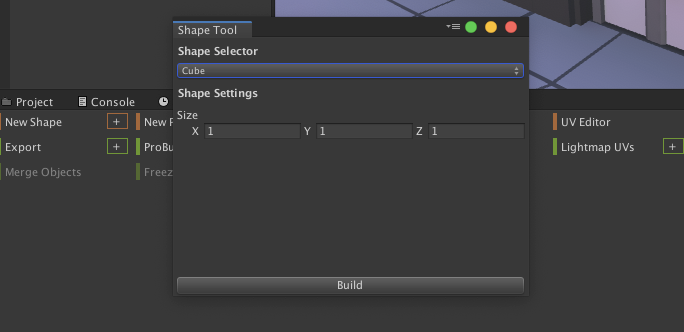
When deciding this, remember that all Snaps assets are made with real-world scale in mind. That means it can be helpful to think about how an object’s size will be relevant to, for example, the height of an average person. Here are the dimensions we went with.
在确定这一点时,请记住,所有Snaps资产都是在现实世界中考虑到的。 这意味着考虑对象的大小与例如普通人的身高之间的关系可能会有所帮助。 这是我们使用的尺寸。
Now, the first thing we can do is make this object snappable. To do so, we will plant our pivot point at the base of the object and in the middle. This will mean that it always snaps to our grid. Alternatively, if you were making a floor or wall tile, you might want to put your pivot in the location of one of the corner vertices.
现在,我们要做的第一件事就是使该对象可捕捉。 为此,我们将轴心点放置在对象的底部和中间。 这将意味着它总是紧贴我们的网格。 或者,如果要制作地板砖或墙面砖,则可能需要将枢轴放置在一个角顶点的位置。
For doing this, ProBuilder includes a handy Set Pivot tool, which will place the pivot at the center point of our current selection. Knowing this, we can select the bottom face of our new mesh, which will place our selection handle in the middle of it, and press Set Pivot to place it at the center-base of our object.
为此,ProBuilder包含了一个方便的Set Pivot工具,该工具会将轴心放置在当前选择的中心点。 知道这一点后,我们可以选择新网格的底面,将其选择手柄放置在其中间,然后按Set Pivot将其放置在对象的中心。
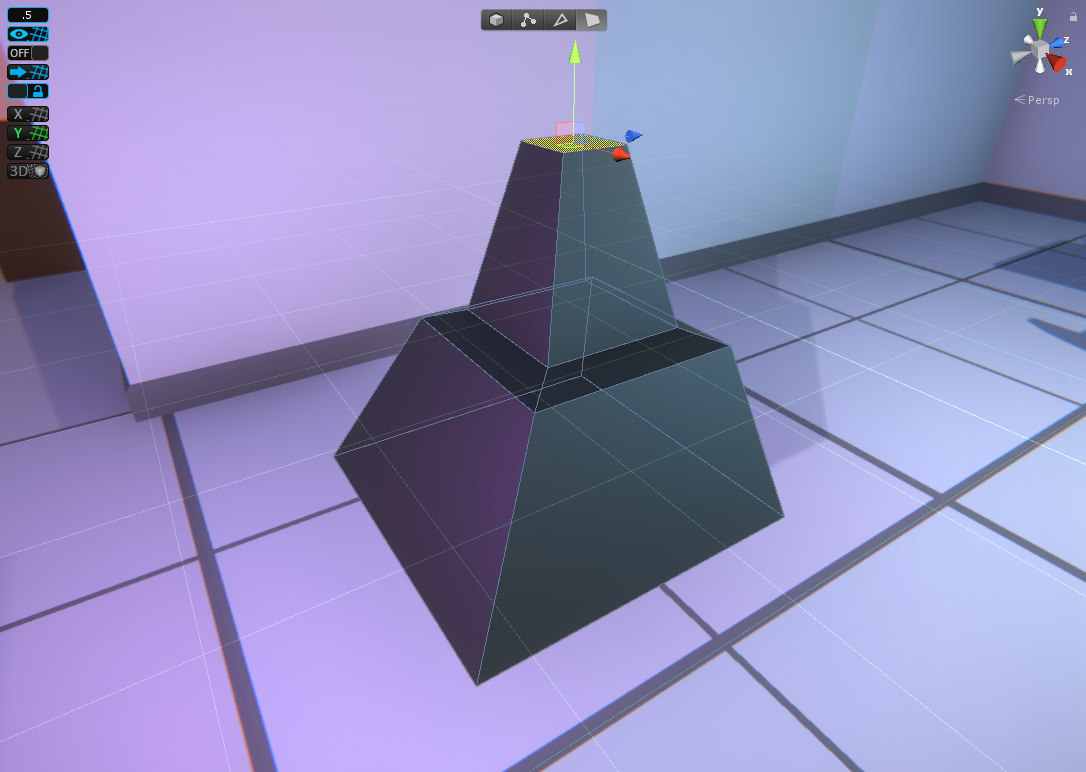
We can start shaping our object. For now, let’s assign it a material and start working by scaling the top face of the mesh inwards since our prop will converge towards the top. We can then use the Extrude Faces tool to add some new geometry at the top and scale it inwards again.
我们可以开始塑造我们的对象。 现在,让我们为其分配一种材质,并通过向内缩放网格的顶面开始工作,因为我们的道具将朝顶部收敛。 然后,我们可以使用“拉伸面”工具在顶部添加一些新几何体,然后再次向内缩放。
Tip: Did you know you can still use ProGrids snapping functionality when modeling? We can turn it on to place our newly extruded faces on the same height level as the top of our base mesh.
提示:您知道建模时仍可以使用ProGrids捕捉功能吗? 我们可以将其打开以将新拉伸的面放置在与基础网格顶部相同的高度上。
After that, we can select the outer top edge loop of our base, and lower it slightly with the Move tool.
之后,我们可以选择底座的外部上边缘环,然后使用“移动”工具将其稍微降低。
Let’s extrude the top once more, and we will have the base shape of our object.
让我们再次拉伸顶部,我们将获得对象的基本形状。
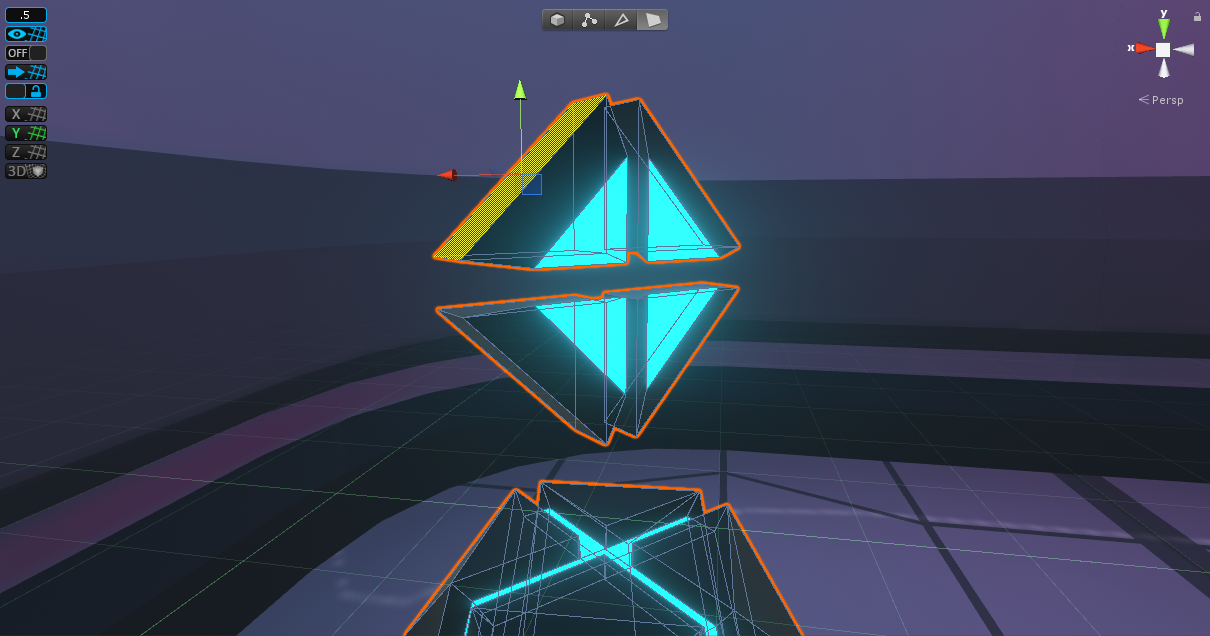
It would be nice to add a glowing inlay to our prop. Let’s do that now. First, begin by adding two edge loops around either side of our mesh. Then add four more, one on each side of both of our new loops, as shown below.
向我们的道具添加发光的嵌体会很好。 现在开始吧。 首先,首先在网格的两侧添加两个边缘环。 然后再添加四个,在两个新循环的每一侧各添加一个,如下所示。
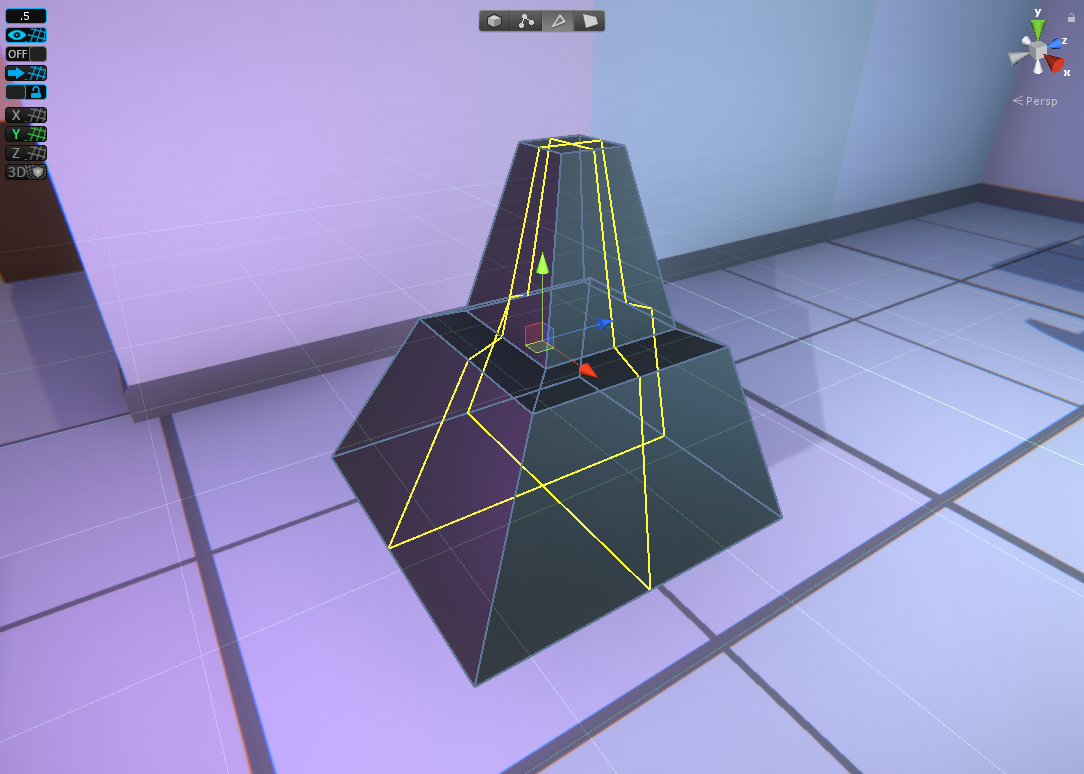
We can now select the two outer edge loops and scale them inwards to bring them towards the center; then do the same on the other side. Now, select all of the faces on the inner side of our edge loop, and in the Extrude menu, we can set them to extrude by Face Normal with a thickness of -0.01. This will give us a nice inlay on our mesh. Let’s make a new emissive material, and assign it to the inlay, for the result below.
现在,我们可以选择两个外部边缘环,并向内缩放它们以使其朝中心。 然后在另一边做同样的事情。 现在,选择边缘循环内侧的所有面,然后在“拉伸”菜单中,将它们设置为通过“面法线”拉伸,厚度为-0.01。 这将使我们在网格上具有很好的镶嵌效果。 让我们制作一个新的发光材料,并将其分配给嵌体,以得到以下结果。
Currently, the top part of our prop is a bit boring, so let’s fix that. We can lower the outer vertices of the top surface. Before then, we can add some support edges with the Connect Vertices tool to ensure that the quads triangulate properly when we lower the vertices. After that, select the four outer vertices, and bring them down with the Move tool.
目前,我们道具的顶部有点无聊,所以让我们修复一下。 我们可以降低顶面的外部顶点。 在此之前,我们可以使用“连接顶点”工具添加一些支撑边,以确保在降低顶点时四边形能够正确地三角剖分。 之后,选择四个外部顶点,然后使用“移动”工具将其放下。
Neat! One other thing we can do is add a floating element above our mesh. Let’s choose the four triangular faces currently at the top of our mesh, and press Detach Faces. This will give us a new ProBuilder mesh but will form a hole in our old one. To fix that, go back to the old mesh and use the Fill Hole tool by selecting the edges around our missing faces.
整齐! 我们可以做的另一件事是在网格上方添加一个浮动元素。 让我们选择当前在网格顶部的四个三角形面,然后按“分离面”。 这将为我们提供一个新的ProBuilder网格,但会在我们的旧网格中形成一个Kong。 要解决此问题,请回到旧的网格并通过选择缺失面周围的边来使用“填充Kong”工具。
Next, we can move our new detached mesh upwards and rotate it 90 degrees. Even though this element is floating, we want to keep it as part of the same mesh. To do so, we can merge our meshes by selecting them with Shift and using the Merge Objects tool.
接下来,我们可以向上移动新的分离网格并将其旋转90度。 即使该元素是浮动的,我们也希望将其保留为同一网格的一部分。 为此,我们可以通过使用Shift选择并使用“合并对象”工具来合并网格。
Let’s add some final touches by extruding from our new mesh twice more, and assigning an emissive material to it as well.
让我们通过从新网格物体中挤出两次以上并为其指定发光材料来添加一些最终效果。
And there we have the result, next to our door.
结果就在我们家门口。

继续创造 (Keep on creating)
We hope you found this guide useful.
我们希望您对本指南有所帮助。
Learn more about Snaps Prototype and the other Snaps packs.
了解有关Snaps原型和其他Snaps包的更多信息。
翻译自: https://blogs.unity3d.com/2019/10/07/customizing-snaps-prototype-assets-with-probuilder-2/
probuilder


 5964
5964

 被折叠的 条评论
为什么被折叠?
被折叠的 条评论
为什么被折叠?
 到【灌水乐园】发言


