


集成电路静态时序分析与建模

Basically, if you write in any of the modern programming languages, you have already – without knowing this – run your code through a static analyzer. You see, any modern compiler provides a set, but only a tiny one, of warnings to report potential issues in your code. For example, when you compile C++ code in Visual Studio, you may see the following message:
基本上,如果您使用任何现代编程语言编写代码,那么您都已经(不知道如何)通过静态分析器运行代码。 您会看到,任何现代编译器都提供了一组警告,但仅提供了很少的警告来报告代码中的潜在问题。 例如,当您在Visual Studio中编译C ++代码时,您可能会看到以下消息:

With this output, the compiler is telling us that the var variable was never used anywhere in the function. So, you've actually been using a plain static code analyzer all this time. However, unlike professional analyzers such as Coverity, Klocwork, or PVS-Studio, compiler warnings identify only a small range of issues.
通过此输出,编译器告诉我们var变量从未在函数中的任何位置使用。 因此,您实际上一直都在使用普通的静态代码分析器。 但是,与诸如Coverity,Klocwork或PVS-Studio之类的专业分析器不同,编译器警告仅识别出一小部分问题。
If you don't know what exactly static analysis is and how to adopt it, read this article to get a better understanding of the methodology.
如果您不知道确切的静态分析是什么以及如何采用静态分析,请阅读本文以更好地了解该方法。
静态分析的目的是什么? (What is the purpose of static analysis?)
In a word: to make development faster and easier.
一句话:使开发更快,更轻松。
Static analysis detects a huge variety of issues in source code: from incorrect use of language constructs to typos. Imagine, for example, that you accidentally write the following correct code:
静态分析可检测源代码中的各种问题:从错误使用语言构造到拼写错误。 例如,假设您不小心编写了以下正确的代码:
auto x = obj.x;
auto y = obj.y;
auto z = obj.z;
as:
如:
auto x = obj.x;
auto y = obj.y;
auto z = obj.y;
You can see a typo in the last line. PVS-Studio would report this error with the following warning:
您可以在最后一行看到错字。 PVS-Studio将报告此错误,并显示以下警告:
V537 Consider reviewing the correctness of 'y' item's usage. V537考虑查看'y'项目用法的正确性。If you want to play around with this bug, try the ready-made snippet on Compiler Explorer: *click*.
如果您想解决此错误,请在Compiler Explorer上尝试现成的代码段:* 单击 *。
Obviously, spots like that are not easily noticed and may cost you a good hour of debugging and wondering why the program behaves so weirdly.
显然,这样的斑点不容易被发现,并且可能会花费您大量的调试时间,并怀疑为什么程序的行为如此怪异。
Yet that bug was transparent enough. But what if your program doesn't work in the most optimal way because you forgot about some subtle peculiarity of the language? Or even ended up with undefined behavior? Unfortunately, things like that happen all around every day, and programmers spend the bulk of their time debugging acting up code flawed by typos, typical bugs, or undefined behavior.
但是该错误足够透明。 但是,如果由于忘记了某种语言的微妙特性,导致程序无法以最佳方式工作,该怎么办? 甚至最终导致不确定的行为 ? 不幸的是,类似的事情每天都在发生,程序员花费大量的时间调试错误代码,典型错误或未定义行为所造成的代码缺陷。
It is to tackle such problems that static analysis was invented. It's an assistant that points out the various defects in your code to you and explains by means of included documentation why you shouldn't write one construct or another, what's bad about it, and how to fix it. Here's one example: *click*.
为了解决这样的问题,发明了静态分析。 它是一个助手,可以向您指出代码中的各种缺陷,并通过随附的文档来解释为什么您不应该编写一个或另一个构造,该构造有何缺点以及如何修复它。 这是一个示例:* 单击 *。
See the following articles for more examples of bugs that the analyzer can detect:
有关分析器可以检测到的错误的更多示例,请参见以下文章:
Now that you've learned of static analysis and become a follower of this methodology, you are probably eager to try it out. Where do you start? How to integrate a new tool into an existing project? How to help your team make friends with it? All these questions will be answered below.
既然您已经了解了静态分析并成为该方法的追随者,那么您可能很想尝试一下。 从哪里开始? 如何将新工具集成到现有项目中? 如何帮助您的团队与之交朋友? 所有这些问题将在下面回答。
注意。 (Note.)
Static analysis does not replace nor cancels such a useful technique as code review. Instead, it complements code review by helping you notice and correct typos, non-optimal or dangerous constructs in good time. Code review becomes much more productive when you can focus on algorithms and readability of your code rather than hunting down a misplaced parenthesis or
静态分析不会替代也不会取消诸如代码审查之类的有用技术。 相反,它可以帮助您及时发现并纠正错别字,非最佳或危险的构造,从而补充代码审查。 当您可以专注于代码的算法和可读性,而不是寻找错误的括号或
going through dull comparison functions. 通过无聊的比较功能 。0.工具入门 (0. Getting started with the tool)
Your trip starts with a trial version. Indeed, making a decision to adopt a new tool isn't easy when you have never seen it in action. That's why you should download the trial version first.
您的旅程从试用版开始。 的确,如果您从未真正行动过,就决定采用新工具并不容易。 因此,您应该首先下载试用版 。
您将在此步骤中学到什么: (What you will learn at this step:)
- In what ways you can interact with the analyzer; 您可以通过什么方式与分析仪交互;
- Whether the analyzer is compatible with your IDE; 分析仪是否与您的IDE兼容;
- What issues your projects currently have. 您的项目当前有什么问题。
Once you've installed all the necessary components, the very first thing you should do is to analyze the entire project (Windows, Linux, macOS). Taking PVS-Studio as an example, the output that you will get in Visual Studio will look something like this:
一旦安装了所有必需的组件,您应该做的第一件事就是分析整个项目( Windows , Linux和macOS )。 以PVS-Studio为例,您将在Visual Studio中获得的输出如下所示:

The problem is that, when run on projects with a large code base, static analyzers will produce an enormous number of warnings. But you don't have to fix them all since your project is already working well enough, which means the issues reported by the analyzer aren't too critical. You can still take a look at the most interesting warnings and fix them if necessary. To do that, filter the output to have only the most relevant warnings left. In the PVS-Studio plugin for Visual Studio, this is done by filtering warnings by levels and categories. To have only the most accurate warnings visible, disable all levels but High and General:
问题是,当在具有大型代码库的项目上运行时,静态分析器将产生大量警告。 但是由于您的项目已经足够好运行,因此您不必全部修复它们,这意味着分析器报告的问题不是很关键。 您仍然可以查看最有趣的警告 ,并在必要时进行修复。 为此,请过滤输出以仅保留最相关的警告。 在Visual Studio的PVS-Studio插件中,这是通过按级别和类别过滤警告来完成的。 要仅显示最准确的警告,请禁用除“ 高”和“ 常规”之外的所有级别:

Only 178 warnings were left, which is certainly easier to deal with than a few thousands…
仅留下了178条警告,这无疑比数千条警告更易于处理……
Useful warnings may often be found under the Medium and Low tabs too, but the diagnostics included in these categories aren't very accurate (meaning a high probability of false positives). See the following article to learn more about the warning levels and ways of working with PVS-Studio on Windows: *click*.
通常在“ 中”和“ 低”选项卡下也可能会找到有用的警告,但是这些类别中包含的诊断信息不太准确(意味着误报的可能性很高)。 请参阅以下文章,以了解有关警告级别以及在Windows上使用PVS-Studio的更多方法:* 单击 *。
Once you have examined (and fixed) the most relevant bugs, it's a good idea to suppress whatever warnings remain. This is done in order to prevent new warnings from getting lost among existing ones. After all, a static analyzer is an assistant rather than a list of bugs. :)
一旦检查(并修复)了最相关的错误,最好取消显示任何警告 。 这样做是为了防止新的警告在现有警告中丢失。 毕竟,静态分析器是助手,而不是错误列表。 :)
1.自动化 (1. Automation)
Now that the preliminary step is through, it's time to configure the plugins and integrate the tool into CI. This must be done before your team starts using the tool because they may forget to turn it on or even consciously ignore it. To counter that, you need to run a final check of the entire project to make sure this code was checked before merge.
现在已经完成了初步步骤,是时候配置插件并将该工具集成到CI中了。 必须在您的团队开始使用该工具之前完成此操作,因为他们可能会忘记打开它,甚至有意识地忽略它。 为了解决这个问题,您需要对整个项目进行最终检查,以确保在合并之前已检查此代码。
您将在此步骤中学到什么: (What you will learn at this step:)
- How the tool can be automated; 该工具如何实现自动化;
- Whether the analyzer is compatible with your build system. 分析仪是否与您的构建系统兼容。
Since no documentation is perfect, you will sometimes have to contact support. It's okay – we are eager to help. :)
由于没有完美的文档,因此有时您需要与支持人员联系。 没关系–我们渴望提供帮助。 :)
Now we need to integrate with CI services. They actually allow smooth integration of any analyzer. You just need to add another pipeline step – normally following the build step and the unit tests. This can be done using various console utilities. For example, PVS-Studio provides the following utilities:
现在,我们需要与CI服务集成。 它们实际上允许任何分析仪的平滑集成。 您只需要添加另一个管道步骤-通常在构建步骤和单元测试之后即可。 可以使用各种控制台实用程序来完成。 例如,PVS-Studio提供以下实用程序:
PVS-Studio_Cmd.exe (analysis of solutions, C# and C++ projects on Windows)
PVS-Studio_Cmd.exe (在Windows上分析解决方案,C#和C ++项目)
CLMonitor.exe (compilation monitoring)
CLMonitor.exe (编译监视)
pvs-studio-analyzer (analysis of C++ projects on Linux / macOS)
pvs-studio-analyzer (分析Linux / macOS上的C ++项目)
pvs-studio-dotnet (analysis of solutions, C# projects on Linux / macOS)
pvs-studio-dotnet (解决方案分析,Linux / macOS上的C#项目)
pvs-studio.jar (analysis of Java projects)
pvs-studio.jar (Java项目分析)
PlogConverter (conversion of log files)
PlogConverter (日志文件的转换)
Integrating an analyzer into CI takes three steps:
将分析仪集成到CI中需要三个步骤:
- Install the analyzer; 安装分析仪;
- Run it; 运行;
- Deliver the results. 交付结果。
For instance, to install PVS-Studio on Linux (Debian-base), you need to run the following commands:
例如,要在Linux(Debian-base)上安装PVS-Studio,您需要运行以下命令:
wget -q -O - https://files.viva64.com/etc/pubkey.txt \
    | sudo apt-key add -
sudo wget -O /etc/apt/sources.list.d/viva64.list \
  https://files.viva64.com/etc/viva64.list

sudo apt-get update -qq
sudo apt-get install -qq pvs-studio
On Windows-based systems, you can't install the analyzer using the package manager but you can still deploy it using the command line:
在基于Windows的系统上,您不能使用程序包管理器安装分析器,但仍可以使用命令行进行部署:
PVS-Studio_setup.exe /verysilent /suppressmsgboxes
/norestart /nocloseapplications
To learn more about deploying PVS-Studio on Windows-based systems, see *this guide*.
要了解有关在基于Windows的系统上部署PVS-Studio的更多信息,请参阅* 本指南 *。
Once you've installed the analyzer, you need to run it. However, we recommend doing this after completing the compilation step and the tests because static analysis normally takes twice longer than compilation.
一旦安装了分析仪,就需要运行它。 但是,我们建议在完成编译步骤和测试之后执行此操作,因为静态分析通常比编译花费两倍的时间。
Since the choice of a particular way to run the analyzer depends on the platform and the project's details, I'll show how to do that for C++ code (on Linux) as an example:
由于选择运行分析仪的特定方式取决于平台和项目的详细信息,因此我将以C ++代码(在Linux上)为例进行说明:
pvs-studio-analyzer analyze -j8 \
                            -o PVS-Studio.log
plog-converter -t errorfile PVS-Studio.log --cerr -w
The first command runs the analysis and the second converts the log into a text format, outputs it, and returns a non-zero code if any warnings have been issued. This mechanism is useful when you want the build process to halt should any errors be found. But you may remove the -w flag if you don't want the build to stop when warnings are issued.
第一个命令运行分析,第二个命令将日志转换为文本格式,输出日志,如果发出了任何警告,则返回非零代码。 当您希望在发现任何错误时停止构建过程时,此机制很有用。 但是,如果您不希望在发出警告时停止构建,则可以删除-w标志。
注意。 (Note.)
The text format is not very convenient. I suggested it above only as an example. Instead, take a look at the more appropriate FullHtml format, which supports code navigation.
文本格式不是很方便。 我在上面仅作为示例提出了建议。 相反,请看一下更合适的FullHtml格式,该格式支持代码导航。
To learn more about integrating the analyzer with CI, see the article "PVS-Studio and Continuous Integration" (for Windows) or "How to set up PVS-Studio in Travis CI" (for Linux).
要了解有关将分析仪与CI集成的更多信息,请参见文章“ PVS-Studio和持续集成 ”(对于Windows)或“ 如何在Travis CI中设置PVS-Studio ”(对于Linux)。
Okay, you've got the analyzer up and running on your build server. From now on, should a team member submit unchecked code, the analysis step will crash, allowing you to detect the problem. It's not quite convenient, though, because a more effective practice is to check the project before merging the branches, at the step of creating a pull request, rather than after it.
好的,您已经启动了分析器并在构建服务器上运行。 从现在开始,如果团队成员提交未经检查的代码,则分析步骤将崩溃,从而使您能够发现问题。 但是,这并不是很方便,因为更有效的做法是在合并分支之前,在创建请求请求的步骤而不是在合并之后检查项目。
Running analysis of pull requests isn't very different from running an ordinary check on CI except that you need to get a list of modified files. It can be usually obtained by requesting a diff between the branches using git:
对拉取请求的运行分析与对CI进行常规检查没有太大区别,只是需要获取已修改文件的列表。 通常可以通过使用git请求分支之间的差异来获得:
git diff --name-only HEAD origin/$MERGE_BASE > .pvs-pr.listNow you need to pass this list to the analyzer as input. In PVS-Studio, it's done using the -S flag:
现在,您需要将此列表作为输入传递给分析仪。 在PVS-Studio中,使用-S标志完成此操作:
pvs-studio-analyzer analyze -j8 \
                            -o PVS-Studio.log \
                            -S .pvs-pr.list
See *this article* for more details about analyzing pull requests. Even if your CI service is not mentioned there, you'll still find useful the section on the general principles of this type of analysis.
请参阅* 本文 *有关分析拉取请求的更多详细信息。 即使此处未提及您的CI服务,您仍会发现有关此类分析的一般原理的部分非常有用。
Once you've configured the analyzer to check pull requests, you can have commits blocked if they contain warnings, thus setting up a boundary that unchecked code won't be able to pass.
将分析器配置为检查拉取请求后,如果包含警告的提交就可以被阻止,从而设置未经检查的代码无法通过的边界。
That's all fine, of course, but you'd like to have all types of warnings gathered in one place – not only from the static analyzer but from the unit tests or dynamic analyzer as well. There's a variety of services and plugins allowing you to do that. For example, PVS-Studio comes with a plugin for SonarQube.
当然,这很好,但是您希望将所有类型的警告收集在一个地方–不仅是从静态分析器中收集的,而且还从单元测试或动态分析器中收集的。 有各种各样的服务和插件可以帮助您做到这一点。 例如,PVS-Studio带有SonarQube插件 。
2.在团队计算机上的集成 (2. Integration on the team's computers)
Now the time has come to install and configure the analyzer for everyday use as part of your development process. By now you have learned of most of the ways to run the analyzer, so this step may well be called the easiest part.
现在是时候将分析仪安装和配置为日常使用,这是开发过程的一部分。 到目前为止,您已经了解了运行分析仪的大多数方法,因此此步骤很可能称为最简单的部分。
The simplest approach is to have your developers install the analyzer themselves, but it will take quite a while and distract them from work. Instead, you can automate this process using the installer and appropriate flags. PVS-Studio supports a number of flags for automatic installation. That said, you can still use package managers instead, such as Chocolatey (Windows), Homebrew (macOS), or dozens of ways available for Linux.
最简单的方法是让您的开发人员自己安装分析仪,但是这将花费相当长的时间并使他们分心。 相反,您可以使用安装程序和适当的标志来自动执行此过程。 PVS-Studio支持许多用于自动安装的标志 。 也就是说,您仍然可以改用软件包管理器,例如Chocolatey(Windows),Homebrew(macOS)或Linux可用的多种方式。
You will then need to install the necessary plugins – for Visual Studio, IDEA, Rider, etc.
然后,您需要安装必要的插件-适用于Visual Studio , IDEA , Rider等。
3.日常使用 (3. Everyday use)
At this point, we need to talk about techniques to speed up the analyzer in its everyday use. Full analysis of the whole project takes too long, but do we always modify all code at once? There hardly exists such global scale refactoring as to involve the entire code base. You don't normally modify more than a dozen files at a time, so why not check these files only? This is what the incremental analysis mode was made for. Don't worry, it's not yet another utility. It's just a special mode that allows checking only modified files and their dependencies. The check starts automatically after you finish building the project – given that you work in an IDE with the appropriate plugin installed.
在这一点上,我们需要讨论加快分析仪日常使用的技术。 对整个项目进行全面分析需要很长时间,但是我们是否总是同时修改所有代码? 几乎不存在涉及整个代码库的全局规模重构。 您通常一次不会修改多个文件,那么为什么不只检查这些文件呢? 这就是进行增量分析模式的目的。 不用担心,它不是另一个实用程序。 这只是一种特殊模式,仅允许检查已修改的文件及其依赖性。 假设您在IDE中安装了适当的插件,则在完成项目构建后,检查将自动开始。
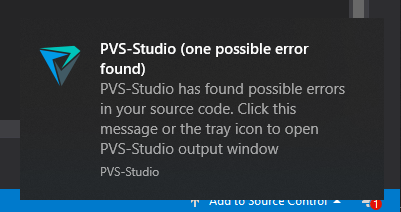
If the analyzer detects issues in recently modified code, it will automatically inform you. PVS-Studio does this by showing the following message:
如果分析仪在最近修改的代码中检测到问题,它将自动通知您。 PVS-Studio通过显示以下消息来做到这一点:
Of course, it won't help to simply tell your developers to just use the tool. You need to tell them what it's all about and what to do with it. Here are a few articles on getting started with PVS-Studio, but similar tutorials can be found for any other tool that you may choose:
当然,仅仅告诉您的开发人员仅使用该工具也无济于事。 您需要告诉他们所有内容以及如何处理。 以下是有关PVS-Studio入门的几篇文章,但是可以为您选择的任何其他工具找到类似的教程:
Articles like these don't take long to read while providing developers with all the necessary information to start using the analyzer on an everyday basis. :)
在为开发人员提供每天开始使用分析仪的所有必要信息时,不会花费太多时间阅读此类文章。 :)
At the preliminary step, after one of the first runs, we suppressed lots of warnings. It's a sad fact about static analyzers that they aren't perfect and tend to produce false positives. But you can usually suppress them with ease. In the PVS-Studio plugin for Visual Studio, you just need to click the button as shown below:
在第一步中,在第一步之后,我们取消了很多警告。 对于静态分析仪来说,这是一个可悲的事实,即它们并不完美,而且容易产生误报。 但是您通常可以轻松地抑制它们。 在Visual Studio的PVS-Studio插件中,只需单击如下所示的按钮:

Actually, you are able not only to suppress warnings but also report them as false positives to our support. If they can be fixed, you'll notice how false positives specific to your own code base will be getting fewer and fewer with every new update.
实际上,您不仅可以禁止显示警告,还可以向我们的支持人员举报这些警告为误报。 如果可以解决这些问题,您会注意到特定于自己代码库的误报在每次新更新中将越来越少。
整合后 (Post-integration)
We have finally passed all the steps of integrating static analysis into the development process. Despite all the importance of configuring static analyzers for use in CI, the developer's computer is the most critical spot. After all, a static analyzer is not some judge sitting on high and reproaching you for writing rubbish code. On the contrary, it's an assistant that suggests the right solutions when you are tired or reminds you whatever you may have forgotten.
我们终于通过了将静态分析集成到开发过程中的所有步骤。 尽管配置用于CI的静态分析仪非常重要,但开发人员的计算机是最关键的位置。 毕竟,静态分析器并不是一个判断力很高的人,它会因为编写垃圾代码而责备您。 相反,当您感到疲倦或提醒您可能忘记的事情时,它会为您提供正确的解决方案。
Without regular use, however, static analysis would scarcely make your life any easier. Its strongest point is actually not in finding intricate and questionable spots as such, but in doing so in good time. Everyone will agree that finding a bug in modified code at the testing step is not only upsetting but also non-optimal. On the other hand, static analysis – when used regularly – examines every change immediately on your computer and informs you of any suspicious spots while you keep writing the code.
但是,如果不定期使用,静态分析几乎不会使您的生活变得更轻松。 实际上,它的最强之处不是要找到复杂而可疑的地方,而是要及时找到。 每个人都会同意,在测试步骤中发现修改后的代码中的错误不仅令人沮丧,而且并非最佳选择。 另一方面,静态分析(经常使用)会立即检查计算机上的所有更改,并在您继续编写代码的同时通知您任何可疑的地方。
If you or your teammates still hesitate to adopt static analysis, I recommend reading the article "Why You Should Choose the PVS-Studio Static Analyzer to Integrate into Your Development Process". It addresses developers' typical concerns about static analysis being a waste of time and many more.
如果您或您的队友仍不愿采用静态分析,建议阅读文章“ 为什么选择PVS-Studio静态分析仪以集成到您的开发过程中 ”。 它解决了开发人员通常对静态分析的担忧,因为静态分析会浪费时间甚至更多。
集成电路静态时序分析与建模


 684
684


 被折叠的 条评论
为什么被折叠?
被折叠的 条评论
为什么被折叠?
 到【灌水乐园】发言


