


 在Mac上删除图像背景而使背景透明时,除了Adobe Photoshop或GIMP之外,还可以免费使用Preview。本文介绍了三种方法:1) 使用即时Alpha工具;2) 使用选择工具,特别是智能套索;3) 使用智能套索结合裁切功能删除部分图像。

macos 关闭预览
If you need to remove an image’s background on your Mac—so that the background is transparent—you could use something like Adobe Photoshop or GIMP. The problem is, Photoshop isn’t cheap, and both applications come with a sizable learning curve. Luckily, you can remove image backgrounds with Preview for free.
如果需要在Mac上删除图像的背景(以使背景透明),则可以使用Adobe Photoshop或GIMP之类的方法 。 问题是,Photoshop并不便宜,并且两个应用程序都具有相当大的学习曲线。 幸运的是,您可以免费使用Preview删除图像背景。
选项一:使用即时Alpha (Option One: Use Instant Alpha)
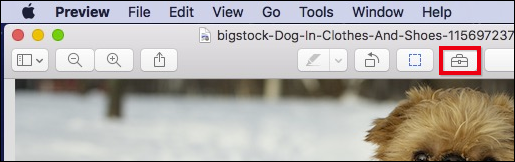
If your image has a simple background, the easiest way to remove it is the Instant Alpha tool. Open your image and click the toolbox icon on the right end of Preview’s toolbar. This will open the editing toolbar, with a number of options.
如果您的图片背景简单,则最简单的删除方法是即时Alpha工具。 打开图像,然后单击“预览”工具栏右端的工具箱图标。 这将打开编辑工具栏,其中包含许多选项。
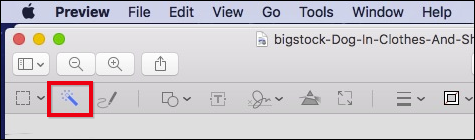
The Instant Alpha tool resembles a magic wand, and can be found on the left side of the editing toolbar.
Instant Alpha工具类似于魔术棒,可以在编辑工具栏的左侧找到。
When you use Instant Alpha, click anywhere on the background and drag the mouse pointer. As you do this, more and more of the image’s background will be highlighted in red.
使用Instant Alpha时,请在背景上的任意位置单击并拖动鼠标指针。 执行此操作时,越来越多的图像背景将以红色突出显示。
Be careful with this tool. Too much Instant Alpha and the selection area can bleed into your image. You want to select just enough so that only background detail is highlighted.
使用此工具时要小心。 太多的Instant Alpha和选择区域可能渗入图像。 您只需要选择足够的内容,以便仅突出显示背景细节。

Once you’re ready, release the mouse button and your area will be selected.
准备就绪后,松开鼠标按钮,您的区域将被选择。
Next hit the “Delete” key. If your image first needs to be converted to PNG, you’ll see the following dialog. Just click “Convert” to proceed.
接下来点击“删除”键。 如果您的图片首先需要转换为PNG,则会看到以下对话框。 只需单击“转换”继续。

Once you do, the highlighted background will be removed.
完成后,突出显示的背景将被删除。
You can use the Instant Alpha multiple times on multiple areas to clean up the image completely, though it’s very inexact.
您可以在多个区域上多次使用Instant Alpha,以完全清理图像,尽管它非常不精确。

This works best on computer-generated graphics as opposed to photos, but can come through in a pinch if your photo is simple enough. It can also be used in conjunction with the Selection Tools, which we’ll describe in the next section.
与照片相比,这在计算机生成的图形上效果最好,但是如果您的照片足够简单,则可能会遇到困难。 它也可以与选择工具结合使用,我们将在下一部分中对其进行描述。
选项二:使用选择工具 (Option Two: Use the Selection Tools)
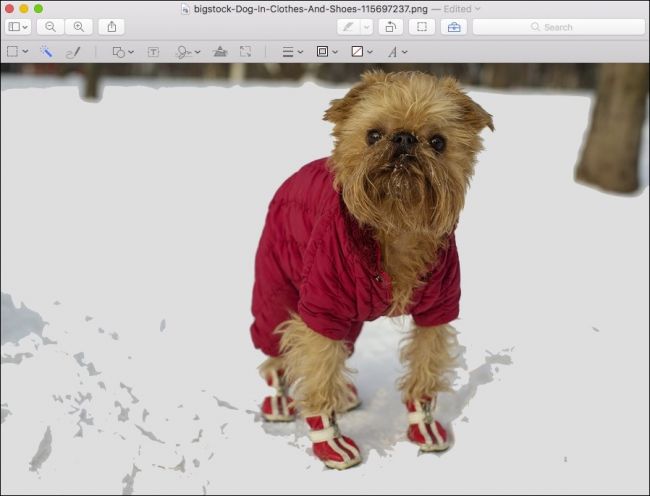
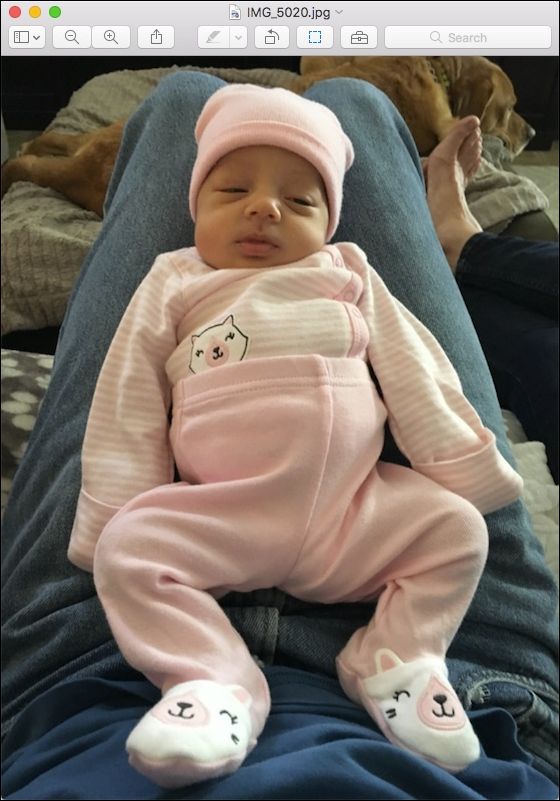
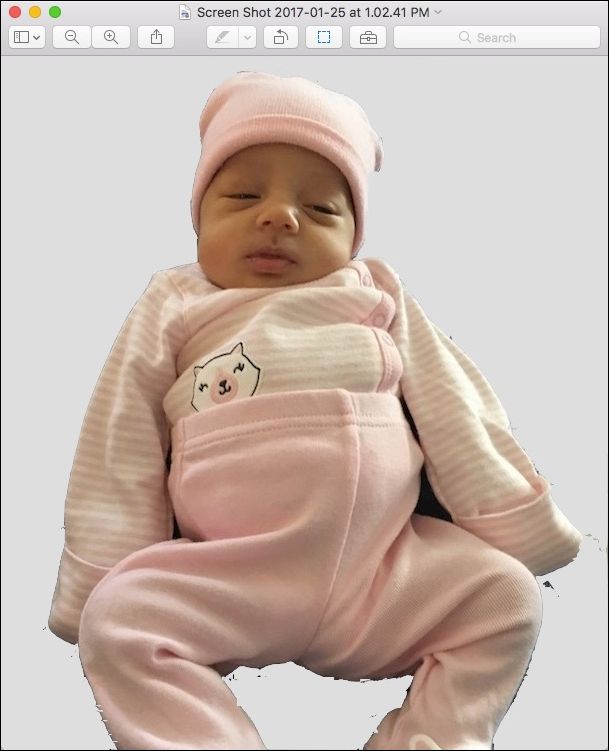
Let’s say you want something more precise, or your photo has a complex background that doesn’t work well with Instant Alpha. For example, here’s a perfect one of a certain uncle’s favorite niece!
假设您想要更精确的照片,或者您的照片背景复杂,无法与Instant Alpha配合使用。 例如,这是某个叔叔最喜欢的侄女的完美伴侣!
Next, click the toolbox icon on the right end of Preview’s toolbar.
接下来,单击“预览”工具栏右端的工具箱图标。

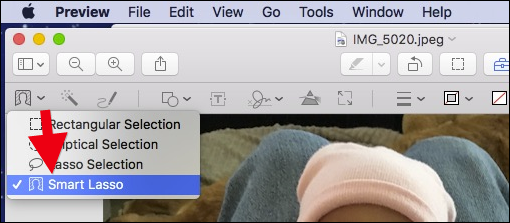
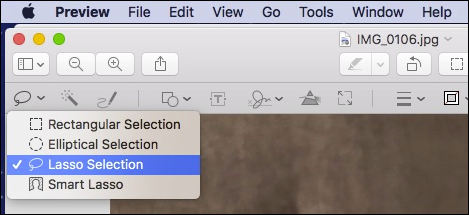
This will open the editing toolbar from which you want to click the “Selection Tools” and then the “Smart Lasso” from the resulting dropdown menu.
这将打开编辑工具栏,从中单击“选择工具”,然后从出现的下拉菜单中单击“智能套索”。
To achieve consistent results, you might want to also zoom in on your subject matter a little bit using the keyboard shortcut Command+Plus (use Command+Minus to zoom out).
为了获得一致的结果,您可能还希望使用键盘快捷键Command + Plus(使用Command +减号来缩小)来稍微放大主题。
Take your time and work in small sections. There’s no reason to rush.
花点时间在小部分中工作。 没有理由着急。
Move the mouse pointer along the edge of your image slowly and then drag the pointer away from the edge to create an area enclosed in red, as shown in the following screenshot.
沿图像的边缘缓慢移动鼠标指针,然后将其从边缘拖开,以创建红色区域,如以下屏幕截图所示。
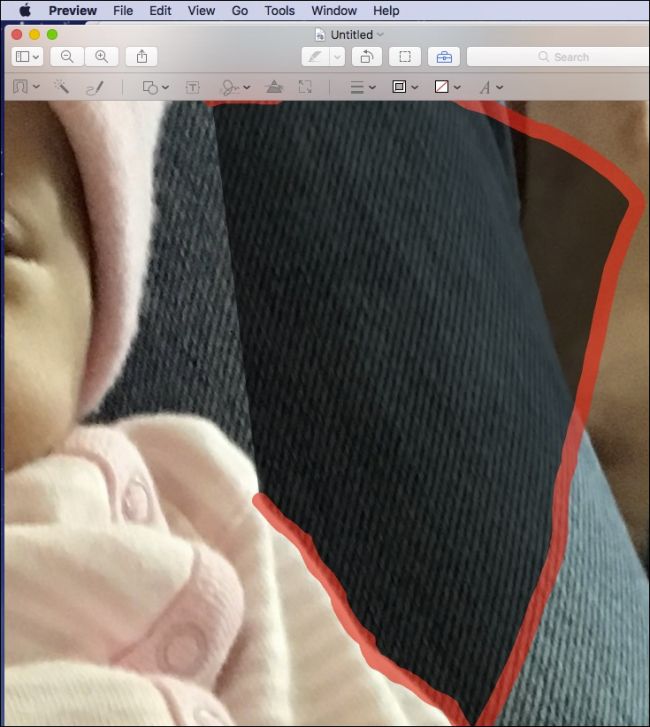
Release the mouse button, and you’ll then be left with a selected area as seen below.
释放鼠标按钮,然后将剩下一个选定的区域,如下所示。

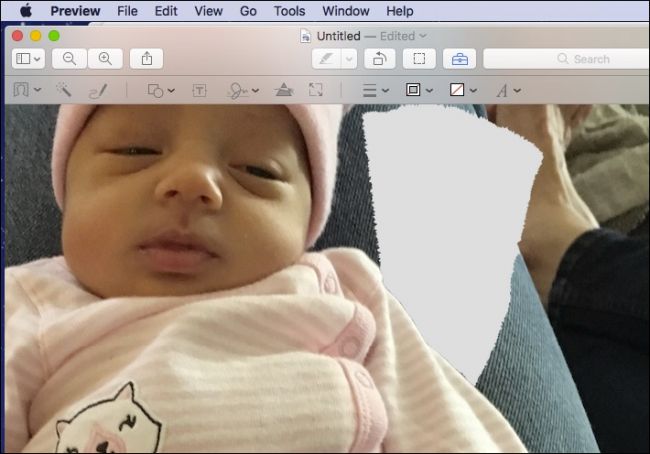
Next hit the “Delete” key and convert to PNG if prompted. Your image’s background will now have an area which has been deleted.
接下来,请按“删除”键,如果出现提示,请转换为PNG。 您图像的背景现在将具有已被删除的区域。
Note, if at any point you make a mistake or want to try to get a more exact results, simply use the Undo command accessible from the “Edit” menu or by pressing Command+Z on your keyboard.
请注意,如果您在任何时候犯了错误或想要获得更准确的结果,只需使用“编辑”菜单中可访问的“撤消”命令或按键盘上的Command + Z。
As you proceed around your image, you will notice that the Smart Lasso tool might leave bits of background behind. To clean these areas up, you can use the Lasso Selection tool, found on the Selection Tools menu.
在继续处理图像时,您会注意到Smart Lasso工具可能会留下一些背景信息。 要清理这些区域,可以使用“选择工具”菜单上的“套索选择”工具。
Simply draw the Lasso around the area you want to erase and hit the “Delete” key …
只需在要擦除的区域周围绘制套索,然后按“删除”键即可。
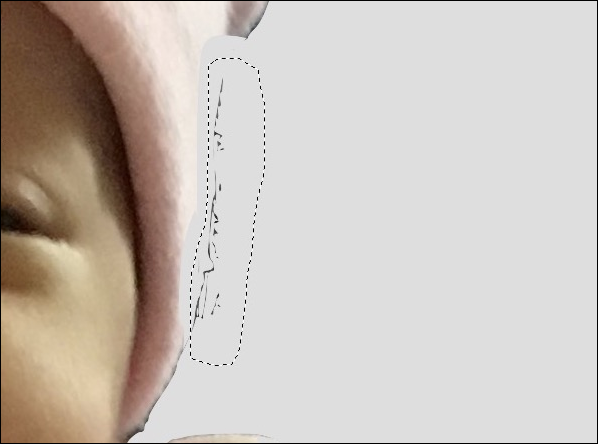
… and voila, the offending area is removed.
…瞧,删除了有问题的区域。
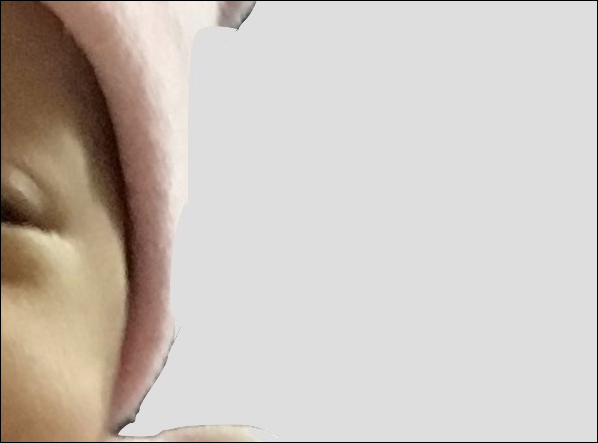
Okay, but what about all that extra background that’s still in the picture? Use the rectangular selection tool, enclose the area you want to affect, and again, hit the “Delete” key.
好吧,那还有那些仍在画面中的多余背景呢? 使用矩形选择工具,包围要影响的区域,然后再次单击“删除”键。
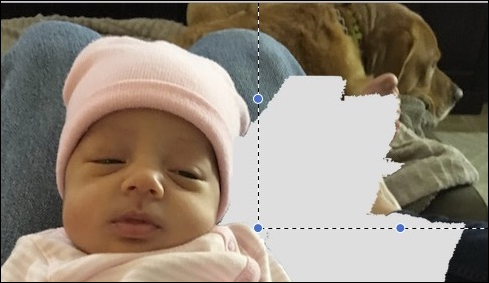
As you can see, our photo is starting to come along.
如您所见,我们的照片开始出现。

It’s important to point out that this probably seems pretty tedious, and it can be, but editing an image in this way is a painstaking process, requiring patience and a steady hand.
重要的是要指出,这似乎很繁琐,而且可以做到,但是以这种方式编辑图像是一个艰苦的过程,需要耐心和稳定的手。
But, you can achieve fairly nice results in a short amount of time, though the more careful you are, the better it will turn out. If you’re using a laptop and the trackpad seems a little too inexact, try switching to a mouse.
但是,您可以在短时间内获得相当不错的结果,尽管您越小心,结果就会越好。 如果您使用的是笔记本电脑,但触控板似乎有点不精确,请尝试切换到鼠标。
This method works well if the background is fairly complex, consisting of various textures and colors without a lot of contrast.
如果背景相当复杂,由各种纹理和颜色组成,且对比度不高,则此方法效果很好。
选项三:使用智能套索删除图像的一部分 (Option Three: Remove a Portion of an Image Using Smart Lasso)
If you just want to remove a small portion of an image, such as a face, from its background, then you can use the Smart Lasso tool and the crop function.
如果只想从背景中删除一小幅图像(例如脸部),则可以使用智能套索工具和裁切功能。
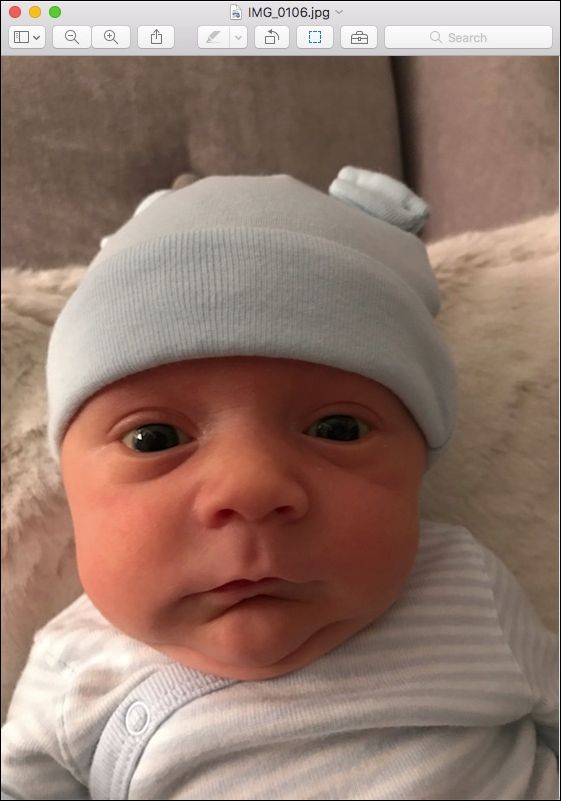
First find a face you want to extract.
首先找到您要提取的脸。
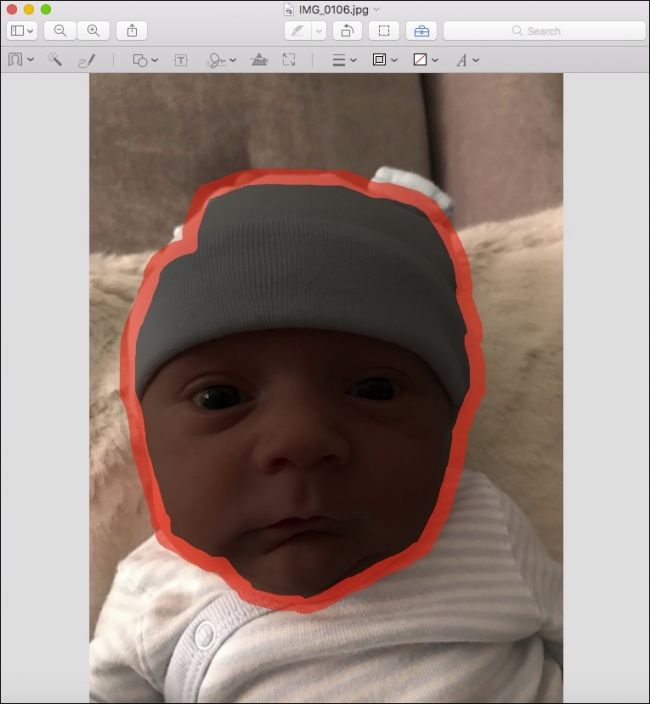
Select the Smart Lasso tool and carefully draw around the subject.
选择“智能套索”工具,然后仔细地绘制主题。
Release the mouse button and then click the crop button that appears on the toolbar or press Command+K on your keyboard.
释放鼠标按钮,然后单击工具栏上出现的裁剪按钮,或按键盘上的Command + K。

Again, if you haven’t yet converted to PNG, you’ll be required to do so before you can proceed.
同样,如果您尚未转换为PNG,则必须先进行转换,然后才能继续。
Remember, if at first you don’t succeed, press Command+Z and try again.
请记住,如果一开始您没有成功,请按Command + Z,然后重试。
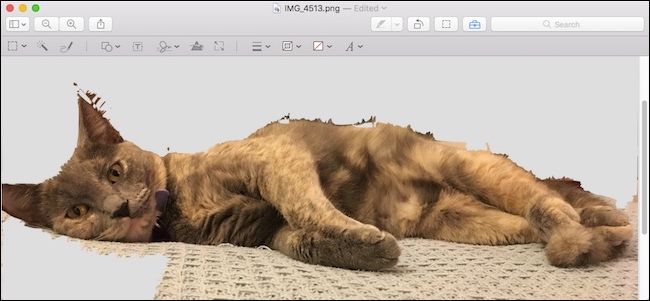
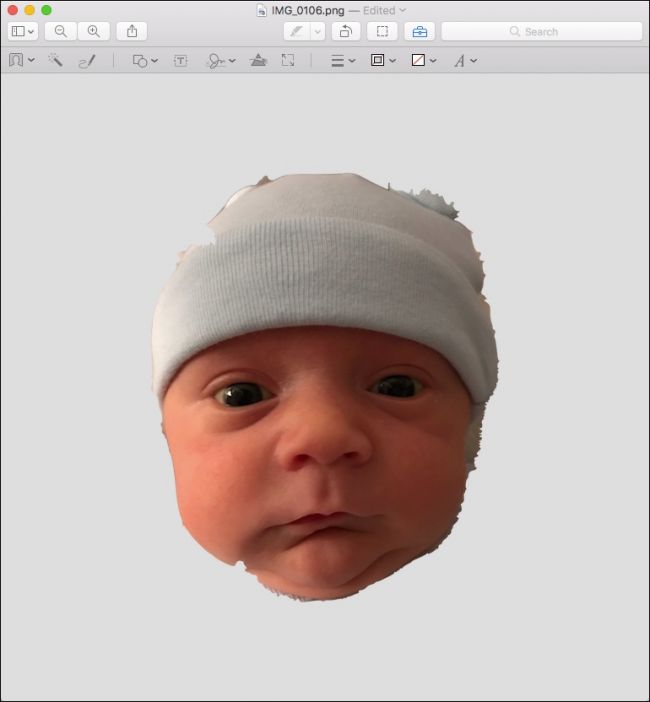
That’s it, you now have removed a face from it’s background (and body) in just a few short minutes. If desired, you can further clean up the image’s edges using the Smart Lasso and Lasso Selection tool as described in option two.
就是这样,您现在仅在短短几分钟内就从其背景(和身体)中删除了一张脸。 如果需要,您可以按照选项二中所述使用“智能套索”和“套索选择”工具进一步清理图像的边缘。
Once you’ve removed your image’s background, you can paste onto another background.
删除图像的背景后,您可以粘贴到另一个背景上。

This makes it easy to create graphics for webpages, greeting cards, slideshows, and pretty much anything else you can think of that requires a transparent image overlaid onto a custom background.
这样就可以轻松地为网页,贺卡,幻灯片以及几乎所有您能想到的其他事情创建图形,这些图形需要将透明图像覆盖到自定义背景上。
Once you get the hang of it, you will find it’s quite easy and actually a lot of fun. Then, you can let your imagination run wild!
一旦掌握了它,就会发现它很容易,而且实际上很有趣。 然后,您可以让您的想象力疯狂起来!
Image credit: Bigstock
图片来源: Bigstock
翻译自: https://www.howtogeek.com/290451/how-to-remove-an-images-background-using-preview-on-macos/
macos 关闭预览


 930
930

 被折叠的 条评论
为什么被折叠?
被折叠的 条评论
为什么被折叠?
 到【灌水乐园】发言


