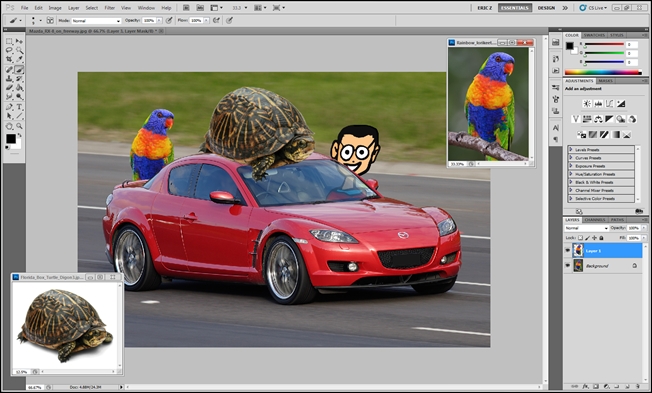
We’re completing the 50+ Tools and Techniques today with this final installment. Read about advanced selection and masking tools, as well as some stupid graphics geek tricks, and ways to fake removing a background in seconds.
我们今天最后一部分将完成50多种工具和技术。 了解高级选择和遮罩工具,以及一些愚蠢的图形怪胎技巧,以及在几秒钟内伪造去除背景的方法。
Whether you’re skilled at Photoshop or a beginner, you’ll be sure to find something to add to your bag of tricks here. Besides descriptions of some of the less-than obvious PS tools, we dispel some common questions about Fill vs Opacity, and Blending Modes like Multiply and Screen. Keep reading!
无论您是熟练使用Photoshop还是初学者,都一定会在这里找到可以添加到技巧包中的东西。 除了对一些不太明显的PS工具的描述之外,我们还消除了有关“填充与不透明度”以及诸如“相乘”和“屏幕”之类的混合模式的一些常见问题。 继续阅读!
Reviewing the Background Removal Basics
查看背景删除基础知识
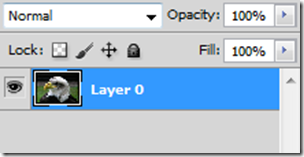
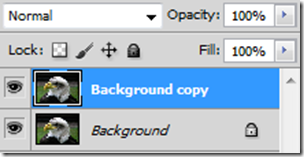
Have you read the first two parts of the 50+ Tools and Techniques? If not, they’re still available, and they provide a good overview of the basics you’ll need to use these more advanced tools and tips for removing backgrounds.
您阅读过50多种工具和技术的前两个部分吗? 如果没有,它们仍然可用,并且可以很好地概述使用这些更高级的工具和删除背景技巧所需的基础知识。
If you’ve caught up with these but still need some brushing up, you can check out a HTG Guide to Layer Masks and Vector Masks, which will come in handy with these tips on advanced maskmaking.
如果您已经掌握了这些技巧,但仍然需要进行一些梳理,则可以查看《 HTG图层蒙版和矢量蒙版指南》 ,该指南将与这些高级蒙版制作技巧一起派上用场。
Finally, if you feel confident in your Photoshop knowledge, dive on in!
最后,如果您对自己的Photoshop知识有信心,请继续学习!
Tools, Tips for Advanced Masking
工具,高级蒙版技巧

Masks Panel: (Window > Masks)
蒙版面板:(“窗口”>“蒙版” )
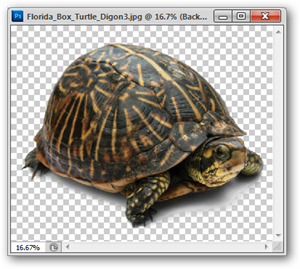
The Masks Panel is a sort of nexus in Photoshop for creating and refining your existing Layer Masks. If you don’t have the Masks Panel visible in Photoshop, you can always grab it by going to Window > Masks.
遮罩面板是Photoshop中的一种关系,用于创建和完善现有的图层蒙版。 如果您在Photoshop中看不到“蒙版”面板,则始终可以通过转到“窗口”>“蒙版”来进行抓取。
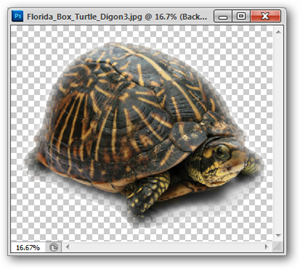
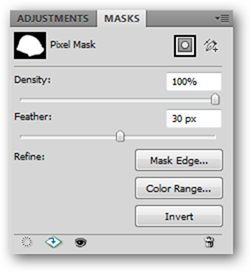
Density increases or reduces the transparency of the mask, allowing more or less of your masked areas to appear or disappear. Feather (shown above) softens the edges of your mask automatically. When done through the mask panel, this feathering is dynamic, and always reversible.
密度增加或减少蒙版的透明度,使或多或少的蒙版区域出现或消失。 羽毛(如上所示)会自动柔化蒙版的边缘。 通过蒙版面板完成时,此羽化是动态的,并且始终是可逆的。
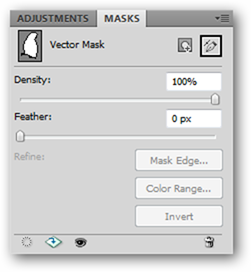
The Masks Panel also works with Vector Masks, but unfortunately, it only allows for adjustment of the density and feathering options.
蒙版面板也可与矢量蒙版一起使用,但是不幸的是,它仅允许调整密度和羽化选项。
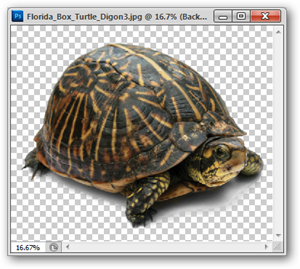
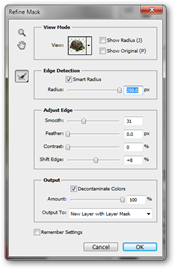
Refine Mask: Shortcut Key (Alt + Ctrl + R)
优化蒙版:快捷键(Alt + Ctrl + R)
Combined with a rough selection (for instance, the Magic Wand or Quick Selection tools), Refine Selection gives you options to automatically refine that existing mask. You can find it under Select > Refine Mask when you’re working with a Mask, or you can simply use the “Refine” button on the Masks Panel.
结合粗略选择(例如,魔术棒或快速选择工具),“细化选择”为您提供了自动细化现有遮罩的选项。 使用蒙版时,可以在“选择”>“优化蒙版”下找到它,也可以只使用“蒙版”面板上的“提炼”按钮。

The “Smart Radius” is where all the action is here. You can adjust your mask with Photoshop’s built in edge detect, which can very carefully mask difficult image data, like hair.
“智能半径”是所有动作的所在地。 您可以使用Photoshop的内置边缘检测功能来调整遮罩,该遮罩可以非常仔细地遮盖困难的图像数据,例如头发。
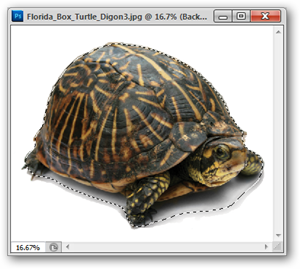

FYI, readers, when you’re working with a selection and not a mask, the menu item become “Refine Edge,” and not “Refine Mask.” Both tools are functionally identical and used in slightly different situations.
仅供参考,读者,当您使用选区而不是遮罩时,菜单项将变为“提炼边缘”,而不是“提炼蒙版” 。 两种工具在功能上都是相同的,并且在稍微不同的情况下使用。
Group Mask:
组掩码:
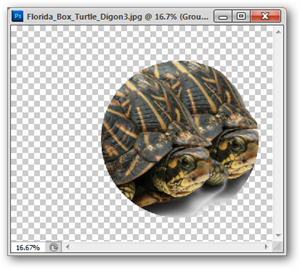
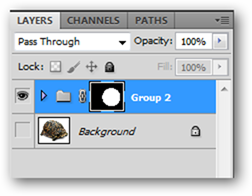
Layer Masks are not limited to single layers. Photoshop has the ability to clump multiple layers into a single “folder” of layers called a Layer Group. Select multiple layers by Shift + clicking with your mouse, and press Ctrl + G to group them. You can apply a mask directly to the group of layers as usual, with the Group Mask hiding the image information not already masked away in the layers inside the group.
图层蒙版不限于单层。 Photoshop可以将多个图层合并为一个称为“图层组”的图层的单个“文件夹” 。 通过Shift +鼠标单击选择多个图层,然后按Ctrl + G进行分组。 您可以像往常一样直接将蒙版应用到图层组,“组蒙版”将隐藏尚未在组内的图层中蒙版的图像信息。
Tools, Tips for Making Advanced Selections
工具,进行高级选择的提示
Select Range (Select > Select Range)
选择范围(选择>选择范围)
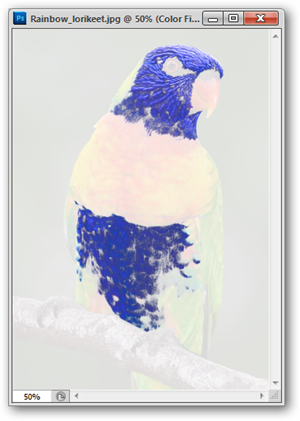
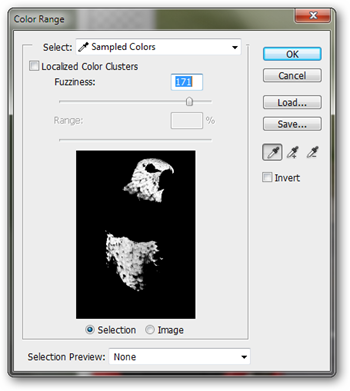
By using your eyedropper tool (shortcut key: I) choose a color from your image, then navigate to Select > Color Range. The color range tool will load a selection of that color, which you can control with the slider tool, shown above right. You may find that Photoshop thinks that the color you’re using is similar to colors you don’t see as all that similar, but Color Range is quite handy for loading selections and creating masks, nonetheless.
使用吸管工具(快捷键:I )从图像中选择一种颜色,然后导航至选择>颜色范围。 颜色范围工具将加载该颜色的选择,您可以使用滑块工具控制该颜色,如右上方所示。 您可能会发现Photoshop认为您所使用的颜色与您看不到的所有颜色相似,但是尽管如此,“颜色范围”对于加载选区和创建蒙版还是非常方便的。
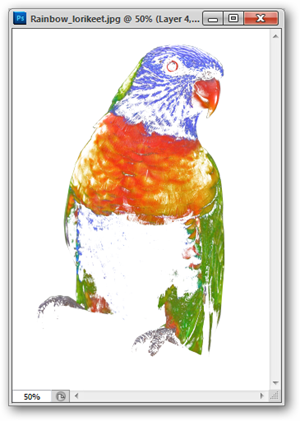
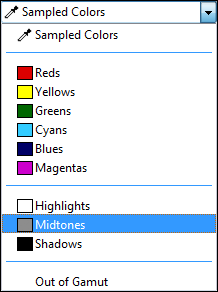
Select Range also has the option of grabbing the primary colors in your image, or the highlights, midtones, and shadows, if you’re interested in that sort of thing. Handy if you want to mask off or adjust certain parts of your image.
如果您对图像感兴趣,“选择范围”还可以选择获取图像中的原色或高光,中间色调和阴影。 如果您想遮盖或调整图像的某些部分,则非常方便。
Select Similar: (Select > Select Similar)
选择相似:(选择>选择相似)
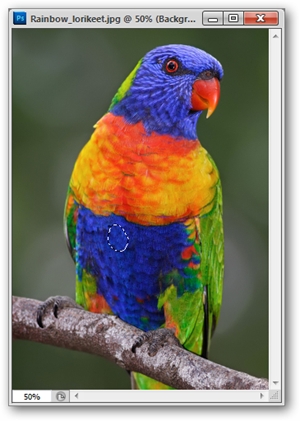
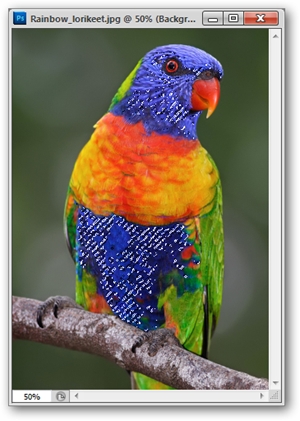
Select Similar works like Select Range, except without the fine-tuned control of the slider. Simply create a selection with the marquee or lasso tool, and Photoshop will attempt to select all the areas it sees as “Similar.”
“选择类似”的工作方式与“选择范围”类似,不同之处在于未对滑块进行微调。 只需使用选取框或套索工具创建一个选区,然后Photoshop就会尝试选择它视为“相似”的所有区域。
Grow Selection: (Select > Grow)
增长选择:(选择>增长)
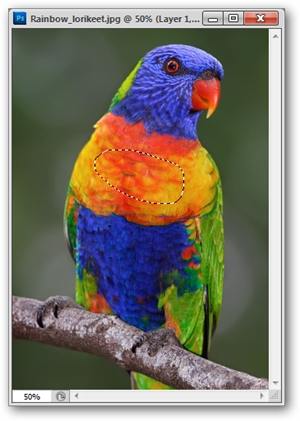
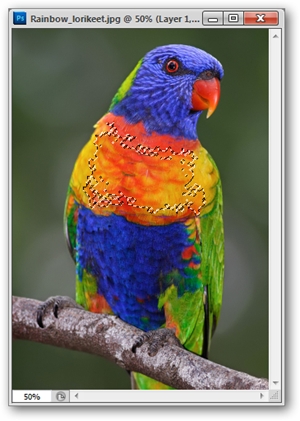
Unlike most of the other tools in this series of How-tos, Select > Grow is not recommended by the author under any plausible real world scenario, as it is somewhat unpredictable and gives results that aren’t useful. Consider the “tip” here to ignore this tool, should you come across it. There are many other tools that accomplish the same things in more useful and controlled ways.
与本指南系列中的大多数其他工具不同,在任何可能的现实世界中,作者都不建议选择>增长,因为它有点不可预测,并且得出的结果毫无用处。 如果您遇到此工具,请考虑此处的“提示”以忽略该工具。 还有许多其他工具以更有用和可控制的方式完成相同的任务。
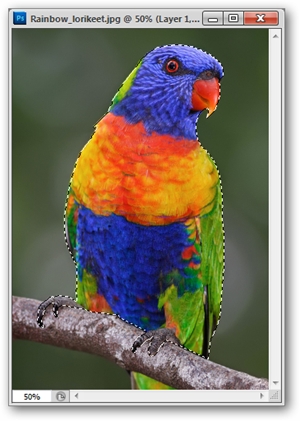

Load Selection: Shortcut Key (Ctrl + Click on Layer, Channel)
负载选择:快捷键( Ctrl +单击图层,通道)
Load Selection is one of the great indispensible tools of Photoshop. You can hold Ctrl and then click any layer (or channel) to load the non-transparent pixels, or you can navigate to Select > Load Selection to get a handy dialog box with lots of helpful options.
负载选择是Photoshop不可或缺的重要工具之一。 您可以按住Ctrl,然后单击任何图层(或通道)以加载非透明像素,或者可以导航至“选择”>“加载选择”以获取一个方便的对话框,其中包含许多有用的选项。
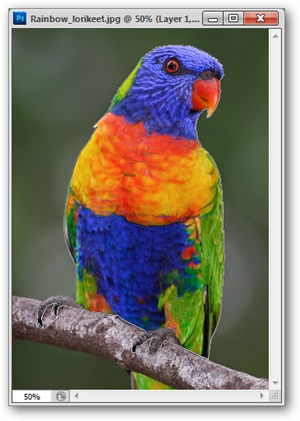
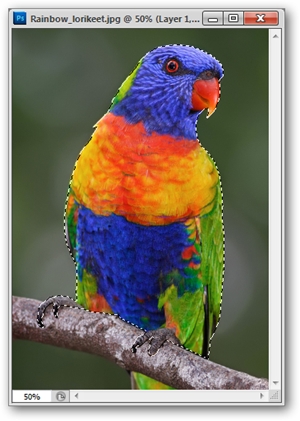
Load Path As Selection:
加载路径作为选择:
As we’ve already covered drawing paths, all vector shapes can be loaded as selections to be cut, copied, pasted, and used as masks, as well as being made directly into Vector Masks.
正如我们已经介绍过的绘制路径一样,所有矢量形状都可以作为要剪切,复制,粘贴和用作蒙版的选择加载,也可以直接制作为矢量蒙版。
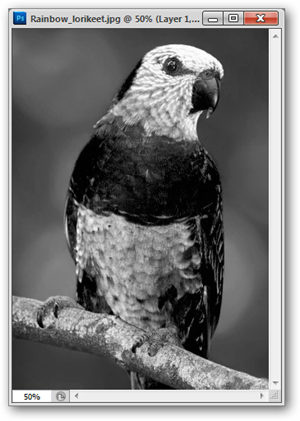
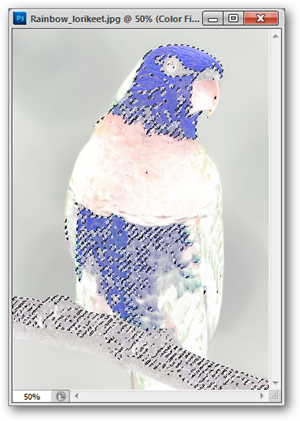
Load Selection from RGB or CMYK Channels:
从RGB或CMYK通道进行负载选择:
One of the most “Graphics Geek” ways possible to load a selection. It is actually possible to use the channel data that makes up your image to load a selection. Not sure how image channels work? How-To Geek has already wrote about what image channels mean, and also an elegant way to use image channels to remove backgrounds.
加载选择的最“图形极客”方法之一。 实际上,可以使用组成图像的通道数据来加载选择。 不确定图像通道如何工作? How-To Geek已经撰写了有关图像通道的含义的文章,以及使用图像通道去除背景的一种优雅方法。
伪造已删除背景的好方法 (Great Ways to Fake Removed Backgrounds)
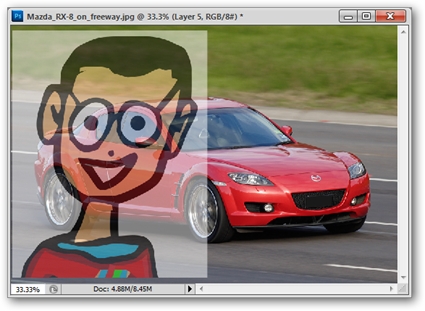
Reduce Opacity:
降低不透明度:
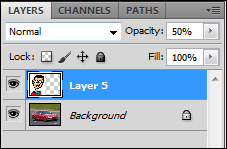
Opacity refers to how non-transparent (see-through) any particular layer is. By reducing the Opacity, layers located below it in the panel will show through in a semi-visible manner. You may notice a second “Opacity” slider below, called “Fill” and wondered what the difference was. Here’s the answer.
不透明度是指任何特定层的不透明性(透明性)。 通过降低不透明度,面板中位于其下方的图层将以半可见的方式显示出来。 您可能会注意到下面的另一个“不透明度”滑块,称为“填充”,并想知道它们之间的区别是什么。 这就是答案。

| |

|

| |

|
Reduce Fill:
减少填充:
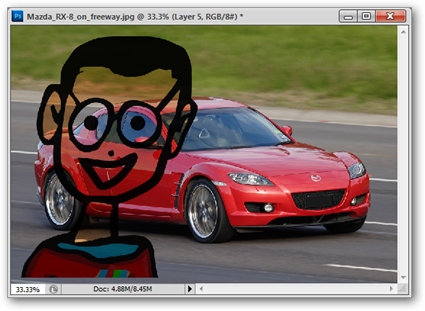
Fill affects the alpha channel of the opaque pixels in a layer—if you’re using layer effects on said layer, they are not affected. For a clearer demonstration of this, look at the example on the right, with the layer effects (Stroke and Gradient Overlay) blending into the background as the “Opacity” is set to 50%. The example on the right reduces the appearance of the geek logo without reducing the appearance of the gradient and stroke.
填充会影响图层中不透明像素的Alpha通道-如果您在该图层上使用图层效果,则它们不会受到影响。 为了更清楚地说明这一点,请看右边的示例,将“不透明度”设置为50%时,层效果(“笔触”和“渐变叠加”)会混合到背景中。 右边的示例减少了怪胎徽标的外观,而没有减少渐变和笔触的外观。
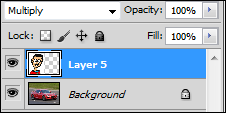
Set Blending Mode to “Multiply”
将混合模式设置为“相乘”
Have you ever printed on an inkjet transparency? This is sort of how the “Multiply” blending mode works. All white is reduced to clear, transparent white, with colors become more opaque, the darker they appear.
您是否曾经在喷墨透明胶片上打印过? 这就是“乘”混合模式的工作方式。 所有白色都还原为清晰,透明的白色,并且颜色变得更不透明(越暗)。
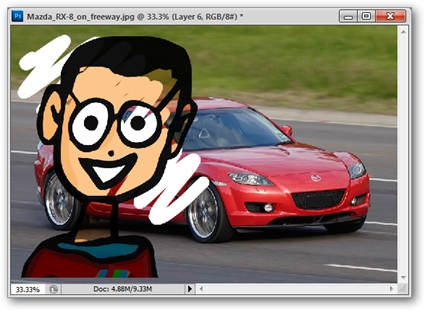

An old geek trick is to use this method and combine it with a white underpainting done with the brush tool in a separate layer. You’d be surprised how easy this is to do, and how quick you can get good results!
一个古老的怪胎技巧是使用此方法,并将其与使用画笔工具在单独的图层中完成的白色底漆结合使用。 您会惊讶地发现这样做很容易,并且您能很快获得良好的结果!
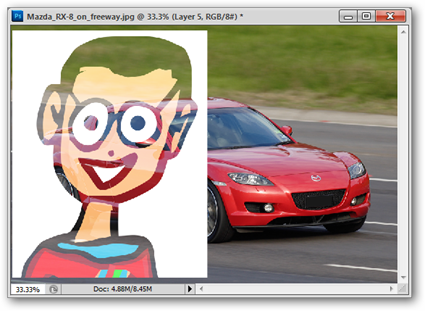
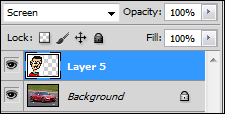
Set Blending Mode to “Screen”
将混合模式设置为“屏幕”
Screen can be thought of as the opposite of Multiply. The lighter the color of a layer, the more opaque it appears. The darkest colors appear transparent in this mode.
屏幕可以被认为是正片叠底的反面。 层的颜色越浅,它显示的越不透明。 在此模式下,最暗的颜色显得透明。
用于创建蒙版,删除背景的愚蠢怪胎技巧 (Stupid Geek Tricks for Creating Masks, Removing Backgrounds)
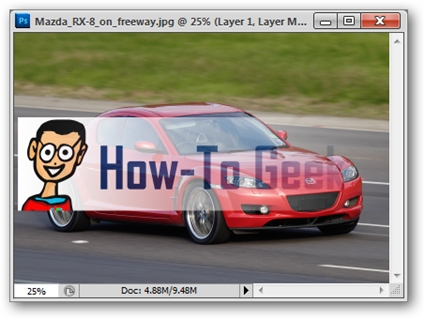

Layer Mask + Gradient:
图层蒙版+渐变:
Creates a cool looking blending transparency out of any masked layer. Simply create a mask and use the Gradient Tool (Shortcut Key: G) with black blending to white.
从任何遮罩层创建酷炫的混合透明度。 只需创建一个遮罩,然后将渐变工具(快捷键:G )与黑色混合为白色即可。
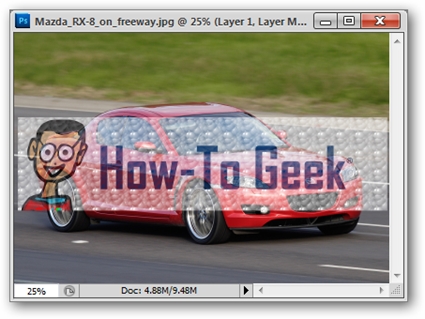

Layer Mask + Fill Pattern
图层蒙版+填充图案
Creates transparency out of whatever weird pattern you might have created or loaded from an internet download. Clearly illustrates that masks don’t have to simply be cut out areas of black and white. Simply create a mask, then navigate to Edit > Fill and set “Use” to “Pattern.”
利用您可能已经从Internet下载中创建或加载的任何奇怪模式创建透明度。 清楚地说明,不必将遮罩简单地切掉黑白区域。 只需创建一个遮罩,然后导航到“编辑”>“填充”,然后将“使用”设置为“图案”。
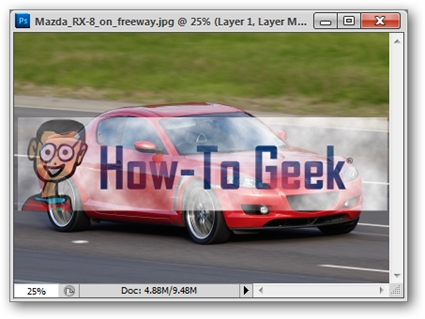

Layer Mask + Filters
图层蒙版+滤镜
Another non-obvious use of layer masks, many filters can be used to mask out areas of a layer. In the illustrated example, we’ve used Filters > Render > Clouds.
图层蒙版的另一种非显而易见的用法是,可以使用许多滤镜来遮盖图层的某些区域。 在所示的示例中,我们使用了滤镜>渲染>云。
Have questions or comments concerning Graphics, Photos, Filetypes, or Photoshop? Send your questions to ericgoodnight@howtogeek.com, and they may be featured in a future How-To Geek Graphics article.
对图形,照片,文件类型或Photoshop有疑问或意见吗? 将您的问题发送到ericgoodnight@howtogeek.com ,它们可能会在以后的How-To Geek Graphics文章中介绍。
Image Credits: Florida Box Turtle by Jonathan Zander, available under Creative Commons. Rainbow Lorikeet and Mazda RX-8 by Fir002, available under GNU License.
图片来源:乔纳森·赞德( Jonathan Zander)创作的《佛罗里达盒龟》 ,可在“创用CC”下找到。 Fir002提供的Rainbow Lorikeet和Mazda RX-8 ,已获得GNU许可。
翻译自: https://www.howtogeek.com/62656/50-tools-techniques-to-remove-image-backgrounds-in-photoshop-pt-3/


 932
932

 被折叠的 条评论
为什么被折叠?


