


chromebook刷机

Android support on Chromebooks started with Android 6.0, which only allows apps to run in full-screen mode, or a smaller static size. This isn’t the best layout for many apps on Chromebooks, and Google finally changed this with Android 7.1.1. The thing is, resizing doesn’t work out the gate—there are a few tweaks to get it working.
Chromebook对Android的支持始于Android 6.0,后者仅允许应用在全屏模式或较小的静态尺寸下运行。 对于许多Chromebook上的应用来说,这并不是最好的布局,而Google最终通过Android 7.1.1进行了更改。 问题是,调整大小无法解决问题,需要进行一些调整才能使其正常工作。
第一步:验证您的Chromebook正在运行哪个Android版本 (Step One: Verify Which Version of Android Your Chromebook Is Running)
Before you get your hands dirty, you’ll want to first make sure your Chromebook is even running an Android build that offers resizable apps.
在动手之前,您首先需要确保Chromebook甚至正在运行可提供可调整大小的应用的Android版本。
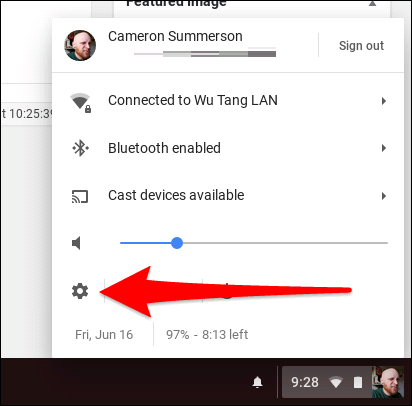
First, click the system tray, then the gear icon.
首先,单击系统托盘,然后单击齿轮图标。
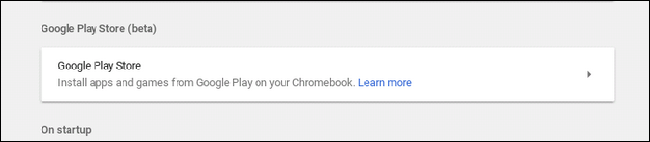
From there, scroll down to the “Google Play Store” section and click it.
从那里向下滚动到“ Google Play商店”部分,然后单击它。
Click “Manage Android preferences,” which will launch the Android settings menu.
点击“管理Android偏好设置”,这将启动Android设置菜单。

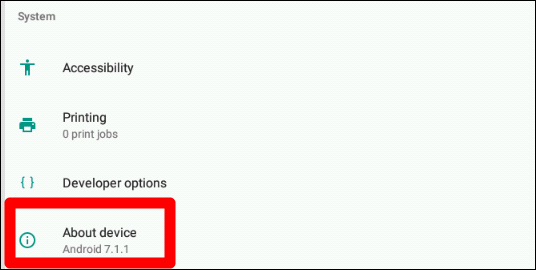
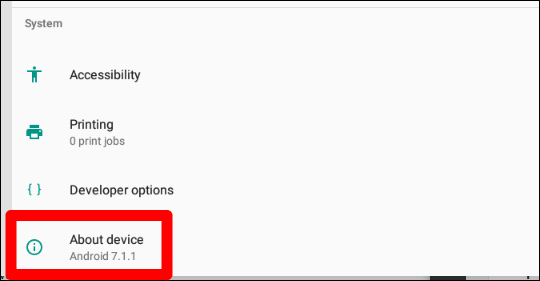
From there, just scroll to the very bottom—you’ll see the Android version under the About Device section.
从那里开始,只需滚动到最底端,您将在“关于设备”部分下看到Android版本。
If your Chromebook is running 6.0, you’re pretty much stuck with what you have for now. Sorry.
如果您的Chromebook运行的是6.0,那么您现在就已经受够了。 抱歉。
If you’re running 7.1.1 or above, however, read on.
但是,如果您运行的是7.1.1或更高版本,请继续阅读。
第二步:启用开发人员选项 (Step Two: Enable Developer Options)
While you’re already in the Android Settings menu, let’s go ahead and enable Developer Settings. You’ll need to do this in order to resize apps.
在进入“ Android设置”菜单后,让我们继续启用“开发者设置”。 您需要执行此操作才能调整应用大小。
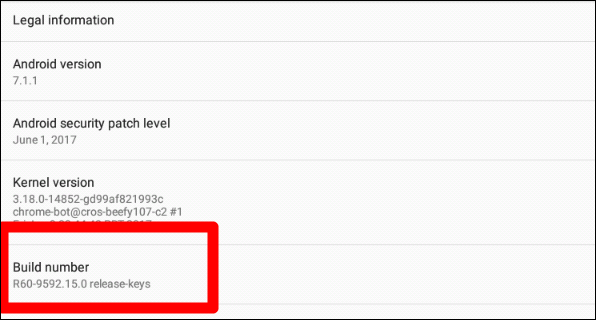
Click into the About Device menu.
单击进入关于设备菜单。
From there, click the “Build number” seven times. You’ll see a small toast notification at the bottom of the screen letting you know how many click are left until you “become a developer.”
从那里,单击“内部版本号”七次。 您会在屏幕底部看到一个小的敬酒通知,让您知道在“成为开发人员”之前还剩下多少点击。
After seven clicks, developer mode will be enabled. Awwww, yeah.
单击七次后,将启用开发人员模式。 噢,是的。
第三步:启用窗口调整大小 (Step Three: Enable Window Resizing)
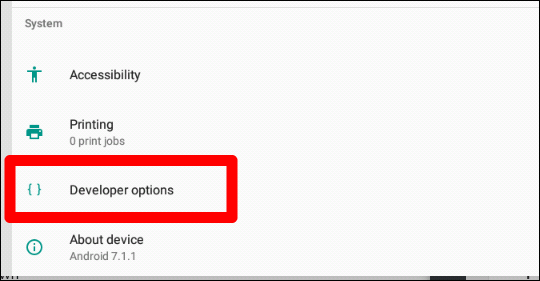
Click the back button in the top left corner, which will take you back into the main Settings menu. You’ll see a new option here: Developer Options. Click into that bad boy.
单击左上角的“后退”按钮,这将使您返回到“设置”主菜单。 您将在此处看到一个新选项:“开发人员选项”。 点击进入那个坏男孩。
Ignore everything you see in this menu until the very bottom. Seriously, start scrolling now, lest your curiosities get the best of you and you break something.
忽略最底部的所有内容。 认真地,现在就开始滚动,以免您的好奇心得到最好的利用,并且您会破坏某些东西。
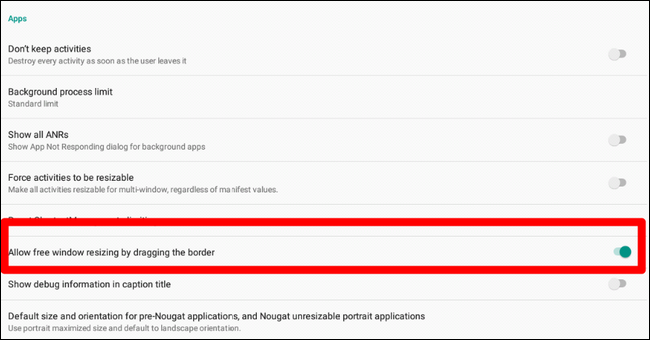
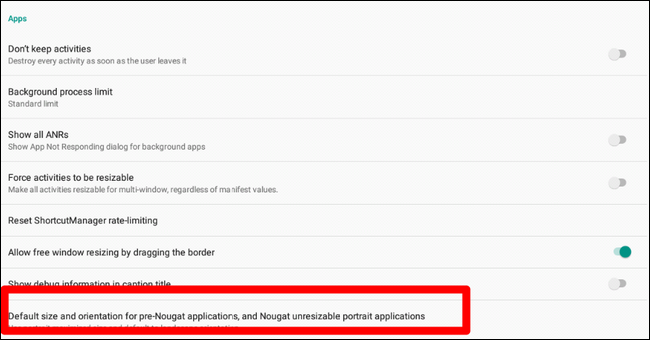
At the bottom, find the “Allow free window resizing by dragging the border” option and enable it. Just like that, you’ll be able to resize Android apps. Keep in mind that this doesn’t work with all apps—if they haven’t been updated in some time, they won’t support this. Many modern apps (with good developers) should be on board, though.
在底部找到“通过拖动边框来允许自由窗口大小调整”选项并启用它。 这样,您就可以调整Android应用的大小。 请记住,这并不适用于所有应用程序-如果一段时间未更新它们,则他们将不支持此功能。 不过,许多现代应用程序(具有出色的开发人员)都应该加入。
To do this, just hover over the edge of the app window, just like you would any other window. The cursor will change, indicating you can resize the window.
为此,只需将鼠标悬停在应用程序窗口的边缘即可,就像其他任何窗口一样。 光标将改变,表示您可以调整窗口大小。
可选:为牛轧糖之前的应用程序设置默认大小 (Optional: Set the Default Size for Pre-Nougat Applications)
Now, you could stop here and be finished, but there’s also another option I think you should check out, which will determine the default size for apps that aren’t designed for Android Nougat.
现在,您可以在此处停止并完成操作,但是我认为还有另一种方法应该检查一下,这将确定非Android Nougat设计的应用程序的默认大小。
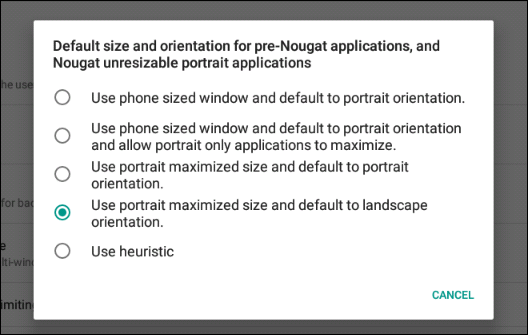
Unironically, it’s called “Default size and orientation for pre-Nougat applications, and unresizable portrait applications.” That’s a mouthful. But click it anyway.
通常,它被称为“用于牛轧糖之前的应用程序和无法调整大小的肖像应用程序的默认大小和方向。” 满嘴 但是还是要单击它。
Basically, this lets you figure out what is going to work best for the way you use Android apps on your Chromebook. For me, defaulting portrait maximized sized and landscape orientation just makes the most sense—that means apps like Instagram, which are portrait-only, launch full screen. Others will launch in landscape mode. It works for me, but feel free to experiment with these options and use what works best for you.
基本上,这使您可以确定哪种方式最适合您在Chromebook上使用Android应用的方式。 对我而言,默认肖像最大尺寸和横向设置才最有意义-这意味着像Instagram这样的应用程序,仅肖像模式,将全屏启动。 其他将以横向模式启动。 它对我有用,但是可以随意尝试这些选项并使用最适合您的选项。
Once you’re finished, just back out of this window—you’re done.
完成后,只需退出此窗口即可。
翻译自: https://www.howtogeek.com/312046/how-to-resize-android-apps-on-chromebooks/
chromebook刷机


 2625
2625

 被折叠的 条评论
为什么被折叠?
被折叠的 条评论
为什么被折叠?
 到【灌水乐园】发言


