


飞利浦dicom
Philips Hue is a really cool Wi-Fi-enabled lighting system that allows you to turn on and off your lights right from your smartphone (or from other smarthome-controlling devices, like the Amazon Echo). It’s one of the first steps in turning your house into a smarthome of the future. Here’s how to set up your Philips Hue lights using the new Philips Hue app.
飞利浦Hue是一款非常酷的具有Wi-Fi功能的照明系统,它使您可以直接从智能手机(或其他智能家居控制设备,如Amazon Echo )打开和关闭灯。 这是将您的房屋变成未来智能家居的第一步。 这是使用新的Philips Hue应用程序设置Philips Hue灯的方法。
Hue has been around for a while, but they recently released a brand new app, with an all-new interface that makes it a bit easier to manage and control your smart bulbs. There can be a bit of a learning curve compared to the old app (which you can still download for iOS and Android), but once you get the basics down, you might come to find that it’s a lot better than the old Hue app. (It is, however, missing a few features from the old app, which we’ll discuss later in this guide).
色相已经存在了一段时间,但是他们最近发布了一个全新的应用程序,它具有全新的界面,可以更轻松地管理和控制您的智能灯泡。 与旧的应用程序相比,可能会有一些学习曲线(仍可以下载到iOS和Android ),但是一旦掌握了基础知识,您可能会发现它比旧的Hue应用程序好很多。 (但是,它缺少旧应用程序的一些功能,我们将在本指南的后面部分讨论)。
You can grab the new app here, and if you already have your bulbs set up, skip down to the setup section of this guide. If you’re new to Hue, let’s talk about what Hue can do, and what you get in the box.
您可以在此处获取新应用,如果已经安装好灯泡,请跳至本指南的设置部分。 如果您是Hue的新手,那就让我们谈谈Hue可以做什么以及您将获得的包装。
什么是飞利浦色相? (What Is Philips Hue?)
Lighting has advanced dramatically over the last few years, especially with the introduction of LED bulbs, which use way less power, last longer, and cost less to operate in the long run.
在过去的几年中,照明技术取得了长足的进步,特别是随着LED灯泡的推出,这种灯泡耗电更少,使用寿命更长,长期运行成本更低。
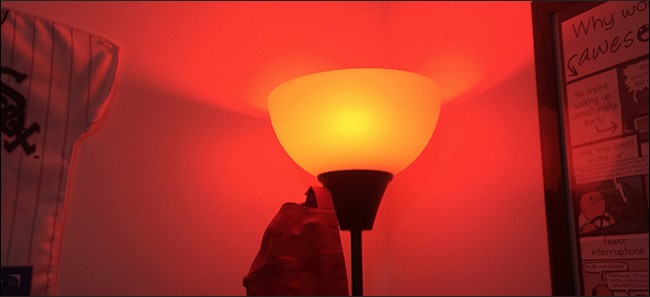
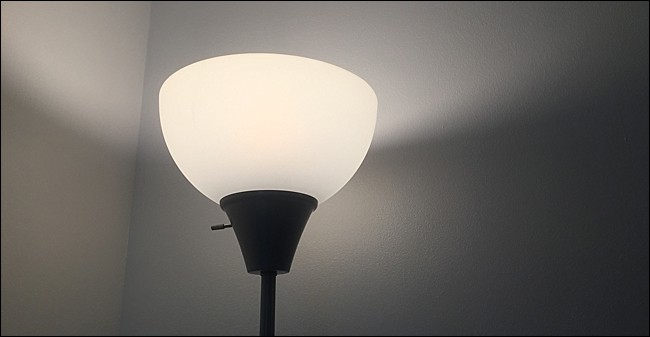
However, smart lighting takes an even further step forward, and Philips is leading the way with its Hue lineup of smart bulbs. These are light bulbs that work with any standard light socket that you already have in your house’s light fixtures, but they have some added internal components that allow them to be controlled wirelessly from your smartphone.
但是,智能照明又向前迈进了一步,飞利浦通过其Hue智能灯泡系列,引领了这一潮流。 这些灯泡可与房屋照明装置中已有的任何标准灯泡插座配合使用,但它们具有一些附加的内部组件,可通过智能手机进行无线控制。
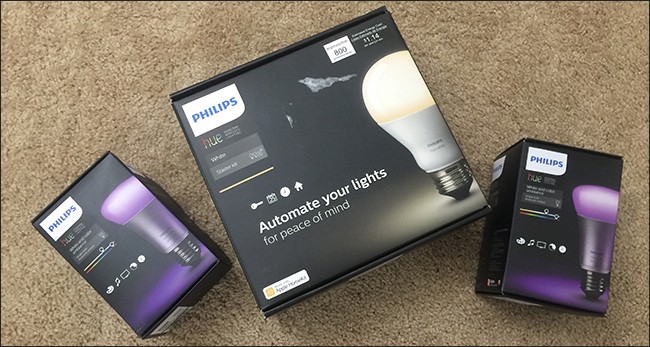
There are a handful of different Hue light bulbs that Philips offers. Its most popular, though, is the $199 Hue White and Color Starter Kit, which comes with the required Hue Bridge, as well as three Hue light bulbs that can change colors and do all sorts of neat stuff. You can also get the cheaper $79 Hue White Starter Kit, which comes with the Hue Bridge and two Hue White bulbs, which are nothing more than just dimmable soft white bulbs.
飞利浦提供了几种不同的Hue灯泡。 不过,它最受欢迎的产品是售价199美元的Hue White and Color Starter Kit ,该产品随附必需的Hue Bridge,以及三个可以改变颜色并进行各种整洁处理的Hue灯泡。 您还可以获得更便宜的79美元的Hue White Starter Kit ,它带有Hue Bridge和两个Hue White灯泡,它们仅是可调光的软白色灯泡。
Since the bulbs can’t directly connect to your home’s Wi-Fi network, the Hue Bridge is a hub that acts as the middleman of sorts. Your light bulbs connect to the hub, and the hub connects to your router.
由于灯泡无法直接连接到家庭的Wi-Fi网络,因此色相桥是充当各种中间人的枢纽。 您的灯泡连接到集线器,而集线器连接到路由器。
This involves a bit more setup than what you might have originally anticipated, but it’s actually very easy to set up Philips Hue lights. Here’s what you’ll need to do in order to get it all up and running.
这涉及到比您最初预期的要多的设置,但是设置飞利浦Hue灯实际上非常容易。 这是您需要做的才能使其全部启动并运行的过程。
如何设置飞利浦色相灯 (How to Set Up Your Philips Hue Lights)
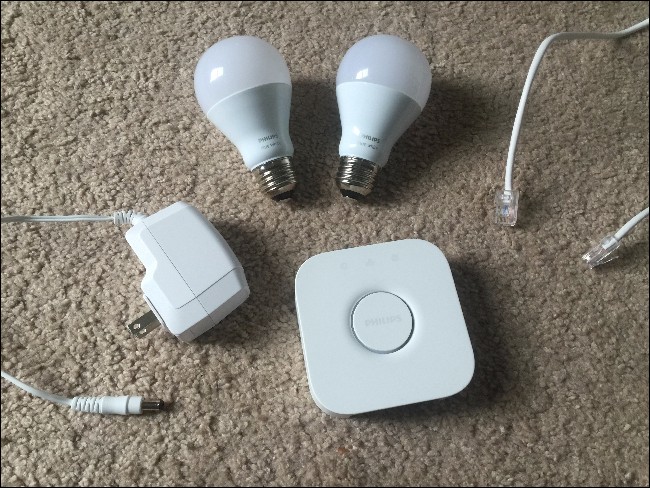
When you unbox your Philips Hue lights, you’ll get a Hue Bridge, a power adapter, an ethernet cable, and either two or three light bulbs, depending on which starter kit you bought. The Hue White and Color starter kit comes with three bulbs, while the Hue White starter kit comes with two bulbs.
拆下Philips Hue灯的包装盒时,您将获得Hue桥,电源适配器,以太网电缆以及两个或三个灯泡,具体取决于您购买的入门套件。 色调白色和彩色入门套件带有三个灯泡,而色调白色入门套件带有两个灯泡。
Start by screwing in the light bulbs into the light fixtures that you want to control wirelessly, and be sure to turn the power on for these light fixtures. The Philips Hue bulbs will automatically turn on, letting you know that they’re working properly and are ready to be paired to the Hue Bridge.
首先将灯泡拧入要无线控制的灯具中,并确保打开这些灯具的电源。 飞利浦Hue灯泡将自动打开,让您知道它们工作正常并且可以与Hue Bridge配对。
Next, plug in the Hue Bridge by connecting the power adapter to the Bridge and the other end into an available outlet. After that, connect one end of the ethernet cable to the Bridge and the other end into an available ethernet port on the back of your router. You have to plug it directly into your router with an ethernet cable–the Hue Bridge does not have Wi-Fi built in; instead, it uses the Wi-Fi in your router.
接下来,通过将电源适配器连接到色相桥并将其另一端插入可用的插座来插入色相桥。 之后,将以太网电缆的一端连接到网桥,另一端连接到路由器背面的可用以太网端口。 您必须使用以太网电缆将其直接插入路由器中-色相桥没有内置Wi-Fi。 而是使用路由器中的Wi-Fi。
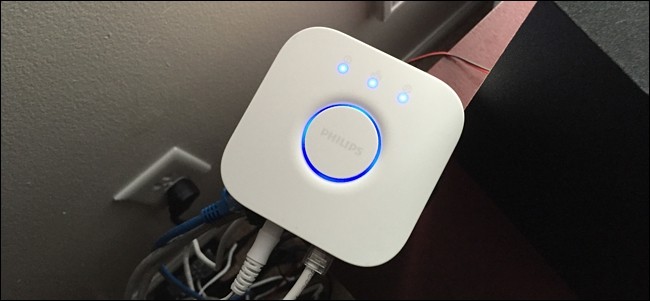
Wait for all four lights to light up on the Hue Bridge, and once that happens, you can begin the setup process.
等待色相桥上的所有四个灯都亮起,一旦发生,就可以开始设置过程。
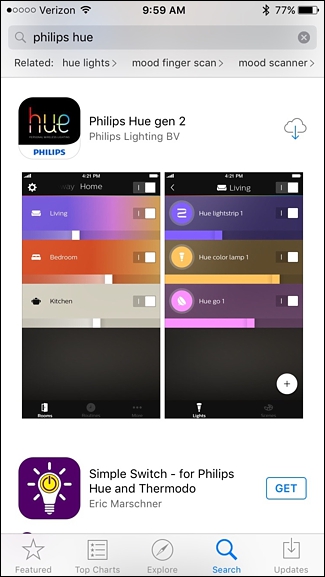
Next, download the new Philips Hue Gen 2 app for iOS or Android. Be aware that there are a lot of third-party Philips Hue apps available, so if you search for it in the app store, you’ll want to make sure to download the official one in order to set up your lights at first.
接下来,下载适用于iOS或Android的新飞利浦Hue Gen 2应用程序。 请注意,有很多第三方飞利浦Hue应用程序可用,因此,如果您在应用程序商店中进行搜索,则需要确保下载正式的第三方软件,以便首先设置灯光。
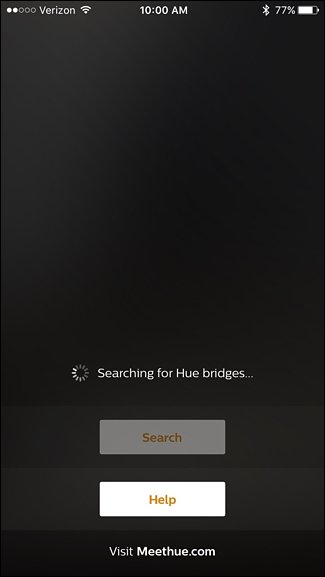
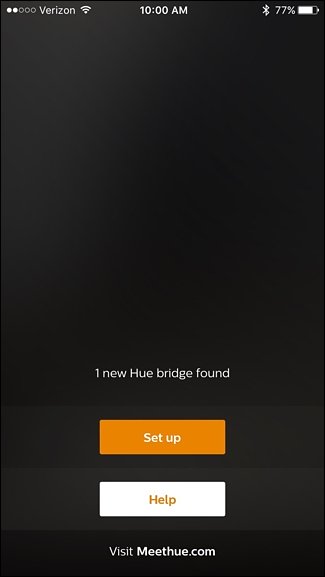
After you open up the app, it will automatically begin searching for a Hue Bridge.
打开应用程序后,它将自动开始搜索色相桥。
Once it has found yours, tap on “Set up”.
找到您的文件后,点击“设置”。
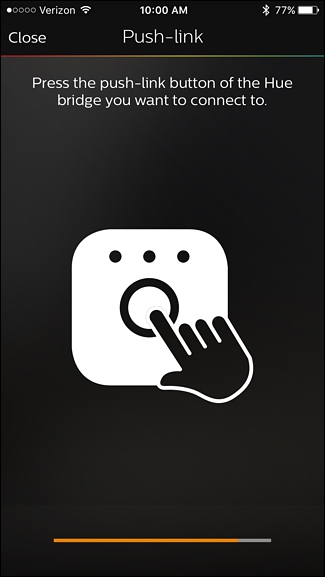
Next, press the push-link button on your Hue Bridge. It will be the big round button in the center.
接下来,按色相桥上的推链接按钮。 这将是中间的大圆形按钮。
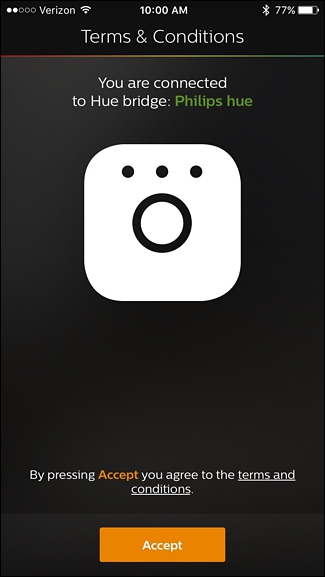
Once it’s connected, tap on “Accept”.
连接后,点击“接受”。
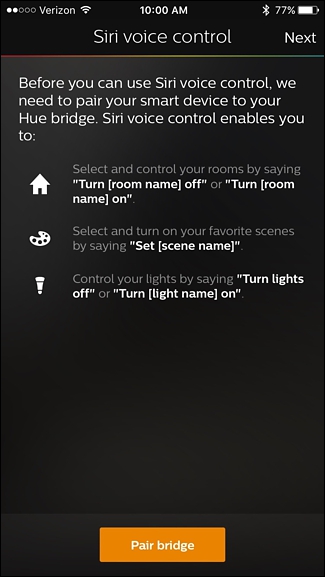
Next, it’s time to set up HomeKit and Siri if you’re an iOS user. Tap on “Pair bridge” at the bottom.
接下来,如果您是iOS用户,那么是时候设置HomeKit和Siri了。 点击底部的“ Pair bridge”。
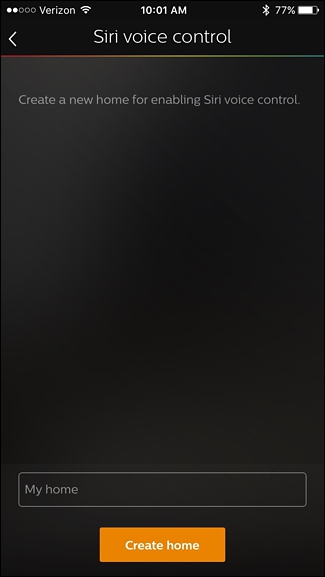
Tap on “My home” at the bottom and give your home a name. “Home” usually works just fine in this case. Tap on “Create home” when finished.
点击底部的“我的家”,为您的家命名。 在这种情况下,“家庭”通常可以正常工作。 完成后,点击“创建家庭”。
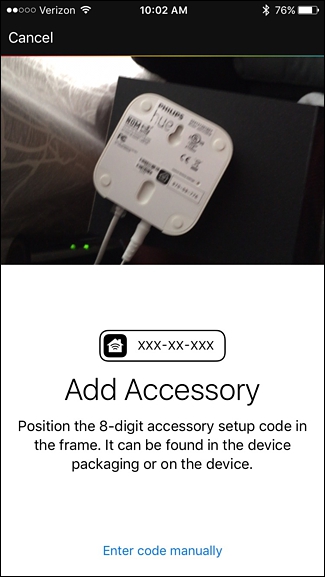
Next, you’ll need to scan the accessory setup code that’s on the back of the Hue Bridge. Hold your phone up to this code and it will detect it automatically.
接下来,您需要扫描Hue Bridge背面的附件设置代码。 按住手机上的此代码,它将自动检测到它。
It’s now time for your Hue Bridge to detect all of your Hue light bulbs, so tap on the “+” icon in the bottom-right corner.
现在是时候让色相桥检测到所有色相灯泡了,因此,点击右下角的“ +”图标。
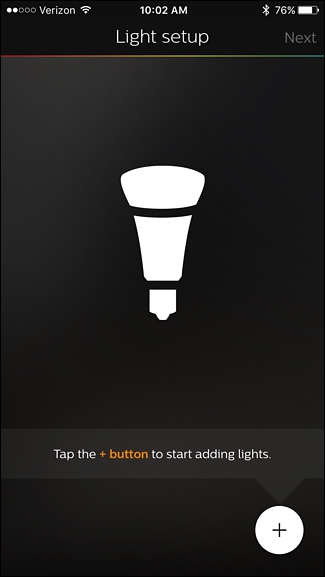
Tap on “Search”.
点击“搜索”。

It will take several minutes for it to find all of your bulbs, but when it’s done, it will tell you how many bulbs it found near the top. If it doesn’t find all of your bulbs, you can tap on the “+” icon again and then select “Add serial number” to manually add the bulbs to your setup. Don’t worry, this is a fairly common necessity.
找到所有灯泡需要几分钟,但是完成后,它会告诉您在顶部附近发现了多少个灯泡。 如果找不到所有灯泡,则可以再次点击“ +”图标,然后选择“添加序列号”以手动将灯泡添加到设置中。 不用担心,这是相当普遍的必要。

Once all of your Hue bulbs are found, the app will prompt you to group them into rooms for easier control. So tap on the “+” icon in the bottom-right corner on the next page.
找到所有的Hue灯泡后,该应用程序将提示您将它们分组到房间中,以便于控制。 因此,点击下一页右下角的“ +”图标。
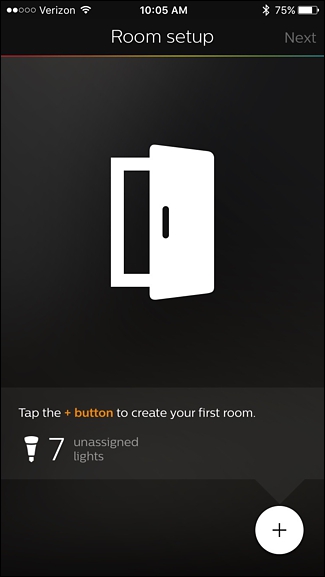
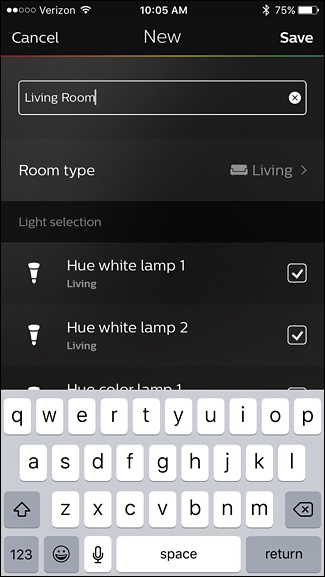
Tap on the text box at the top and give your first room a name.
点击顶部的文本框,为您的第一个房间命名。
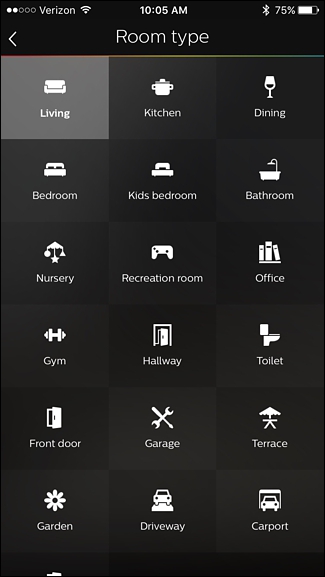
Then tap on “Room type” and select the type of room it is.
然后点击“房间类型”,然后选择它的房间类型。
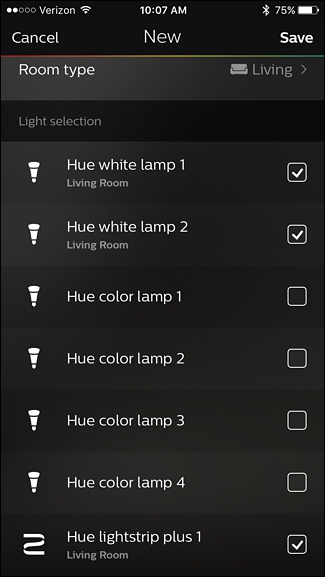
Next, under “Light selection”, check or uncheck any bulbs that you don’t want associated with this room, and then tap “Save” in the top-right corner.
接下来,在“光选择”下,选中或取消选中您不想与此房间关联的任何灯泡,然后点击右上角的“保存”。
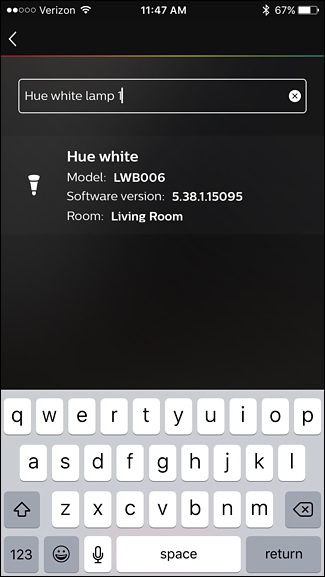
Unfortunately, this part is pretty poorly designed: If you’re using new bulbs, they’ll all have generic names like “Hue white lamp 1”, and you won’t necessarily know which one is which. Go ahead and guess for now–if it’s wrong, you can go back into the settings and change it. We’ll discuss this later in the guide.
不幸的是,这部分设计得很差:如果您使用的是新灯泡,它们都具有通用名称,例如“ Hue white lamp 1”,而您不一定会知道哪一个。 请继续猜测,如果有误,则可以返回设置并进行更改。 我们将在指南的后面对此进行讨论。
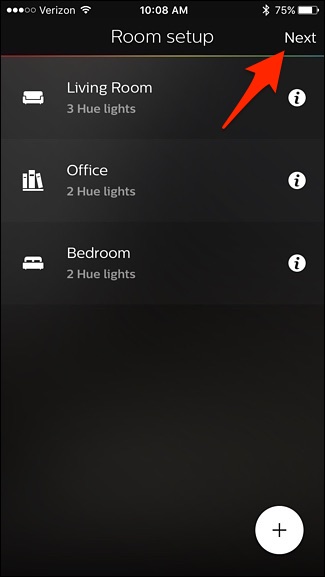
Add more rooms if you want by tapping on the “+” icon at the bottom. Otherwise, tap on “Next” in the top-right corner.
如果需要,可以通过点击底部的“ +”图标来添加更多房间。 否则,请点击右上角的“下一步”。
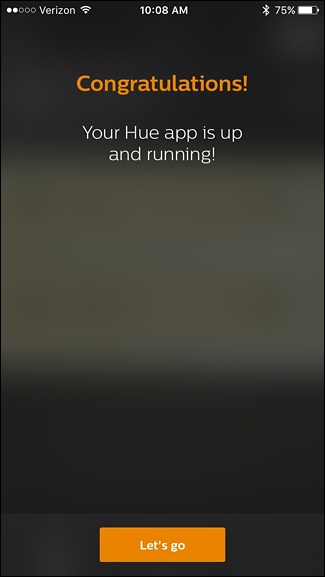
You’re all done with the initial setup process. Tap on “Let’s go” to begin controlling your Hue lights.
初始设置过程已经完成。 点击“开始吧”开始控制您的色相灯。
如何重命名和重新组合您的色相灯 (How to Rename and Regroup Your Hue Lights)
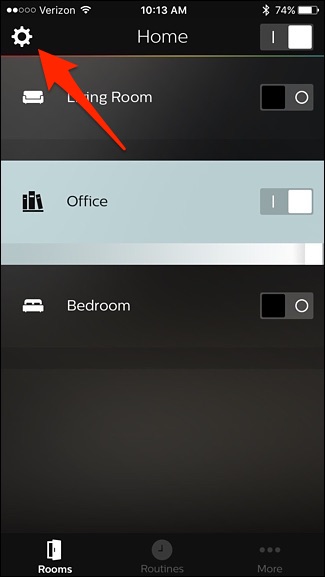
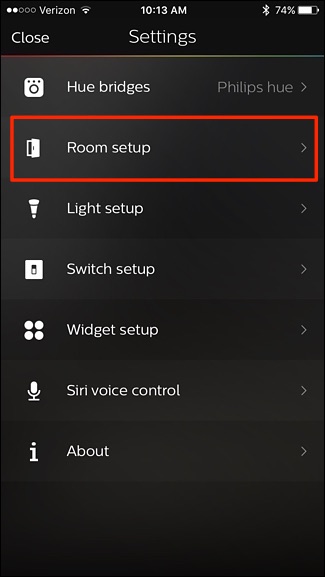
Now is the time to make changes if any of your bulbs are in the wrong room. If so, tap on the settings gear icon in the top-left corner from the main control screen.
如果您有任何灯泡在错误的房间内,现在是时候进行更改了。 如果是这样,请点击主控制屏幕左上角的设置齿轮图标。
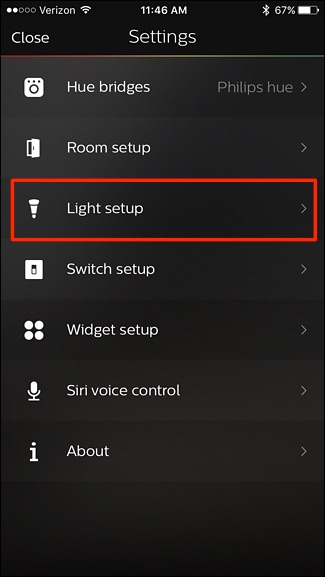
First, select “Light setup”.
首先,选择“灯光设置”。
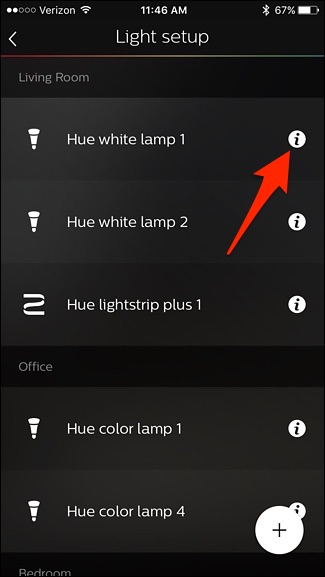
On this page, you can tap on any bulb’s name to see it flash. Then, tap on the small circular “i” icon to rename the light to whatever you want.
在此页面上,您可以点击任何灯泡的名称以查看其闪烁。 然后,点击圆形的小“ i”图标,将灯光重命名为您想要的任何颜色。
Tap in the text box and give the light bulb a new name of your choice. This will make it much easier to tell which bulbs are which.
在文本框中点按,然后为灯泡指定一个新名称。 这将使分辨哪个灯泡更容易。
After you’ve renamed all your bulbs, go back to the Settings and select “Room setup”.
重命名所有灯泡后,返回“设置”并选择“房间设置”。
Then, you can repeat the room creation process as described above, but with your lights properly named.
然后,您可以重复上述房间创建过程,但要正确命名灯光。
如何控制飞利浦色相灯 (How to Control Your Philips Hue Lights)
From the main control screen, you can turn on and off a room using the switch on the right. You can also adjust the brightness using the bar below the room name.
在主控制屏幕上,您可以使用右侧的开关打开和关闭房间。 您还可以使用房间名称下方的栏来调节亮度。
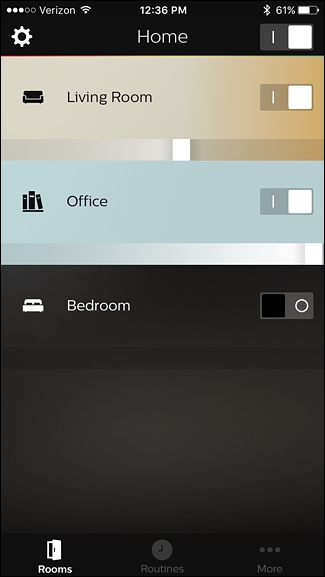
You can also tap on a room to control each light bulb individually.
您也可以点击房间以单独控制每个灯泡。
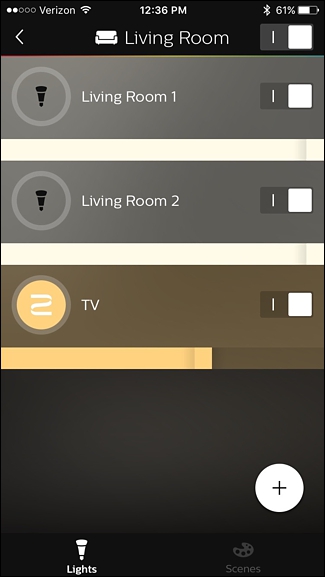
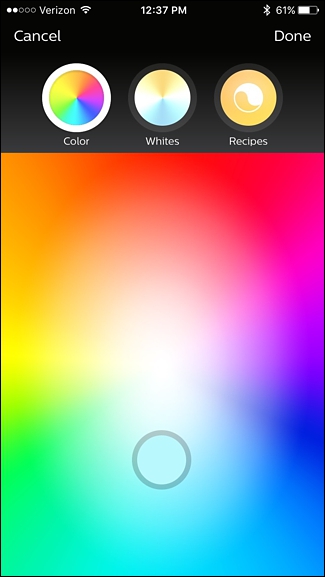
Tapping on the circle of an individual light bulb will bring up the color selector, where you can change the bulb to any color if you have the more expensive Hue White and Color bulbs. You can also tap on “Whites” to select a white color temperature.
轻按单个灯泡的圆圈将弹出颜色选择器,如果您拥有更昂贵的“色调白色”和“彩色”灯泡,则可以在其中将其更改为任何颜色。 您也可以点击“白色”以选择白色温度。
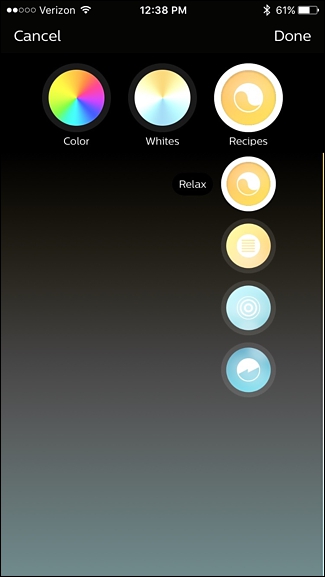
There’s also a “Recipes” section that can change the color temperature based on different moods and scenarios.
还有一个“食谱”部分,可以根据不同的心情和场景更改色温。
通过远程访问控制远处的灯光 (Control Your Lights From Afar with Remote Access)
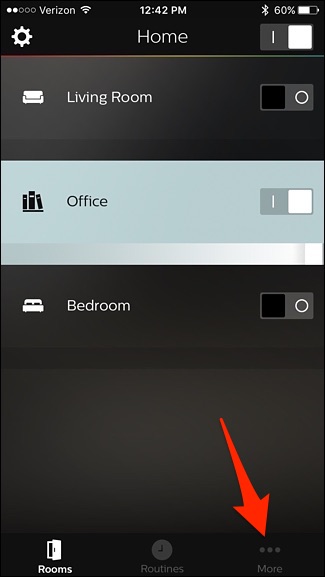
If you want to be able to control your Hue lights when you’re away from home, you’ll need to create an account on Philips’ website (if you don’t have one already). You can do this by first tapping on “More” in the bottom-right corner of the main control screen.
如果您希望出门在外时可以控制Hue灯,则需要在Philips网站上创建一个帐户(如果您还没有帐户)。 您可以通过先点击主控制屏幕右下角的“更多”来完成此操作。
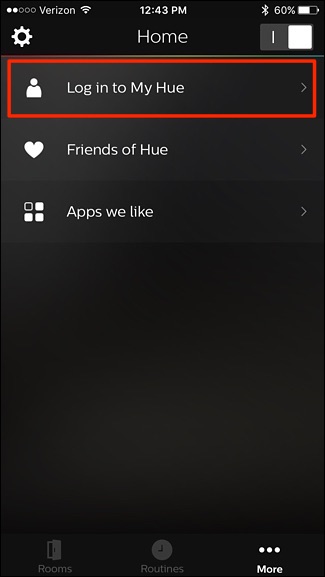
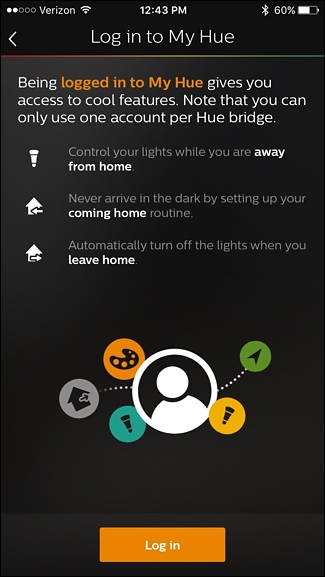
From there, tap on “Log in to My Hue”.
从那里,点击“登录到我的色相”。
Select “Log in” at the bottom.
选择底部的“登录”。
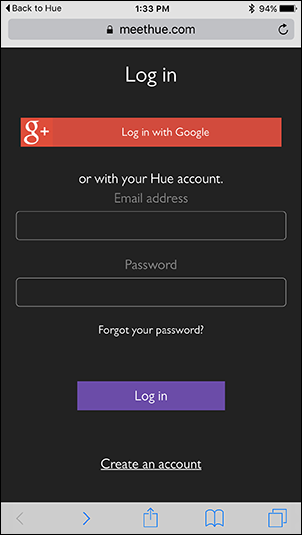
The Philips Hue website will load in your web browser. Go ahead and select “Create an account” at the bottom or enter in your email address and password to log in if you already have an account.
Philips Hue网站将在您的Web浏览器中加载。 继续并选择底部的“创建帐户”,或者输入您的电子邮件地址和密码以登录(如果已经有一个帐户)。
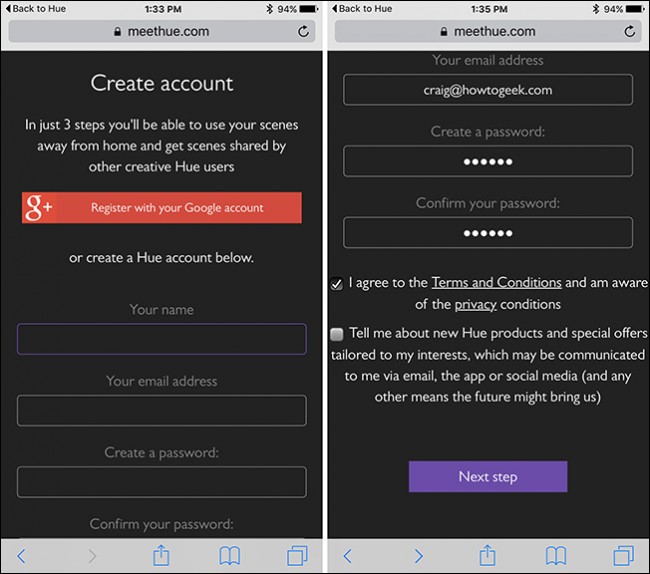
Enter in your name, email address, password, and agree to the terms and conditions. Then tap on “Next step.”
输入您的姓名,电子邮件地址,密码,并同意条款和条件。 然后点击“下一步”。
Next, you’ll need to push the Push-Link button just like you did earlier when you first set up the Hue Bridge.
接下来,您需要像之前第一次设置“色相桥”时一样,按下“推链接”按钮。
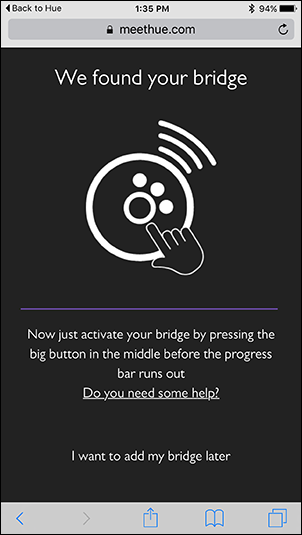
The website will verify the hub and it should verify the connection. Hit “Continue.”
该网站将验证集线器,并应验证连接。 点击“继续”。
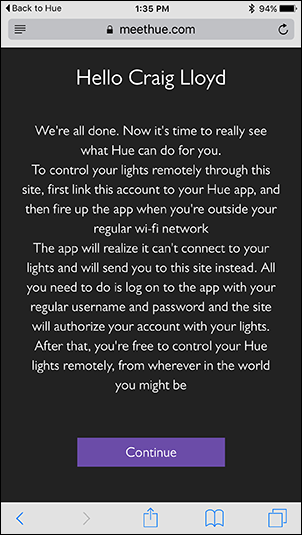
On the next page, you’ll want to select “Yes” when it asks for access to your bridge for controlling your lights while you’re away from home. After that, you’ll be taken back to the Philips Hue app and remote access will now be enabled.
在下一页上,当您出门在外时,它要求访问您的桥梁以控制灯光时,您需要选择“是”。 之后,您将被带回Philips Hue应用程序,并且现在将启用远程访问。
飞利浦Hue灯可以做什么 (What You Can Do with Your Philips Hue Lights)
Turning on and off your lights from your smartphone might be awesome, and turning them on and off with Siri is awfully convenient. But there are a handful of things you can do that don’t just involve flipping your lights on and off. Here are some of the basic features of Philips Hue lights that you can enable in the Philips Hue app.
通过智能手机打开和关闭灯可能很棒,而使用Siri打开和关闭它们非常方便。 但是您可以做很多事情,而不仅仅是打开和关闭灯光。 这是可以在Philips Hue应用程序中启用的Philips Hue灯的一些基本功能。
创建“场景” (Create “Scenes”)
In the world of Philips Hue, “scenes” is a fancy term for presets. If there’s a particular color you like, or a certain brightness you use often, you can create a scene for it. That way, instead of changing the color on each individual bulb, you can change the entire room to your favorite preset with one tap. Even if you don’t have the fancy color-changing Hue lights, you can still create scenes with your white-only bulbs for specific brightness levels (like “daytime” and “nighttime”).
在Philips Hue的世界中,“场景”是预设的一个奇特名词。 如果您喜欢某种特定的颜色,或者经常使用某种亮度,则可以为其创建场景。 这样,您只需单击一下,即可将整个房间更改为您喜欢的预设,而不必更改每个灯泡的颜色。 即使您没有花哨的变色Hue灯,仍然可以使用白色灯泡针对特定亮度级别(例如“白天”和“夜间”)创建场景。
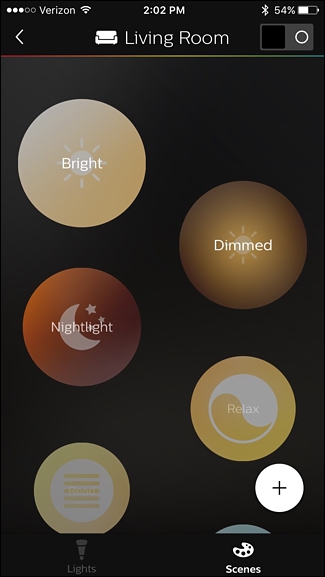
From the main screen in the Philips Hue app, select a room and tap on “Scenes” at the bottom (or the top, if you’re an Android user).
在Philips Hue应用程序的主屏幕上,选择一个房间,然后点击底部(或顶部,如果您是Android用户)的“场景”。

There will be a handful of pre-made scenes, but if you want to create your own, tap on the “+” icon in the bottom-right corner.
会有一些预制的场景,但是如果您要创建自己的场景,请点击右下角的“ +”图标。
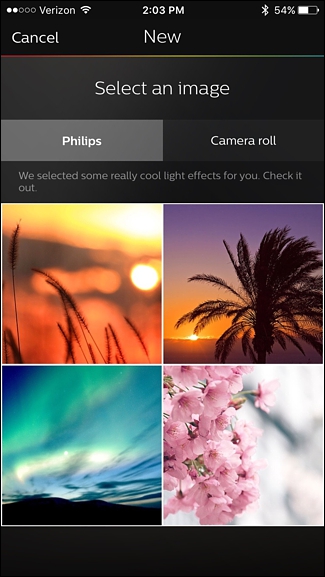
From there, the Hue app will allow you to create a scene from a photo. The app has some built-in images, but you can also use a photo that’s on your phone.
从那里,Hue应用程序将允许您从照片创建场景。 该应用程序具有一些内置图像,但您也可以使用手机上的照片。
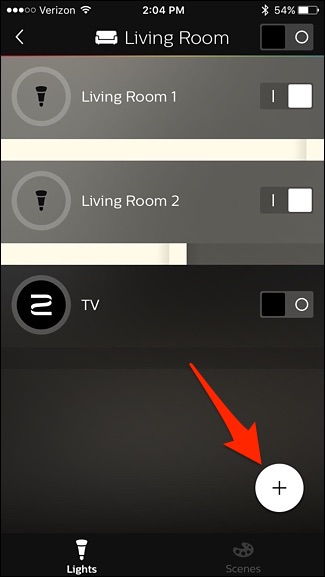
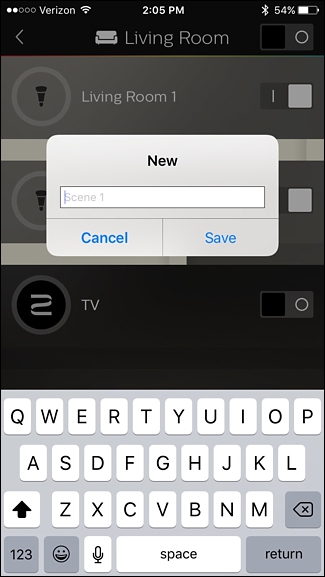
Alternatively, if you want more fine-grained control, you can create a scene by going to control page of a room and setting the light bulbs to how you want them. Then tap on the “+” icon.
另外,如果您想进行更细粒度的控制,则可以通过控制房间页面并将灯泡设置为所需的方式来创建场景。 然后点击“ +”图标。
From there, give the scene a name and hit “Save”. You can then access the scene on the “Scenes” page, and turning it on will bring your lights to that exact state.
从那里开始,为场景命名,然后点击“保存”。 然后,您可以在“场景”页面上访问场景,将其打开将使您的灯光进入该确切状态。
离开时关灯 (Turn Off the Lights When You Leave)
The new Philips Hue app lets you use geofencing to turn off and on your lights when you leave and get home, that way you never have to touch a light switch again.
全新的Philips Hue应用程序可让您在出门回到家时使用地理围栏来关闭和打开灯,这样就不必再触摸灯开关了。
We’ve already covered this with the old app, and the method is still mostly the same–except you’ll tap on “Routines” at the bottom and select “Home & Away”.
我们已经在旧版应用程序中对此进行了介绍,但方法仍然大致相同-除非您点击底部的“常规”并选择“家庭与外出”。

创建唤醒警报 (Create Wake-Up Alarms)
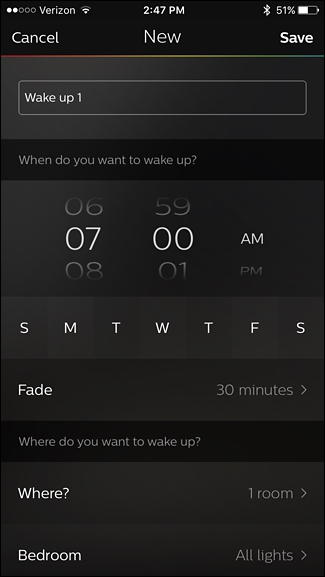
You can also use the Philips Hue app to create a wake-up alarm, which will slowly fade your lights on to simulate a sunrise.
您还可以使用Philips Hue应用程序创建唤醒警报,该警报将慢慢淡化灯光以模拟日出。
Something like this is really nice if you wake up before the sun actually comes up, or your bedroom doesn’t get a whole lot of sunlight anyway.
如果您在实际升起的太阳之前醒来,或者您的卧室总得不到很多阳光,那么这样的事情真的很好。
We’ve also covered this in the past with the old Philips Hue app, but the process is similar in the new app. Simply just tap on “Routines” at the bottom and select “Wake up” to create your wake-up alarm.
过去,我们也使用旧的Philips Hue应用程序进行了介绍,但新应用程序的过程与此类似。 只需点击底部的“常规”,然后选择“唤醒”即可创建唤醒警报。
Gen 2 Hue App的缺点 (The Shortcomings of the Gen 2 Hue App)
While the new Philips Hue app brings a new look and layout that makes it a bit easier to control your Hue lights, it’s actually missing a few useful features from the original app–which is incredibly frustrating.
新的飞利浦Hue应用程序具有新的外观和布局,使您的Hue灯光控制更加轻松,但实际上却缺少了原始应用程序的一些有用功能,这令人难以置信。
The Gen 2 app does not allow you to group lights so that you can adjust the color and temperature of two or more bulbs at once–instead, you have to create a scene for any color combo you may want. In addition, the Gen 1 app lets you pick out custom colors from a photo using an eyedropper tool when creating a scene–something the new app does not do.
Gen 2应用程序不允许您对灯光进行分组,以便您可以一次调整两个或多个灯泡的颜色和温度-而是必须为您可能需要的任何颜色组合创建一个场景。 此外,通过Gen 1应用程序,您可以在创建场景时使用吸管工具从照片中选择自定义颜色,而新应用程序则无法做到。
Worst of all: the new app doesn’t seem to sync over your scenes from the old app, even when you sign into your Hue account on the new app and sync it via the My Hue web site. Your old scenes just won’t show up, and it’s safe to say that scenes overall are given less focus than before.
最糟糕的是:即使您在新应用程序上登录自己的Hue帐户并通过“我的色相”网站进行同步,新应用程序似乎也无法在旧应用程序上同步场景。 您以前的场景不会显示出来,可以肯定地说,整个场景的焦点比以前少了。
Thankfully, there are plenty of third-party apps that easily do grouping, and iConnectHue is our favorite one, as it can do a whole lot of stuff. Alternatively, you can still download the Gen 1 app and use it as you did before. Hopefully, Philips will fix these omissions soon.
值得庆幸的是,有许多第三方应用程序可以轻松地进行分组,而iConnectHue是我们最喜欢的应用程序,因为它可以完成很多工作。 另外,您仍然可以下载Gen 1应用并像以前一样使用它。 希望飞利浦能够尽快解决这些遗漏。
翻译自: https://www.howtogeek.com/247500/how-to-set-up-your-philips-hue-lights/
飞利浦dicom


 1774
1774

 被折叠的 条评论
为什么被折叠?
被折叠的 条评论
为什么被折叠?
 到【灌水乐园】发言


