


 本文深入解析SLIC超像素分割算法原理,包括种子点初始化、距离度量、迭代优化及连通性增强等关键步骤。通过实例展示,阐述算法在图像分割领域的应用优势,如紧凑超像素生成、快速收敛特性及对图像特征的有效提取。
简介:最近项目使用到了超像素分割,因此顺道研究了以下SLIC这一算法。超像素分割这类low-level vision问题已经在CVPR,ICCV这种顶级会议上逐渐销声匿迹,越来越流行的learning method渐渐占据了这些顶级会议90%的篇幅。本文讲解的SLIC是2010年提出的一种十分简单的超分辨分割算法,原理简单、便于实现。


一.SLIC(simple linear iterative clustering)原理分析
-
初始化种子点(聚类中心):按照设定的超像素个数,在图像内均匀的分配种子点。假设图片总共有 N 个像素点,预分割为 K 个相同尺寸的超像素,那么每个超像素的大小为N/ K ,则相邻种子点的距离(步长)近似为S=sqrt(N/K)。
-
在种子点的n*n邻域内重新选择种子点(一般取n=3)。具体方法为:计算该邻域内所有像素点的梯度值,将种子点移到该邻域内梯度最小的地方。这样做的目的是为了避免种子点落在梯度较大的轮廓边界上,以免影响后续聚类效果。
-
在每个种子点周围的邻域内为每个像素点分配类标签(即属于哪个聚类中心)。和标准的k-means在整张图中搜索不同,SLIC的搜索范围限制为2S2S,可以加速算法收敛,如下图。在此注意一点:期望的超像素尺寸为SS,但是搜索的范围是2S*2S。

-
距离度量。包括颜色距离和空间距离。对于每个搜索到的像素点,分别计算它和该种子点的距离。距离计算方法如下:

其中,dc代表颜色距离,ds代表空间距离,Ns是类内最大空间距离,定义为Ns=S=sqrt(N/K),适用于每个聚类。最大的颜色距离Nc既随图片不同而不同,也随聚类不同而不同,所以我们取一个固定常数m(取值范围[1,40],一般取10)代替。最终的距离度量D’如下:

由于每个像素点都会被多个种子点搜索到,所以每个像素点都会有一个与周围种子点的距离,取最小值对应的种子点作为该像素点的聚类中心。
-
迭代优化。理论上上述步骤不断迭代直到误差收敛(可以理解为每个像素点聚类中心不再发生变化为止),实践发现10次迭代对绝大部分图片都可以得到较理想效果,所以一般迭代次数取10。
-
增强连通性。经过上述迭代优化可能出现以下瑕疵:出现多连通情况、超像素尺寸过小,单个超像素被切割成多个不连续超像素等,这些情况可以通过增强连通性解决。主要思路是:新建一张标记表,表内元素均为-1,按照“Z”型走向(从左到右,从上到下顺序)将不连续的超像素、尺寸过小超像素重新分配给邻近的超像素,遍历过的像素点分配给相应的标签,直到所有点遍历完毕为止。
二.伪算法描述
/∗ Initialization ∗/
Initialize cluster centers Ck = [lk , ak , bk , xk , yk ]T by sampling pixels at regular grid steps S.
Move cluster centers to the lowest gradient position in a 3 × 3 neighborhood.
Set label l(i) = −1 for each pixel i. Set distance d(i) = ∞ for each pixel i.

repeat
/∗ Assignment ∗/
for each cluster center Ck do
    for each pixel i in a 2S × 2S region around Ck do
        Compute the distance D between Ck and i.
        if D < d(i) then
            set d(i) = D
            set l(i) = k
        end if
    end for
end for

/∗ Update ∗/
Compute new cluster centers. Compute residual error E.
until E ≤ threshold
三.参考博文
1.https://github.com/laixintao/slic-python-implementation
2.https://blog.csdn.net/zhj_matlab/article/details/52986700
3.https://blog.csdn.net/electech6/article/details/45509779
超像素(Superpixel)理解
最近看点云处理的文章,有些文章中提到了superpixel这个概念,查了一些资料,对其理解记录如下:
- 超像素就是把一幅原本是像素级(pixel-level)的图,划分成区域级(district-level)的图。可以将其看做是对基本信息进行的抽象。
- 超像素分割属于图像分割(image segmentation),再细化应该属于过分割(over segmentation)。
- 比如我们对一幅图像进行超像素分割,分割之后,会得到许多大小不一的区域,我们可以从这些区域中提取出有效的信息,比如颜色直方图、纹理信息。比如有一个人,我们可以对这个人的图像进行超像素分割,进而通过对每个小区域的特征提取,辨识出这些区域是处于人体的哪个部分(头部、肩部,腿部),进而建立人体的关节图像。
- 如果你要用图论的方法来分离前景背景。如果这幅图的大小为480 * 640,那么你建立的图(graph)有480640个节点。如果你预先对这幅图像使用超像素分割,将其分割为1000个超像素,那么你建立的图只有1000个节点。大大提升了计算速度。
- 有趣直观并且带有源代码(业界良心)的是SLIC Superpixel,使用K-means的聚类方法,分割的效果很好。地址为:https://infoscience.epfl.ch/record/177415
原理
超像素概念是2003年Xiaofeng Ren提出和发展起来的图像分割技术,是指具有相似纹理、颜色、亮度等特征的相邻像素构成的有一定视觉意义的不规则像素块。它利用像素之间特征的相似性将像素分组,用少量的超像素代替大量的像素来表达图片特征,很大程度上降低了图像后处理的复杂度,所以通常作为分割算法的预处理步骤。
常见的超像素分割方法包括: Graph-based 、NCut 、Turbopixel 、 Quick-shift 、 Graph-cut a、Graph-cut b 以及 SLIC 。
其中,SLIC(simple linear iterativeclustering),即 简单线性迭代聚类 。
它是2010年提出的一种思想简单、实现方便的算法,将彩色图像转化为CIELAB颜色空间和XY坐标下的5维特征向量,然后对5维特征向量构造距离度量标准,对图像像素进行局部聚类的过程。
SLIC主要优点如下:
生成的超像素如同细胞一般紧凑整齐,邻域特征比较容易表达。这样基于像素的方法可以比较容易的改造为基于超像素的方法。
不仅可以分割彩色图,也可以兼容分割灰度图。
需要设置的参数非常少,默认情况下只需要设置一个预分割的超像素的数量。
相比其他的超像素分割方法,SLIC在运行速度、生成超像素的紧凑度、轮廓保持方面都比较理想。
效果图
经过观察发现,在迭代至第10轮后,分割效果基本不再发生变化。
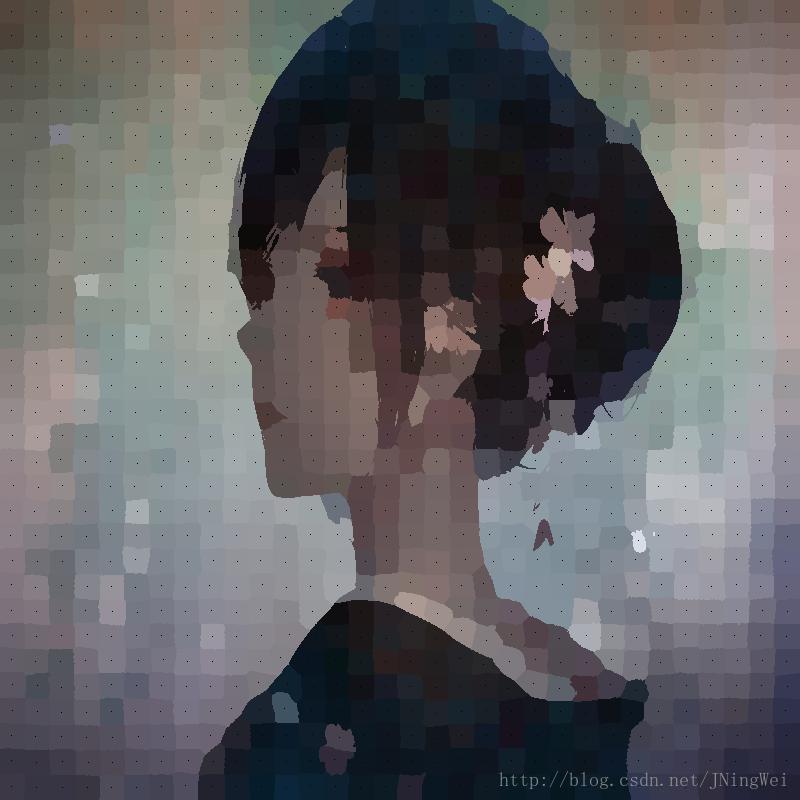
原图

K=64 时
第1轮迭代,效果图:

第20轮迭代,效果图: 
K=128 时
第1轮迭代,效果图: 
第20轮迭代,效果图: 
K=256 时
第1轮迭代,效果图: 
第20轮迭代,效果图: 
K=1024 时
第1轮迭代,效果图: 
第20轮迭代,效果图:
实现代码
代码是我上网找来的,稍微改动了一丢丢。
原代码出处:SLIC算法分割超像素原理及Python实现
import math
from skimage import io, color
import numpy as np
from tqdm import trange


class Cluster(object):
    cluster_index = 1

    def __init__(self, h, w, l=0, a=0, b=0):
        self.update(h, w, l, a, b)
        self.pixels = []
        self.no = self.cluster_index
        self.cluster_index += 1

    def update(self, h, w, l, a, b):
        self.h = h
        self.w = w
        self.l = l
        self.a = a
        self.b = b

    def __str__(self):
        return "{},{}:{} {} {} ".format(self.h, self.w, self.l, self.a, self.b)

    def __repr__(self):
        return self.__str__()


class SLICProcessor(object):
    @staticmethod
    def open_image(path):
        """
        Return:
            3D array, row col [LAB]
        """
        rgb = io.imread(path)
        lab_arr = color.rgb2lab(rgb)
        return lab_arr

    @staticmethod
    def save_lab_image(path, lab_arr):
        """
        Convert the array to RBG, then save the image
        """
        rgb_arr = color.lab2rgb(lab_arr)
        io.imsave(path, rgb_arr)

    def make_cluster(self, h, w):
        return Cluster(h, w,
                       self.data[h][w][0],
                       self.data[h][w][1],
                       self.data[h][w][2])

    def __init__(self, filename, K, M):
        self.K = K
        self.M = M

        self.data = self.open_image(filename)
        self.image_height = self.data.shape[0]
        self.image_width = self.data.shape[1]
        self.N = self.image_height * self.image_width
        self.S = int(math.sqrt(self.N / self.K))

        self.clusters = []
        self.label = {}
        self.dis = np.full((self.image_height, self.image_width), np.inf)

    def init_clusters(self):
        h = self.S / 2
        w = self.S / 2
        while h < self.image_height:
            while w < self.image_width:
                self.clusters.append(self.make_cluster(h, w))
                w += self.S
            w = self.S / 2
            h += self.S

    def get_gradient(self, h, w):
        if w + 1 >= self.image_width:
            w = self.image_width - 2
        if h + 1 >= self.image_height:
            h = self.image_height - 2

        gradient = self.data[w + 1][h + 1][0] - self.data[w][h][0] + \
                   self.data[w + 1][h + 1][1] - self.data[w][h][1] + \
                   self.data[w + 1][h + 1][2] - self.data[w][h][2]
        return gradient

    def move_clusters(self):
        for cluster in self.clusters:
            cluster_gradient = self.get_gradient(cluster.h, cluster.w)
            for dh in range(-1, 2):
                for dw in range(-1, 2):
                    _h = cluster.h + dh
                    _w = cluster.w + dw
                    new_gradient = self.get_gradient(_h, _w)
                    if new_gradient < cluster_gradient:
                        cluster.update(_h, _w, self.data[_h][_w][0], self.data[_h][_w][1], self.data[_h][_w][2])
                        cluster_gradient = new_gradient

    def assignment(self):
        for cluster in self.clusters:
            for h in range(cluster.h - 2 * self.S, cluster.h + 2 * self.S):
                if h < 0 or h >= self.image_height: continue
                for w in range(cluster.w - 2 * self.S, cluster.w + 2 * self.S):
                    if w < 0 or w >= self.image_width: continue
                    L, A, B = self.data[h][w]
                    Dc = math.sqrt(
                        math.pow(L - cluster.l, 2) +
                        math.pow(A - cluster.a, 2) +
                        math.pow(B - cluster.b, 2))
                    Ds = math.sqrt(
                        math.pow(h - cluster.h, 2) +
                        math.pow(w - cluster.w, 2))
                    D = math.sqrt(math.pow(Dc / self.M, 2) + math.pow(Ds / self.S, 2))
                    if D < self.dis[h][w]:
                        if (h, w) not in self.label:
                            self.label[(h, w)] = cluster
                            cluster.pixels.append((h, w))
                        else:
                            self.label[(h, w)].pixels.remove((h, w))
                            self.label[(h, w)] = cluster
                            cluster.pixels.append((h, w))
                        self.dis[h][w] = D

    def update_cluster(self):
        for cluster in self.clusters:
            sum_h = sum_w = number = 0
            for p in cluster.pixels:
                sum_h += p[0]
                sum_w += p[1]
                number += 1
                _h = sum_h / number
                _w = sum_w / number
                cluster.update(_h, _w, self.data[_h][_w][0], self.data[_h][_w][1], self.data[_h][_w][2])

    def save_current_image(self, name):
        image_arr = np.copy(self.data)
        for cluster in self.clusters:
            for p in cluster.pixels:
                image_arr[p[0]][p[1]][0] = cluster.l
                image_arr[p[0]][p[1]][1] = cluster.a
                image_arr[p[0]][p[1]][2] = cluster.b
            image_arr[cluster.h][cluster.w][0] = 0
            image_arr[cluster.h][cluster.w][1] = 0
            image_arr[cluster.h][cluster.w][2] = 0
        self.save_lab_image(name, image_arr)

    def iterate_10times(self):
        self.init_clusters()
        self.move_clusters()
        for i in trange(20):
            self.assignment()
            self.update_cluster()
            name = 'Elegent_Girl_M{m}_K{k}_loop{loop}.jpg'.format(loop=i, m=self.M, k=self.K)
            self.save_current_image(name)


if __name__ == '__main__':
    for k in [64, 128, 256, 1024]:
        p = SLICProcessor('800.jpg', k, 30)
        p.iterate_10times()
打印结果:
  0%|          | 0/20 [00:00<?, ?it/s]/home/user/anaconda2/lib/python2.7/site-packages/skimage/util/dtype.py:111: UserWarning: Possible precision loss when converting from float64 to uint8
  "%s to %s" % (dtypeobj_in, dtypeobj))
100%|##########| 20/20 [32:36<00:00, 97.83s/it]
100%|##########| 20/20 [24:37<00:00, 73.88s/it]
100%|##########| 20/20 [21:30<00:00, 64.55s/it]
100%|##########| 20/20 [18:49<00:00, 56.46s/it]

Process finished with exit code 0


 12万+
12万+

 被折叠的 条评论
为什么被折叠?
被折叠的 条评论
为什么被折叠?
 到【灌水乐园】发言


