


 本文详细介绍了屏幕空间反射的实现方法,包括Camera vs GBuffer Normal、2D射线绘制、几何体厚度计算,以及如何通过二进制搜索改进法和处理隐藏艺术效果来优化。还探讨了模拟粗糙表面反射的技巧,适用于高级图形渲染。
[来源
by kode80]
原始的做法
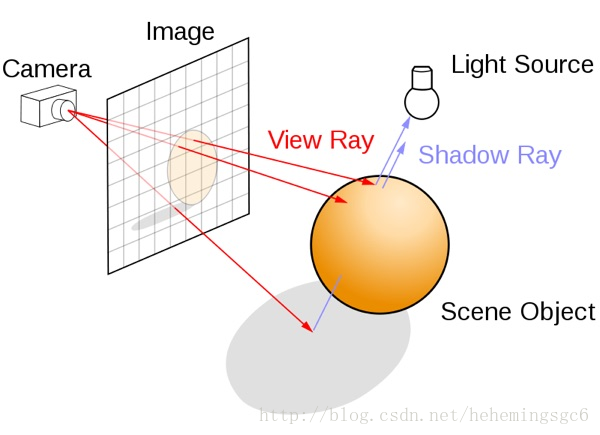
经典的对图像的光线追踪的做法是从镜头处发射一条射线,当其与物体相交时,计算这个点的颜色,并作为这条射线最近的像素的颜色值。通常来说光线追踪会需要获取场景中所有几何体、材质、光照的信息,并使用一个完整的Rendering pipeline来达成。我们也能使用类似的方法,
利用延迟渲染中的GBuffers来达成期望的效果。
在Unity中我们可以获得所有所需的信息。我们可以将Camera的depthTextureMode设为DepthTextureMode.DepthNormals,从而使得任何这个镜头调用到的Shader都会获得一个sampler2D _CameraDepthNormalsTexture,这其中包含了当前镜头渲染图片的normal和depth信息;由此我们可以构建出每个像素对应的到三维空间中的位置,再使用reflect(lightDir, normal)可以得到反射方向向量;
在Unity中的后处理效果都是通过渲染一个屏幕的四边形来实现的,我们可以在vert函数中获得对应的UV,将其转化为NDC坐标,再右乘一个inverse projection matrix,就可以获得到远裁剪面的四个顶点(在观察空间下)。将这个方向向量传给frag函数,我们便可以得到一个插值后的结果,这个结果就是对应各个像素的镜头到远裁剪面的射线。将这个射线乘以depth,我们便可以得到像素对应在三维空间中的位置。
// Calculate camera to far plane ray in vertex shader
float4 cameraRay = float4( vertex.uv * 2.0 - 1.0, 1.0, 1.0);
cameraRay = mul( _CameraInverseProjectionMatrix, cameraRay);
output.cameraRay = cameraRay.xyz / cameraRay.w;
// Calculate camera space pixel position in fragment shader
float3 decodedNormal;
float decodedDepth;
DecodeDepthNormal( tex2D( _CameraDepthNormalsTexture, input.uv), decodedDepth, decodedNormal);
float3 pixelPosition = input.cameraRay * decodedDepth;
Camera vs GBuffer Normal
_CameraDepthNormalsTexture是一个32bit的图像,其中depth和normal各占用16bit,使用它会使得两者的精度下降。我们可以使用GBuffer中的_CameraGBufferTexture2来获取世界空间的normal,再通过传入一个转换为观察空间的矩阵(camera.worldToCameraMatrix)将其转到观察空间,从而获得normal,这样我们就能使用32bit来存储一个完整的depth图像,从而提高精度(将Camera的depthTextureMode设为DepthTextureMode.Depth
);
// In C# script
material.SetMatrix( "_NormalMatrix", camera.worldToCameraMatrix);
// In fragment shader
float3 worldSpaceNormal = tex2D( _CameraGBufferTexture2, i.uv).rgb * 2.0
最低0.47元/天 解锁文章


 1万+
1万+

 被折叠的 条评论
为什么被折叠?
被折叠的 条评论
为什么被折叠?
 到【灌水乐园】发言


