


>- **🍨 本文为[🔗365天深度学习训练营](https://mp.weixin.qq.com/s/rbOOmire8OocQ90QM78DRA) 中的学习记录博客**
>- **🍖 原作者:[K同学啊 | 接辅导、项目定制](https://mtyjkh.blog.csdn.net/)**
我的环境
-语言环境:Python3.11
-tensorflow版本 2.14.0
代码部分
import os,PIL,pathlib
import matplotlib.pyplot as plt
import numpy as np
from tensorflow import keras
import tensorflow as tf
from tensorflow.keras import layers,models
data_dir='E:/Administrator/Desktop/biomedical/noml/deeplearning/data/weather/weather_photos'
data_dir=pathlib.Path(data_dir)
image_count = len(list(data_dir.glob('*/*.jpg')))
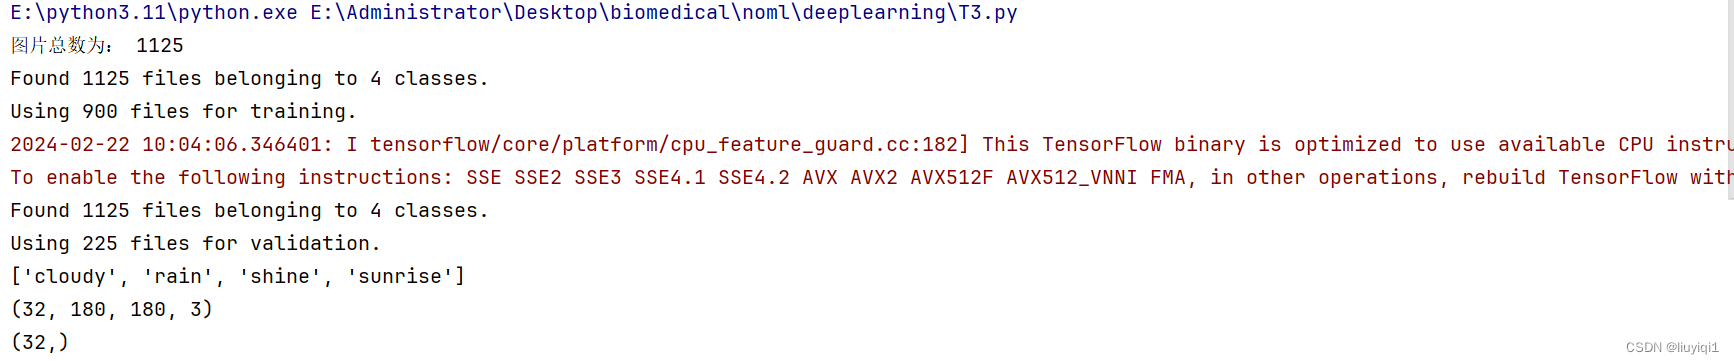
print("图片总数为:",image_count)
roses = list(data_dir.glob('sunrise/*.jpg'))
PIL.Image.open(str(roses[0]))
batch_size=32
img_height=180
img_width=180
train_ds=tf.keras.preprocessing.image_dataset_from_directory(
data_dir,validation_split=0.2,subset='training',seed=123,image_size=(img_height,img_width),batch_size=batch_size
)
val_ds = tf.keras.preprocessing.image_dataset_from_directory(
data_dir,validation_split=0.2,subset="validation",seed=123,image_size=(img_height, img_width), batch_size=batch_size
)
class_name=train_ds.class_names
print(class_name)
plt.figure(figsize=(20, 10))
for images, labels in train_ds.take(1):
for i in range(20):
ax = plt.subplot(5, 10, i + 1)
plt.imshow(images[i].numpy().astype("uint8"))
plt.title(class_name[labels[i]])
plt.axis("off")
for image_batch, labels_batch in train_ds:
print(image_batch.shape)
print(labels_batch.shape)
break
AUTOTUNE = tf.data.AUTOTUNE
train_ds = train_ds.cache().shuffle(1000).prefetch(buffer_size=AUTOTUNE)
val_ds = val_ds.cache().prefetch(buffer_size=AUTOTUNE)
num_classes = 4
model = models.Sequential([
layers.experimental.preprocessing.Rescaling(1. / 255, input_shape=(img_height, img_width, 3)),
layers.Conv2D(16, (3, 3), activation='relu', input_shape=(img_height, img_width, 3)),
layers.AveragePooling2D((2, 2)),
layers.Conv2D(32, (3, 3), activation='relu'),
layers.AveragePooling2D((2, 2)),
layers.Conv2D(64, (3, 3), activation='relu'),
layers.Dropout(0.3),
layers.Flatten(),
layers.Dense(128, activation='relu'),
layers.Dense(num_classes)
])
model.summary() # 打印网络结构
# 设置优化器
opt = tf.keras.optimizers.Adam(learning_rate=0.001)
model.compile(optimizer=opt,
loss=tf.keras.losses.SparseCategoricalCrossentropy(from_logits=True),
metrics=['accuracy'])
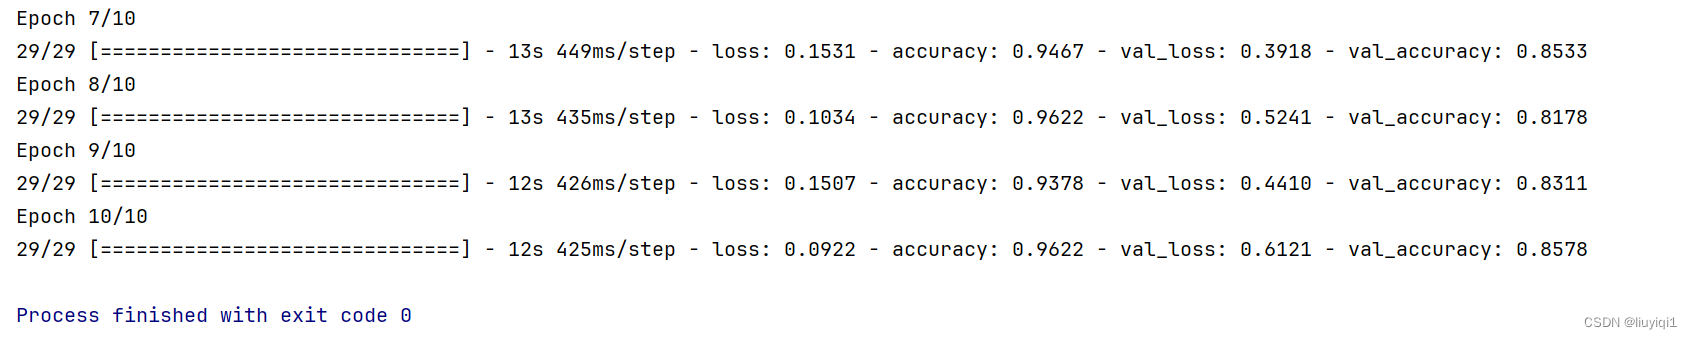
epochs = 10
history = model.fit(
train_ds,
validation_data=val_ds,
epochs=epochs
)
acc = history.history['accuracy']
val_acc = history.history['val_accuracy']
loss = history.history['loss']
val_loss = history.history['val_loss']
epochs_range = range(epochs)
plt.figure(figsize=(12, 4))
plt.subplot(1, 2, 1)
plt.plot(epochs_range, acc, label='Training Accuracy')
plt.plot(epochs_range, val_acc, label='Validation Accuracy')
plt.legend(loc='lower right')
plt.title('Training and Validation Accuracy')
plt.subplot(1, 2, 2)
plt.plot(epochs_range, loss, label='Training Loss')
plt.plot(epochs_range, val_loss, label='Validation Loss')
plt.legend(loc='upper right')
plt.title('Training and Validation Loss')
plt.show()结果部分:

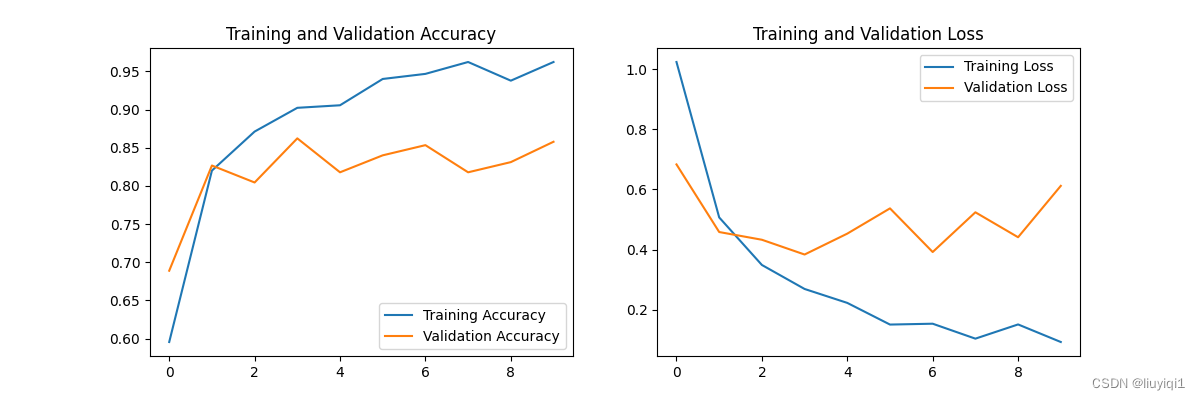


个人总结:这次学会了加载磁盘中的数据和配置数据集的时候可以预取数据加速运行,网络中添加Dropout,可以防止过拟合,增加泛化能力。


 65
65


 被折叠的 条评论
为什么被折叠?
被折叠的 条评论
为什么被折叠?
 到【灌水乐园】发言


